Posts Tagged ‘Image editing techniques’

Suprematist Abstract Art Photography

without comments

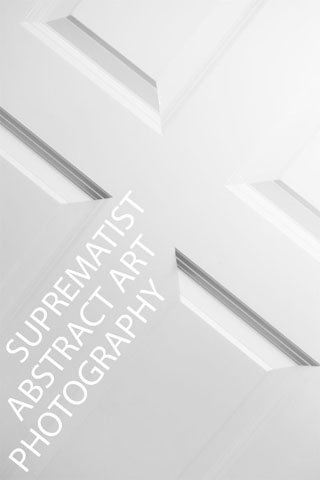
Suprematism is an abstract art movement founded in the early 20th century by Russian painter Kazimir Malevich. Suprematist paintings are constructed from simple geometric shapes, such as circles, squares and lines.

Suprematist art is based on creating from feeling rather than depicting an actual object. The movement's name comes from the supremacy of pure artistic feeling, as Malevich described it in his manifesto.

Given that photography is based on capturing physical objects / scenes, suprematist photography may seem like a oxymoron. But while replicating the suprematist style exactly in photography may be difficult, it is certainly possible to create abstract art inspired by suprematism.

Suprematist Abstract Art Photography

Read the rest of this entry »

Written by Discover Digital Photography

June 12th, 2016 at 12:27 pm

Split Toning Explained

without comments

Split toning is a technique where a color cast is applied to an image, but the color cast applied to the highlights is different to the color applied to the shadows.

Different color casts can give different feelings to an image. Oranges, reds, and yellows can give a warm, sunny day feeling. Blues can give a cold feeling. Greens and magentas can give a cross-processed film look.

There are quite a few different ways a split toned effect can be applied to an image. Different methods can be applied at different stages of the image editing process, they differ in how much control they offer, and how quickly they can be applied. In this article we'll look at the main split toning methods so you can decide for yourself which one would work best for your needs.

Split Toning Explained

Read the rest of this entry »

Add a 35mm transparency slide frame border to a photo using Photoshop CC, CS, or Elements

without comments

In this tutorial we'll look at how you can create a replica 35mm transparency slide frame to add as a border around a photo. The process is pretty much the same in Photoshop CC, CS, or Photoshop Elements. I'll also cover how to add text to the frame, which allows you to add branding or information to the image without covering up any of the actual photo.

Add a 35mm transparency slide frame border to a photo using Photoshop CC, CS, or Elements

Read the rest of this entry »

Written by Discover Digital Photography

November 1st, 2015 at 3:50 pm

How to add a vintage haze effect to your photos

without comments

Photos with a soft, low contrast hazy look seem to be very popular at the moment. You can purchase packs of film presets for most image editing software that allow you to easily create this look.

I've also seen several Photoshop tutorials that show how to create a similar look, making use of various adjustment layers. However, the look can also be achieved using only RGB curves, which are available in Adobe Camera RAW, Lightroom, Photoshop, GIMP, and the majority of image editing software. No need to purchase anything additional, and no need for multiple layer Photoshop documents.

In this article I'll cover both creating the hazy look in-camera and using RGB curves. Plus, I'll explain why the curves adjustments create the effect, so you'll better understand how you can modify the curves to fine-tune the effect.

How to add a vintage haze effect to your photos

Read the rest of this entry »

Create crazy colored lighting with a single uncolored light

without comments

In this article we'll look at how you can create unusual images that look like they were taken with red, green, and blue lights, but are actually a composite of three different images taken with any light source (colored or not).

I'll cover how to create this type of image using a technique that works in Photoshop Elements and the full version of Photoshop (CS / CC), plus two alternative techniques that you can use in the full version of Photoshop.

Create crazy colored lighting with a single uncolored light

Read the rest of this entry »

Written by Discover Digital Photography

December 28th, 2014 at 7:50 pm

Create a Hand-Colored Black and White Photo

without comments

Before the advent of color photography, a process of hand coloring black and white photos was sometimes used. Color (often using watercolors) was simply painted on top of the photograph, to create a color image.

This process gives the images quite a unique look. In this article I want to look at how you can do the same, giving any image that hand-colored black and white photo look.

Create a Hand-Colored Black and White Photo

Read the rest of this entry »

How to create a selective color photo

without comments

A selective color photo is one where part of the image is in color, while the rest of the image is black & white (or heavily desaturated). Selective color photos work very well to draw the viewer's attention to the part of the image that is in color.

Light trails along the highway selective color photo
Highway Insomnia by Nrbelex on flickr (licensed CC-BY-SA)

Read the rest of this entry »