How to create a selective color photo
A selective color photo is one where part of the image is in color, while the rest of the image is black & white (or heavily desaturated). Selective color photos work very well to draw the viewer's attention to the part of the image that is in color.
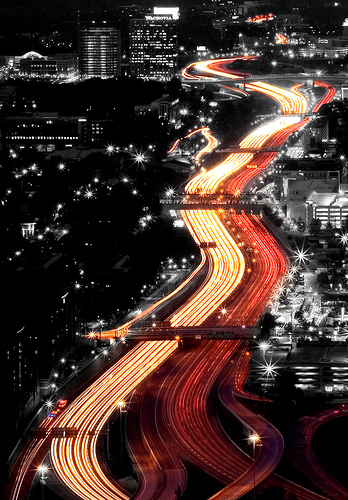
Highway Insomnia by Nrbelex on flickr (licensed CC-BY-SA)
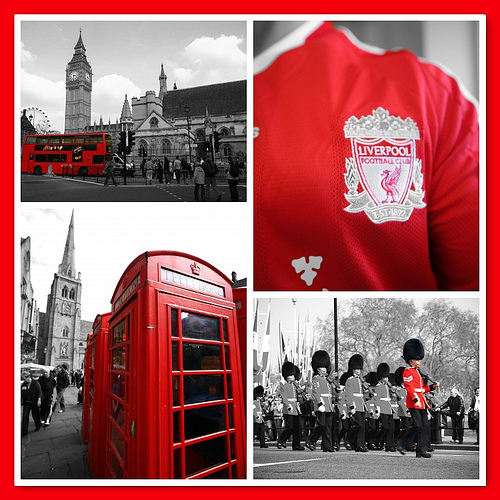
Very often it is used to keep color just in parts of an image that are red. I can't really say why this is, but it does seem to work well with red. Red contrasts nicely against black and white. That's not to say it doesn't work well with other colors though, just that red seems to work best.
For an image to be suitable for selectively coloring, the subject that you want to be colored in the final image should be reasonably strongly colored. A strong colored subject will stand out well against a monochrome background.
The colored object or objects should also take up a reasonably large part of the frame. This makes them easy to notice, and helps them stand out.
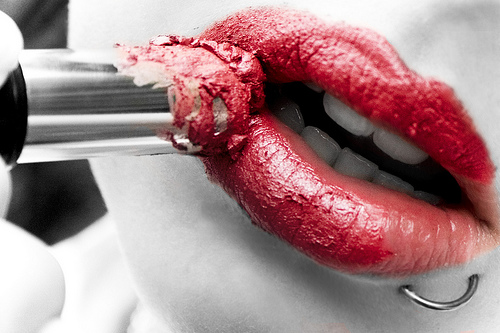
What's a Girl Gotta Do? by Natalion on flickr (licensed CC-BY-SA)
The process of creating a selective color is quite simple. Create a hue/saturation adjustment layer and reduce the saturation to zero. This gives you a black and white image. Now use the layer mask of the hue/saturation layer to mask out the effect where you want the photo to be colored. (For more information on layer masks see How to use Photoshop Layer Masks).
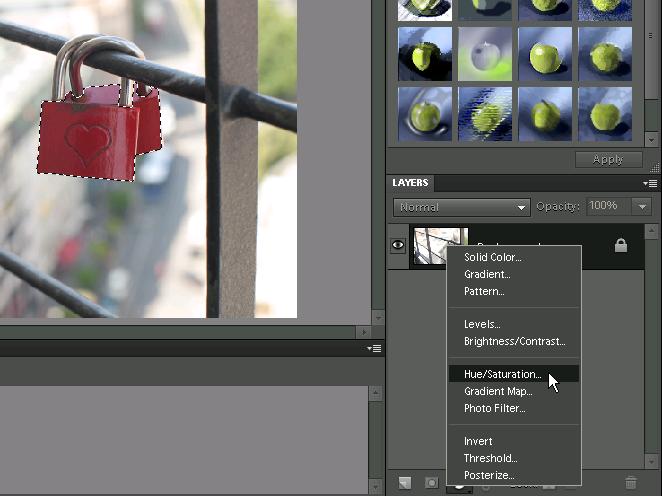
Creating a hue/saturation adjustment layer in Photoshop Elements
There are many different ways that you can create a selection of the object that should be colored. You can just paint on the layer mask using a brush. Or you can use selection tools, like the magic wand and magnetic lasso.
When using a selection tool, you will probably want to make the selection first, and then create the hue/saturation adjustment layer. Then use the selection to create the mask for the saturation adjustment. In Photoshop, if you create a hue/saturation adjustment layer, the current selection will automatically be used as the layer mask for the adjustment.
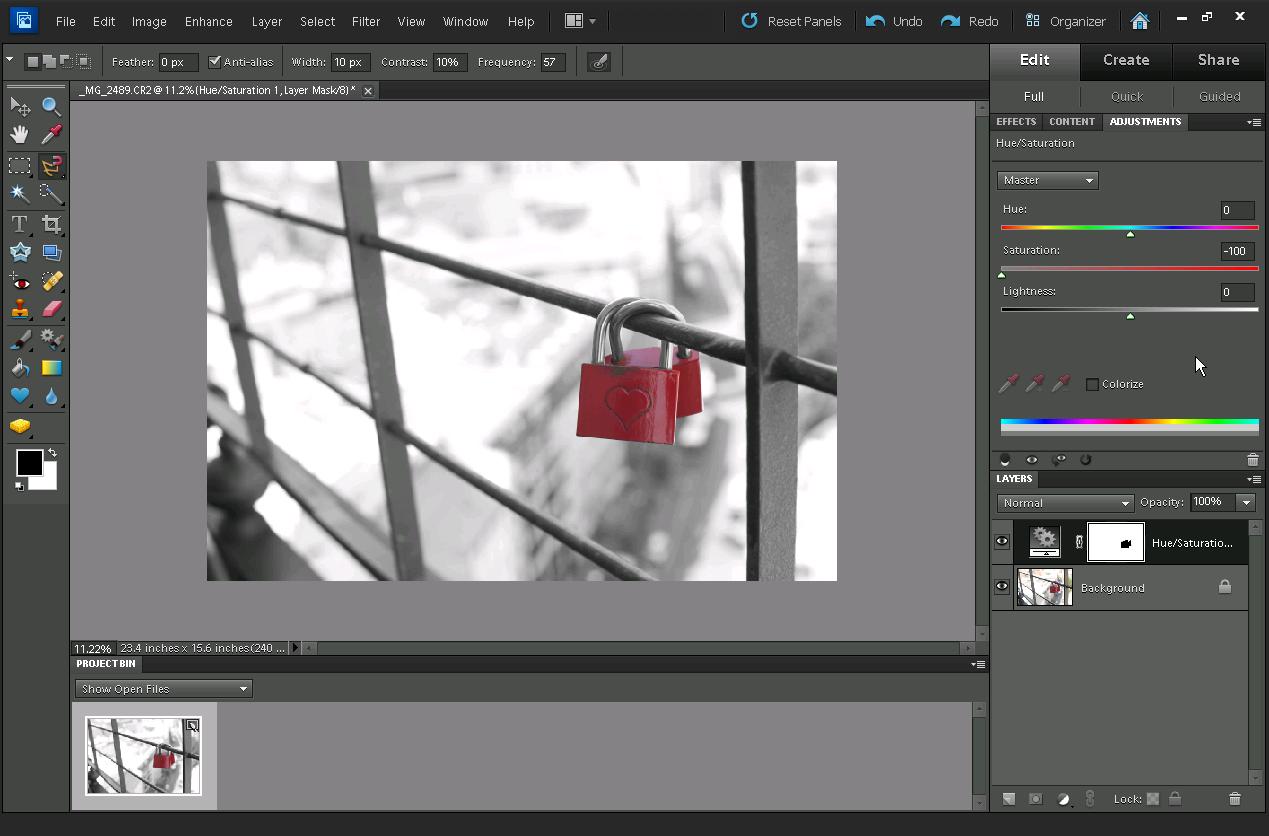
Image after creating a selection of the locks, then creating a hue/saturation adjustment layer and inverting the layer mask
Using selection tools to select an object
You can see some of the different ways of creating a selection demonstrated in the video below:
Alternatively, text descriptions of how to use the different selection tools are below:
Magic wand
With the magic wand tool, click on the area that you want selected. This selects all pixels that are a similar color and tone to where you click. To add to the selection, hold down the shift key and click on the area you want added to the selection.
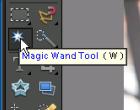
Magic wand tool in the tool palette of Photoshop Elements
If you want to remove an area from the selection, hold down the Alt key when you click.
The Magic wand tool has some important settings that affect how it works.

Options for the Magic Wand tool in Photoshop Elements
-
Tolerance affects how similar a color has to be to the color you clicked on for it to be included as part of the selection. The default tolerance of 32 works well for most images. If you find that the magic wand is also selecting part of the background, try decreasing the tolerance value.
-
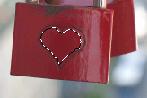
Contiguous affects whether the magic wand will only select parts of the image that are connected to where you clicked. For example, in the image below I clicked inside the heart on the lock. The rest of the lock is the same color and tone as inside the heart, but only the heart was selected because there is a dark outline of the heart. The red color inside the heart shape is not connected to the red color outside of the heart shape.
Magic Magic wand tool selection with contiguous checkedWith contiguous unchecked, then the magic wand will select all pixels in the image that have a similar color and tone to where you click, and these pixels do not need need to be adjacent to where you clicked.
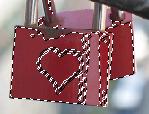
Magic wand tool selection with contiguous option unchecked
Magnetic Lasso
The Magnetic Lasso tool can be accessed by clicking on the lasso tool icon, and holding down the mouse button. Then a little menu will pop out that allows you to choose the Magnetic lasso tool.

Magnetic Lasso tool in the tool palette of Photoshop Elements
With the magnetic lasso tool, click at the edge of the object you want to select. Now slowly move the mouse pointer along the edge of the object. The magnetic lasso tool will automatically hug the edge of the object and add points to the selection path as you move the mouse around the edge of the object.
The Magnetic lasso tool in action
If the tool adds a point where you don't want one, just press the Delete (Del) key on your keyboard. To scroll while using the magnetic lasso, hold down the space key, and then click and drag on the image to scroll.
When you have finished your selection (have got back to near the starting point), click on the starting point. This will complete the selection process and create an active selection. Alternatively, you can press enter to complete the selection.
Magic Extractor (Photoshop Elements)
The Magic Extractor in Photoshop Elements can be used to 'extract' part of an image. We can then use this extraction to create a selection. The Magic Extractor works in a similar way to selection plugins available for Photoshop, such as Topaz remask.
To use it, you first want to create a duplicate layer of your image. This duplicate layer will then be used for the extraction. To duplicate a layer, right-click and choose duplicate layer. Or drag the layer to the new layer icon. Or press Ctrl + J. Or go to Layer > Duplicate Layer... on the menu. So many ways to do the same thing!
With the duplicate layer selected, go to Image > Magic Extractor on the menu. The Magic Extractor window will then open with the layer loaded.
There is a plus brush - use this to paint on the area of the image you want to keep. Use the minus brush to paint on areas of the image you don't want to keep. Anything that is left unpainted, Photoshop will work out whether you want to keep or lose it based on the areas that you have painted.

The Magic Extractor window in Photoshop Elements
This technique can be very good for selecting objects that don't have an easily defined edge, such as hair or fur. And it works well for objects with solid edges as well.
When done, click the preview button to preview the extraction. Touch up the selection with the selection brushes if necessary and preview again, otherwise hit OK.
When the extractor has finished, your layer will end up with just the extracted object, and everything else removed. To create a selection from this, hold down the Ctrl key on the keyboard. Then click the layer thumbnail in the layers palette. This will create the selection, and you can then use this for creating a layer mask for the adjustment layer.
Color Range (Photoshop)
In the full version of Photoshop, you can also create a selection using the color range tool. On the menu go to Select > Color Range. This brings up a little dialog, which shows a preview image of the selection.
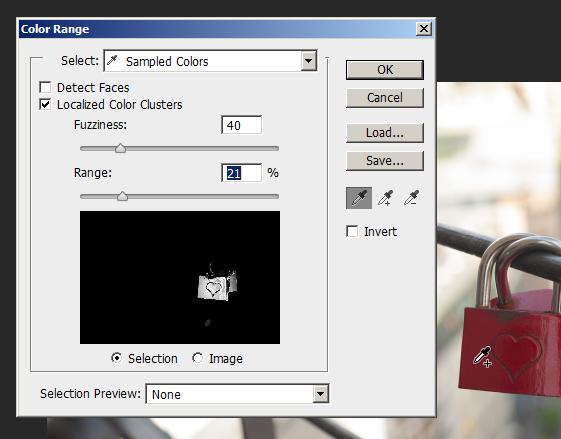
Color Range selection dialog in Photoshop CS6
The color range selection tool works in much the same way as the magic wand. Instead of tolerance, we have the fuzziness option. But unlike magic wand, we can adjust this after we have already clicked on the object we want to select.
The Localized color clusters is similar (though not quite the same) as the contiguous setting for the magic wand. When the Localized color clusters option is checked, then a range slider control is available. Use this to control how close to where you clicked the other areas of similar color must be to become selected.
Like the Magic wand selection tool, you can hold down the shift key when clicking to add to a selection. Or hold down the Alt key when clicking to subtract from a selection.
With all these selection methods, your selection doesn't need to be perfect. After creating a layer mask based on the selection, you can easily touch up the mask to refine it.
With so many different ways of selecting the object you want to be in color, you should be able to create a mask for the hue/saturation adjustment layer okay. Sometimes you might need to invert the mask, to do this just press Ctrl + I.
Enjoy making selective color images!
i see red by laszlo-photo on flickr (licensed CC-BY)


