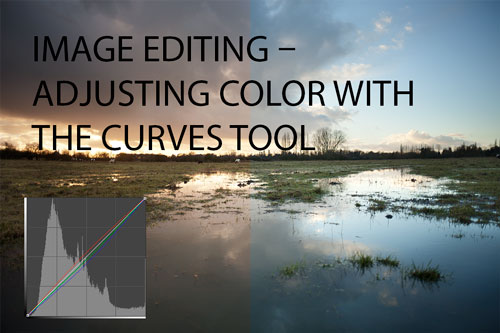
Image editing – adjusting color with the curves tool
Carrying on from the previous article Using the curves tool in Photoshop etc. to improve your photos, in this article we'll look at using the curves tool to alter the color balance in your photos.
Curves can be used to fix a color cast in your photo, or add a color cast. You can adjust the colors in just the highlights, midtones, or shadows depending on where you place the points on the curve. You can even create giant shifts in color such as a cross-processing effect using curves. They are a very useful tool in adjusting the color of a photo.
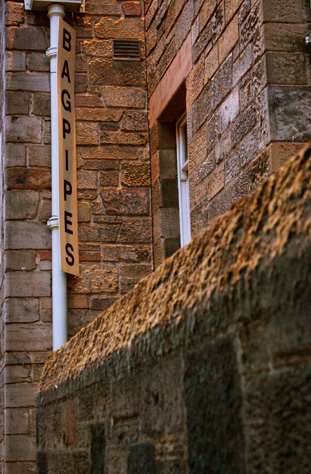
If you'd like to follow along and try the adjustments mentioned in this article, you can download the example images used here and here. Or you can always try making the adjustments on your own photos.
Adjusting the different color channels using curves
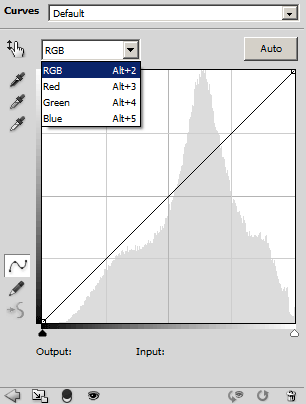
The first thing to do is to open up a curves adjustment. The curves adjustment dialog varies between different image editing programs, but you should see an option to edit the curve for a specific channel. In Photoshop CS5, the drop down menu looks like below:
If your image editing program doesn't allow editing the curves for individual channels (e.g. Photoshop Elements), you can download and install the free curves plugin Smart Curve.
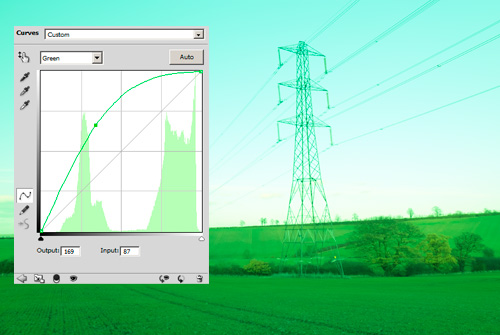
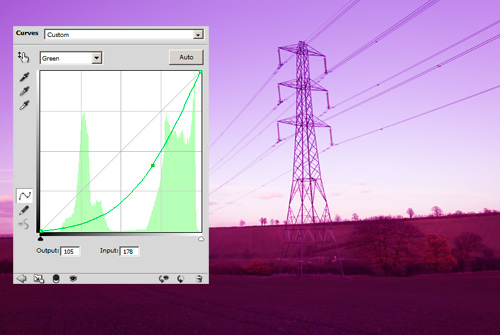
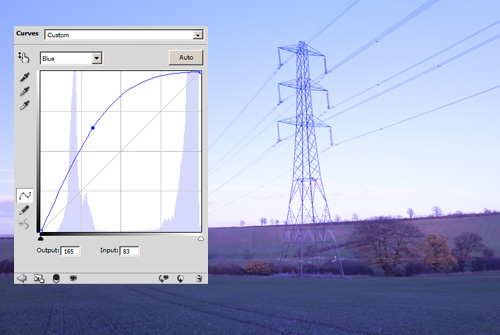
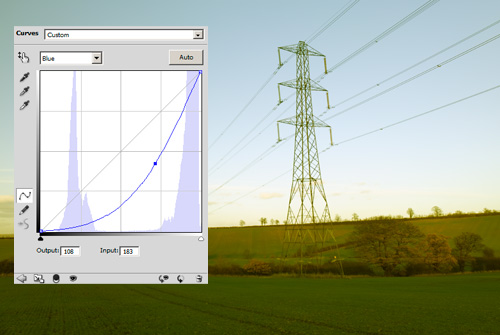
The three channels we can choose from are Red, Green, and Blue.
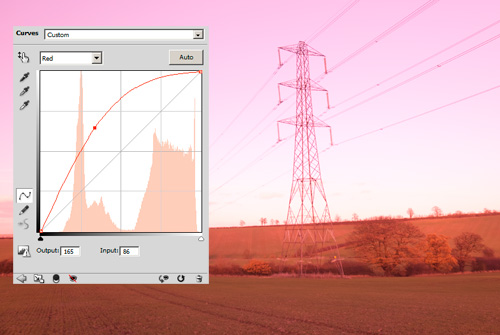
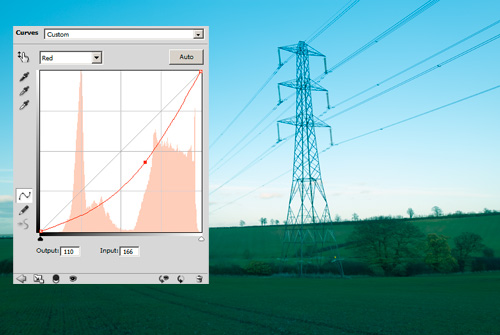
By boosting the red channel, our photo takes on a more reddish tone, while if we reduce the red it will create a cyan color cast:
If we undo our changes to the red channel, let's take a look at how modifying the green channel affects the photo. Increasing the green curve gives the photo a green tint, while decreasing it gives a magenta tint:
Finally, we undo the changes to the green channel, and only make changes to the blue channel. Increasing the blue gives a blue tone (how predictable!), while reducing it gives a yellow tone.
Using curves to create a warm color balance
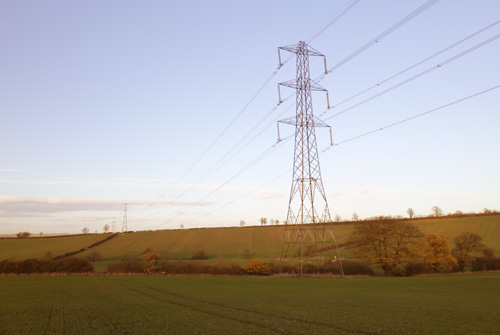
While you could apply a change in just one channel to a photo, normally you will want to change two or all three of the channels to create a color effect. An example is warming the color temperature of an image. To do this we increase the red channel slightly, while reducing the blue:
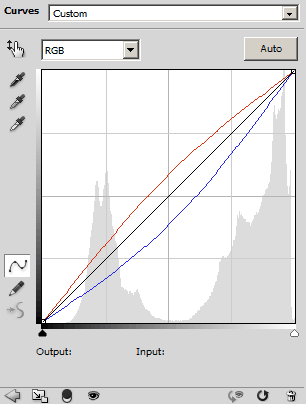

For this particular photo, the sky is brighter than the landscape. So if we want to restrict the change in color mostly to the landscape, we can do this by modifying the red and blue curves to mostly affect just the darker tones. This leaves the sky with more of its original blue tone, while the landscape is warmed:
If we wanted to apply a tone curve to only the landscape, but the sky was roughly the same tone, we could instead use a layer mask or selection to restrict where the curve is applied.
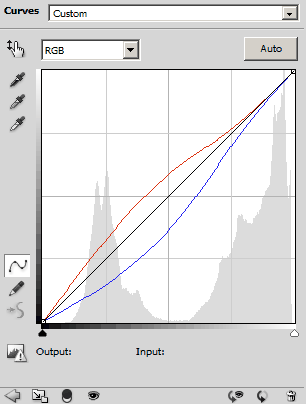
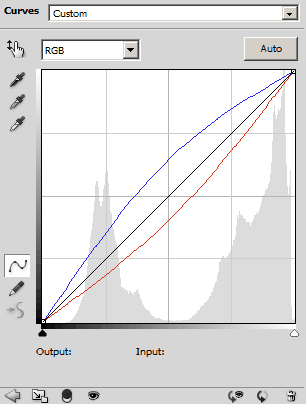
Using curves to create a cool color balance
To apply a cooler color temperature to a photo, we just do the opposite of applying a warmer color temperature. We reduce the amount of red while increasing the amount of blue.
Using curves to correct a color cast
We can also use curves to correct the color temperature of a photo.
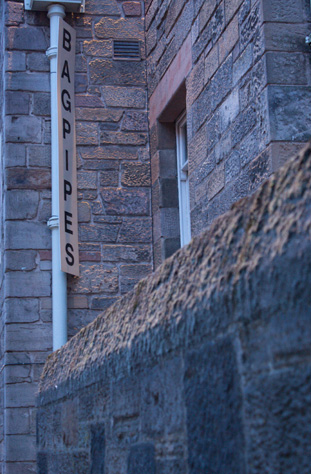
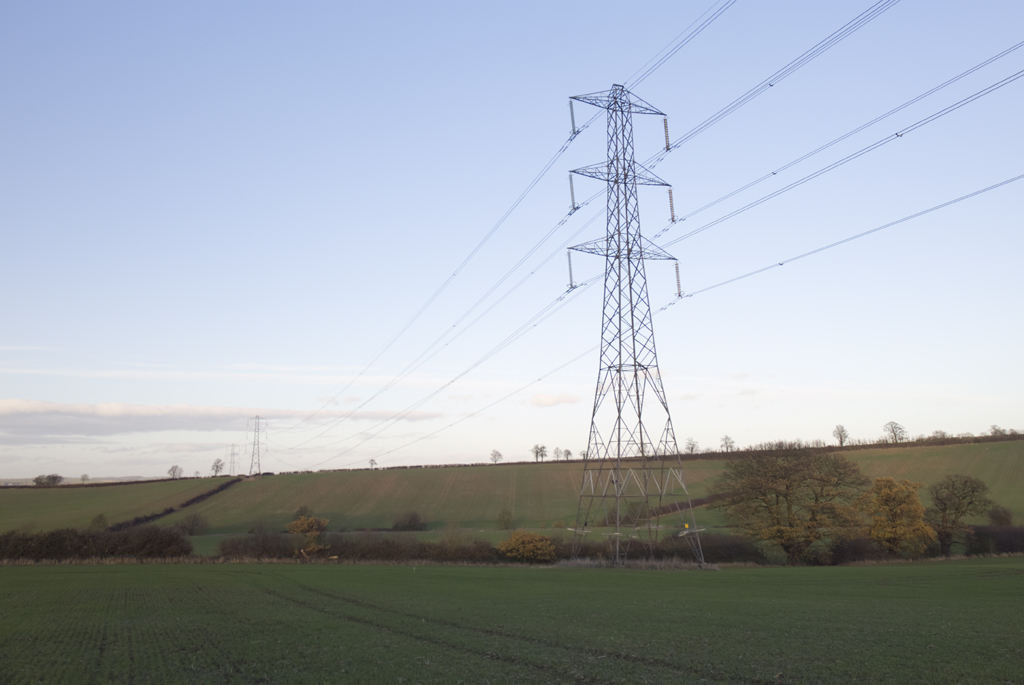
For example, this photo is obviously too blue. We know that the window frame should be white, so we can use curves to remove the blue cast. If we reduce the blue and increase the red, this gives us a much more neutral colored image:
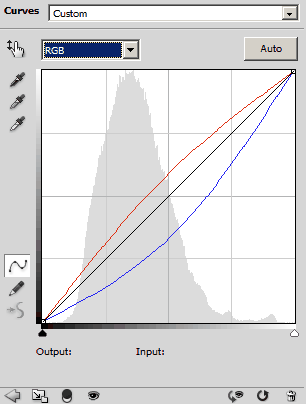
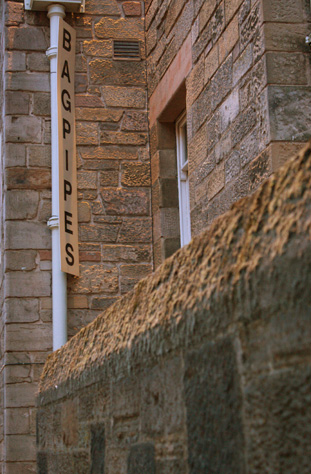
Now, lets also apply some of the techniques discussed in the previous article. We go back to the RGB tone curve and pull the left and right edges in to meet the edges of the histogram. I have also applied a slight s-curve to increase the contrast:

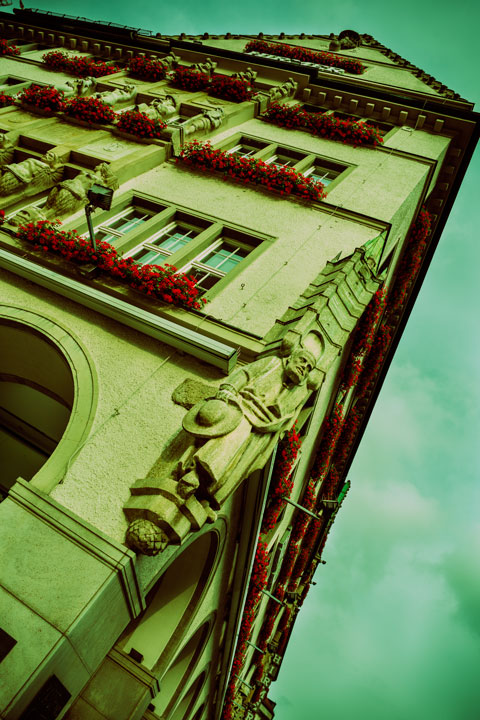
Using curves to create a cross processed effect
By making quite extreme curves adjustments for the different channels, you can make can large differences to the color and tone of an image. These sorts of adjustments are often known as cross-processing (or x-processing) as they mimic the effect of developing one type of film in a solution meant for developing a different type of film.
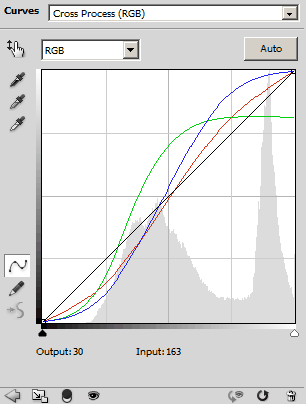
Depending on your image editing software, you can save any curve you create, allowing you to quickly load it in the future rather than having to make the adjustments again. You can also download curves presets that other users have saved, for example here is a collection of Crossprocessing Curve Presets for Photoshop, or Film emulation curves presets for Gimp.
You should now have a good understanding of curves, how they work, and how you can use them to improve your photos. If you have any questions, please either leave a comment below, on Google plus, Facebook, or email info@discoverdigitalphotography.com.


