Split Toning Explained
Split toning is a technique where a color cast is applied to an image, but the color cast applied to the highlights is different to the color applied to the shadows.
Different color casts can give different feelings to an image. Oranges, reds, and yellows can give a warm, sunny day feeling. Blues can give a cold feeling. Greens and magentas can give a cross-processed film look.
There are quite a few different ways a split toned effect can be applied to an image. Different methods can be applied at different stages of the image editing process, they differ in how much control they offer, and how quickly they can be applied. In this article we'll look at the main split toning methods so you can decide for yourself which one would work best for your needs.
What makes a successful split-toned image?
Generally split toning works better on photos you'd like to give a film effect, vintage, low contrast, or dreamy look. If you intend your photo to have strong contrast with bright popping colors, then split toning is unlikely to work well. (Of course, there are always exceptions to the rule).
While split toning can be useful for photos where the intended output is low contrast, it works best when applied to images that contain a wide range of tones before processing. If you have a photo that is quite bright with hardly any shadows, then split toning won't be effective. You'll be able to tint the highlights, but if there aren't any shadows to tint then you're effectively just tinting the image a single color, not split toning.
Split toning can be applied to monochrome or color images. With color images you need to bear in mind that the colors you choose for the shadows and highlights will blend with the existing colors in the image. So you need to think carefully about how well that will work. You can, of course, create both a color split tone and monochrome split tone version of an image, then see which one you prefer.
Normally the colors you choose for split toning will be complementary colors, i.e. opposite colors on the color wheel. For example, orange highlights and blue shadows. Or magenta highlights and green shadows.

RGB color wheel by Sylveno (licensed CC-BY-SA)
Split toning using the sliders in LR / ACR
Adobe Camera RAW and Lightroom (also made by Adobe) are the two most popular RAW converters. Both programs use the same RAW conversion engine, and so both offer the same simple way to apply split toning to an image at the point of RAW conversion.
In ACR Split toning is under its own tab, which has an icon of a white bar above a black bar.
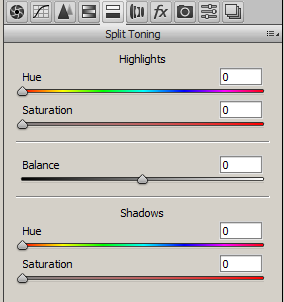
Split toning tab in ACR
In Lightroom the tab is located between the 'HSL / Color / B & W' and 'Detail' tabs (by default) in the Develop Module.
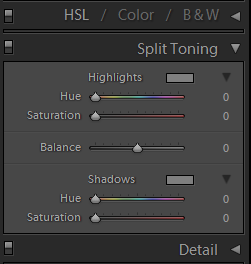
Split toning tab in Lightroom
The process of split toning is pretty straight forward. The Hue settings let you choose what color you want the highlights or shadows to be. The Saturation settings affect how strong the color cast is. 0 means no effect at all.
Typically you'll want something around 20-30%, but it depends how strong you want the effect to be.

Image before performing split toning adjustments
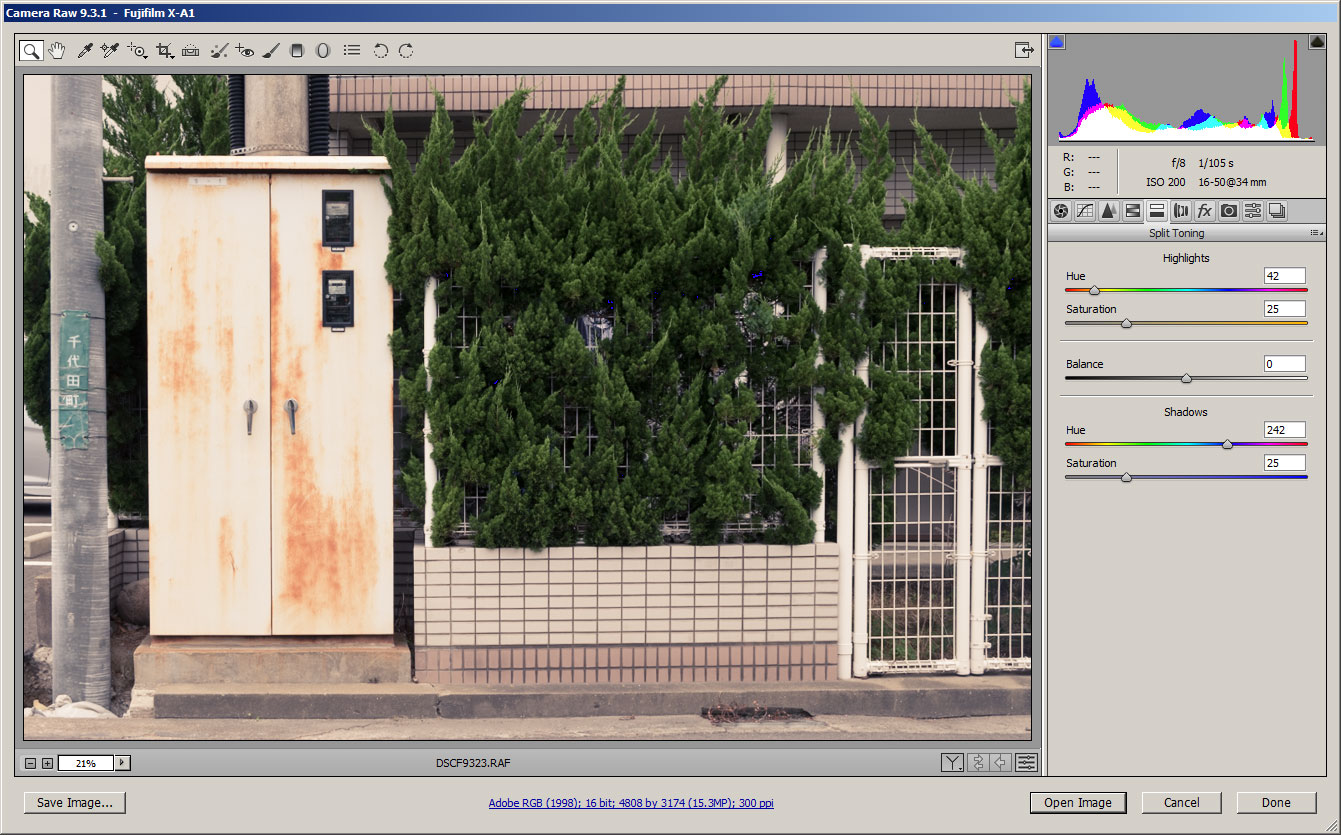
Image split toned using orange for highlight tint and blue for shadow tint
The balance affects what portion of tones are considered highlights, and what tones are considered shadows. Anything not considered a highlight is a shadow and anything not a shadow is a highlight as far as the tool is concerned. So you can't apply the split toning only to the brightest highlights and darkest shadows.
What you can do though is shift the balance of how the tones are considered. So shifting the slider towards the left (darker side), it will consider more of the tones in the image to be shadows, and only the brightest tones to be highlights.
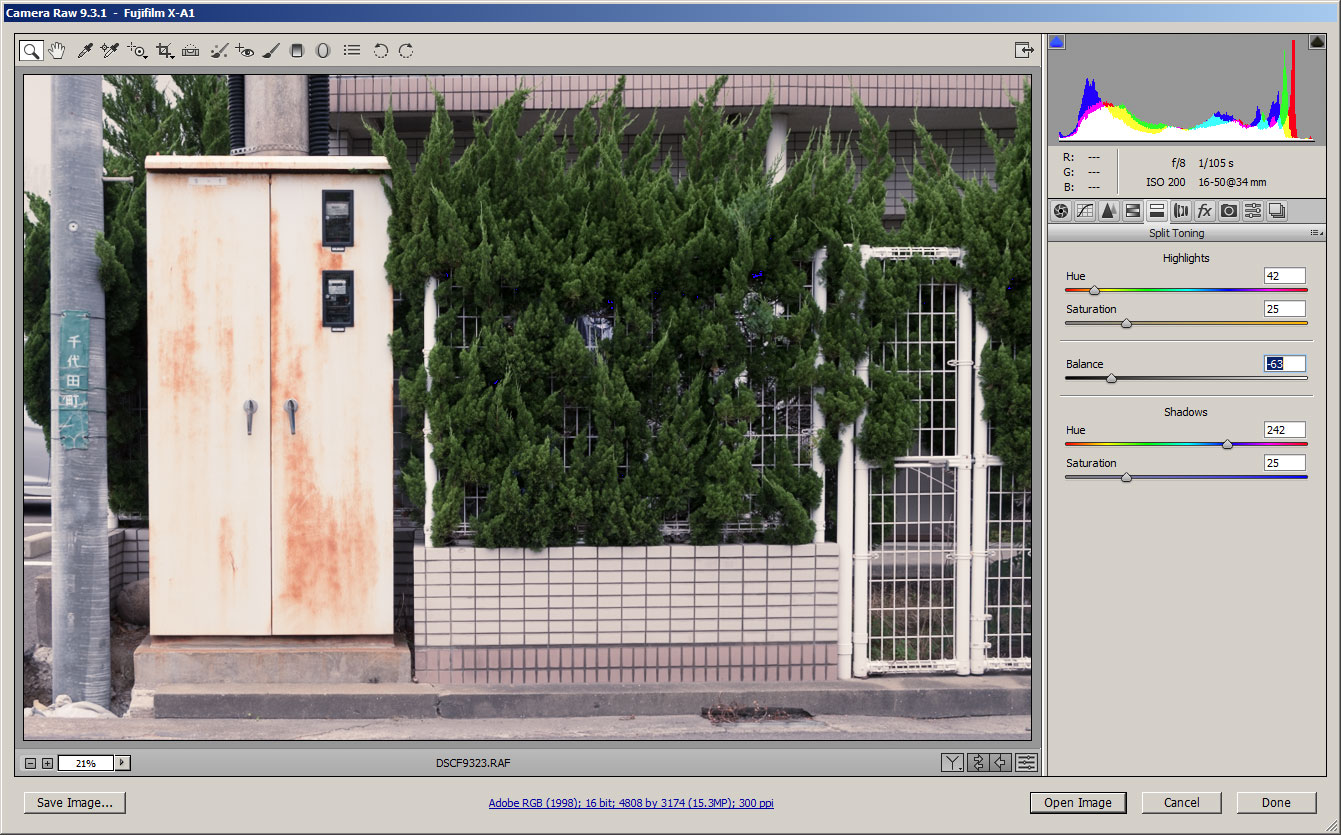
Biasing the tinting to the shadow color
Shifting the balance to the right, it will consider most of the tones to be highlights and only the darkest tones to be shadows. Using the balance slider lets you fine tune the amount of the image that will be affected by the highlight or shadow color.
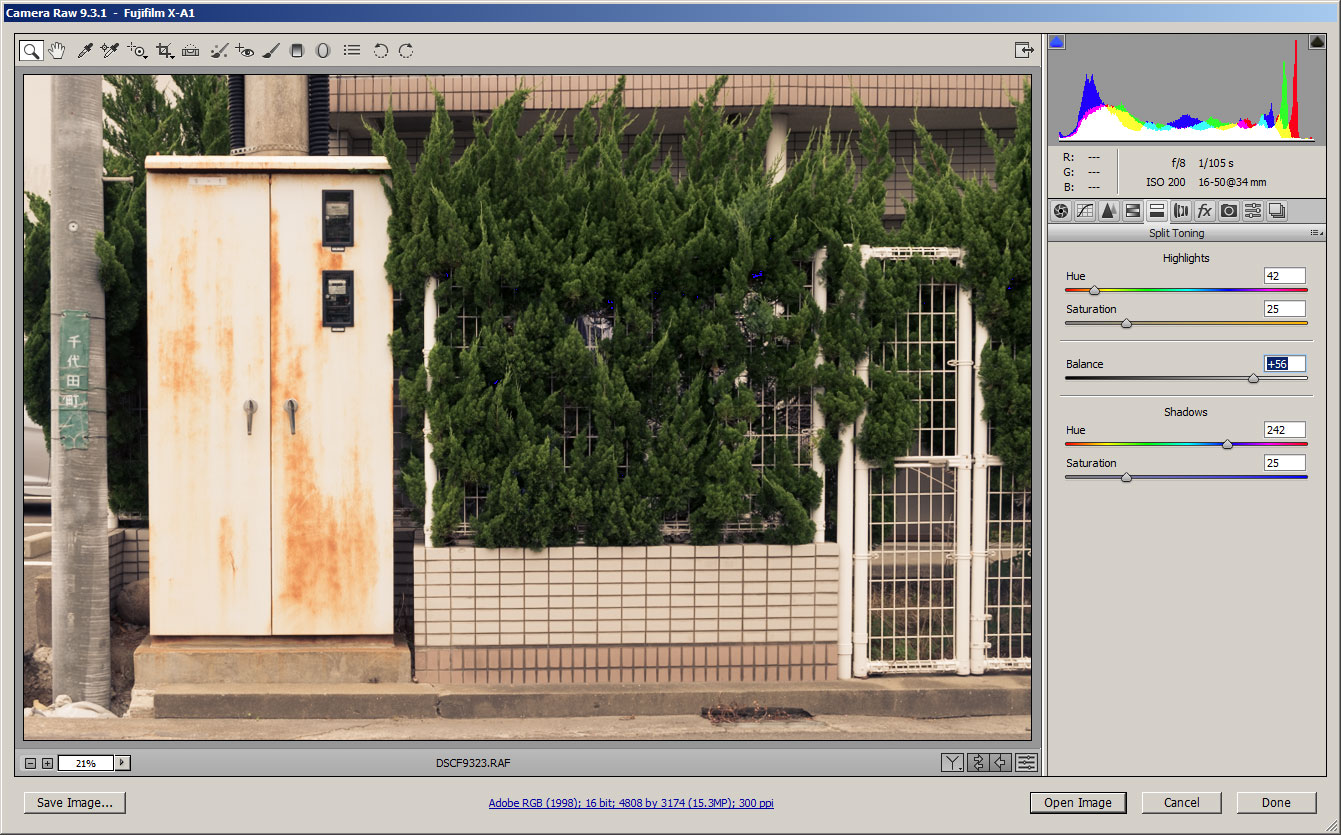
Biasing the tinting to the highlight color

Coloring highlights only
As I mentioned earlier, you can apply split toning to color or black and white images. For a split toned monochrome you can adjust the main saturation setting to -100. Or you can use the B & W (Lightroom) or HSL / Grayscale (ACR) panel to convert the image to monochrome. The split toning effect is applied on top of either.
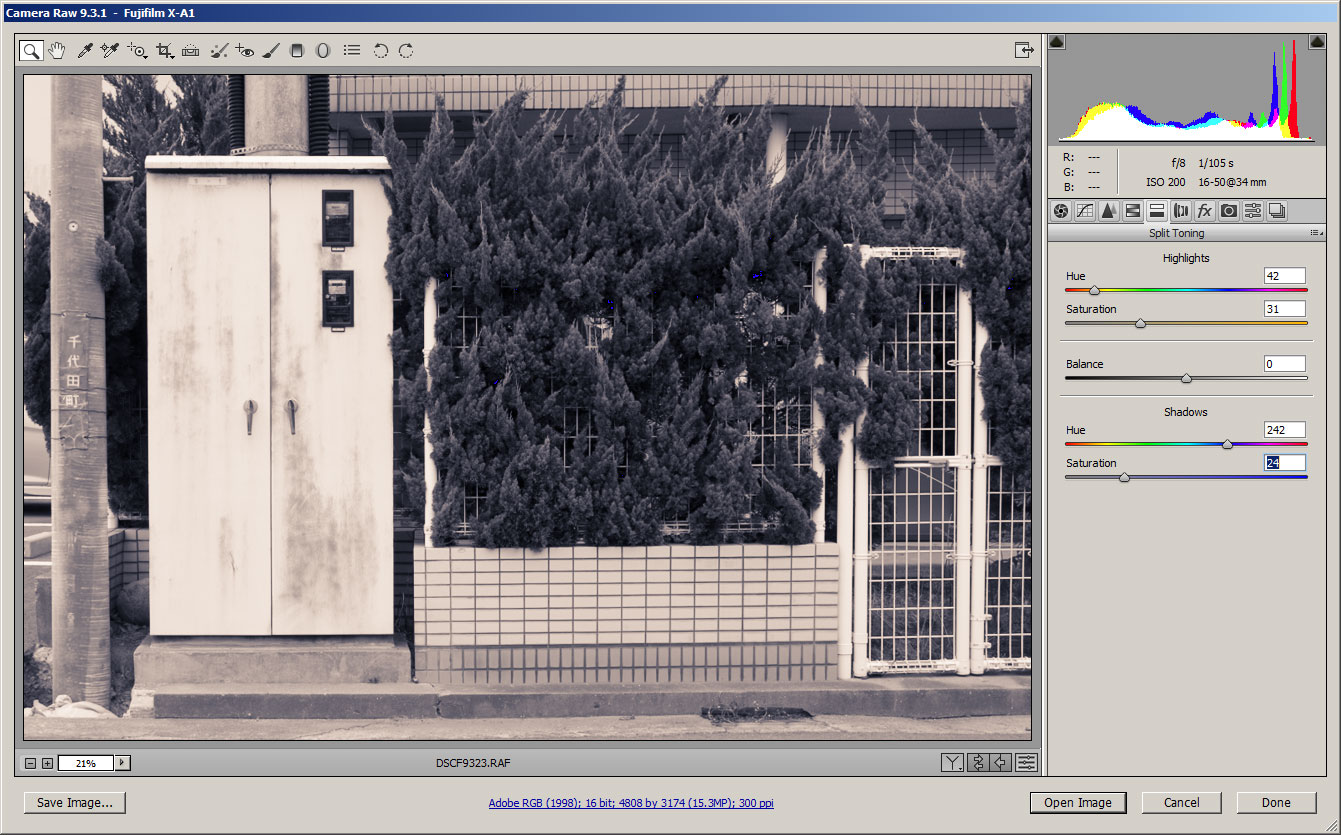
Saturation set to -100, to create split toned black and white image
Split toning using RGB Curves
Most image editing software will offer the ability to adjust the curves for each of the Red, Green, and Blue color channels separately. By selecting a color channel, then pulling up the curve for the brighter tones while pulling down the curve for the darker tones (or vice versa) you can easily create a split tone image.
Note that Photoshop Elements does not include Curves adjustments for separate color channels, but this functionality can be added by installing the SmartCurve plugin. I'll be using the Tone Curve setting in ACR for the example images below, but it works the same in all other software.

Image before making any adjustments.
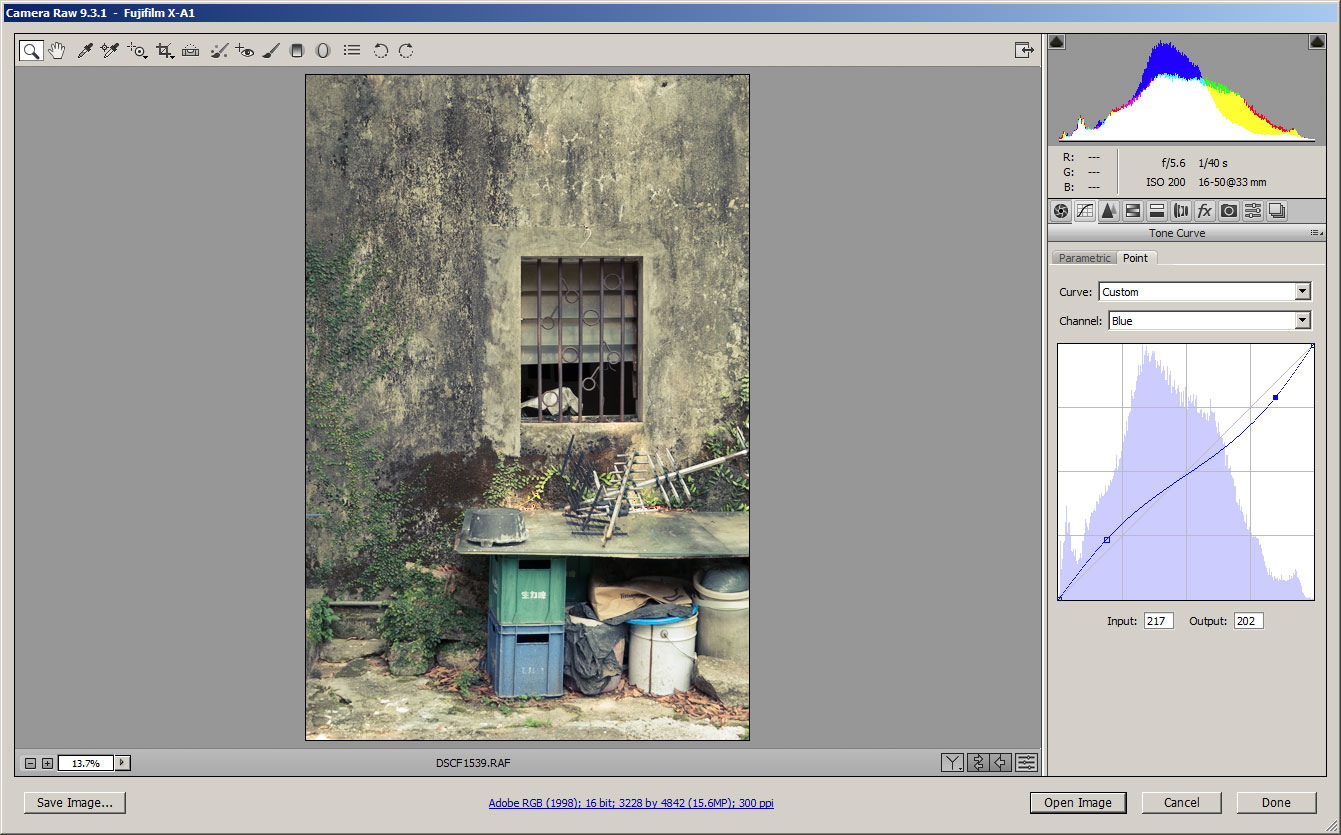
Split toned using curves - yellow for highlights and blue for shadows, using just the Blue channel curve.
You need to bear in mind how the color channels work:
- Pulling up the blue channel curve gives a blue tint, while pulling it down gives a yellow tint.
- Pulling up the green channel curve gives a green tint, while pulling it down gives a magenta tint.
- Pulling up the red channel curve gives a red tint, while pulling it down gives a cyan tint.
With curves you have a lot more control over the toning process. By adding multiple points on a curve you can color only the brightest tones or deepest shadows. Or you can color just the midtones and leave the highlights alone. Or you can color the shadows, midtones, and highlights all separate colors.
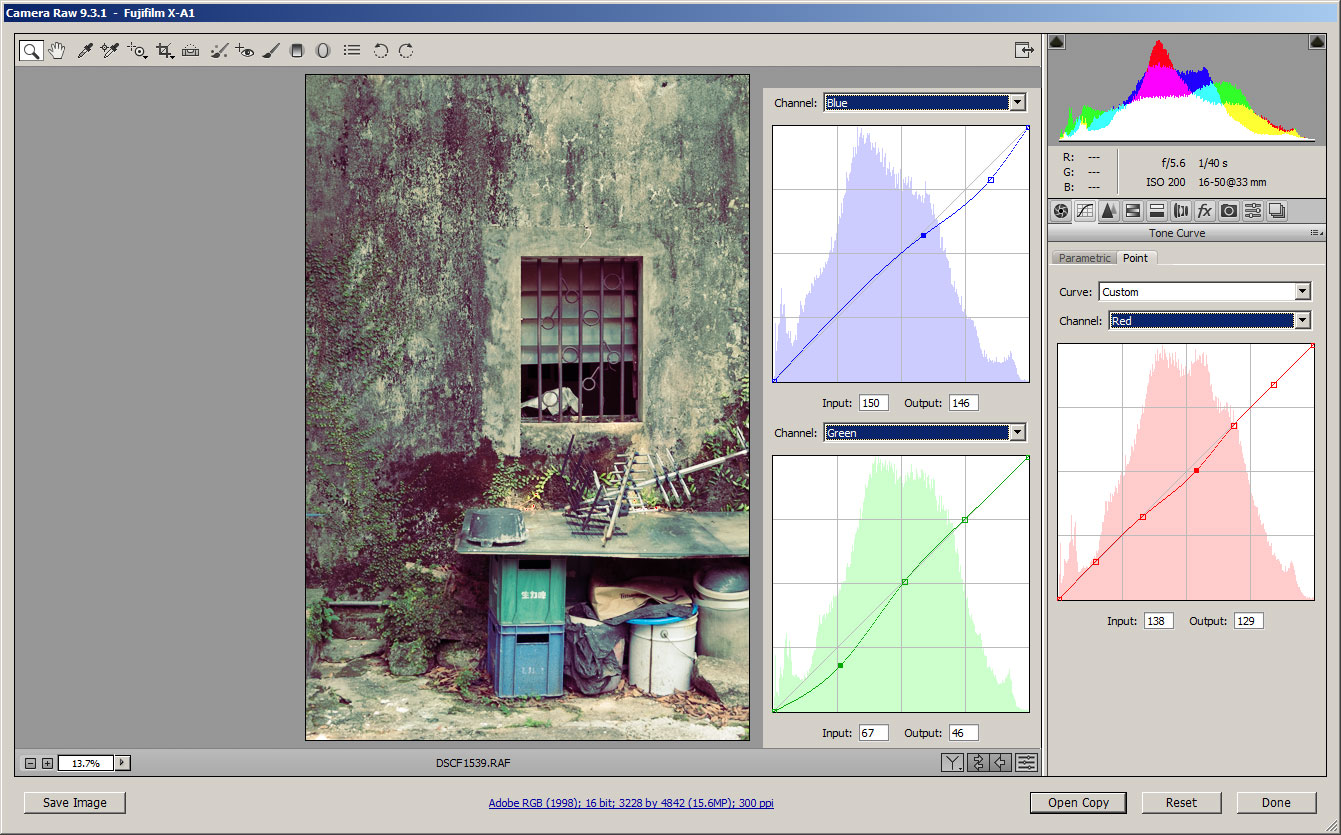
Blue reduced in highlights, Red reduced in midtones, Green reduced in shadows
Just like using the split toning panel in ACR / Lightroom, separate channel curves adjustments can also be applied to a black and white photo. If working on a file that has already been converted to black and white, note that you may first need to convert your image to RGB.
Most black and white images tend to be saved in RGB, which will let you change the curves for each color channel with no problems. However, if an image has been saved in the grayscale color mode, then there are no color channels for you to adjust. If you open a grayscale image and find you can't adjust the RGB curves, then make sure the document is in RGB color.
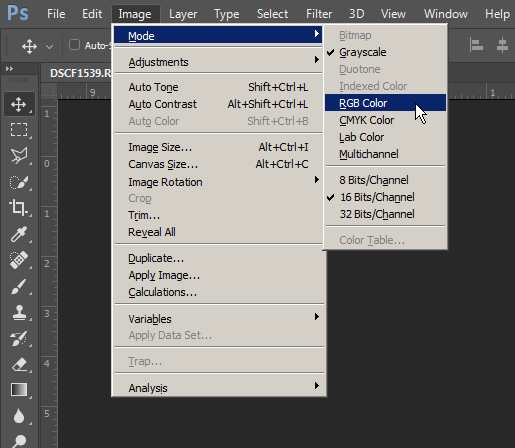
Changing the document color mode in Photoshop CC
Color Balance tool
The color balance tool allows you to adjust the three color channels separately for the Midtones, Highlights, and Shadows. In some ways it is similar to using RGB curves, except that you work using sliders rather than manually placing points and pulling them up or down.
In Photoshop CS /CC the Color Balance tool can be accessed from Image > Adjustments > Color Balance. However I would recommend the use of the non-destructive Color Balance Adjustment Layer instead.
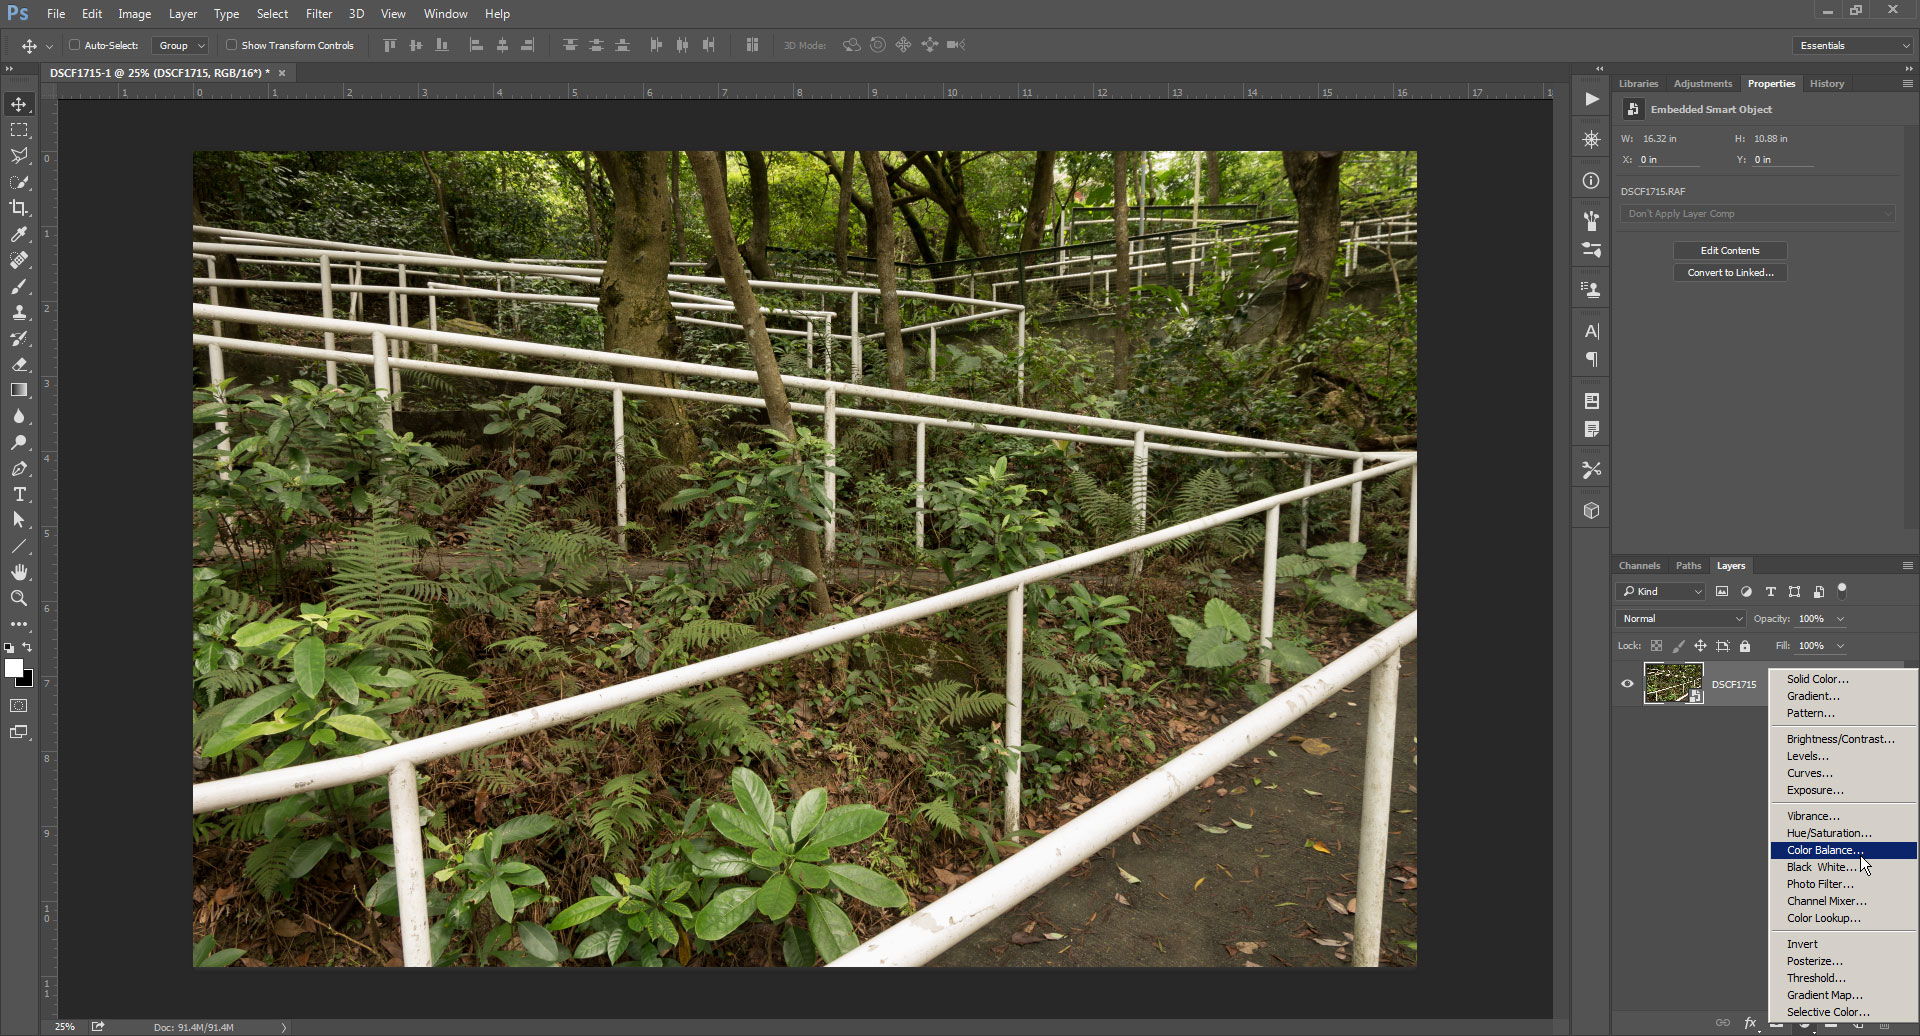
Adding a color balance adjustment layer in Photoshop
In GIMP the tool can be found under Colors > Color Balance.
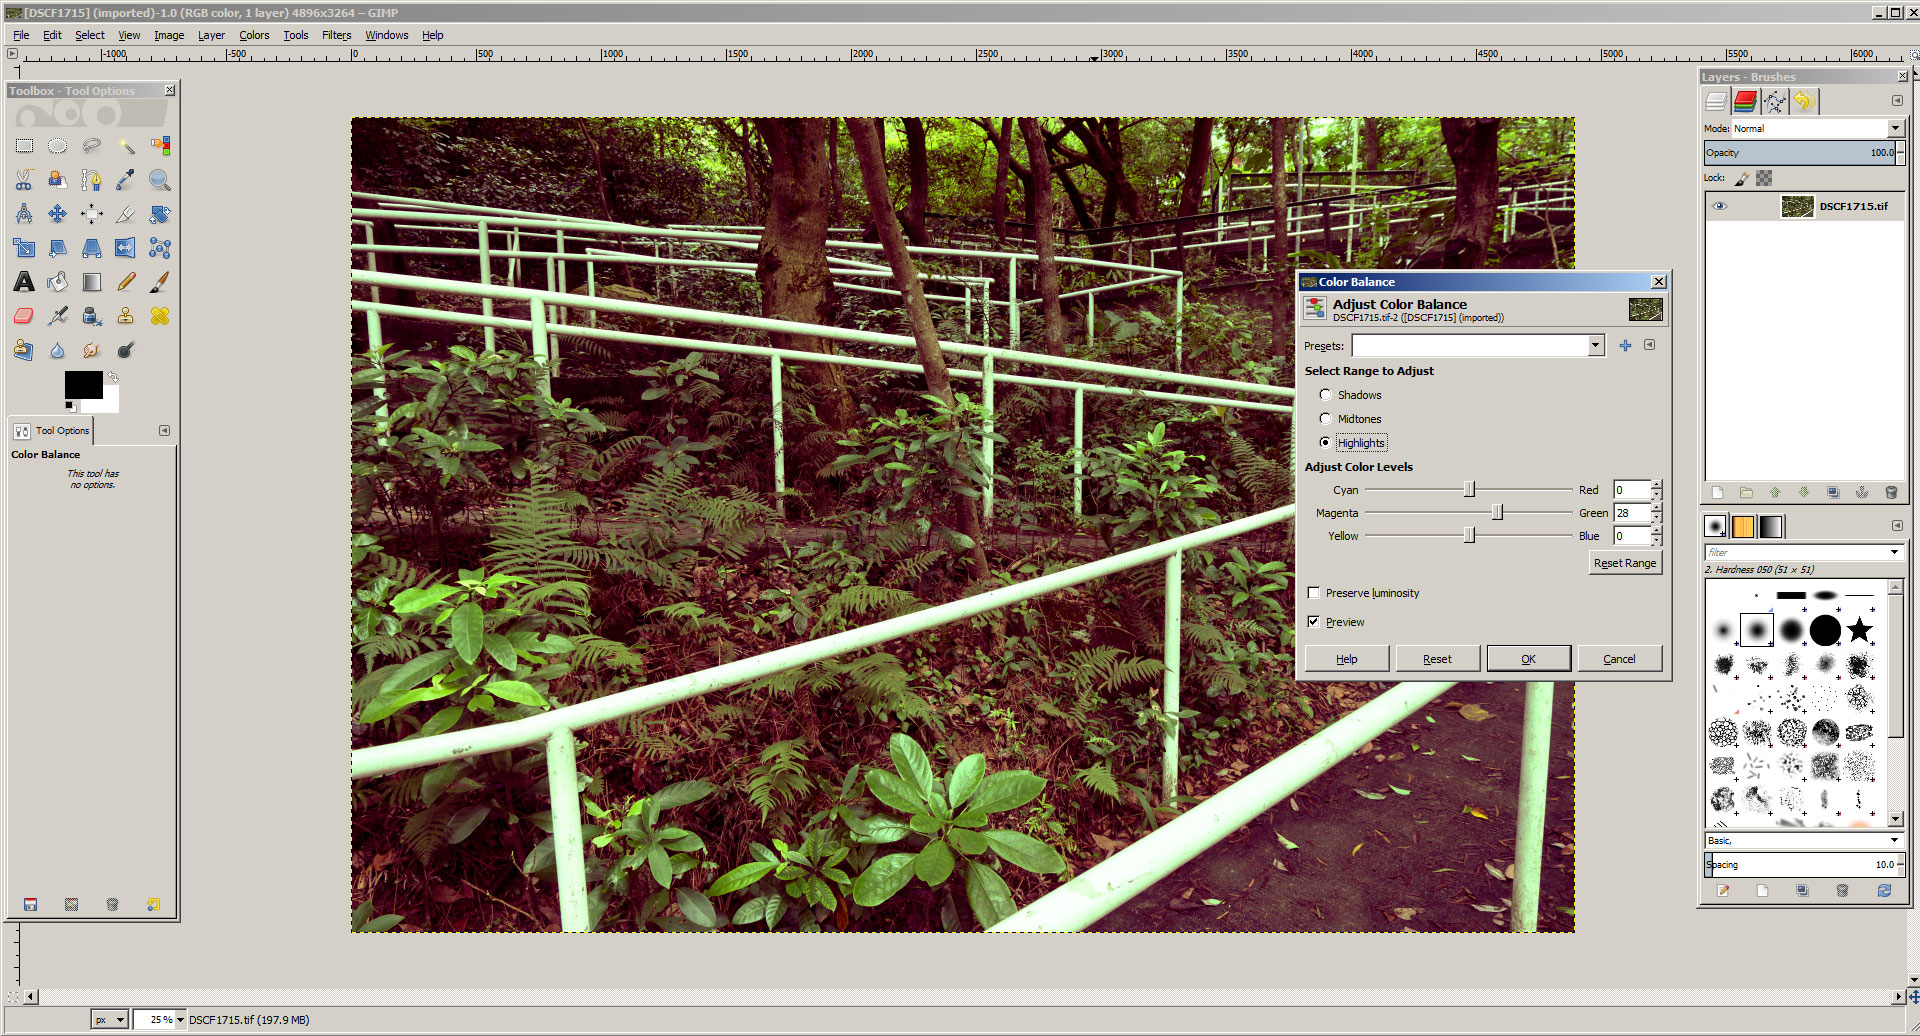
Applying the color balance adjustment in GIMP
Simply choose the tonal range to adjust the colors for, then adjust the colors using the sliders for any of the RGB channels.
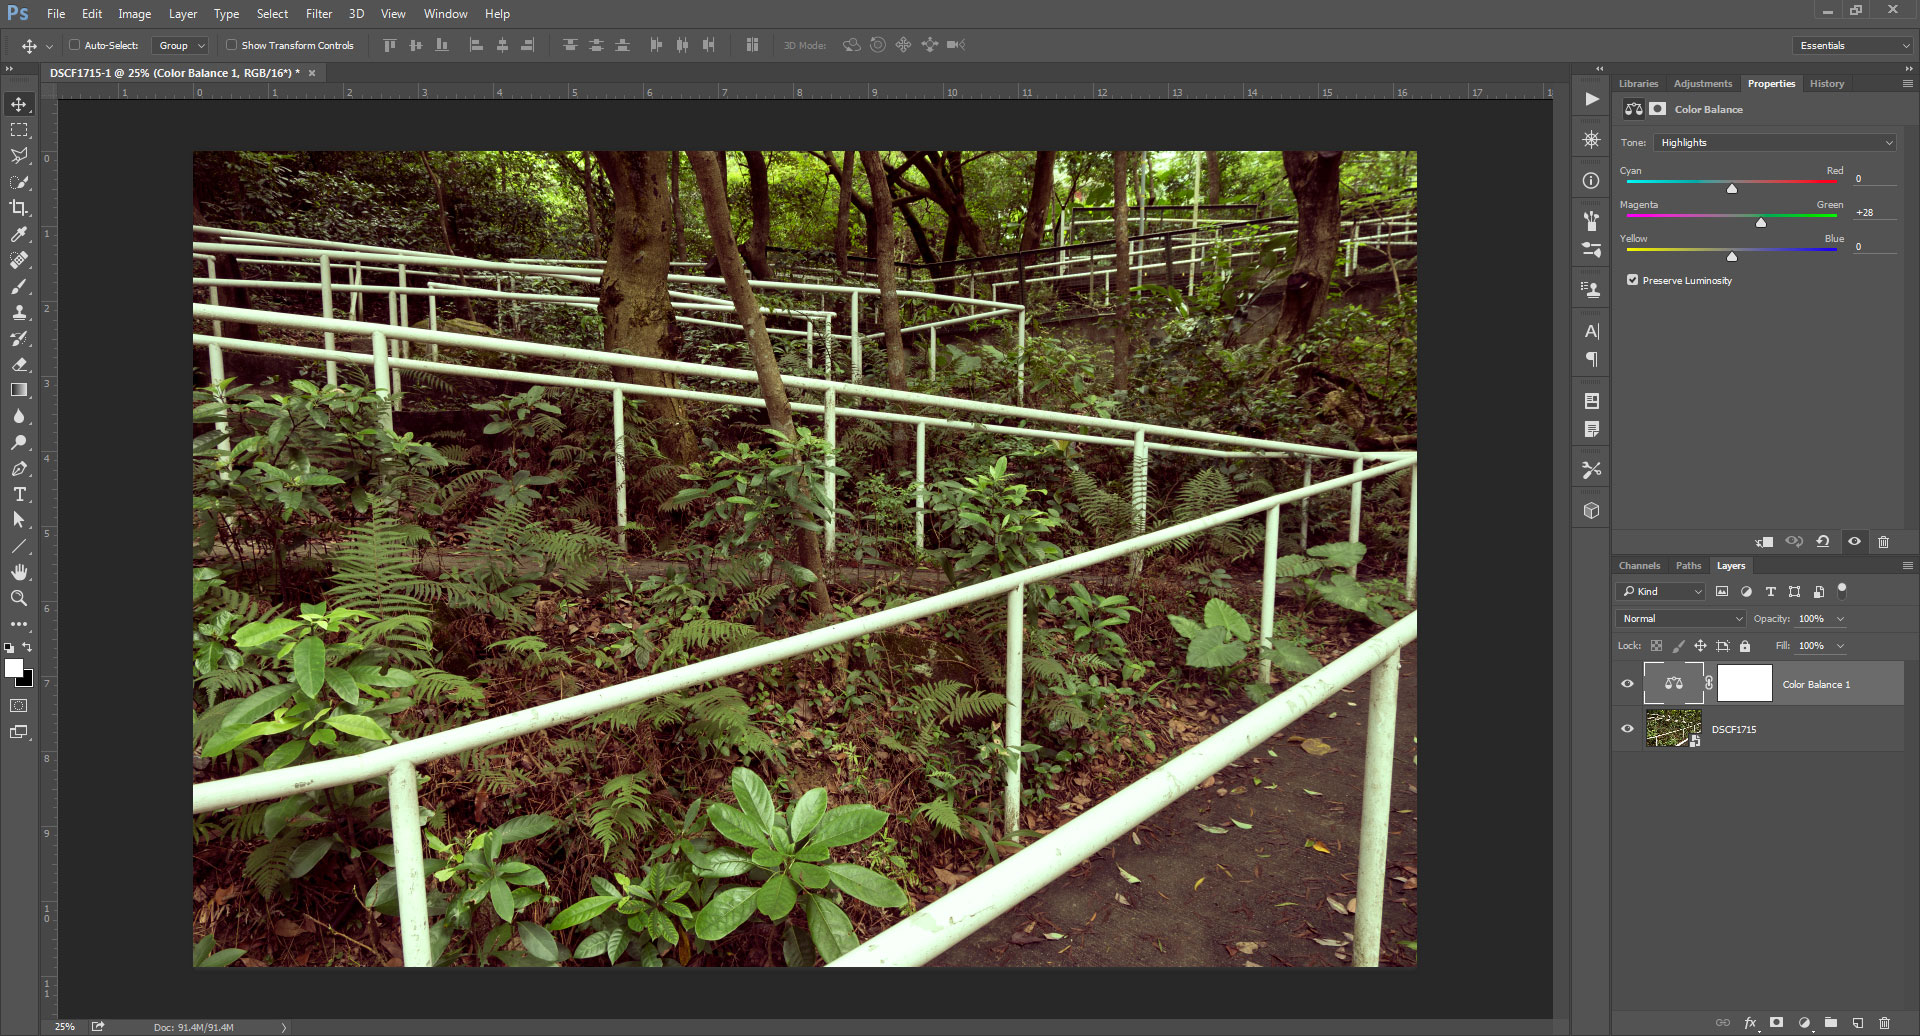
Image with split tone effect (green highlights, magenta shadows) applied in Photoshop
Unfortunately the Color Balance tool is not available in Photoshop Elements, so you'll need to stick to one of the other split toning methods if you use PSE.
Gradient Map
The Gradient Map tool maps the tones and colors in a gradient (that you choose) to the tones in the image. So if you choose a gradient from purple to green, then the darkest tones will be purple, while the brightest tones will be green. The tones in between will be somewhere in between green and purple.
In Photoshop (CS / CC / Elements) you can create a Gradient Map adjustment layer. This is a non-destructive method that allows you to change the gradient colors after applying the effect.
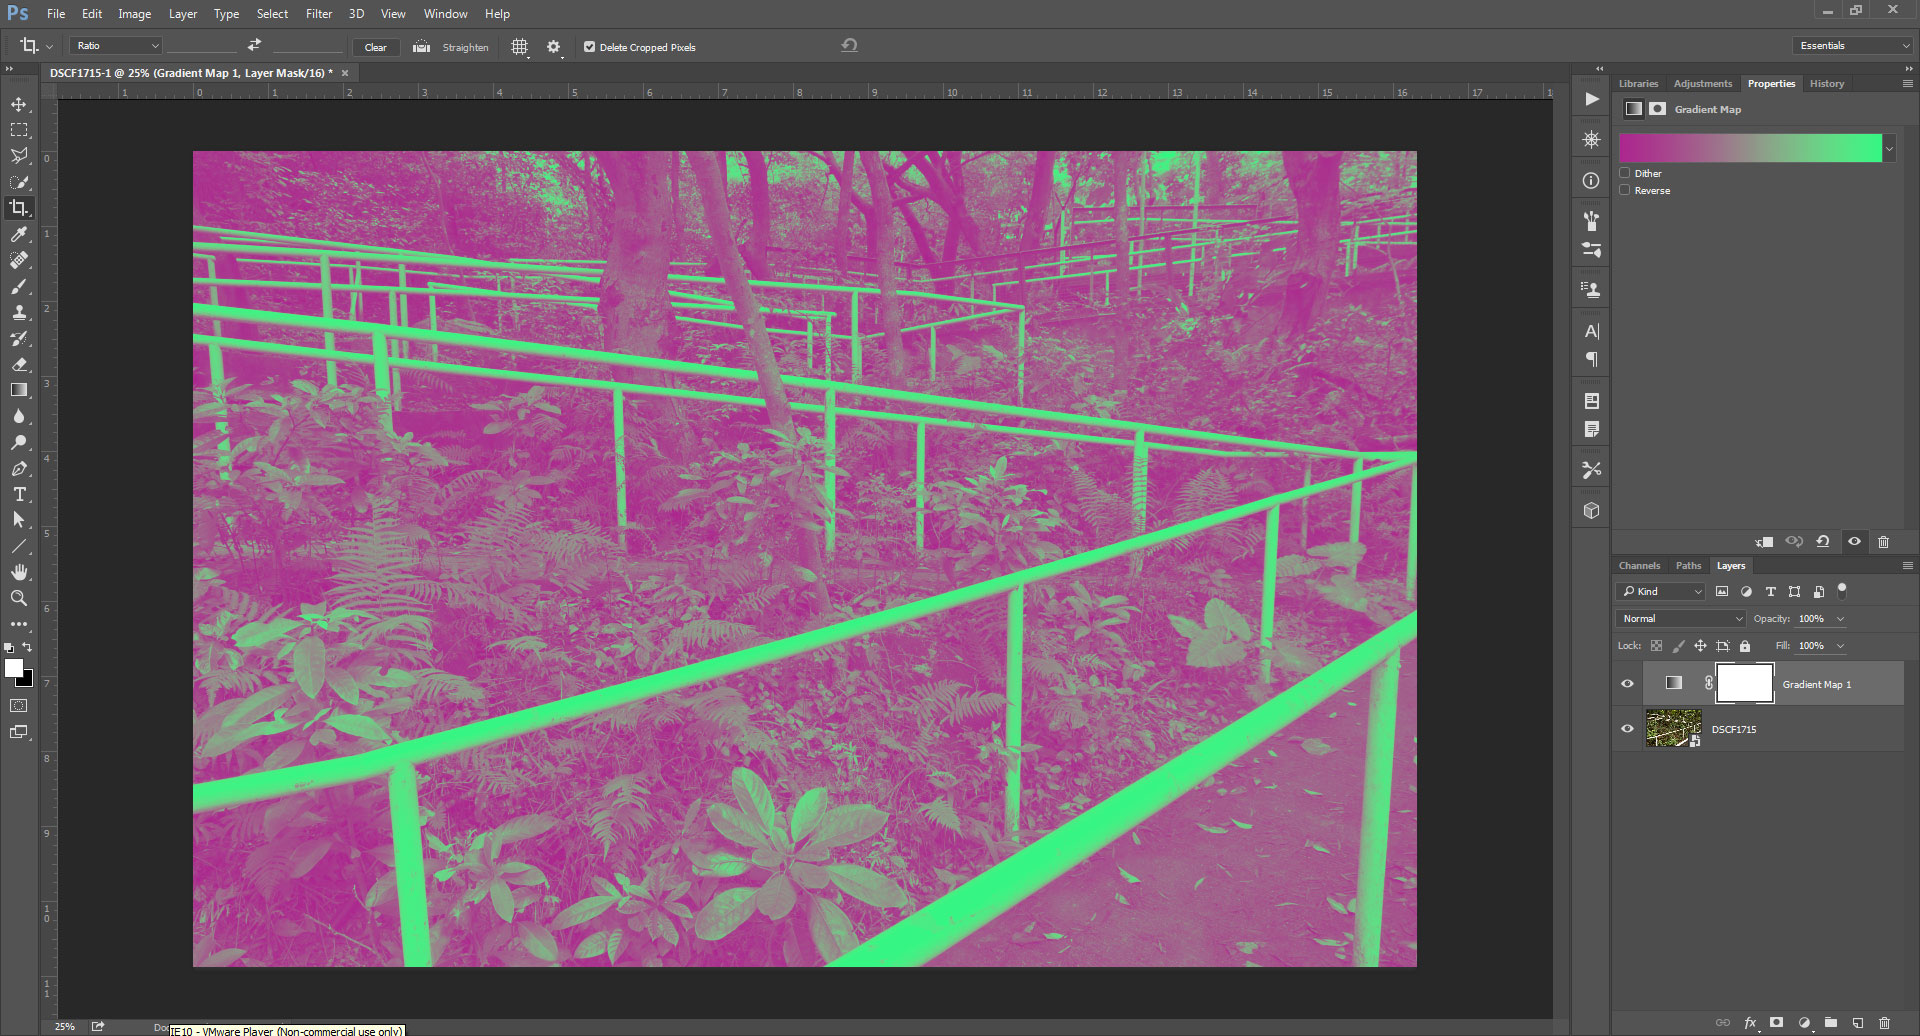
Magenta - Green Gradient Map adjustment layer added above image layer
With the adjustment performed, the image doesn't look great. But change the blend mode of the gradient map layer to Overlay and the split tone effect is applied. Don't be afraid to experiment with other blend modes for the layer too.
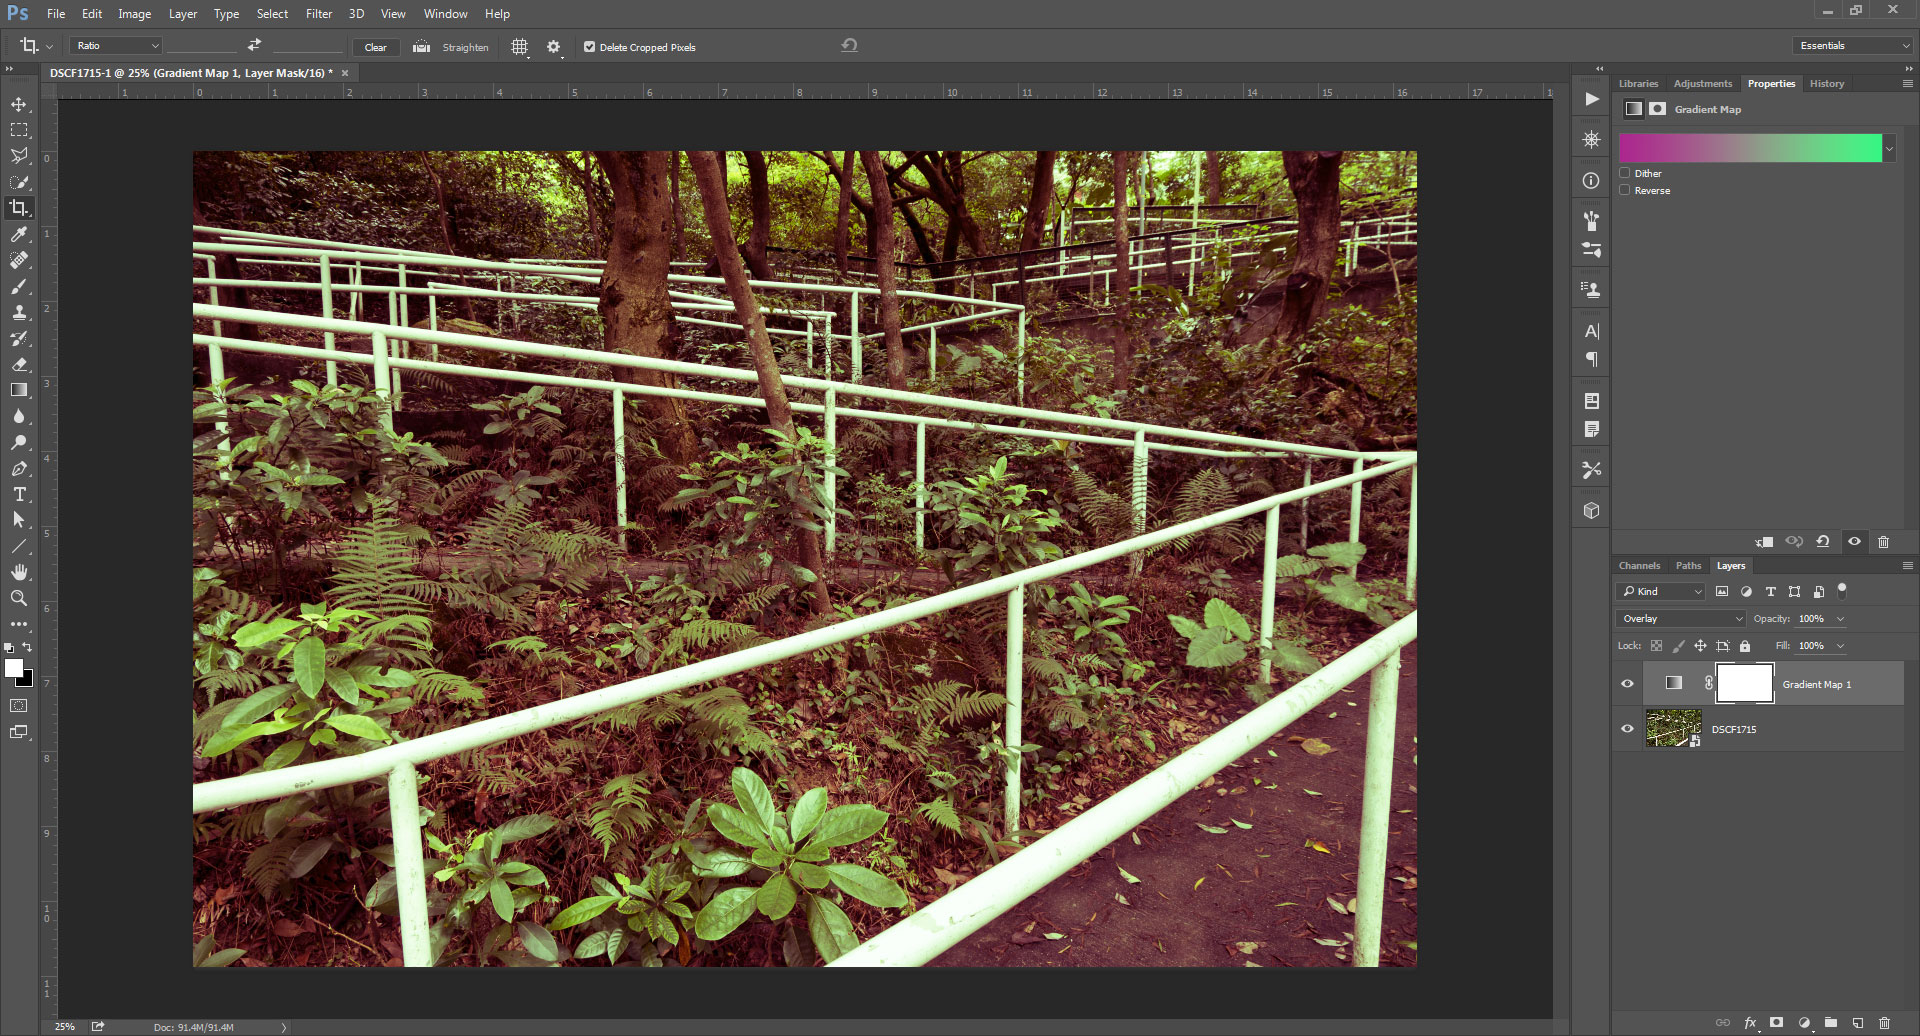
Gradient Map layer changed to overlay blend mode
In GIMP you'll need to duplicate your layer. Set your foreground and background layers to the colors you want to use for the gradient map / split toning. Select your duplicated layer, then go to Colors > Map > Gradient Map. As in Photoshop, change the gradient map layer's blend mode to Overlay.
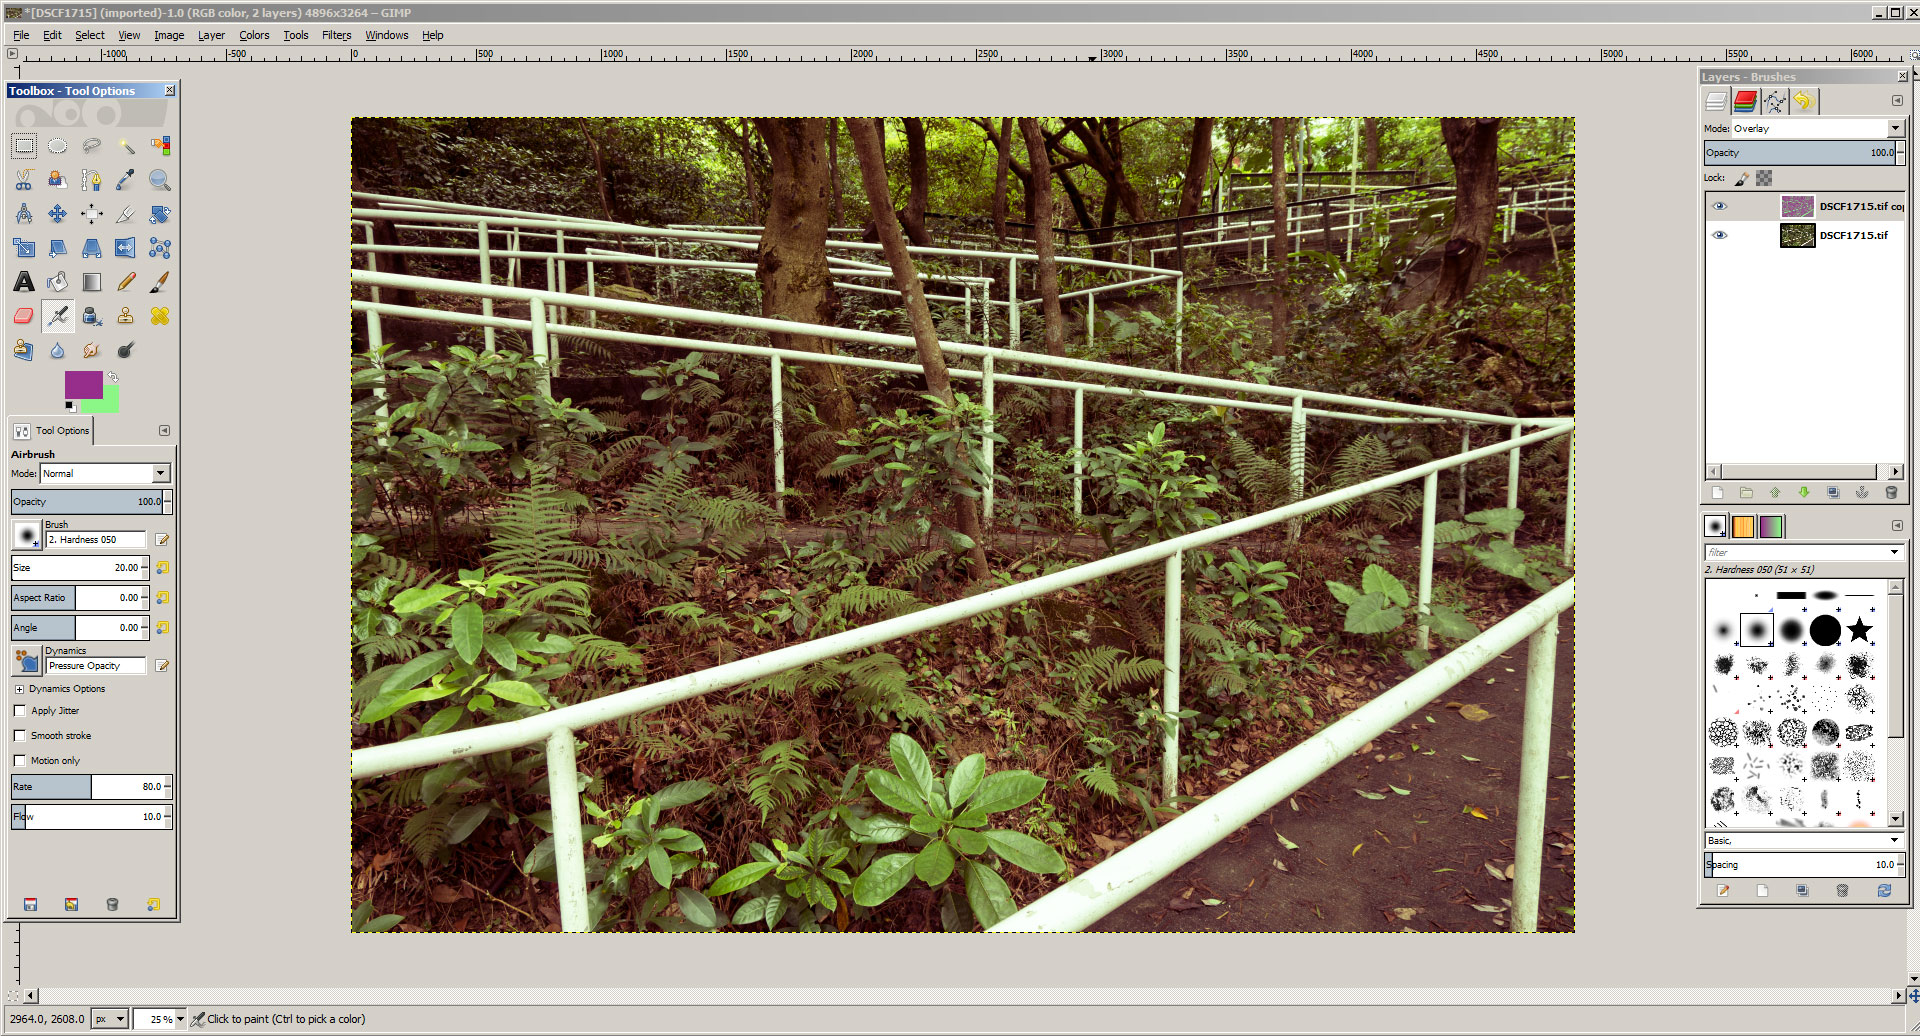
Gradient map applied to duplicated image layer set to overlay blend mode in GIMP
Color layers
Another way you can split tone an image is to use colored layers overlaid above your image. In your image editing software, open your photo. Above it create a color layer, filled with the color you want to use for the shadows.
The next step is to adjust the shadow color layer so that it applies the color strongly to the darkest tones, weakly to the midtones, and not at all to the highlights. In Photoshop CC this can be done using the 'Blend if' blending options for the layer. However, using a luminosity mask is a much more generic option for achieving this.
In Photoshop CC / CS you will need to hide your color layer, so you can just see the image. Now create a luminosity based selection - Ctrl + Alt + 2 (PC) / Cmd + Opt + 2 (Mac). Make your shadow color layer visible again, and select its layer mask in the layer palette. With black as your background color, hit Ctrl + Backspace (PC) / Cmd + Backspace (Mac) to fill the selection with your background color.
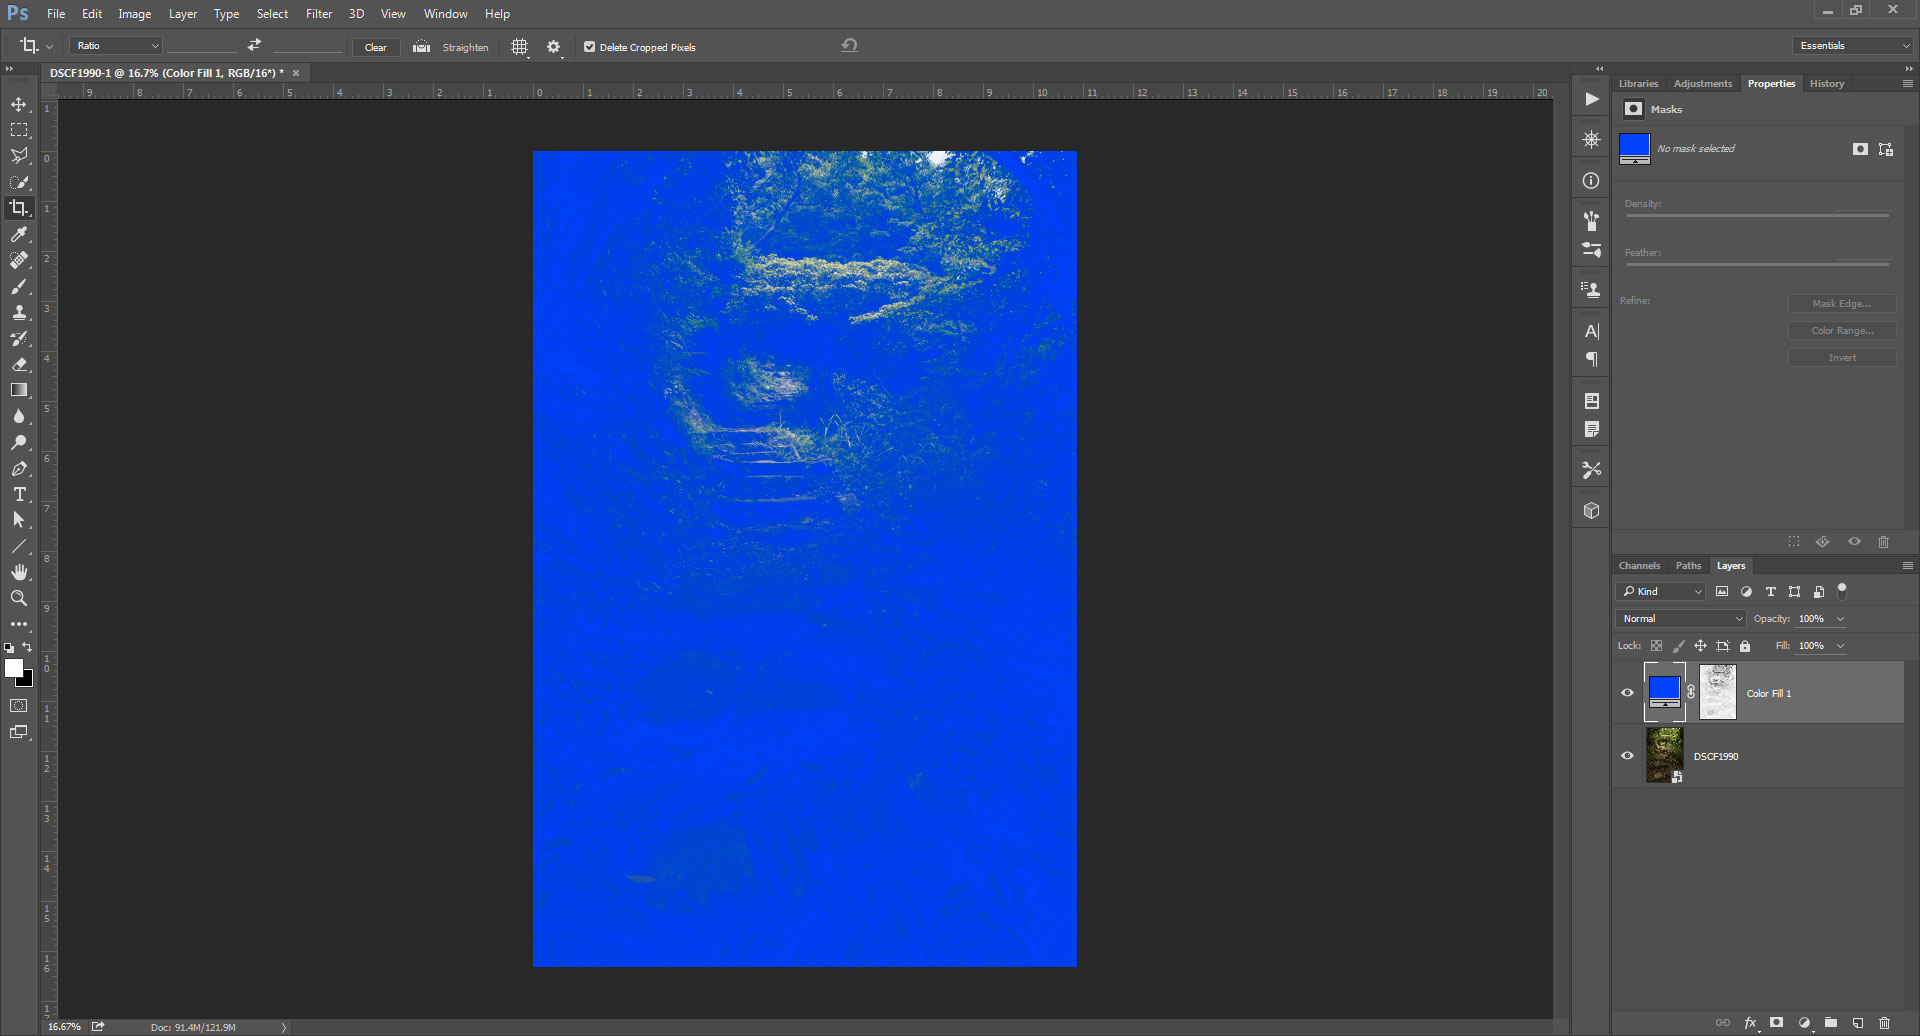
Blue color layer added with layer mask in Photoshop CC
In a layer mask white reveals and black conceals. So by creating a luminosity mask where the brightest tones are black and the darkest white we ensure that the shadow color layer will affect the shadow tones much more strongly than it will the highlight tones.
In GIMP the process of creating a luminosity mask is slightly different. Probably the simplest way to do it is to create the mask before you create your color layer. Duplicate your image layer, then go to Layer > Mask > Add Layer Mask. From the Add Layer Mask dialog choose Grayscale copy of layer and ensure Invert mask is checked. Then click the Add button.
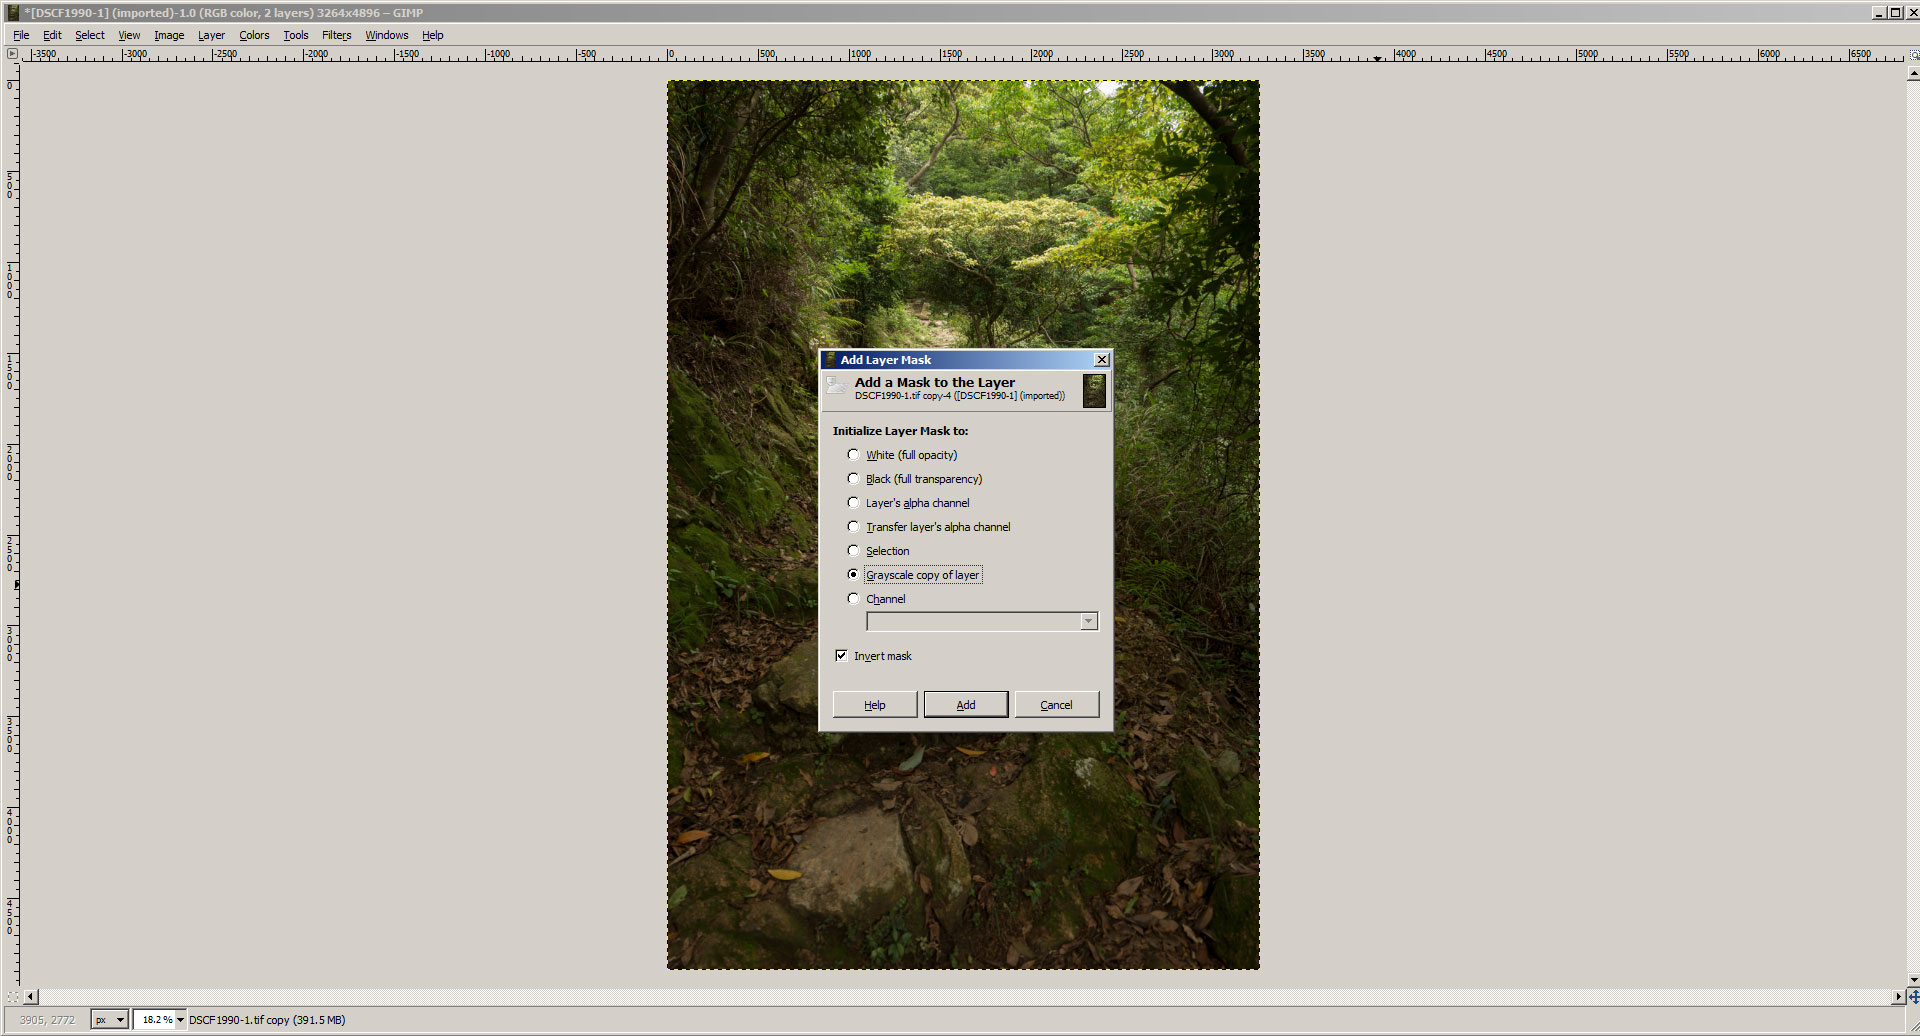
Adding a layer mask based on the inverted image in GIMP
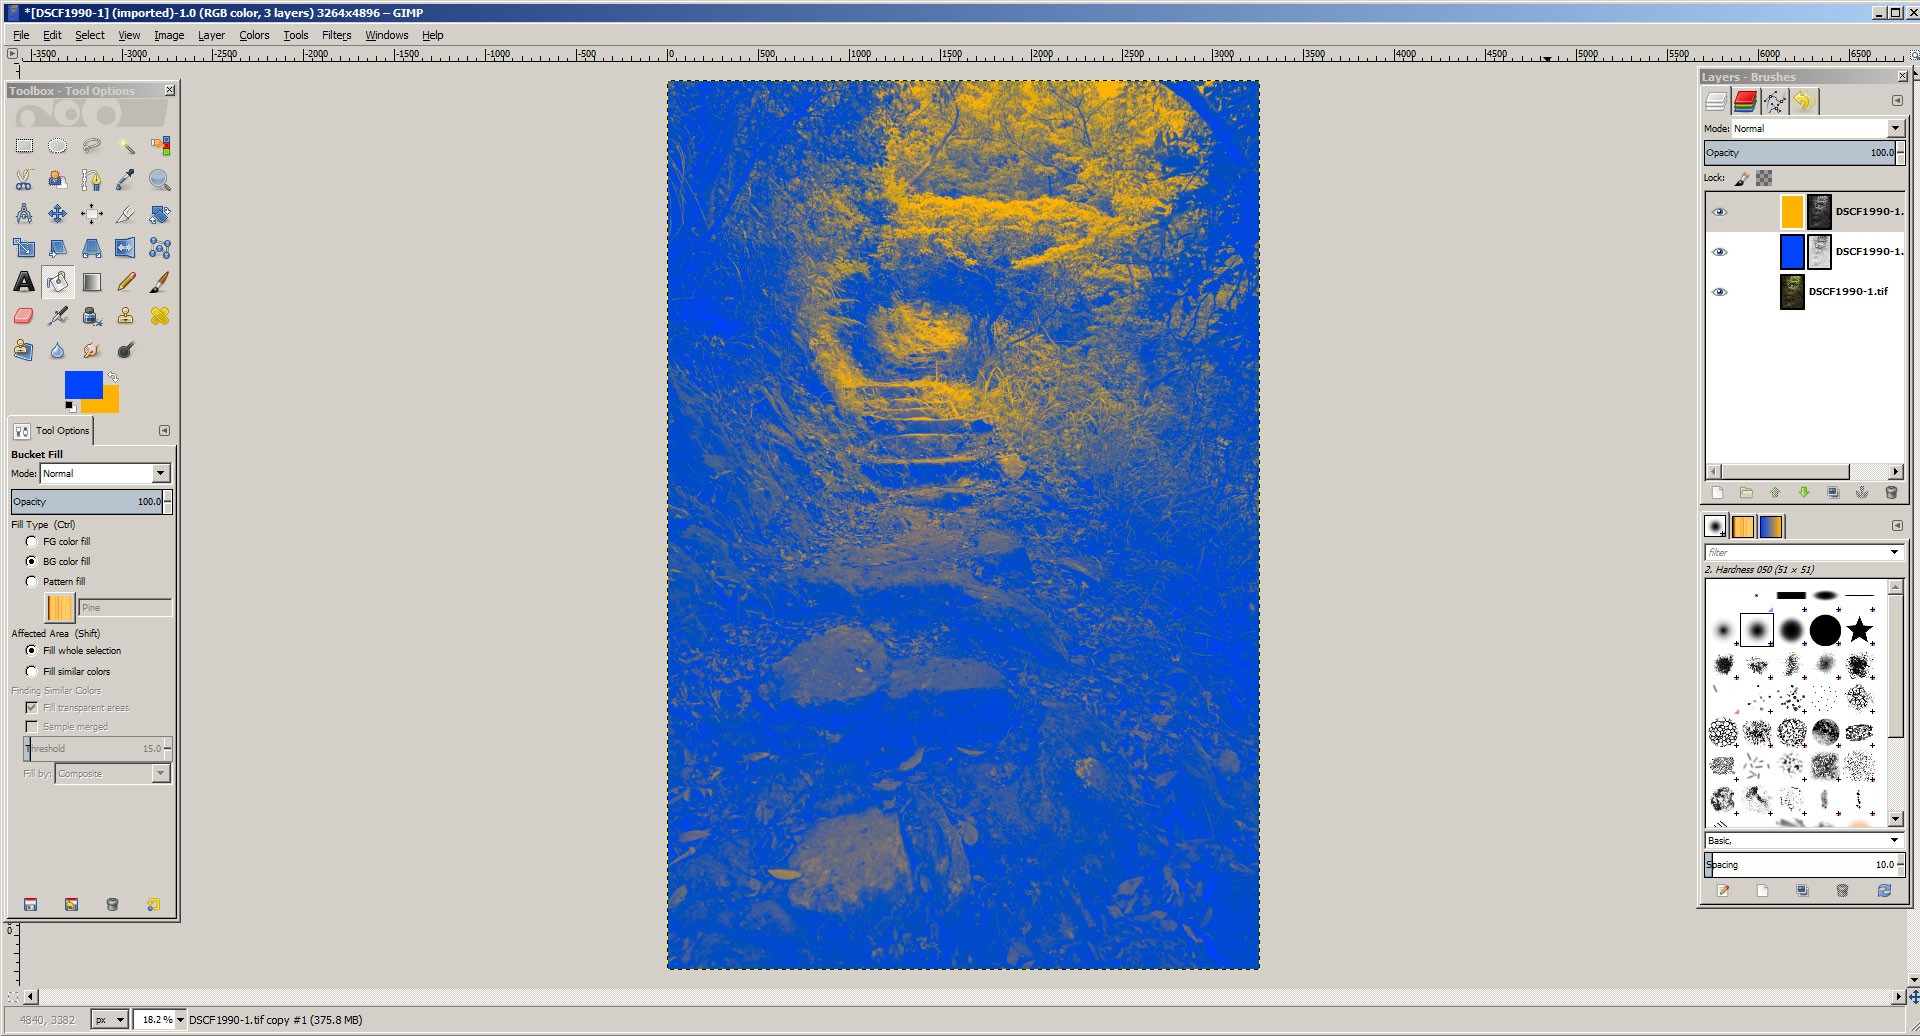
In the layer palette, select the image thumbnail for the layer (rather than the mask, which will be selected by default after adding it). Using the color fill tool, and ensuring that Fill whole selection is checked, fill the layer with your shadow color.
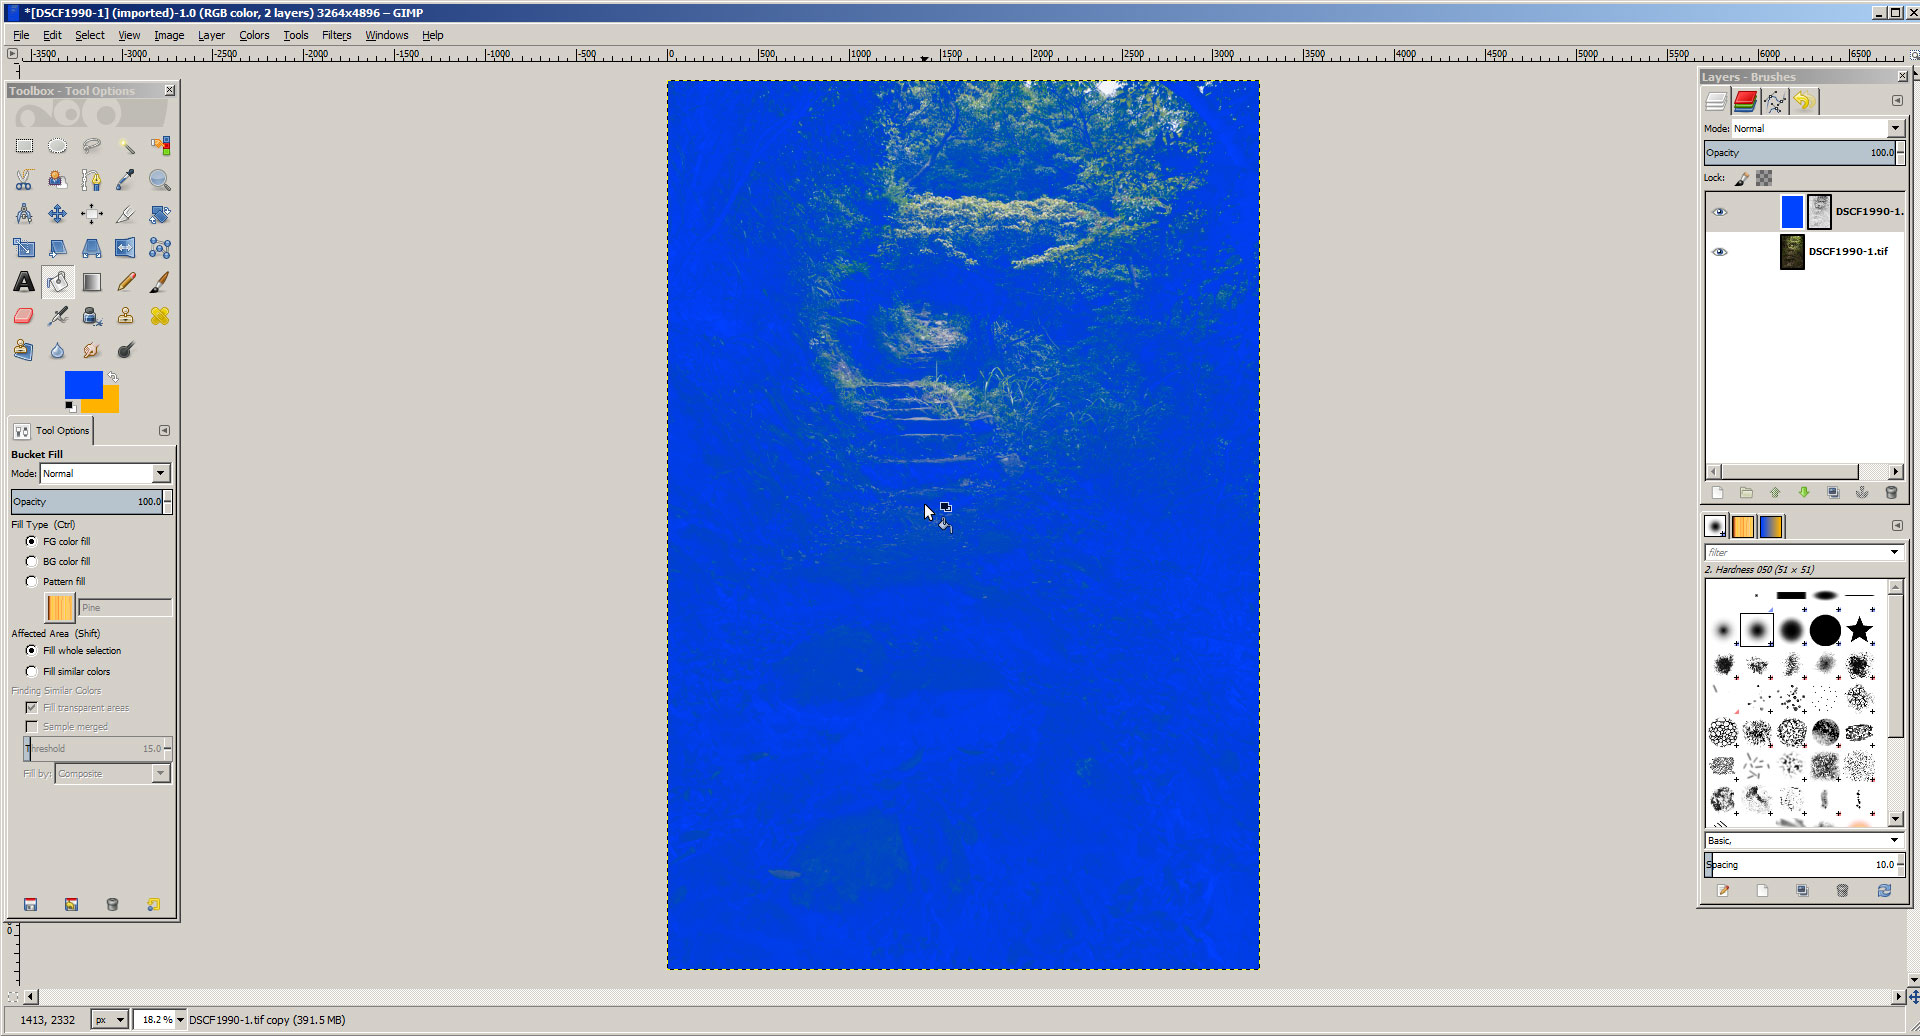
Blue color layer added with layer mask in GIMP
For Photoshop Elements you can create your shadow color layer. Then in the layer palette select the image layer and press Ctrl + A (PC) / Cmd + A (Mac) to select all. Press Ctrl + C (PC) / Cmd + C (Mac) to copy the image. Now Alt + click (PC) / Opt + click (Mac) the layer mask for your shadow color layer to view the mask.
Press Ctrl + V (PC) / Cmd + V (Mac) to paste the copied image into the layer mask. Finally press Ctrl + I (PC) / Cmd + I (Mac) to invert the mask.
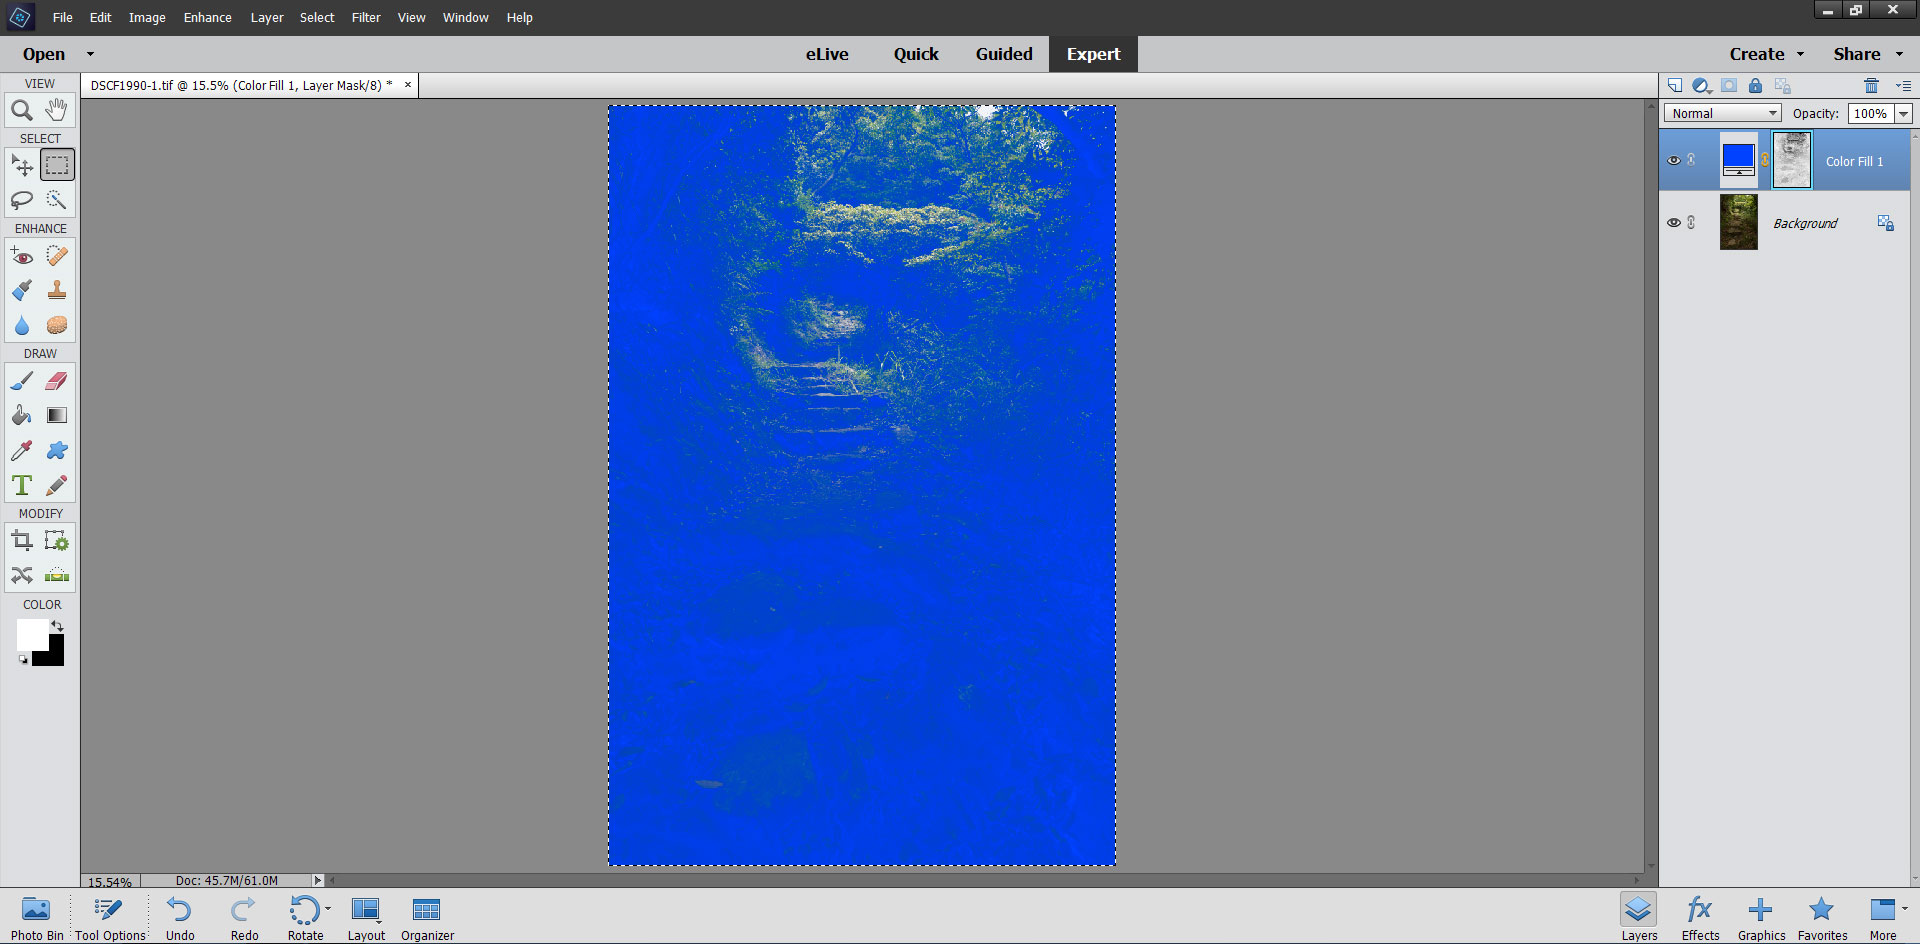
Blue color layer added with layer mask in PSE
The next step is to create the highlights color layer. This is exactly the same process as the shadow color layer, except the mask needs to be inverted. So the shadow color layer will have a strong effect on the shadows and no effect on the highlights, while the highlight color layer will have no effect on the shadows and a strong effect on the highlights.
In Photoshop CC / CS you can make your luminosity selection (remember to hide the color layers first) then press Ctrl + Shift + I (PC) / Cmd + Shift + I (Mac) to invert the selection. Then fill your highlight color layer's mask with black using the selection.

Highlight color layer and mask added in Photoshop CC
In GIMP you can duplicate the image layer again, add the layer mask using the Grayscale copy of layer option, but ensure Invert mask is not checked. Then fill the layer with your chosen highlight color.
Highlight color layer and mask added in GIMP
For Photoshop Elements copy the image layer and paste it into your highlight color layer mask. But this time there's no need to invert the mask.

Highlight color layer and mask added in Photoshop Elements
Now just adjust the opacity and blend modes of the layers until you get the split toning effect you want.
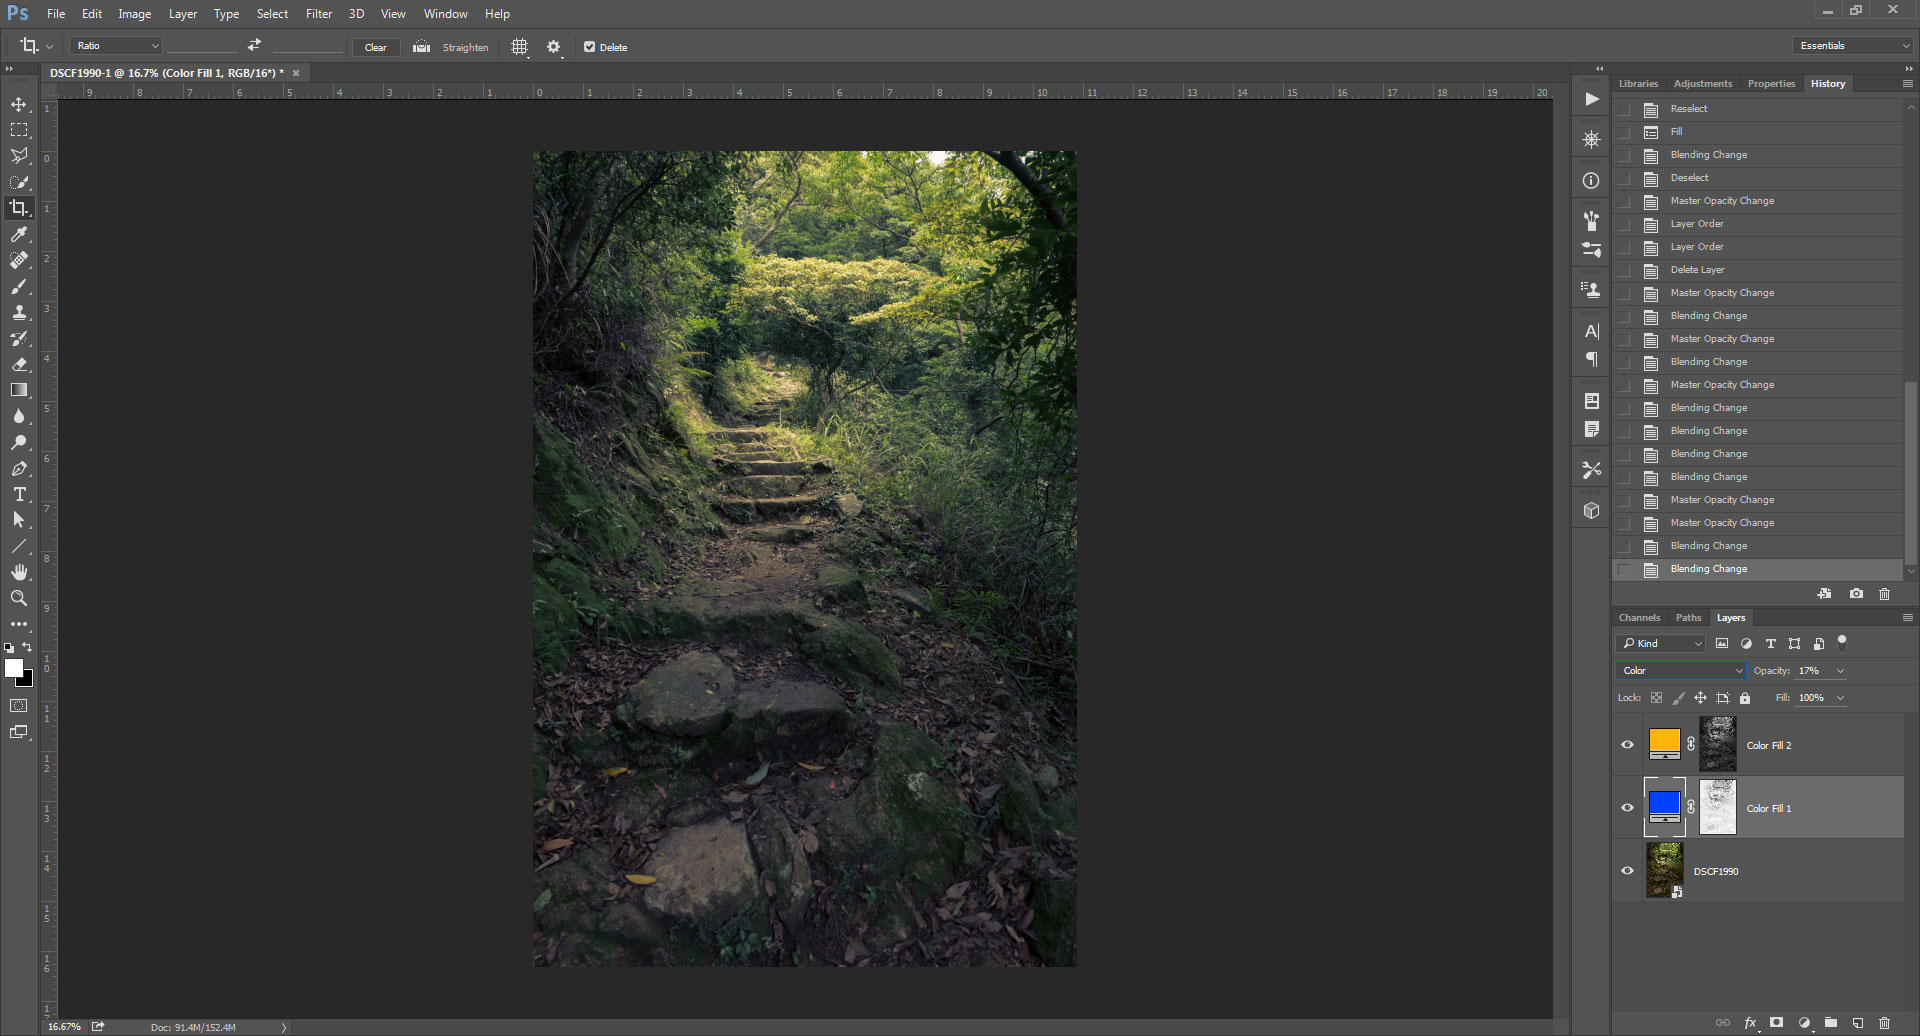
Color blend mode used for both layers, 17% opacity for blue (shadow) layer and 25% opacity for orange (highlight) layer.

Both color layers set to overlay, full opacity.
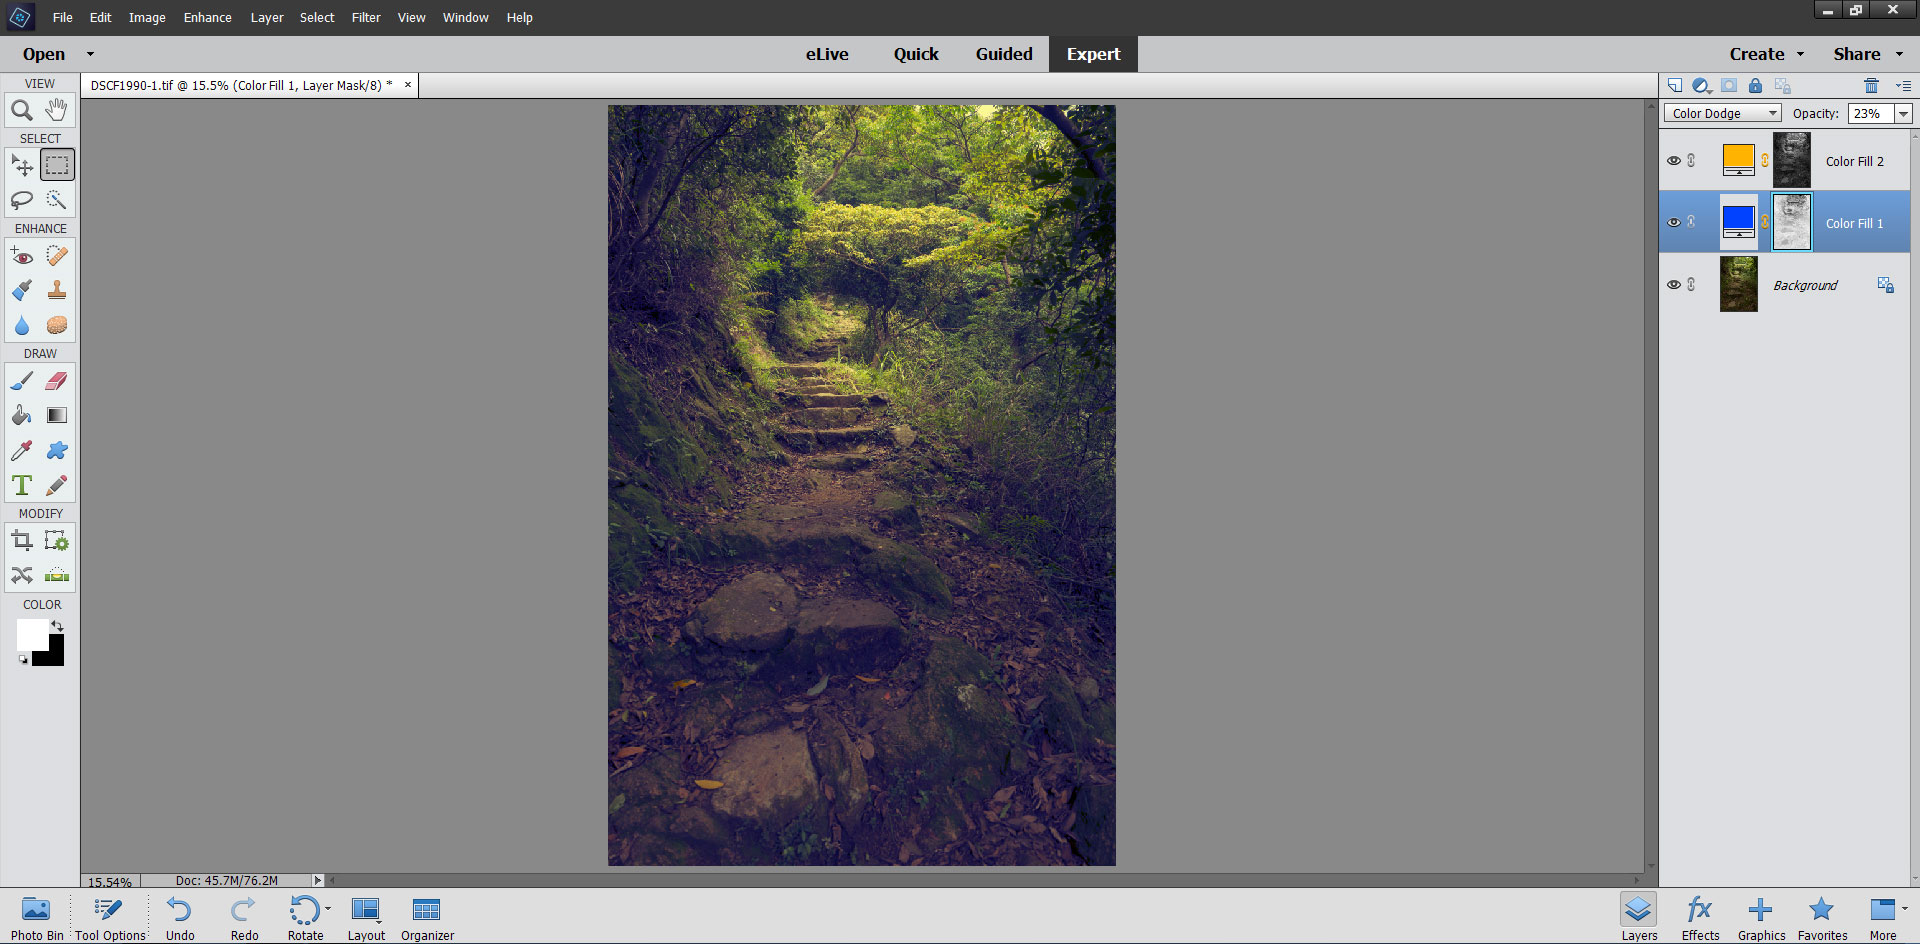
Highlight layer at 40% opacity, color burn blend mode. Shadow layer at 23% opacity, color dodge blend mode.
As you can see, there are quite a few different methods you can use to split tone an image. You can play around with the different methods to fine tune the results. Play around with the starting saturation of your image too - often a split tone effect will work very well with an image that has some color, but is not strongly saturated.
With the techniques described above, even if you're not using GIMP or Photoshop as your editor, hopefully there will be at least one you can easily apply to split tone your images. And don't forget that for many of these methods, when you find a setting you like the result of, you can save it as a preset and then easily apply the same effect to other images in the future.


