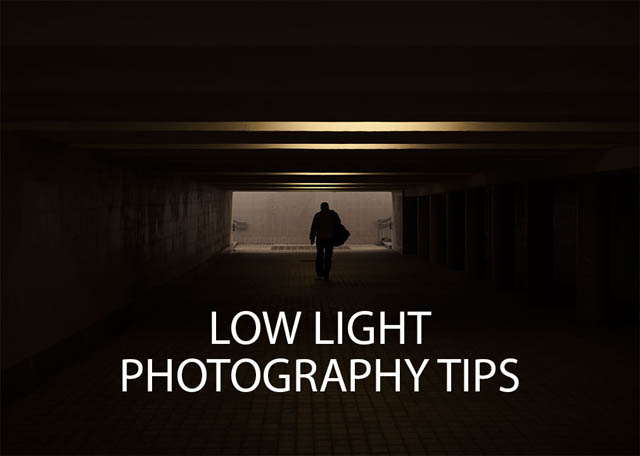
Low light photography tips
Shooting in low light situations can cause a number of problems such as autofocus issues, high levels of image noise, and blurry photos. However, unless you resolve to only photograph outdoors when it's sunny, you'll sometimes have to shoot in low light and deal with these issues.
While these problems can be a pain, they can all be minimized to a certain extent, so you don't need to worry about them so much. There are a load of great photo opportunities that can only be had in low light situations (such as shooting at night), so it's worth learning the tricks for getting great photos in low light.
Low light and blurry images
Photography is all about capturing light, so when there's not much light about to capture, it causes a problem. While it depends on your camera settings, generally when light levels are low, your camera will opt to use a slow shutter speed. The longer the shutter is left open, the more time the camera has to gather light.
The problem with a slow shutter speed is that it can result in a blurry image. If you're hand-holding the camera, the whole image can suffer with blur from camera shake. You're not able to hold the camera completely still during the length of time it takes the camera to gather enough light for a good exposure, and the movement of the camera in your hands results in a slight blur across the whole image.
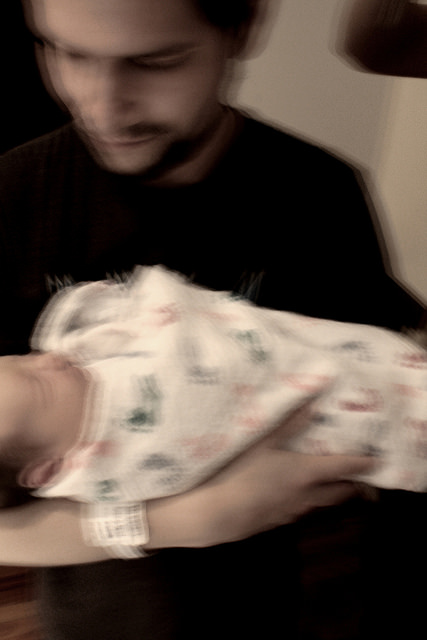
IMG_5275-1 by Andrew Toskin on Flickr (licensed CC-BY-SA)
Even if you opt to use a tripod, you can still get a blurry image if your subject is moving. However, in this case, only parts of the scene that are moving will be blurred - parts that are static will stay nice and sharp since the camera will not move at all during the exposure. This can be used to good creative effect, creating a photograph that captures the movement rather than just a static split-second moment in time.
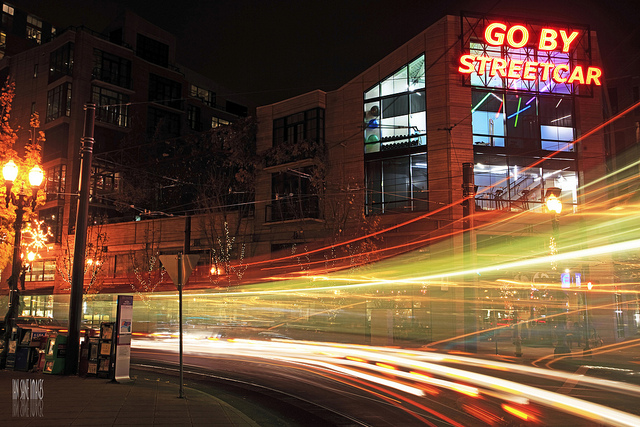
Go By Streetcar by Ian Sane on Flickr (licensed CC-BY)
Assuming that you're after a photo with no blur (or minimal blur), then the obvious solution is to use a faster shutter speed. However, if you just set your camera to use a fast shutter speed, without changing anything else to do with the exposure, you'd end up with a very dark and underexposed image. To compensate for the reduced time the camera has to collect light over you'll need to either:
Adding a light source
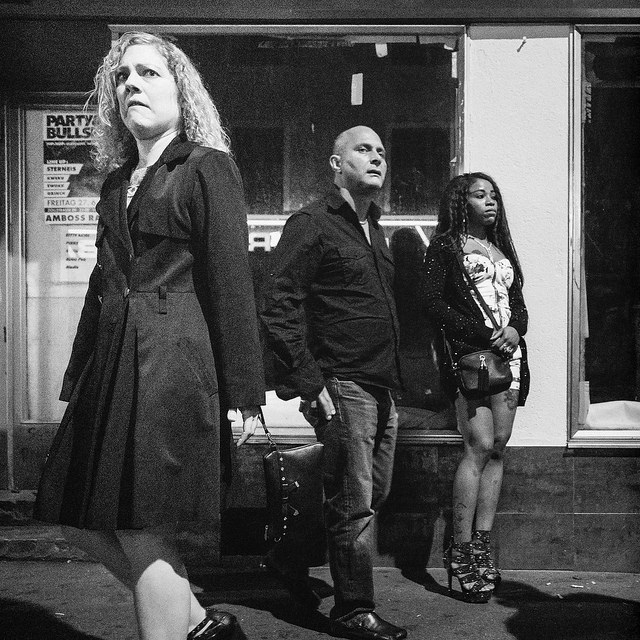
Adding more light to the scene can be done by using a flash or LED video light. You need to take into account the way that light falls off though. If your subject is standing relatively close to your light source, but the background is off in the distance, then the subject will be lit well, but very little of the light will reach the background.
This means that you end up with an image where the subject is lit much more brightly than the background. Sometimes this effect can produce a stronger photo, helping your subject stand out.
Erik Gonzalez by Carsten Schertzer on Flickr (licensed CC-BY)
Other times the subject stands out too much, and the resulting photo looks more like an un-natural composite.
If your subject and background are both near each other, on the other hand, then the light won't fall off much between the subject and the background. This results in a much more evenly lit image. Remember that you can control the difference in lighting between the two by adjusting the distance between the subject and the background, and the distance between the light source and your subject.
The key in most situations is to try and strike a balance between the brightness of your subject and the background. You generally want your subject just a bit brighter than the background.
If your subject is lit less brightly than the background (before adding any extra lighting), the easiest way to do this is to set your camera to manual exposure mode. Without your subject in the frame (if possible) adjust the aperture / shutter speed / ISO settings so that the camera's meter shows the image will be slightly underexposed.
Then add your additional lighting for the subject, adjusting the power (or letting your camera automatically adjust the power) as necessary for a good exposure of the subject at the current exposure settings. This will give an image where both the background and subject are exposed nicely.
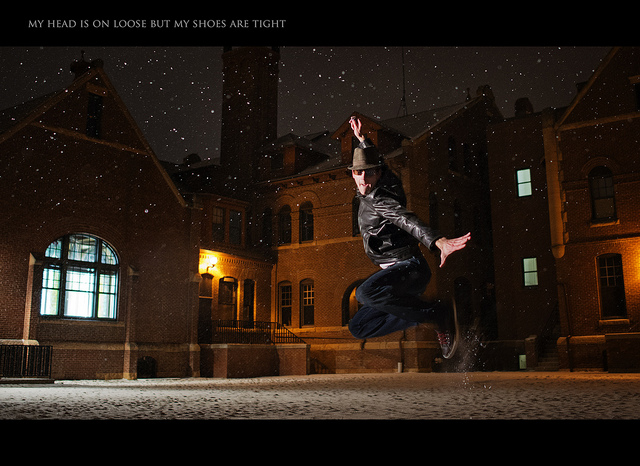
Day 35: Showing off my jumping skills with a fancy new hat by Dustin Gaffke on Flickr (licensed CC-BY)
Adjusting the aperture
The aperture setting adjusts the size of the iris in your camera's lens. A larger iris lets in more light, while a smaller iris lets in less light. Apertures are measured in f-stops, f/1.4 is a large aperture (lets through lots of light), while f/8 is a small aperture (lets through little light).
If you're using a zoom lens with your camera, the maximum size of the aperture is probably not that big. The standard kit zoom lens is something like a 18-50mm f/3.5-5.6. This means that at 18mm the lens has a maximum aperture of f/3.5, while at 50mm it has a maximum of f/5.6. So by zooming the lens out to 18mm we can achieve a larger aperture, letting more light into the camera. (Aperture is expressed as a fraction of the focal length, so f/3.5 is larger than f/5.6).
However, you'd be better off still with a fast prime lens. A 50mm f/1.8 lens shot wide open at f/1.8 lets in over 8 times as much light as a standard kit lens shot wide open at 50mm f/5.6.
Look At The One by Daniel Lee on Flickr (licensed CC-BY-ND)
Using a large aperture setting also has another effect on the image though - depth of field (the amount of the image in focus) is reduced. Whether this is a good or bad thing depends on the effect you are trying to achieve. For a landscape photo you typically want as much of the image in focus as possible, and so using a large aperture is not a great solution. But for a portrait photo you may be very happy for the background behind the subject to go out of focus.
Adjusting the ISO
Techinically speaking, the ISO setting does not actually adjust the sensitivity of the camera's image sensor to light. But rather, it boosts the result of the light captured by the sensor to give a brighter image. The problem with this process is that it also boosts the noise in the image. This can leave your image with a grainy look.
Thankfully the majority of modern cameras, especially those with larger image sensors, such as most interchangeable lens cameras, have quite low noise levels. So it requires a significant boost (high ISO) to reveal a lot of noise.
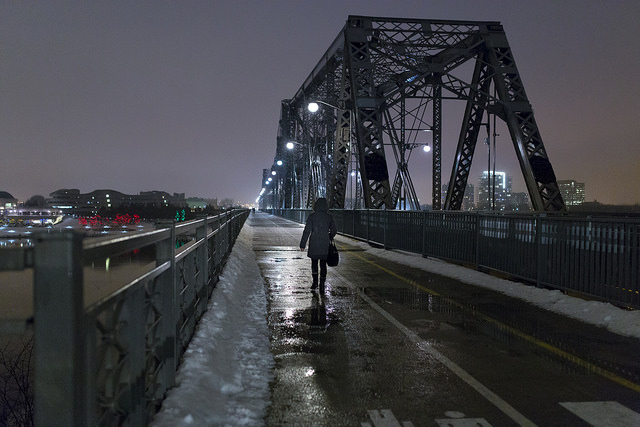
A long, lonely walk. by davejdoe on Flickr (licensed CC-BY)
Dealing with noise
Noise becomes more visible in darker areas of an image, and also in areas of flat tone, such as an out of focus background. It can be minimized by using a low ISO, exposing the image to be as bright as possible, and using noise reduction.
In low light situations the first two options are probably not available to you, unless you are shooting on a tripod and can use a slow shutter speed. So that leaves the third option of noise reduction. Most cameras have a High ISO noise reduction setting, which you can use to reduce the effect of noise at high ISOs.
However, noise reduction can also reduce the sharpness of an image. Noise is blurred away, but so are fine details, resulting in an image that looks more like a watercolor painting than a photo. It is much better to take your photos in RAW format, then apply noise reduction to the image later on a computer.
Your computer is much more powerful than the computer inside your camera. And your computer does not need to apply the noise reduction quickly so the image can be written to the memory card / displayed on screen - your computer can take its time when applying noise reduction. This means that your computer can use much more sophisticated algorithms for reducing noise, giving a much better result than your camera can.
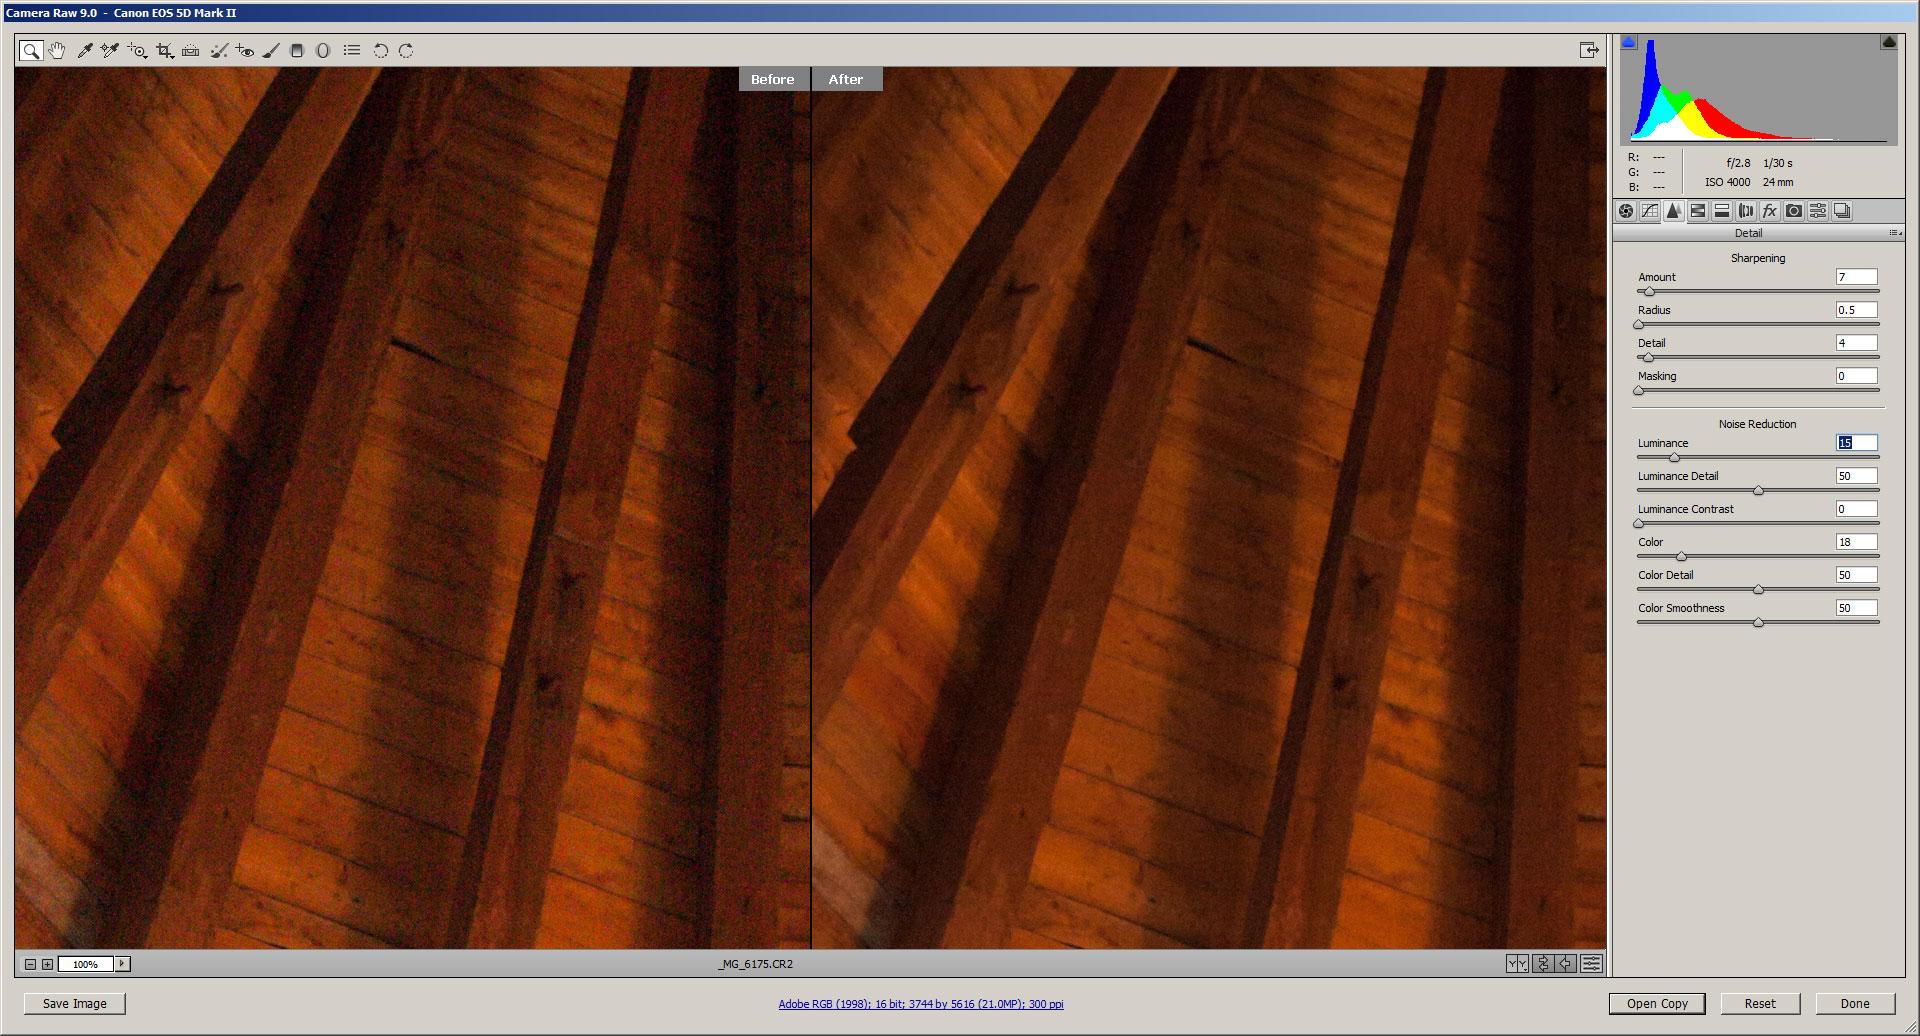
Comparison of RAW image before and after noise reduction
The other option is to just not let yourself be bothered by noise at all. Converting an image to black and white typically makes noise much less intrusive than it appears in a color image. And the grittiness of the noise can actually add something to the image it would otherwise lack.
alienated by Zuerichs Strassen on Flickr (licensed CC-BY)
Minimum shutter speed rule
If you're shooting handheld, there's a handy rule you can use to determine when the shutter speed is so slow that you'll likely see blur from camera shake in your images:
Min shutter speed = 1 / (Focal length x 35mm crop factor of camera)
So, if I was shooting a standard DSLR with an APS-C sized sensor (1.5x crop) and a 35mm lens, I would want to ensure my shutter speed was at least 1 / (35x1.5) = 1/52.5s. If I was using a Micro Four Thirds camera (2x crop) with a 35mm lens, I would want to ensure my shutter speed was at least 1 / (35x2) = 1/70s. And if I was shooting a full frame camera (no crop) with a 35mm lens I would want at least 1 / (35x1) = 1/35s.
This is only a guideline though - you may need a faster shutter speed if you have shaky hands, or you may be able to work find at slower shutter speeds if you have particulalrly steady hands. The guideline is also meant for viewing an image at a normal size without seeing blurring. If you want your image to be sharp at the pixel level when viewed at 100% magnification, then you may need to use a shutter speed two to four times faster.
Image stabilization
Some cameras and lenses feature image stabilization, which can be a great benefit when photographing static subjects handheld in low light. The stabilization lets you capture a sharp image at shutter speeds two to four stops slower than you could normally.

Comparison showing blurriness of images captured handheld with no Image stabilization against with Image stabilization turned on by dr_relling on Flickr (licensed CC-BY)
If you're photographing a static subject, a slower lens with image stabilization can actually be more useful than a fast lens without image stabilization.
For example, let's say we were using a 35mm f/1.4 lens on a full frame camera at f/1.4, and ISO1600 and 1/40s were needed for a good exposure without blur from camera shake. If we instead used a slightly slower 35mm f/2 lens with image stabilization, we can now shoot at f/2, ISO400, 1/5s. We'll get an image at the same brightness, but with lower noise (due to the lower ISO) and slightly more depth of field (due to the smaller aperture).
For capturing moving subjects image stabilization doesn't really provide much benefit. It only stabilizes the movement of your camera. But for shooting static subjects handheld in low light it can be extremely useful.
Autofocus in low light
The autofocus systems of most cameras can struggle in low light. They just don't get enough light to determine whether the subject is in focus or not. However, there are a few things you can do to help your camera.
If you're photographing a subject that is reasonably close to the camera, you can turn on your camera's AF-assist light. Some speedlight flash units also offer an AF-assist light, which is typically stronger than the one built into the camera.
With AF-assist turned on, when the camera tries to focus, the AF-assist light will fire a beam of light towards the subject, giving the camera enough light to focus. When focus is obtained the AF assist light turns off and the photo can be taken.
IMG_1083 by trent roche on Flickr (licensed CC-BY-ND) - in this image the group's faces are lit by the AF assist light of another camera
If you're trying to take candid photos, then using the AF-assist beam is probably not a good idea. It will definitely alert your subject that they're being photographed.
For autofocus without the AF-assist beam, your best bet is just to try and aim the autofocus point so that it is over part of the subject that is well lit (comparatively speaking) and high in contrast. Autofocus systems use contrast to try and determine whether the subject is in focus, so by providing it with an area to focus on that is high contrast, you stand a much better chance of the camera being able to focus quickly and accurately.
Using a tripod
As mentioned earlier, when you're shooting a static subject or want an image that combines a static scene with a blurred moving subject, then it can be very helpful to use a tripod to keep your camera steady. When using a tripod there are a couple of other things you can do to avoid any unintended blurring.
The act of pushing down and releasing the shutter button on your camera produces a small amount of camera shake, which can cause a slight blurring in your photos. By using a remote shutter release, or your camera's self timer you can avoid this potential problem.
For DSLR cameras, the act of the mirror flipping up at the start of the exposure can also produce some small vibrations, which can cause a slight amount of blur. Utilizing your camera's mirror-up setting, or live-view mode allows you to flip up the mirror a few seconds before actually starting the exposure. This gives enough time for any vibrations caused by the mirror flipping up to dissipate before the photo is taken.
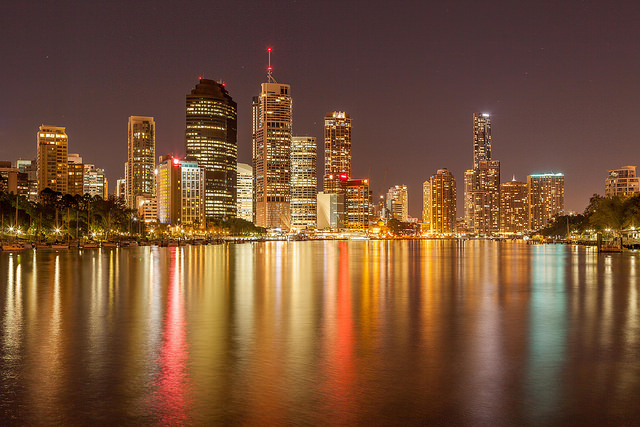
Brisbane CBD Night by Andrew Sutherland on Flickr (licensed CC-BY-SA)
There are plenty of great photo opportunities that are only available in low light, whether it be shooting at night, the early hours of the morning, or inside a dimly lit building. By following the above tips you can capture great images that aren't marred by excessive blurring or image noise. Except, of course, in those cases where you want to introduce blur or noise on purpose.


Great article! just wanted to say, your website is so much help for me, and I am really grateful and appreciate your work!All the best