Photography Basics – Shutter
The shutter is an essential part of every camera, without it you wouldn't be able to take photos. It opens to allow light to reach your camera's sensor, and then closes after a predetermined amount of time to complete the photo. The amount of time the shutter is open for can effect the exposure and look of your photo, and different shutter speeds can be used for different creative effects.
Types of shutter
There are three types of shutter that you are likely to come across:
Electronic shutter
Electronic shutters are usually found in compact cameras. They work by simply recording what the camera's sensor sees for the duration of the shutter speed. Electronic shutters are often preferred for high speed photography.
Electronic shutters are silent, which makes them very suitable for photography where you don't want to draw attention to your subject that they are being photographed, such as candid and street photography.
Depending on the model of sensor, it may also suffer from an effect known as 'jello' when photographing objects moving at high speed. This occurs on camera sensors where each row of pixels is read out one row (or column) at a time. If the electronics for reading the rows off the sensor aren't fast enough, an object can move between one row being read off and the next row being read off.
You can see this phenomenon in the photo below, where the slow sensor read-out makes the propeller blades appear curved:
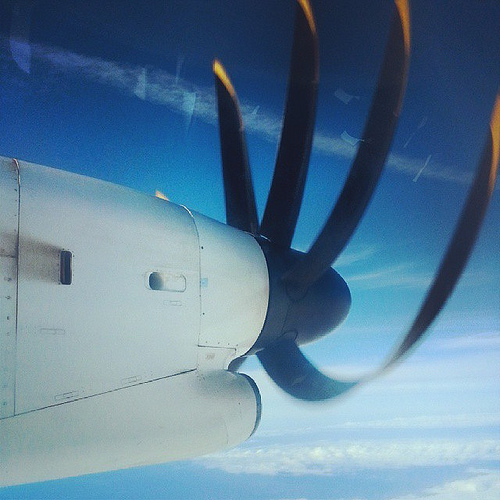
Took this on the way to PE today. Can anyone explain why the propellers appear to curve when photographed? by Dave Duarte on flickr (licensed CC-BY-SA)
Not all cameras with electronic shutters suffer from this though, and cameras with focal plane shutters also suffer from a similar phenomenon. You are most likely to find it in cameras that use a CMOS sensor and have a slow sensor readout, such as camera phones.
Leaf shutter
Leaf shutters tend to be found in specialist medium format and large format lenses, rather than cameras. They operate as an iris, consisting of a number of blades that slide open to form a circular hole the light can travel through. Leaf shutters typically can open and close fully faster than a focal plane shutter, though not as fast as an electronic shutter.
Their fast maximum shutter speed means that they can sync with strobes at faster speeds than a focal plane shutter can, making medium format cameras and leaf shutter lenses popular for high end fashion and studio photography.
Having the shutter built into the lenses usually makes leaf shutter lenses slightly larger and more expensive than an equivalent lens without a shutter. Leaf shutters are also usually limited to a maximum shutter speed of around 1/500, which is not as fast as most electronic shutters, or as fast as focal plane shutters can go when used above their x-sync speed.
Focal plane shutter
Focal plane shutters are found in all DSLRs, and in many other cameras as well.
They work by using two 'curtains', usually made from thin metal. The first curtain covers the imaging sensor. When the shutter button is pressed, this curtain slides downwards (or to one side), revealing the sensor. Then when the exposure is finished, the second curtain slides down (or to one side), covering the sensor again.
This video shows this in action:
K200D shutter video by P^2 - Paul on flickr (licensed CC-BY-NC)
The shortest period the entire sensor is exposed after the first shutter opens, but before the second shutter starts to close, is known as the flash sync or x-sync speed. This varies between camera models, but is usually around 1/200s - 1/250s. At shutter speeds faster than this, the second shutter starts to close before the first shutter has finished fully opening. This means that the light burst from a flash (which is typically around 1/10000s) would only light the part of the sensor that was open at the time the flash fired.
Using flash at a higher shutter speed than the camera's max sync speed results in only part of the image being illuminated by the flash
This problem can be avoided by using continuous lighting. Alternatively, many cameras and flashes feature a High Speed Sync (HSS) mode. In this mode you can shoot at shutter speeds faster than the normal flash sync speed of the camera. The flash pulses its light on and off for the duration of the normal flash sync speed. This results in an even light across each part of the sensor as it is exposed. Unfortunately, pulsing the light for a duration of 1/250s means that the amount of light output by the flash will be much less than it would be normally. For this reason, High Speed Sync flash is not used very much.
Another problem with focal plane shutters is that due to the way they move, you can get an effect often known as 'jello' when a fast moving object is in the frame. This is especially true at high shutter speeds where only part of the sensor is exposed at any one time. The fast moving object is recorded at different points as the shutter moves down (or across) the image sensor.
Compared to electronic shutters (which are silent) and leaf shutters, focal plane shutters are quite noisy, which could be a problem in some types of photography. They can also cause vibrations that could affect image quality, though this is only a very minor concern.
Shutter speed and exposure
To set your camera to use a specific shutter speed, set the camera to manual mode or shutter priority, on the camera's mode dial this is usually indicated as S or Tv.
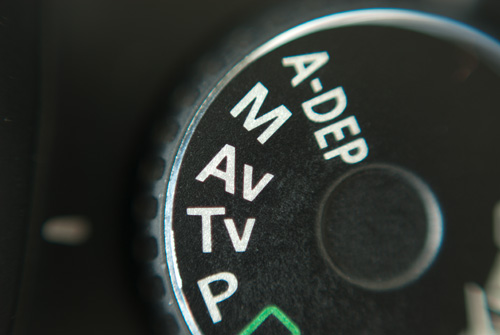
Some cameras use Tv on the mode dial to indicate Shutter priority mode
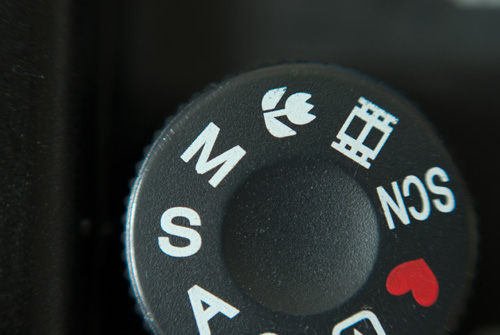
Other models use S on the mode dial to indicate Shutter priority mode
Along with ISO and aperture, the shutter speed is one of the settings that affects the exposure (brightness) of an image. Exposure is measured in stops, each doubling of the shutter speed reduces the exposure by one stop. So increasing the shutter speed from 1/160s to 1/320s is a reduction in exposure of one stop.
Likewise, each halving of the shutter speed is an increase in exposure of one stop. So reducing the shutter speed from 1/160s to 1/80s will increase the exposure by one stop.
Because aperture and ISO speed can also be used to affect exposure, you can alter your shutter speed to use a different aperture or ISO setting, but still get the same exposure. For example, by increasing the shutter speed by one stop at the same time as opening the aperture up by one stop, all the following settings would give the same exposure:
| Aperture | Shutter Speed | ISO |
|---|---|---|
| f/8 | 1/40 | 100 |
| f/5.6 | 1/80 | 100 |
| f/4 | 1/160 | 100 |
| f/2.8 | 1/320 | 100 |
| f/2 | 1/640 | 100 |
Or you could keep your aperture the same, but decrease your ISO speed by one stop for each stop that you decrease your shutter speed. Again, all the following settings would give an image with the same exposure:
| Aperture | Shutter Speed | ISO |
|---|---|---|
| f/8 | 1/640 | 1600 |
| f/8 | 1/320 | 800 |
| f/8 | 1/160 | 400 |
| f/8 | 1/80 | 200 |
| f/8 | 1/40 | 100 |
Safe shutter speeds for shooting handheld
If you are shooting handheld, you do not want your shutter speed to drop too low, or you will end up with a blurry photo due to the camera / lens moving slightly while you were taking the photo. A good rule for handheld photography is that the shutter speed should be at least 1 divided by the 35mm equivalent focal length of the lens you are using. So for example, with a 100mm lens:
With a full frame camera like the Canon 5D or Nikon D700, you would need at least 1/100s shutter speed.
With an APS-C camera like most consumer DSLRs, the sensor gives the 100mm lens a 35mm equivalent focal length of 150mm (Nikon, Sony, Pentax consumer DSLRs) or 160mm (Canon consumer DSLRs). So you would want a shutter speed of at least 1/150s or 1/160s for a sharp photo.
Four thirds cameras, such as the Panasonic and Olympus have a 2x crop factor compared to a full frame camera. This gives a 100mm lens a 35mm equivalent focal length of 200mm when used on a four thirds camera. So for these cameras you would want to use a shutter speed of at least 1/200s.
Most non-DSLR cameras will either tell you the 35mm equivalent focal length on the screen when you zoom in, so you can just use this as your minimum recommended shutter speed guide. Alternatively, some models will tell you a zoom magnification when you zoom in instead, e.g. 2x or 3x zoom. So long as you know the minimum 35mm equivalent focal length of your camera, you can use this to work out what minimum shutter speed you should use. For example, the Panasonic ZX3 has a zoom lens with a 35mm equivalent focal length of 25-200mm. So if the camera told you that you were at 2x zoom, you would know this was 2x25 = 50mm. So you would want to use a shutter speed of at least 1/50s for a sharp handheld photo.
Many lenses and cameras now also feature image stabilization, which can help in getting sharp shots with slow shutter speeds while shooting handheld. For example, if you were using a lens with a 35mm equivalent focal length of 60mm, the fastest shutter speed you could normally use while shooting handheld, while still getting a good chance of a sharp image, would be 1/60s. Many image stabilization systems will give a 3 stop advantage. So if the same 60mm lens had image stabilization (or the camera you were using featured image stabilization), you could use 1/8s and still have a good chance of getting a sharp image.
The way that image stabilization is marketed depends on the manufacturer, Sony uses 'Super Steadyshot' (SSS), Nikon uses 'Vibration Reduction' (VR), Panasonic uses 'Mega Optical Image Stabilizer' (Mega OIS), Canon uses 'Image stabilization' (IS), Tamron uses 'Vibration Compensation' (VC), Simga uses 'Optical Stabilizer' (OS), Pentax uses 'Shake Reduction' (SR), Olympus uses 'Image Stabilizer' (IS). If you see a camera or lens with one these, you will know it will help you shoot handheld photos at slower shutter speeds. Bear in mind that some lenses are available in both image stabilized and non-stabilized versions. The non-stabilized versions are uaually quite a bit cheaper, so make a better deal if you don't intend shooting handheld at slowish shutter speeds.
Most cameras / lenses with image stabilization have the option to turn it on or off, so make sure you have it turned on if you are relying on it to steady your hand-held shots.
Using a tripod
If you use a tripod to keep your camera steady, then it is generally a good idea to turn image stabilization off, as there should be no shake for it to counteract. If the image stabilization is switched on and thinks that there is movement when there is none, then this could result in a blurred photo when you use a tripod.
When using a tripod, you can use any shutter speed and not have to worry about camera shake at all. However, you do still need to think about things that are moving in the frame. Using a tripod to photograph a football game at night means you can use a slow shutter speed without having to worry about camera shake, but unless the players are standing perfectly still, you won't get any good shots!
Fast shutter speeds
For things involving movement like sports, children, wildlife, etc. you will want to use a fast shutter speed to capture the action. To keep the images from being too dark, you may need to use a large aperture, high ISO speed, or flash, or a combination of all three.

Shannon Evans by Chad Cooper on flickr - shot at 1/1250s (licensed CC-BY)
Slower shutter speeds
Where movement can be predicted, and the subject is moving at a relatively constant speed in a single direction, you can try using a slightly slower shutter speed and panning with the subject. Rather than freezing the action, a slower shutter speed helps convey the sense of motion of the subject.

Mike Penberthy by Finizio on flickr - shot at 1/100s (licensed CC-BY-ND)
Long exposures
Capturing movement can also be used in landscape photography. A long shutter speed can be used to blur moving water, clouds, long grass blowing in a field. This works best with the camera mounted on a tripod to avoid camera shake, and something static in the scene to contrast against the movement.
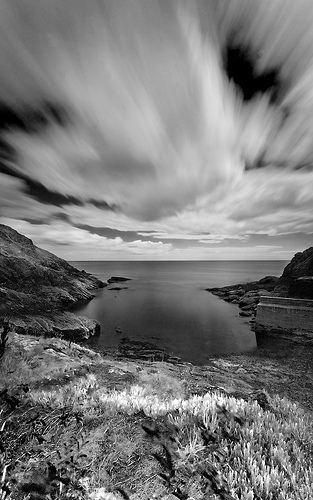
Just a couple of minutes, revisited by Johan J.Ingles-Le Nobel on flickr - 100s exposure (licensed CC-BY-ND)
For long exposures, you can either wait until night, where there is little light, or you can use a neutral density filter to reduce the amount of light that enters the camera. Use the lowest ISO setting available on your camera, and depending on how much depth of field you want, you may want to use a very small aperture as well.
Most cameras only have a maximum shutter speed of 1/30s, and after this have a bulb mode, where you hold down the shutter to keep it open for as long as you like. Not all cameras have bulb mode, and some cameras have a much shorter maximum shutter speed, such as 5s. Check your camera model to be sure it allows for long exposure photography.
For keeping the camera's shutter open in bulb mode, you don't want to be actually holding the shutter button down on the camera. This would likely lead to camera shake unless you can keep your hand 100% still. Instead, use a shutter release cable that can be locked into keeping the shutter open. Most shutter release cables do this by allowing you to push the button on the release down, and then sliding it back into a locked position. When you think the exposure should be finished, just slide the button on the release back to the unlocked position.
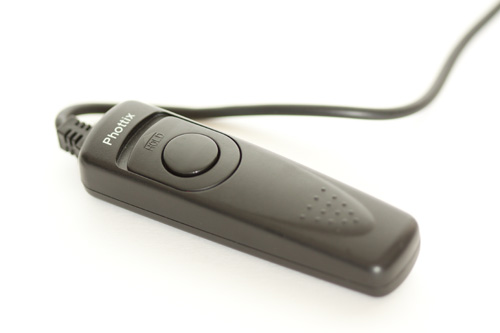
Shutter release cable
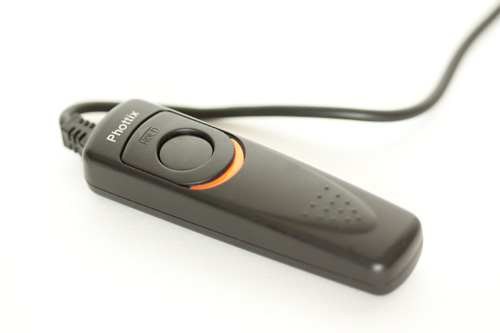
Shutter release cable with shutter locked open
A shutter release cable is recommended for any photography on a tripod at slowish shutter speeds, not just when you using the bulb shutter speed. Normally when you press the shutter button down on the camera, it will cause a small movement in the camera, which has the potential to cause blur in the image. This is avoided with a shutter release cable. You can also purchase infrared and radio trigger shutter releases for some cameras.
Many cameras feature long exposure noise reduction (also known as dark frame subtraction) where they take another (blank) photo after any long exposures. This helps reduce 'hot pixels' in the image, but also means you need to wait as long as the original exposure again until you can use the camera. So for example, if you took a photo where the shutter speed was 60s, the camera would then take another photo afterwards for another 60s, meaning your camera is locked up for 120s in total.
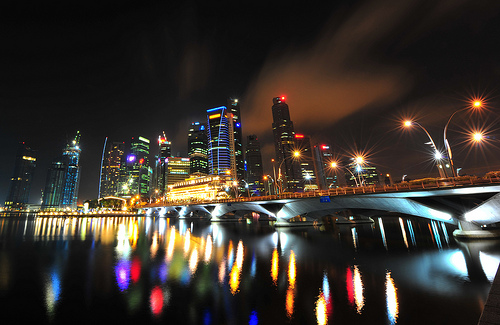
Singapore by Mike Behnken on flickr - 60s exposure (licensed CC-BY-ND)
If you dealing with exposures measured in minutes, the long exposure noise reduction can create quite a long delay between taking one shot and being able to review the image and take any more shots. You can turn long exposure noise reduction off, but then you will have to deal with any hot pixels (bright red, green, blue, or white pixels that appear randomly).
For long exposures, I would recommend first setting your lens to the widest aperture, and using a high ISO speed. You can then take a few test shots to check your focus and the needed exposure settings relatively quickly. Now you can reduce your ISO speed and aperture to the correct settings you want to use, and reduce your shutter speed accordingly.
For example, if a test shot at f/4 and ISO1600 used a shutter speed 10s for a well exposed shot, and you wanted to use f/16 and ISO100 for the final image. f/16 is 4 stops slower than f/4. And ISO100 is 4 stops slower than ISO1600. So reduce the shutter speed by 8 stops and you will get a photo with the same exposure, but a much slower shutter speed (2560s).
In cases with very slow shutter speeds, like the example above, make sure your camera has enough power. Use mains power if you can, otherwise a newly charged battery. If you use a DSLR, consider a battery grip that allows the camera to be powered from 2 batteries.
Slow shutter speeds can be useful for landscape and city photography at night, and also star trails. Typically for star trails though, you take a large number of shots at 15s - 30s shutter speed, and then merge them together on the computer.
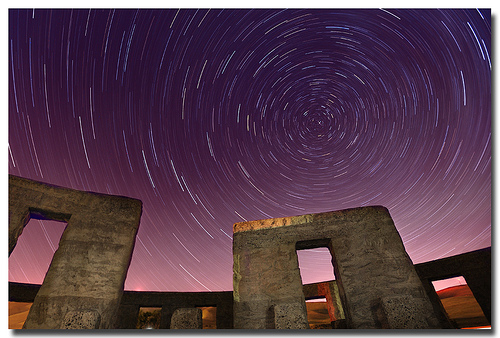
Trails on the Henge by Bala Sivakumar on flickr - 54m exposure (licensed CC-BY)
Shutter life rating
One of the things to look for when purchasing a new camera is the shutter life rating. If a camera uses an electronic shutter, then you don't need to worry about this as no physical shutter exists. But for most DSLRs and other cameras that use a focal plane shutter, the shutter mechanism will eventually wear out and break.
Cameras with a focal plane shutter will usually be given a shutter life rating, which tells you how many photos you should be able to take before the shutter will fail. Usually this is around 100,000 - 250,000. This may seem like such a large number you don't need to worry about it, but you will be surprised quite how many photos you take with a digital camera.
If your camera's shutter does fail, you can usually get it repaired. The cost varies, but expect to pay somewhere in the region of $200 - $500 / £200 - £500.
Shutter lag
With DSLR cameras you are unlikely to have a problem with shutter lag, but you may come across this phenomenon with compact cameras. Shutter lag is the delay between when you press the camera's shutter button, and the camera actually taking the photo. If you have ever tried photographing fast moving sports with a compact camera, you may have found the shutter lag quite annoying, even if the delay is only a fraction a second.
If your camera does suffer from shutter lag, there may be a couple of things you can do to reduce its effect. Most cameras will autofocus and calculate the auto exposure when you press the shutter button, and then take the photo. The time taken for the autofocus and auto exposure to be calculated can add to any shutter lag your camera has, so the simple solution is to lock these beforehand.
You can focus on where you think your subject will be, or focus on something the same distance away in advance. Press the shutter button halfway down for the camera to autofoucs and calculate exposure. Then when the subject comes to that point, press the shutter button all the way down to take the photo.


