How to get a white or black background in your photo or video
A plain white or black background can be very useful for both photography and video. It gives a very clean look, without any distractions to take the viewer's attention away from the subject.
A plain white background also works well where the intent is for the image or video to blend in with a web page or printed page that is also white. (The same for black, though white is a much more common background).
A plain background is often used for catalog style product photography. And it can also work well for portraits, still lifes, and studio-style nature photos. In this article we'll look at a few different ways you can create a clean white or black background for your images or videos (the technique is the same for both).

Creating a white background
You might think the simplest way of creating a white background is to just position your subject with a white background (such as a piece of white card) behind them. However, unless you're photographing a very dark subject you'll likely find that this results in a gray background, not white.
If you adjust the exposure settings on your camera to ensure the background is really white, your subject will become overexposed. So, how do we deal with this? The answer is that you need to light your subject and the background separately. By applying stronger lighting to the background than the subject, you can ensure that the background becomes bright white, while the subject does not.

Ensuring your whites are neutral in color
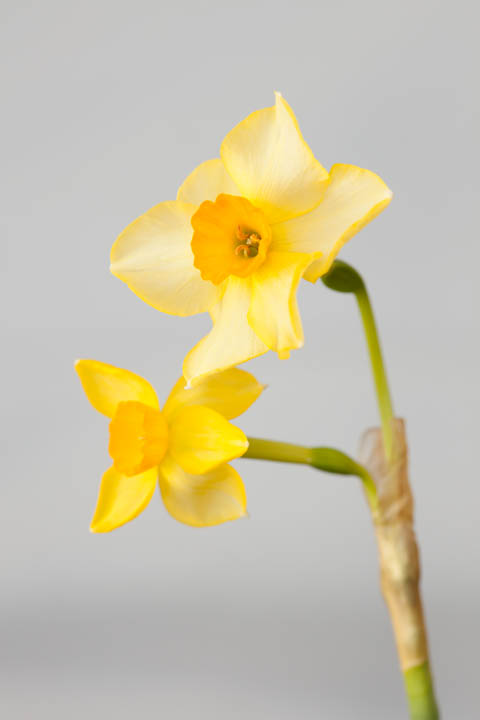
Before I get into this though, let's cover how to check whether the background is really white or not. The first thing to do is to make sure that you have your camera's white balance set correctly. This ensures that the background, even if it is not 100% blown out pure white, will at least appear neutral in color, rather than a slightly orange or blue color.
When the background isn't fully blown out, a wrong white balance setting results in a colored background

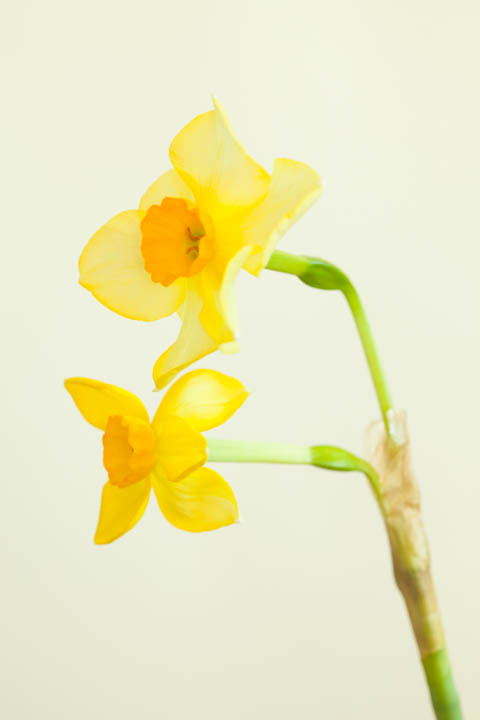
With the white balance corrected, the background is neutral in color
You may be able to set the white balance using one of the preset values available on your camera. For example, use the 'flash' white balance setting if you're using flash to light your image.
But the most accurate way is to take a custom white balance reading of the background, with the lighting that you will be using. The exact method of creating a custom white balance depends on your camera model. Typically it will involve something like choosing the custom white balance setting, choosing set, taking a photo of the white background, and then accepting the result.
If the background is lit too brightly, the camera may not be able to take a custom white balance reading from it. So you may need to reduce the power on your lights just when setting the white balance like this. After the white balance has been set, you can turn the lights back up again.
Getting a pure 100% white background
Getting a pure white background is quite simple - just hit it with a lot of light. However, in practice you need to be a bit more considered than this. The brighter your background is lit, the greater the amount of light bouncing back that will wrap around the edge of your subject.
In some circumstances, having a large amount of light spilling back off the background can be desirable. It can work quite well for some portraits, giving a slightly dreamy glowing effect. But for other subjects you may want to minimize the light spill from the background, to keep the subject darker around the edges.
To minimize light spill from the background, you should light it with just enough light so that it becomes pure white, so you don't use more light than is actually needed. The problem then becomes, how to check whether you've lit the background so that it is pure white, rather than looks pure white on the camera screen but is actually very light gray. The answer is in your camera's highlight warning setting.
Most cameras have the highlight warning setting available either as a playback display option in the menus, or by cycling through the different playback screens when viewing an image. Some cameras can even display a highlight warning on screen or in the viewfinder as you compose the image, though this is not useful if you're using flash for lighting (as the preview won't incorporate the effect of flash).
Example of highlight clipping warning
Example of highlight clipping warning
The highlight warning setting will cause areas that are pure white (or almost pure white) to blink on the camera's screen. So if you see the background blinking, try turning your background lighting down, take another test shot and see if the background is still blinking. If it is still blinking, turn the power down again, and take another test shot. Continue until you get a shot where the background is not blinking, then you know that you need the next power level up on your lights to ensure the background is pure white.
In a similar fashion, if the background is not blinking, then just keep turning up the power for your background light and taking test shots until it does start to blink. Then you know you've got the optimum amount of power for a white background.
If you're using lights without adjustable power, then you could adjust your camera's exposure settings instead. But bear in mind this also adjusts the exposure for the subject. Adding extra lights to increase the light power, or adding diffussion layers in front of your lights to reduce the power may also be a solution.
For video a similar feature to the highlight clipping warning is available, known as zebras. This displays black and white bars across the areas of the scene that are overexposed. Note that zebras can be configured to display at different amounts, you'll want to make sure they are set to display at 100% so that they only show on areas of the image that are over-exposed.
Positioning your lights and subject
As I said earlier, we usually want to light our background and subject separately. This allows us to use whatever lighting we like with our subject. To do this, there are two aspects to consider - the distance of the lights from the background, and the distance of the subject from the background.
The closer we have our lights to the background, the more concentrated their power will be on the background. However, don't position your lights too close to the background, otherwise they won't fully illuminate it.
You will need to experiment with the distance of your lights from the background to discover the optimum position. The number of lights you have available for lighting the background will also have an effect. If you have four lights, you can get a nice even coverage with them quite close to the background and each light lighting a quarter of the background. Whereas if you only have one light, you'll need to have it a bit further back to allow the light enough distance to spread out and cover the whole background.
Of course, the size of the background will also have some effect on the number / positioning of lights needed. And the size of the background will in turn be determined by your subject size and the focal length you are using.
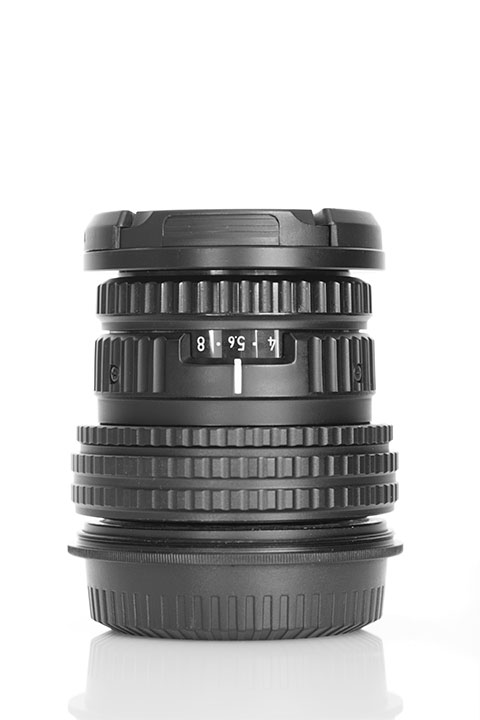
If you are using a wide-angle focal length, you will need a much larger background behind the subject than if you use a telephoto focal length. For this reason, a longer focal length (100 mm - 200 mm) is often preferable for photographing a subject with a plain background.
With a wide-angle focal length a large white background would be needed behind the subject, and lighting the large background would be quite tricky.

Using a longer focal length, and moving the camera further back to keep the subject the same size, gives a much narrower field of view, allowing use of a smaller background that could be lit more easily.
The distance between the subject and the background affects how much light spill from the background will affect your subject. The closer the subject is to the background, the more you'll find light from the background spilling around the edges of the subject.

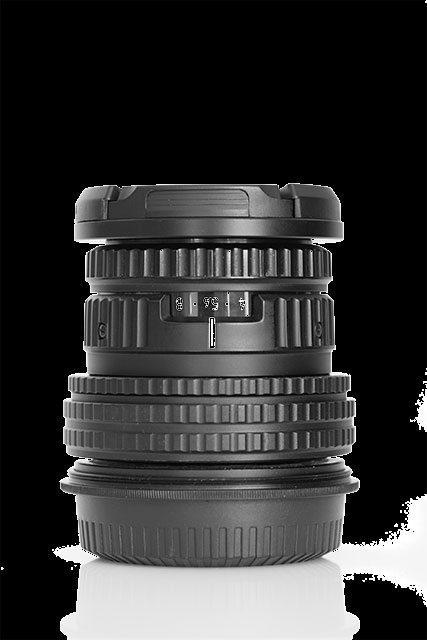
Background some distance away from subject
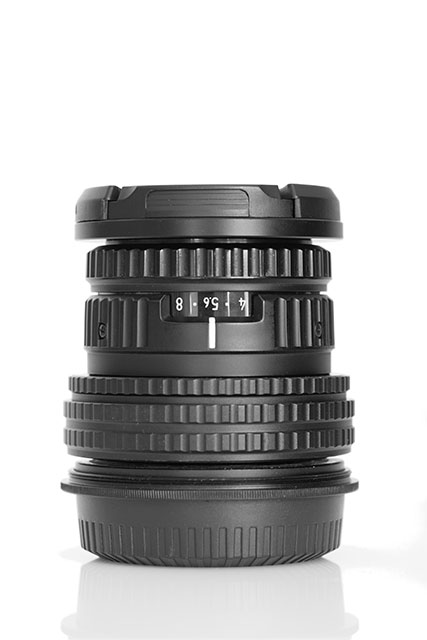
Background close to subject - note the increased light spill around the edges (yes, it is only a small difference)
If you want to minimize light spill you may also want to consider using flags. A flag is simply an object that you place between the light source and your subject, which blocks the light from hitting your subject. A flag can just be a piece of card, it doesn't need to be anything fancy.
Typically you will place a flag on the edge of each of your background lights on the side facing towards the subject. This blocks the light from hitting the subject, as well as reflecting more light back towards the background, giving more even lighting of the background and possibly allowing you to use less power for your lights while still keeping the background pure white. You can also use flags to block some of the light from the background bouncing back towards your subject.

In this image the background is still close to the subject. The background light was not flagged, but flags were placed either side of the subject to reduce the amount of bounced light from the background hitting the subject. You can see this has greatly reduced the amount of light spill around the edges of the subject. Though the flags are visible in the image they could easily be removed by editing the image.
Type of white background
There are three different types of background you can have for a white background - solid, translucent, and none.
With a solid background, such as card, thick paper, or heavy cloth, you aim your lights at the background. The light hits the background, and bounces off it, making it bright white. This is probably the most common way to create a white background.
With a translucent background, such as a thin white plastic tablecloth, a white bed sheet, or a sheet of heavy diffusion material, you light the background from behind. The light hits the rear of the background, spreads out somewhat, and most of it travels through the material, making it appear bright white. A softbox can also be used for a white background in the same way, since it is essentially just a sheet of translucent white material that is lit from behind.
In some circumstances you can also use just a plain light as the background, with no actual background at all. A good example of this would be shooting subjects outdoors around sunset or sunrise. Simply position the subject with the sun behind them, then expose for the subject. The bright sky behind them will blow out into white.
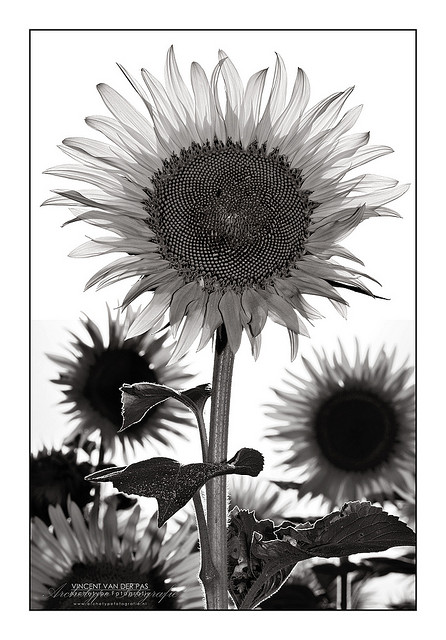
Sunflower in B&W by Vincent_AF on Flickr (licensed CC-BY-SA) - sun used for white background and to backlight the flower, fill flash used to brighten the front of the flower
Creating a black background
Creating a black background is somewhat similar to the white background, again we are relying on lighting our background and subject separately. But in this case we don't want to light our background at all.
Whereas with a white background we typically want to prevent the background light from spilling onto the subject, for a black background it is the opposite way round. We want to prevent the lighting for our subject from spilling onto the background.
Because light falls off over distance, the easiest way to do this is to position your lights very close to your subject, and your subject as far away as possible from the background. Doing this ensures that by the time the light reaches the background, it will be extremely spread out, and of very low intensity, so hardly brightening the background at all.
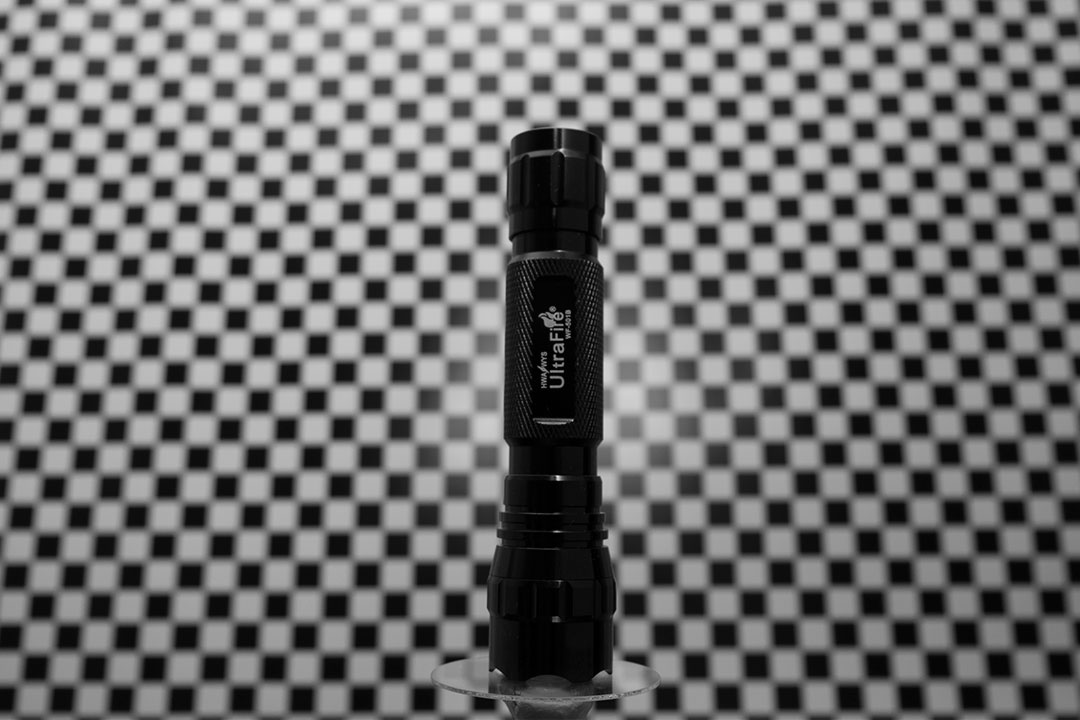
With the background far from the subject and the light close to the subject the background is near pure black
With the light farther away from the subject we have to use more power, and the background is not quite as dark

With the light close but also having the background close as well, more of the light spills onto the background than when it is further away
As with the white background technique, you can also employ flags on your lights to help prevent light spilling backwards onto the background. You may need to be quite careful with the angles that you have your lights at, being careful to aim them so they aren't pointed at the background.
The ease of flagging your light to prevent spill onto the background depends on the position and direction of your lighting. In this example, with the light and background both close to the subject, flagging the light has made the background ever so slightly darker.
For a black background it can often be preferable to use flash for lighting your subject compared to continuous lighting, though obviously this is not possible for video work. Flash allows you to use a low sensitivity setting while keeping a fast shutter speed. This in turn means that any ambient light will have very little effect on the background, and so it is much easier to get black. For video work (or stills) with continuous lighting, you just need to ensure there is as little ambient light as possible, e.g. work in a darkened room.
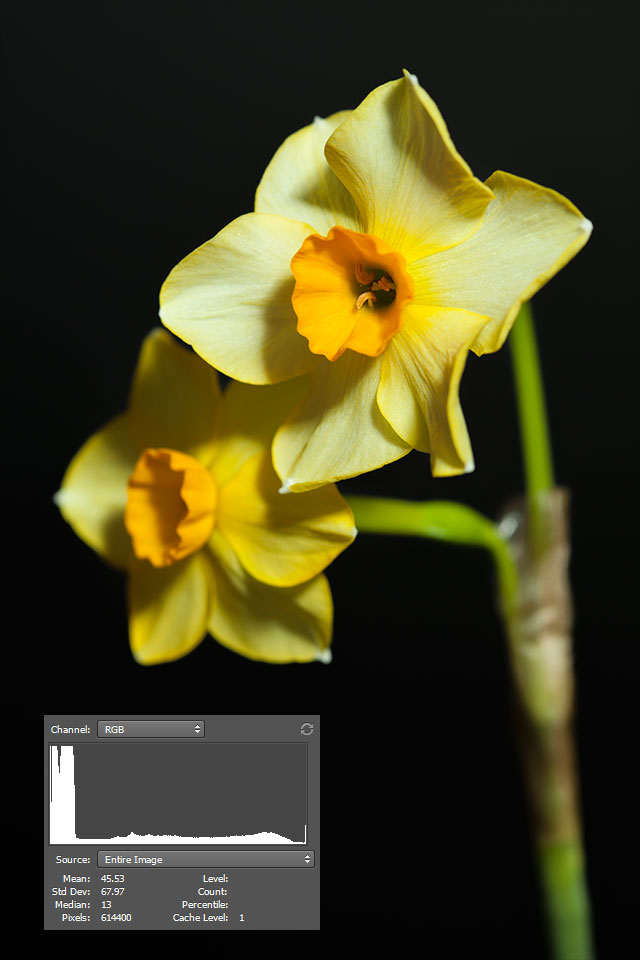
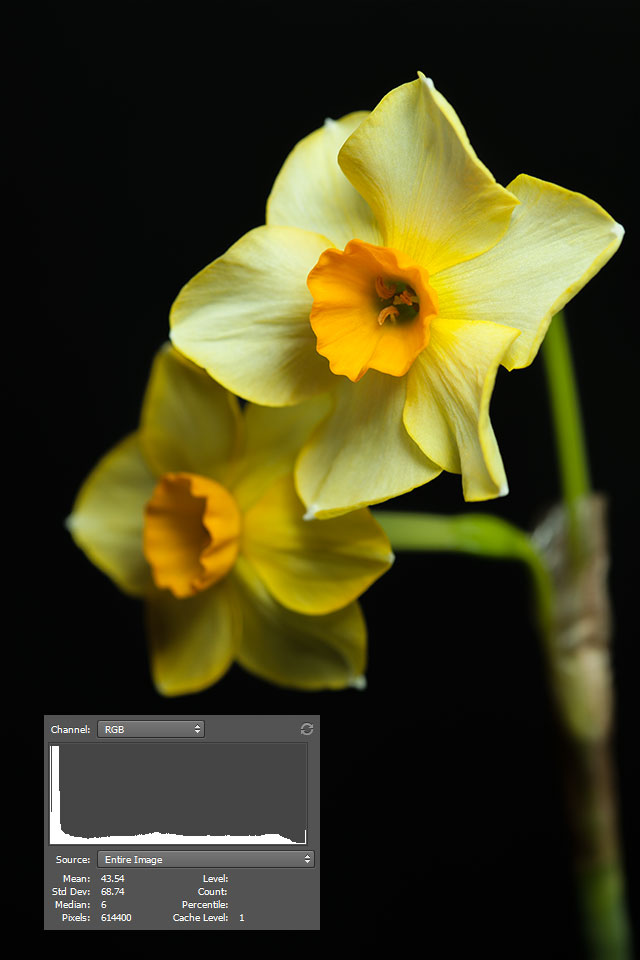
Most cameras do not offer a shadow clipping warning for determining that the background is fully black. Instead you may have to rely on your camera's histogram. If you see a large spike on the left hand (black) side of the histogram, then it means that you have fully black tones in your image. I've included the histograms for each of the above images so you can see what I mean. The more bunched up towards the left the dark tones are, the nearer to pure black you have the background.
Ensuring the background is pure white or black in software
It's not always possible to get a background 100% white or 100% black in-camera. In these instances we can use image editing software to help us out.
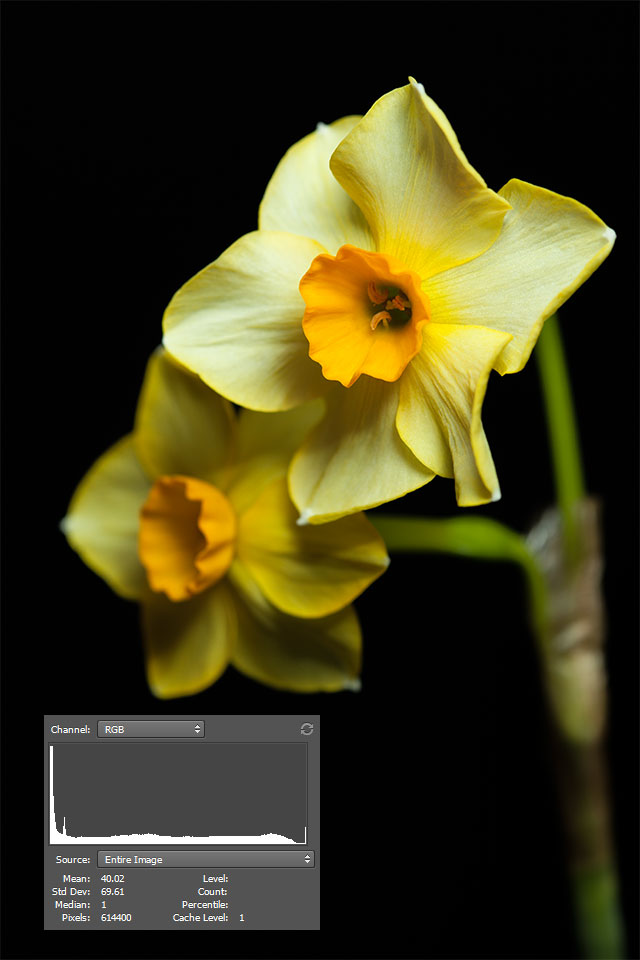
A useful technique to check whether a background is pure white or black when editing is to use a threshold adjustment. Move the slider either to the far left for pure black or to the far right for pure white. This will change your image so that all pixels as bright or brighter than the brightness you chose appear white, while all pixels below that brightness level appear black.

With the threshold level set to 1 (0 is pure black, 255 is pure white), we can see there are virtually no pure black tones
You can then use a levels or curves adjustment and bring in the black point for a pure black background. Or bring in the white level for a pure white background. If the adjustment negatively affects the subject, then apply a layer mask to the adjustment to restrict its effects only to the background.
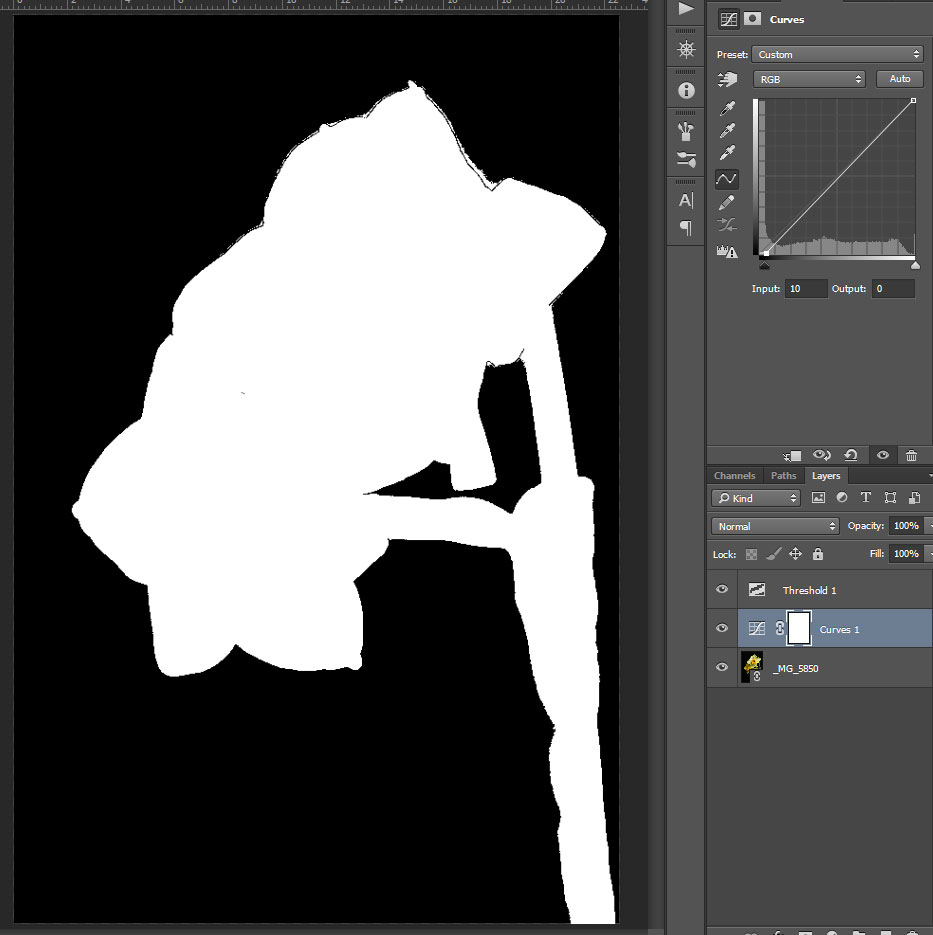
By using a curves adjustment and pulling the black point in, with the threshold layer still active, we can easily see the amount of adjustment needed to turn the background pure black. Note the curves layer is below the threshold layer, not the other way round.
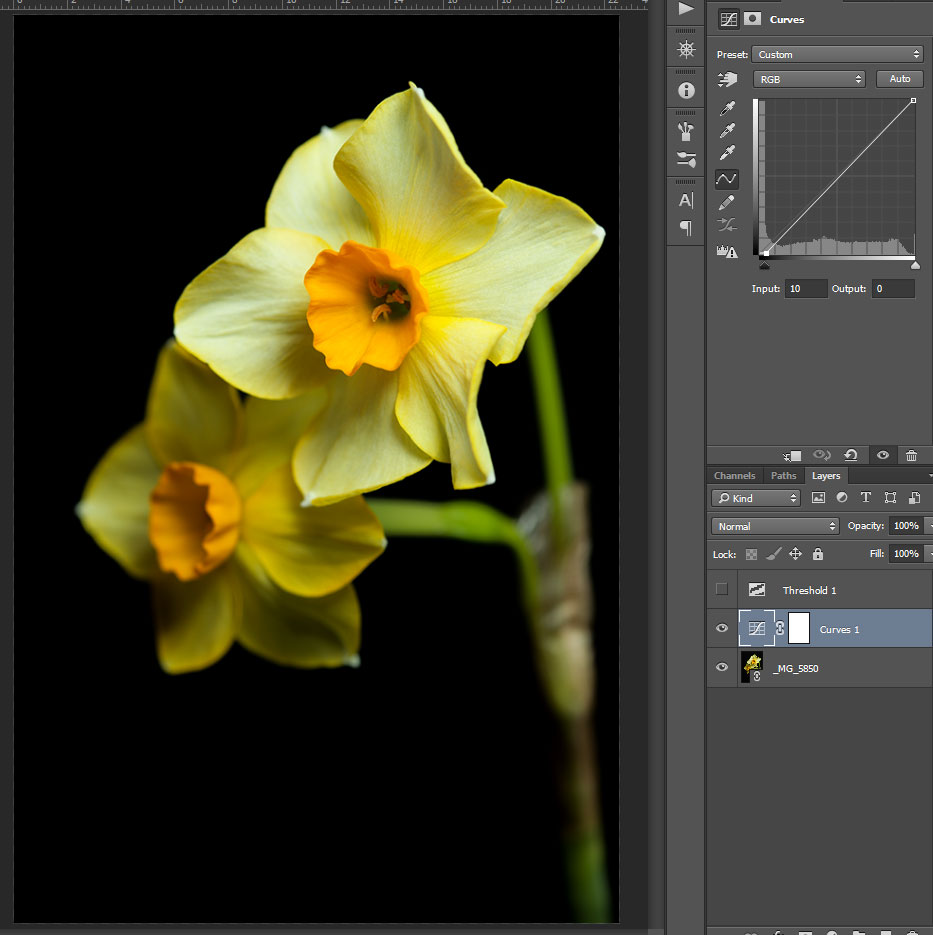
Finally we can hide or remove the threshold layer to see our image with its pure black background
Hopefully this article has given you some good ideas on how to achieve a good plain black or plain white background behind your subject. It's all about controlling your lighting, and the distance between the lighting, your subject, and your background. For most of the example photos in this article I used a combination of flash and bounced natural light, but you can use whatever light source you want. It's how you control the light that matters, not what type of light it is.


