Using the Levels tool in Photoshop etc. to correct and enhance your photos
The levels tool is similar to the curves tool, in that it allows you adjust the brightness / darkness and color of the tones in your photos. Levels is slightly simpler than curves in that it only allows you to adjust the black point, white point, and mid point, whereas curves will let you adjust those and any point in between.
For this article, I'll be using the levels tool in Photoshop CS5, but the levels tool in Photoshop Elements, Paintshop Pro, GIMP, etc. are all very similar.
If you want to follow along with the examples in this article, you can download the images used here: image-1.jpg image-2.jpg
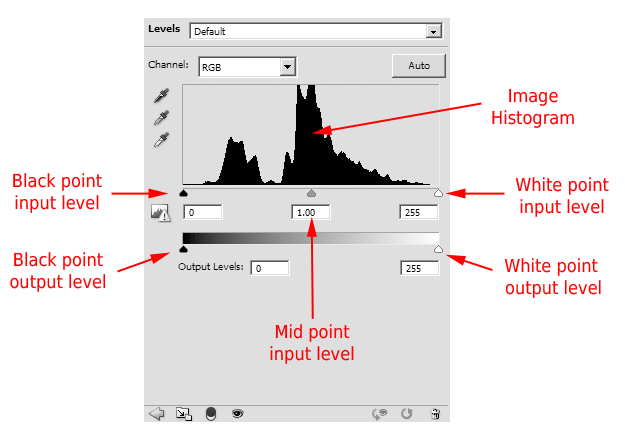
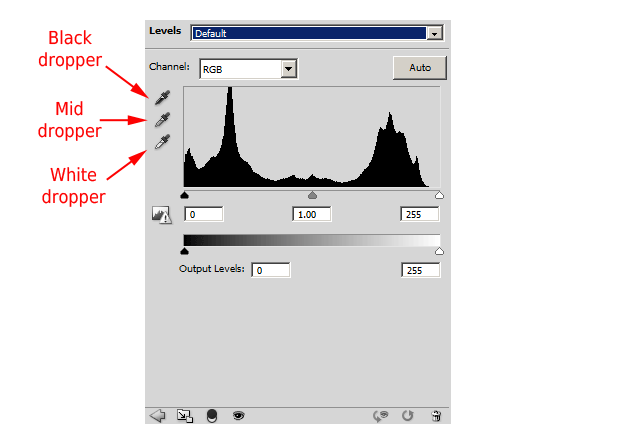
Above is a description of part of the Levels tool. First we will cover the output slider, though you should have little need to modify it in real use.
The black input slider maps black to the value of the black output slider. So, for the image above, Levels is mapping black in the image (value 0) to black (value 0). (The values range from 0 pure black to 255 pure white). If you moved the black output slider up (e.g. to value 27), black in the image would then be mapped to the new, brighter, value of 27. All values above black would also be shifted up in brightness accordingly.
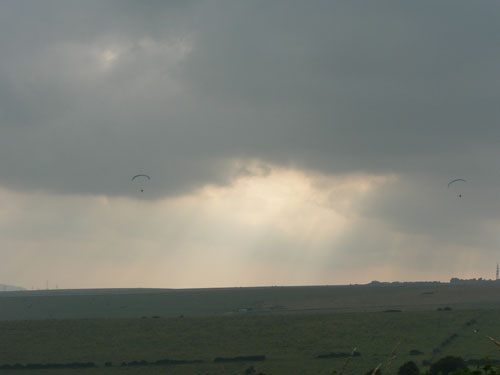
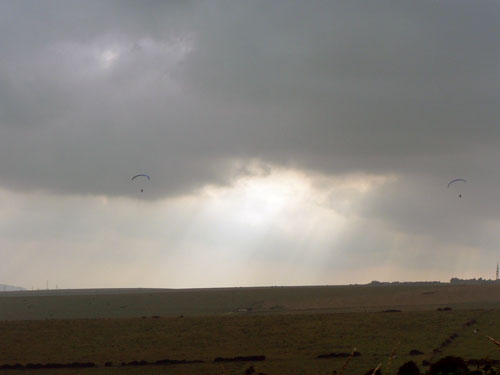
For example, here is an image with no adjustments:
With the black output slider moved to 27:

As you can see, changing the black output level brightens the image and lowers the contrast. For the white output slider, the situation is similar. Moving it down means white and bright tones are mapped to darker tones, resulting in an image that is darker with less contrast.
How often do you have an image where you want black to appear brighter than black (or white darker than white)? Not very often, if at all, I suspect. So normally you will want to leave to leave the output slider levels as they are. Hopefully the above helps to show the relationship between the input levels and the output levels though.
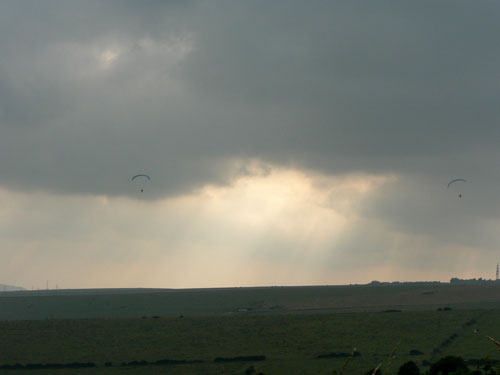
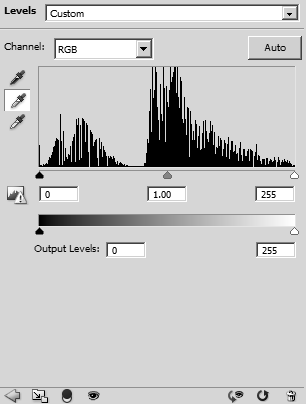
Now, onto some real-world uses for Levels. If you look at the Histogram for the image, you can see that we have no pure black tones and no pure white tones.
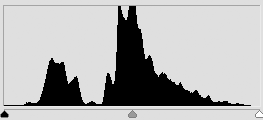
Pure black is the very left edge of the histogram area, and pure white is the very right edge. For more on reading histograms, see this article: Stop Exposure Problems Ruining Your Shot.
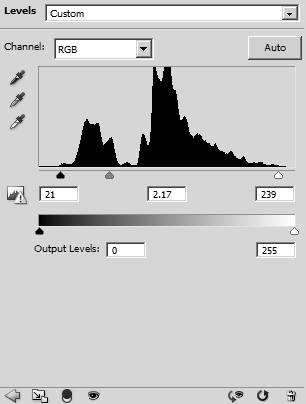
To increase the contrast, we can grab the black input slider, and move it up to the left edge of the histogram, so that the darkest tones in the image turn to pure black. Likewise, we grab the white slider and move it up to the right edge of the histogram to make the brightest tones turn pure white.

From the Levels panel, you can see that all tones with a brightness of 21 and below have been mapped to an output tone of 0 (solid black). While tones with a brightness of 239 and above in the original image have now been mapped to an output tone of 255 (pure white).
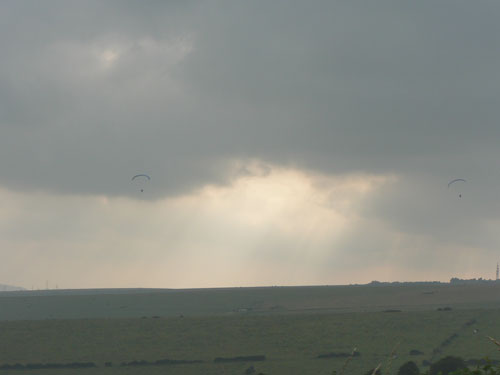
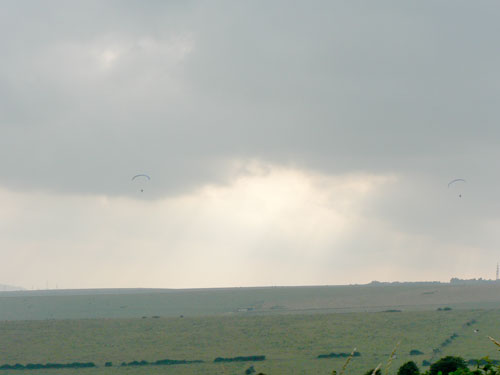
After making these adjustments, the image looks like this:
The midtone slider is the grey slider in the center, underneath the histogram. We can use this to adjust the brightness of the image without affecting the black and white points.
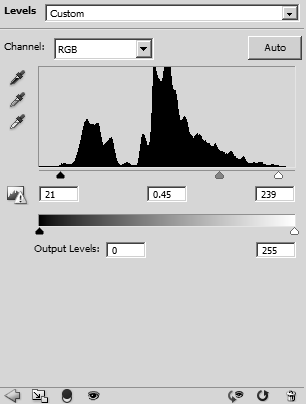
Moving the slider to the left means that the darker tones are now mapped to the midtones, so they become brighter:
Moving the midtones slider to the right will change the brighter tones to become midtones, and so darken the image:
Using the Levels eyedropper tools
Next let's look at the eyedropper tools, which give us an easy way to set the black, midtone, and white points, and perform color correction also.
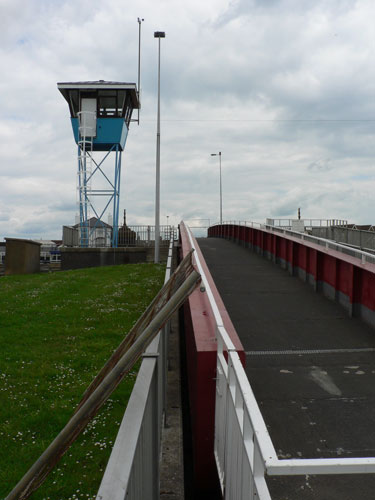
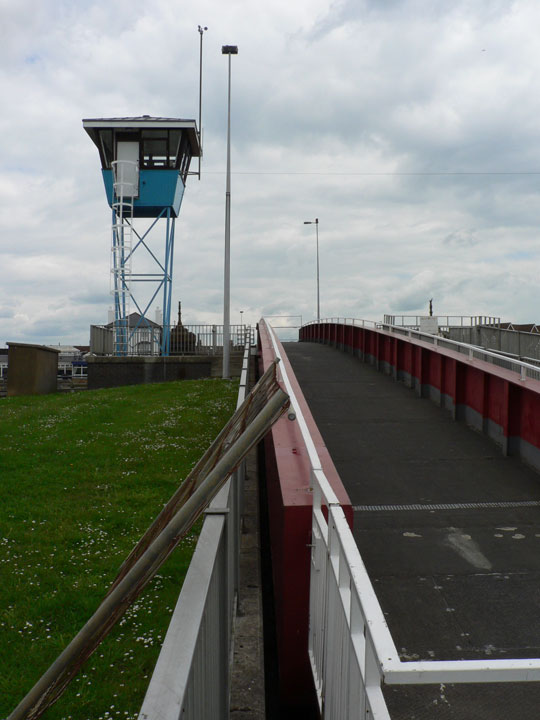
This is what the image looks like with no adjustments:
And here is the Levels panel for this image, pointing out the eyedropper tools:
Looking at the histogram, you can see that the darkest tones in the image are already solid black. (The left edge of the histogram is bunched up against the edge of the histogram area). So, we don't really need to set a black point for this image, but it won't hurt.
Click the black point eyedropper, then click on an area of the image that you want to be pure black. For this image I chose the shadow area under the bridge.
Now, click the white eyedropper and then click on an area of the image that should be pure white. For this image I chose a highlight at the top of the clouds.
Lastly, click the middle gray eyedropper, and click it on part of the image that should be middle gray. I chose the gray metal railing for this.
After doing this, the image looks like this:

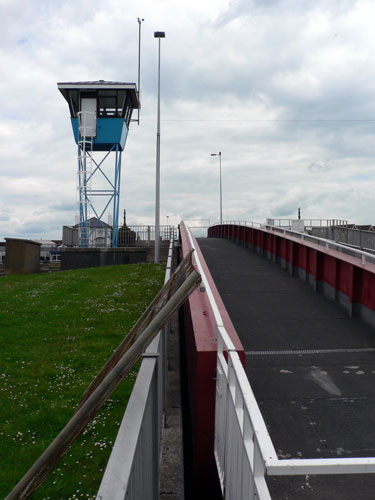
Using the eyedropper tool adjusts not just the overall tone of the image, but each color channel individually. You can see this by checking the individual color channels:

Because using the eyedropper tool adjusts each channel, this means that it also corrects color casts. So when using the eyedropper tools, it is important to use them on areas that you want to be black / gray / white with no color cast.
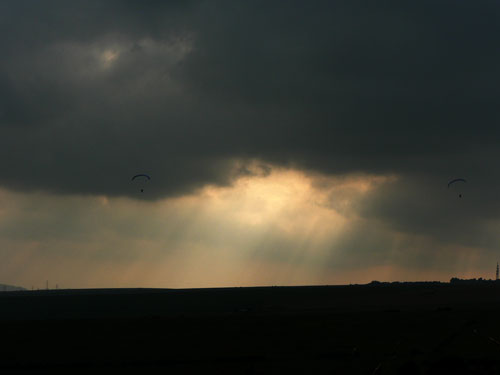
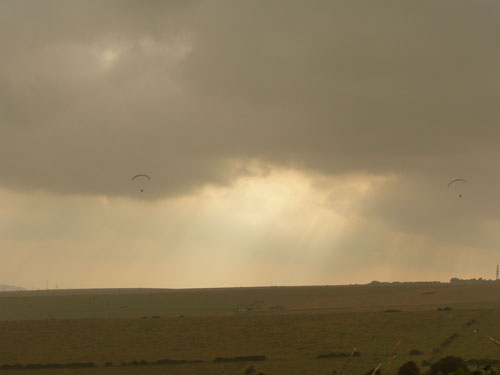
Below is a corrected version of the first image using the eye dropper tools to set the black, mid, and white points. The black point was set using the bush at the bottom right corner, white point on the highlight in the middle of the clouds, and midtone on the clouds.
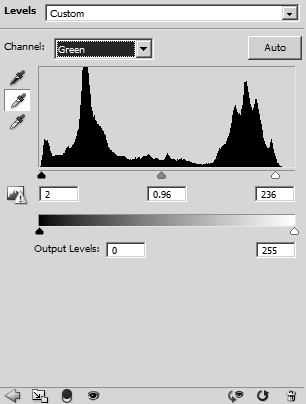
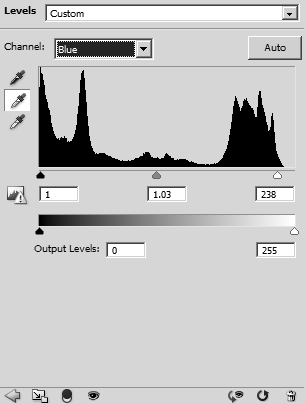
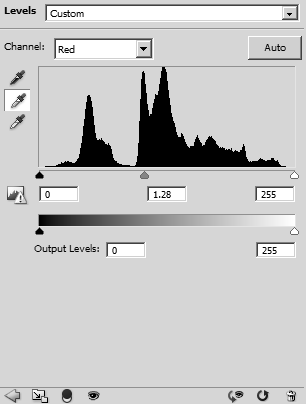
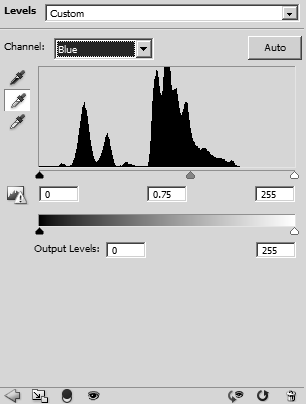
Just as with the curves tool, we can adjust each color channel individually. For example, to give the image a warmer tone, we can move the midpoint up on the blue channel (to give more of a yellow tone), and move the midpoint down on the red channel (to give more of a red tone). Combined, the adjustments result in a warmer image.
With the red and blue channel adjusted, but no other adjustments, the image looks like this:
The adjustments to color are very similar to what you can do using curves, except you are using the midpoint slider of levels instead of adjusting a curve up and down around its midpoint. For more information and examples, see the article Image editing – adjusting color with the curves tool.
I hope that gives you a good overview of the Levels tool, and how it works. Personally, I prefer to use the curves tool, but it is worthwhile knowing how to use both curves and levels.


