Using your camera’s image review playback
One of the main benefits of digital cameras is the ability to review your images on the camera. This allows you to easily check whether you got the shot you wanted. If you didn't (and your subject hasn't changed), then you can adjust the settings and try again until you do get the shot you want.
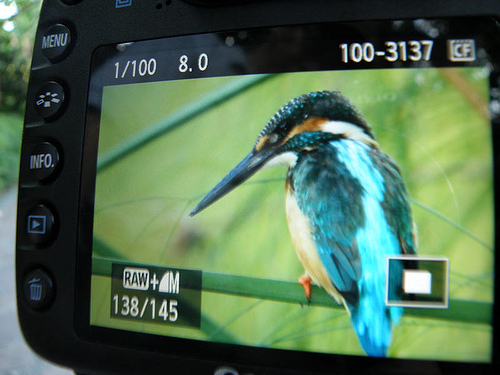
Camera LCD by Hanumann on flickr (licensed CC-BY)
In this article we'll look at the different information we can see using the camera's image playback, and how to use this to get the shot you want.
Instant playback
For reviewing images, most cameras have an instant playback option, that pops up the photo on the screen just after you have taken it for a short amount of time. Normally you can set the amount of time that the photo appears for in seconds, or turn this feature off.
Using the instant image playback lets you get a quick look at the photo after you have just taken it. If there is anything obviously wrong with the image, then you can correct for this.
Image playback
For more detailed checking of the image though, you'll probably need to use the standard image playback. This is usually brought up by a button or setting on the mode dial that looks like a play symbol (►).
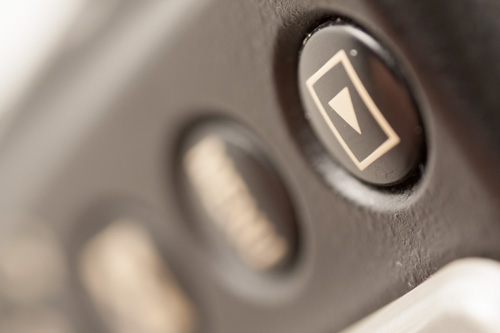
Image playback button
Cameras that feature EVFs can usually show the image review in the EVF or on the rear LCD. While other cameras just use the rear LCD for image review.
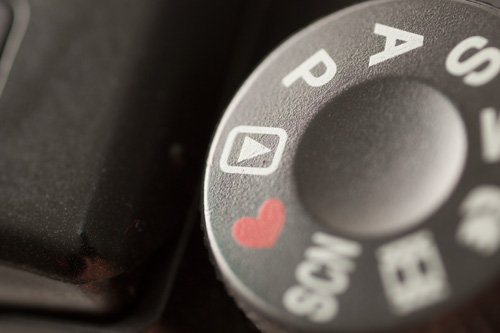
Image playback mode on shooting mode dial
Some cameras allow a live preview of what the image will look like, so you can check everything before you take the photo. This allows you to see the result of any adjustments you make in real time. With the majority of cameras though, you need to take the photo, review it, make adjustments, and then take another photo. Then repeat until you have the photo you envisioned.
Once you have the image playback (or live preview) up, there are a number of things you can check. Most cameras have several screens of information for each image in playback mode. Usually you can move through the screens using the 4-way controller or a control wheel, check your camera manual for details.
Example of going through the screens of information for a single imageCheck composition / framing
It is a good idea to use the image playback to make sure that you got the image framing and composition that you wanted. This is particularly important for cameras with optical viewfinders, where the view through the viewfinder might not show the full view of what is captured by the camera.
If you see distracting elements poking in at the edge of the frame, or some other compositional problem, you can adjust the camera to correct and take another (better) shot.
Check the focus / image quality
If an image is really out of focus or suffering blur from camera shake, it will be obvious when you review the image. Camera LCDs aren't particularly big, so to get an idea of how the image will appear on a computer screen or in print, it is a good idea to zoom in on the image. This allows for more critical checking of focus and any image blurring.
If there is a problem, you should be able to tell what the cause is by looking closely at the image. If the subject is blurred, but an area behind or in front is in focus, then the camera was not focused properly.
If the image appears smudged, and a slow shutter speed was used, then likely the problem is down to camera shake. Use a faster shutter speed or some form of camera support, then retake the shot.
If a slow shutter speed was not used, but the image appears soft (particularly around the edges), and the lens was set to a wide aperture, the problem may be due to a soft lens. Most lenses don't give the best image quality when used wide open. Try using a smaller aperture setting and retake the shot.
Check the exposure
Although the camera LCD is a good way to get an idea of how a shot will look, judging exposure by looking at the image is more difficult. For this, we can use a couple of tools - the Histogram and 'Blinkies'. For getting the histogram, you might have to flip through a couple of pages of the image playback screens.
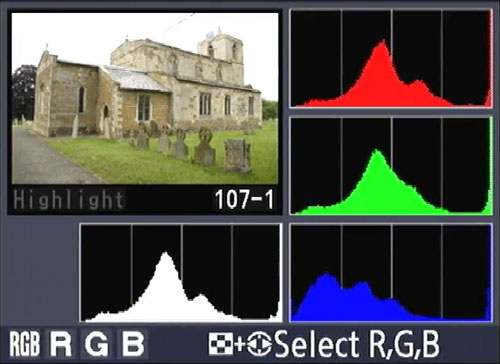
Viewing the histogram for an image - to the right are the separate histograms for the Red, Green, and Blue channels, while the combined histogram is shown in white at the bottom
The histogram shows the range of tones in an image, the right edge being white, and left edge black. If the histogram is bunched up against the right edge at all, then you are loosing some image detail to pure white. If the histogram is bunched up against the left edge at all, then you are loosing some image detail to pure black.
The ideal histogram is placed towards the right as far as possible without bunching up tones against the right edge. For more information on reading Histograms, see this article: Stop Exposure Problems Ruining Your Shot.
Blinkies are so called because they flash (blink on and off) on any part of an image that has lost highlight detail. In some cameras, blinkies will be offered as a page in the image playback mode. In other cameras, you need to turn them on in the camera menu for them to appear when reviewing an image. Often the setting will be called something like 'Highlight clipping warning'.
Blinkies (Highlight Clipping warning) flash where the highlights are blown out
If your image is overexposed (or underexposed), then you can adjust the exposure and take another shot.
Comparing to a monitor
Because a lot of camera LCDs don't accurately show what an image will look like on your monitor, it can be a good idea to compare the two.
Take a photo with your camera, then copy the photo to the computer. Put the memory card back in the camera, and bring up the image playback. Open the photo on the computer too, and now you can compare the two.
This will let you see how colors and the tonal range differ between the camera and your monitor. You can then take any differences into account when reviewing images on the camera.
For example, maybe you notice that the monitor displays greens much more vividly than the camera. Now you can take this into account, so that when reviewing an image on the camera, if the greens look slightly dull, then you know that is not how they will appear on the monitor.
Dealing with bright light
In bright light many LCDs can be difficult to see. If your camera has an EVF, you can just use the EVF, but for cameras with just a rear LCD for image playback, this can be a problem.
The solution is to use a shade or viewfinder for the LCD. There are a number of manufacturers of these products, most attach to the camera in some way so you don't have to manually hold them over the screen. But they are easily removable as well to allow normal viewfinder shooting.

Using the image playback function of your camera to check your shots and reshoot if necessary is one of the big advantages of digital photography.
A word of warning if you are shooting fast action though - only check your images every so often. If you check each shot after you take it, then you'll miss many shots because you were checking the last image instead of shooting.


