Stop Exposure Problems Ruining Your Shot
Getting the right exposure is critical to ensuring images have impact and don't appear flat or washed out. You may not realise though, there is no such thing as correct exposure. There are however exposure errors and problems that must be avoided. Once you understand how to evaluate and correct exposure errors you will be able to take the next step to using exposure creatively. This will give your images mood and feeling.
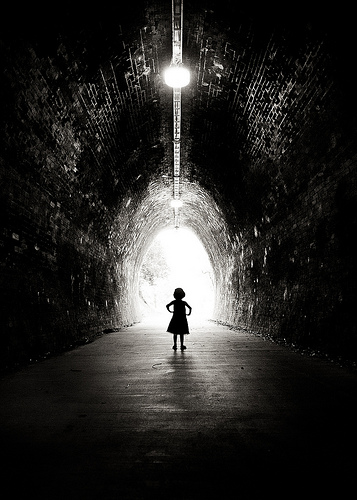
13/365 by phozographer on flickr (licensed CC-BY)
Think of a dark scene with little colour except beneath a street light where a woman stands alone. She's partially in the light but also partially in shadow. Around her you can just make out dark shadows and shapes in the side streets. Hopefully you can appreciate how this type of exposure would create a mood or atmosphere in the picture. This exposure couldn't be achieved by relying on the cameras meter alone. You need to take control and make the exposure decisions.
The best tool to evaluate your exposure with is the histogram. Most digital cameras can display the histogram for the image they have taken. Many will also allow you to show the separate histograms for the Red, Green and Blue channels. Whilst this is useful, if you haven't mastered using the basic histogram it won't help you. If you haven't already done so, set up your camera to view the standard histogram with each picture.
Before continuing you should also set your camera to shoot in aperture priority mode. Typically this is represented as the "Av" setting but if you are not sure consult your camera manual. I will assume you know how to select an aperture suitable for the image you want to shoot.
Looking now at the histogram, this shows how the camera records tones in the image. If the histogram peaks in the middle and extends to either side you probably have a technically well exposed shot; although this may not be what you want to achieve. This is also what the cameras built in light meter is programmed to achieved. These are however some of the problems you need to look out for.
Shadow Clipping
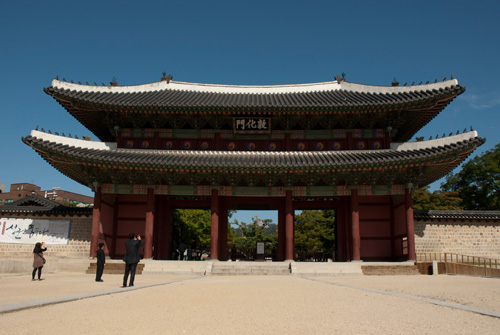
Photo with shadows clipped
Histogram for above photo showing the clipped shadows on the left edge
Shadow Clipping is where the histogram appears to run off to the left and comes to an abrupt stop. When you clip the shadows they lose all their detail and turn to pure black; something that should be avoided. If you see this happening you should use the exposure compensation feature of your camera to increase the exposure. Initially try a stop (+1) and shoot the image again. Continue to adjust and shoot until you have the histogram you require.
Shadow Clipping
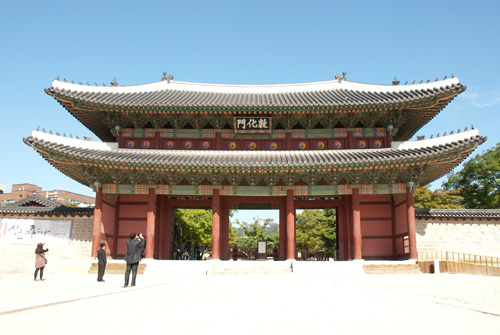
Photo with highlights clipped
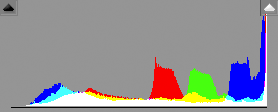
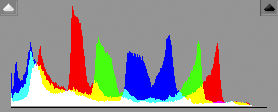
Histogram for above photo showing the clipped highlights on the right edge
Highlight Clipping is where the histogram appears to run off to the right and comes to an abrupt stop. This causes highlights in the image to turn to pure white and lose all their detail. Again this is something to be avoided in most situations. If you see this happening you should use the exposure compensation feature of your camera to reduce the exposure. Initially try a reduction of a stop (-1) and shoot the image again. Read the histogram and make further adjustments as necessary.
Contrast Range
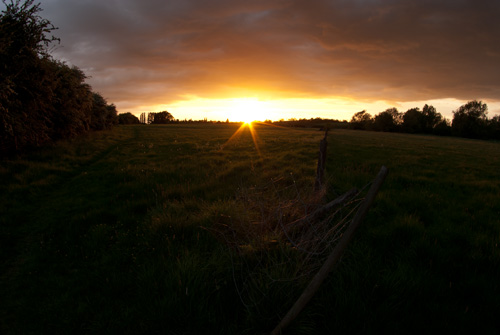
Photo with large contrast range where both highlights and shadows are clipped
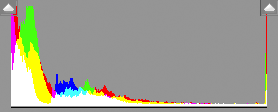
Histogram for above photo showing the clipped highlights on the right edge and clipped shadows on the left edge
The histogram extends to either side simultaneously and appears to run off at both ends. Your camera is having a problem exposing for both the light and dark areas in the same shot. The picture is said to extend beyond the contrast range of the camera. A number of possible solutions exist for this:
- Decide you will lose either the highlight or the shadow detail and adjust your exposure accordingly using exposure compensation
- Recompose the shot to exclude the problem area
- Shoot multiple identical images at different exposures and blend these into one new image using special software. This is known as HDR (High Dynamic Range) photography
- If the problem area is the sky, as it often is if you shoot landscapes, use a ND Graduated filter to darken the sky
Now you know how to address exposure problems there are a couple of special situations to be aware of. An image which has mainly light areas e.g. a snow scene should have a histogram which is grouped to the right side but which isn't clipped. This is known as a high key image. If the image is mainly shadows such as the scene described at the start of this tutorial the histogram appears grouped to the left. This is known as a low key image.
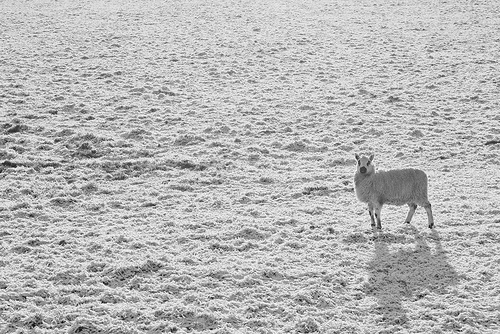
High key sheep by Adam Kerfoot-Roberts on flickr (licensed CC-BY-SA)
With a little practice you will grow to automatically evaluate the histogram and use the exposure compensation controls to adjust the exposure to your preference.


