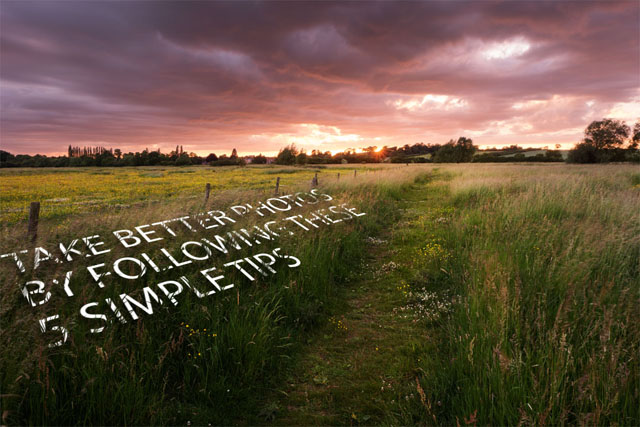
Take better photos by following these 5 simple tips
In this article we'll look at five relatively simple tips that you can apply to your photography to capture much better images.
However, none of these are quick 'magic' tips. They won't suddenly make you an amazing photographer. They all take time and practice. But if you put the work in you'll find a noticeable improvement in your photography.
Simplify
One of the keys to a good photograph is a relatively simple composition. Ensure that the image contains only the most important elements to get the message across to the viewer. Remove distracting elements that attract the viewer's attention away from the subject, and you end up with a much stronger image.

White-Cheeked Barbet by Sandeep Gangadharan on Flickr (licensed CC-BY) - while not a bad image, the background does not really complement the subject
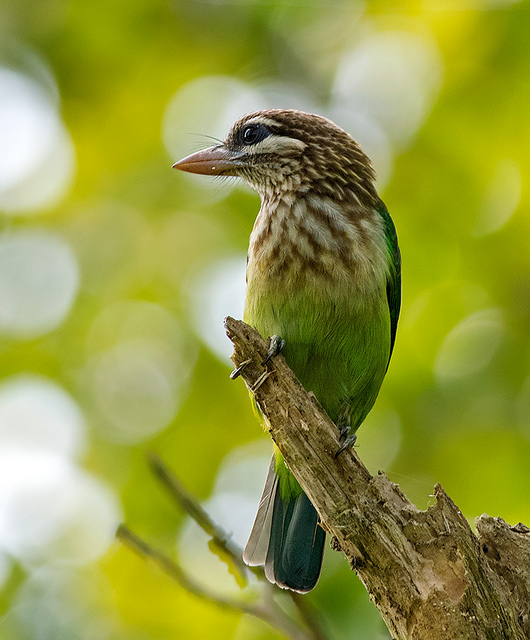
white cheeked barbet by shrikant rao on Flickr (licensed CC-BY) - the lack of detail in the background helps concentrate your attention on the subject
This doesn't mean that you should always shoot your subjects isolated against a plain background. But that the other elements in the background should help reinforce and emphasize the subject.
For example, a portrait of a toy shop owner with shelves of toys in the background will produce a strong photo with the message 'This is a toy shop owner'. Whereas the same person photographed against a blank backdrop tells the viewer nothing about them. A photo of the same person photographed outside on the street tells us nothing about them, but you may also have distracting elements such as lamp posts, signs, etc. attracting the viewer's attention away from the subject.
So, think about what it is the image should convey. What drew you to take a photo of the subject? Try to compose your image to focus on this, while removing (as far as possible) any elements that conflict or do not add to the message of the photo.
Focus on the subject
This point ties in with the previous point. You want to make sure the viewer's attention is on the subject. There are various techniques you can use to do this. The techniques can be taken to extremes to completely eliminate distracting backgrounds. Or they can be used more subtly, just to draw more attention to one part of the image than another.
Focus and depth of field is one way of drawing the viewer's attention. Your eye will naturally be drawn to the area of the image that has more edge contrast (is sharper). So make sure you get your focus correct.
Depth of field determines how much of the image is in focus. By using a very shallow depth of field and having some distance between the subject and background, a distracting background can be blurred away.
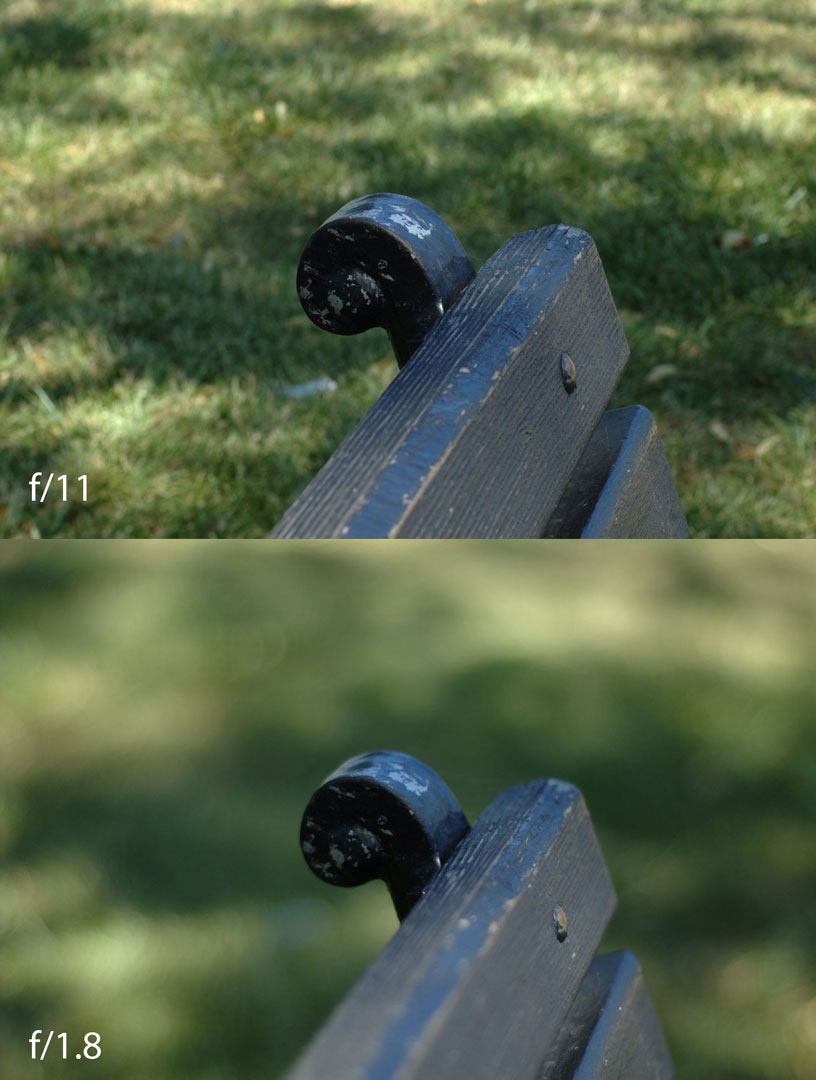
Modified from Aperture Comparison by Malcolm Tredinnick on Flickr (licensed CC-BY)
The size of the subject in the frame also indicates how important it is. The more of the frame the subject takes up, the greater importance is assigned to it.
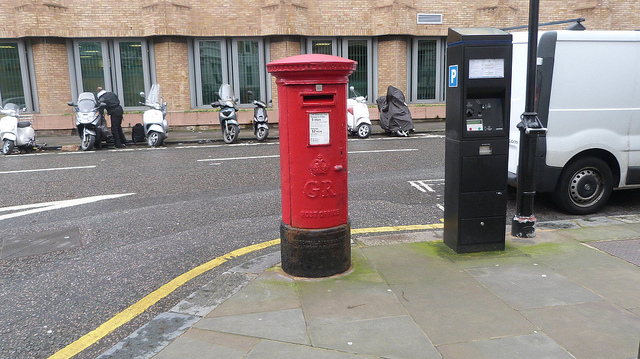
George V Post Box by Peter Broster on Flickr (licensed CC-BY) - although you can probably tell the subject here is the post box (thanks to the strong color contrast), it could be clearer
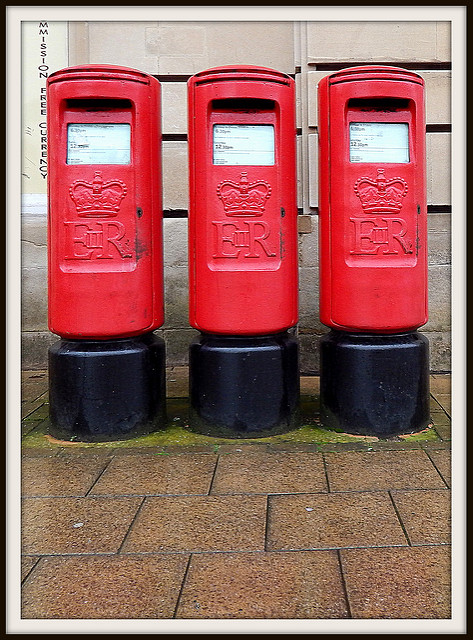
Atten-SHUN! EIIR Red Pillar Boxes by drivethrucafe on Flickr (licensed CC-BY-SA) - here the post boxes take up a much large portion of the frame and it's immediately obvious they are the subject
The exception to this is when the majority of the frame is featureless. In this case the subject can be small, but still draw attention because its difference in shape makes it stand out against the rest of the image. Bear in mind though that the size of the subject in the frame also affects the message the photo gives. (Small = isolated, distant, lonely).

Mail box by Fabian Reus on Flickr (licensed CC-BY-SA) - here the box takes up a small amount of the frame, but it is still very obviously the subject
Lighting / Contrast can also be used to affect where the viewer concentrates their attention. A bright subject against a dark background (and vice versa) sticks out and calls attention to itself.
contrast by keith ellwood on Flickr (licensed CC-BY)
By making the subject slightly brighter than the background (e.g. using some fill flash in the case of a portrait), then you can keep detail in the background while still drawing the viewer's attention to the subject.
Use perspective
One of the things that separates beginner photographers from the more experienced is how they choose what focal length to use. The beginner photographer chooses their focal length based on how large they want their subject in the frame and how far they are from the subject.
Whereas the more experienced photographer chooses their focal length and how close to the subject they should stand based on what perspective they want.
These methods of working sound similar, but the goals are very different. Using a short focal length (wide angle) gives a perspective that includes a lot of background, emphasizes the foreground, and accentuates leading lines in the image.
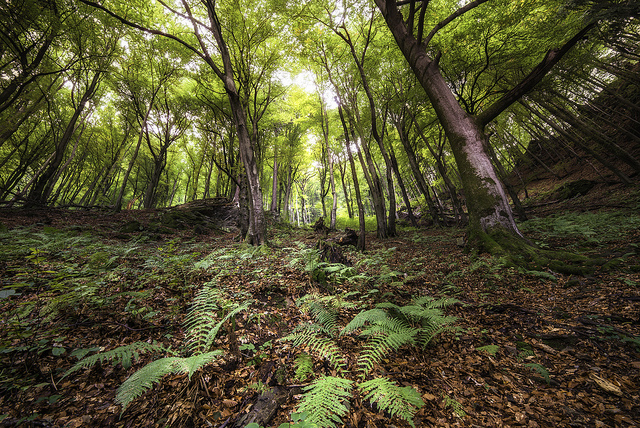
magic forest by Bernhard Latzko on Flickr (licensed CC-BY-ND)
While a long focal length (telephoto) only captures a narrow angle of view of the background. There is very little (rectilinear) distortion. Items can appear bunched close together as they recede into the distance, rather than spaced out.
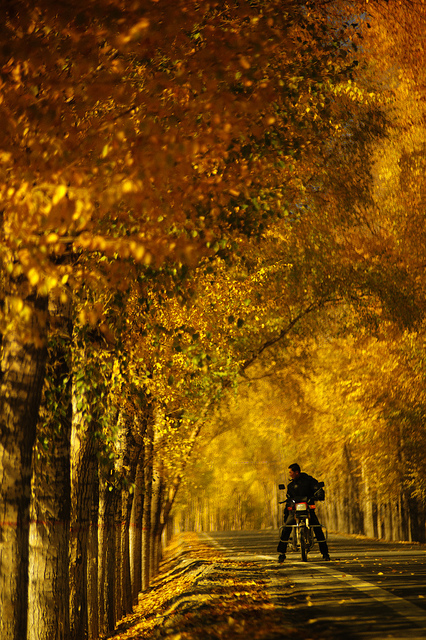
Silk Road #10 by Jonathan Kos-Read on Flickr (licensed CC-BY-ND)
The choice of perspective has a large effect on what the final image will look like, and so is very important to consider. Don't just zoom in to make a subject larger in the frame. And don't just 'zoom with your feet' and get closer to make the subject larger. But rather think about the perspective and how it will affect the image, then choose the appropriate focal length and shooting distance to achieve the desired perspective and framing.
Pay attention to the lighting
When talking about lighting, I don't just mean using the correct exposure settings to ensure your subject is properly lit. I mean the feeling that the lighting gives to the image. An image lit by soft light has quite a different look and feel to one hit by hard light. Similarly, a subject lit from the side has quite a different look than when lit straight from the front.
A landscape photographed in gloomy overcast light has a very different look and feeling to the same landscape photographed during a sunny day. And will look different again when photographed at sunrise or sunset.
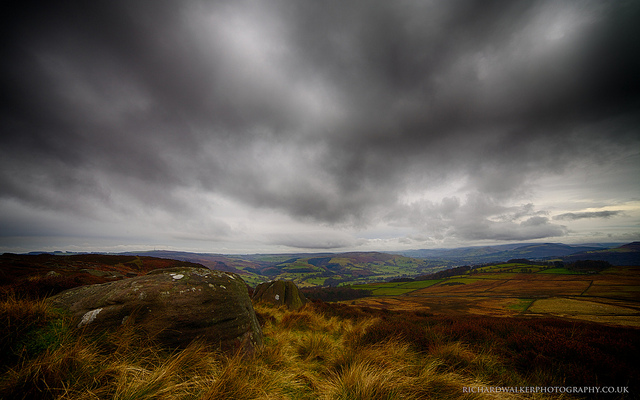
Overcast Peak District by Richard Walker on Flickr (licensed CC-BY)
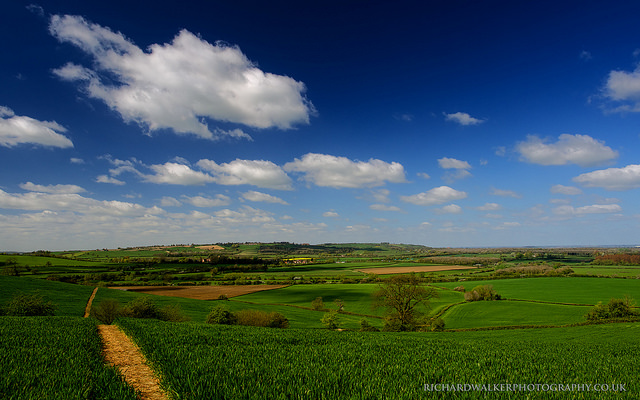
This Green and Pleasant Land by Richard Walker on Flickr (licensed CC-BY)
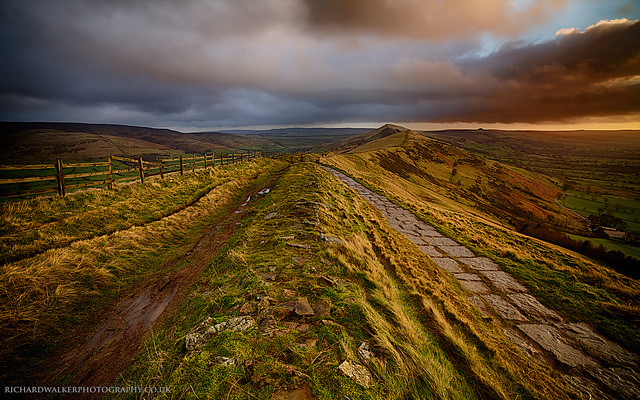
Mam Tor to Hollins Cross by Richard Walker on Flickr (licensed CC-BY)
With most subjects it is generally best to avoid direct light from the camera position e.g. the pop-up flash. This gives very flat lighting with few shadows, and hides the form of your subject.

Lit with the camera's pop-up flash - lighting is very boring and flat
Lighting from an angle works much better as the light is less even as it falls across the subject. It creates shadows and highlights, bringing out the dimension of the subject.
Lit with off-camera flash, the image appears much more '3D'
Don't be afraid to edit
There are two types of editing you can do with your photos. The first is editing in the form of choosing which photos to share, and which to keep to yourself (or simply delete).
When you see the work of a great photographer, you need to remember that they heavily edit the selection of work to show. They may take hundreds of photos on a shoot, but only share two or three images from the shoot.
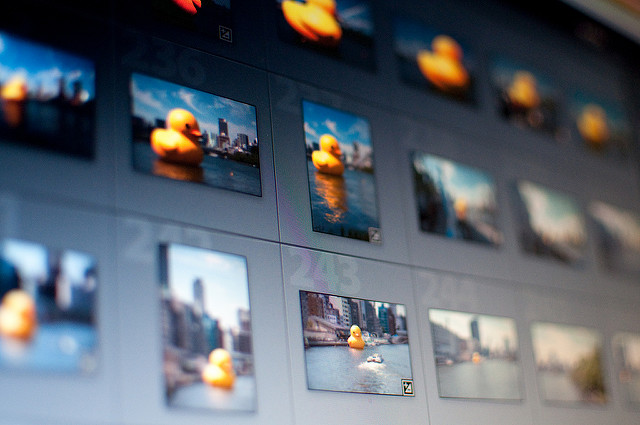
Lightroom by Yu Morita on Flickr (licensed CC-BY-SA)
No-one wants to look through hundreds of similar images, especially if some aren't that great. So share only your very best work. Think about what makes those pieces better than the others, and what could make them even better still. This will help you improve your photography.
The other type of editing is changing the photos to improve them. Unless you're a strict documentary photographer (or entering a competition), there is nothing wrong in altering your images. Even radical changes such as changing the background completely are fine. You make the rules as to what is acceptable and what is too much in terms of post processing.
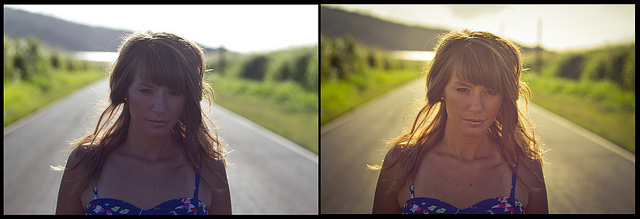
Before and After by Steven Worster on Flickr (licensed CC-BY-ND)

before-after express by b.t.photo on Flickr (licensed CC-BY)
Where you need to be careful with post processing is if you're performing fixes on the image rather than enhancements. If you're constantly cropping your photos because the subject isn't large enough in the frame, for example, that's a problem you should be solving in-camera, not in post processing.
So, do edit your photos to improve them. But if you spot a mistake you're making at the time of the shot, learn from this to improve your photography and get it right in-camera next time.
As a final note, don't work too hard with the goal of just 'improving your photography'. Photography should be fun and enjoyable. If you stress too much about trying to get everything perfect you'll loose the enjoyment. And in turn, that will often actually result in you ending up with worse images than you would if you were enjoying yourself while shooting.
Do work to improve your photography skills, but make sure you have fun doing it.


