Why does the sky often come out white in my photos?
This is a very common problem that almost everyone will come across. You take a photo of a scene with a nice sky, but the photo comes out with a white or very bright pale colored sky.
The issue here is that your eye has a much greater dynamic range than your camera. Dynamic range is the range of tones from dark to bright. Our eyes can see a wide range of tones, while a camera can only record a limited range. Any tones that exceed the top of that range come out as pure white, any below the bottom come out as pure black.
Thankfully, there are quite a few different things you can do to remedy this situation and capture a scene in which both the sky and foreground are properly exposed.

Don't shoot against the sun
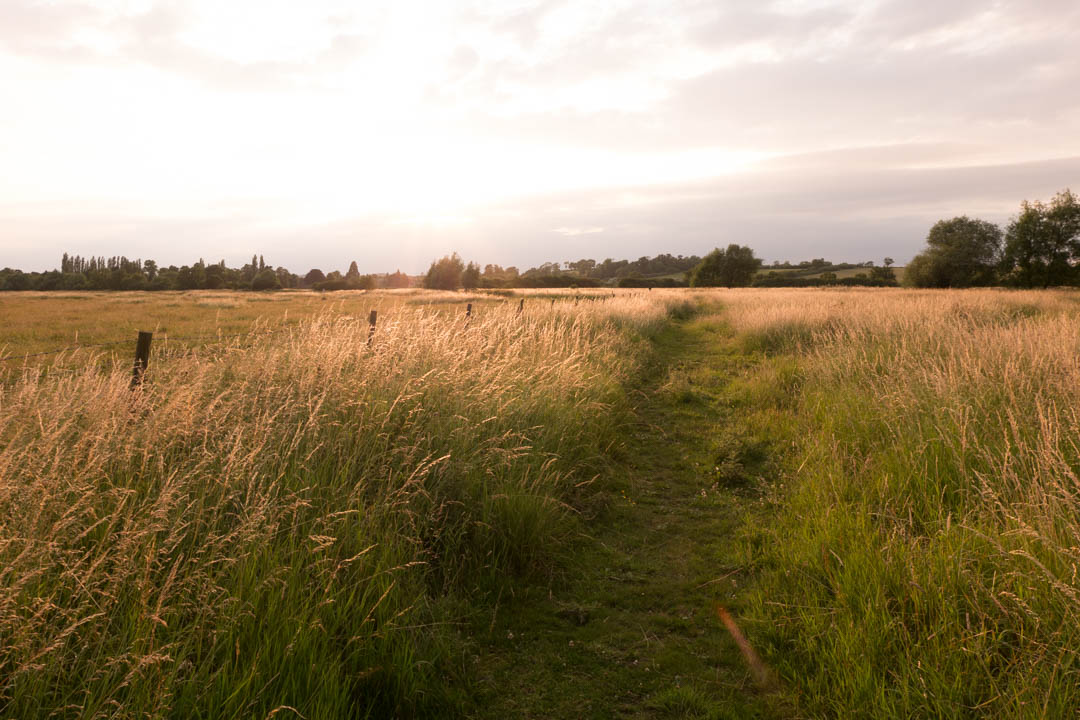
This is probably the easiest solution, though not usually the best solution, since it limits your photography. If you shoot towards the sun, then the sky will be very bright around the sun, blowing it out into white.
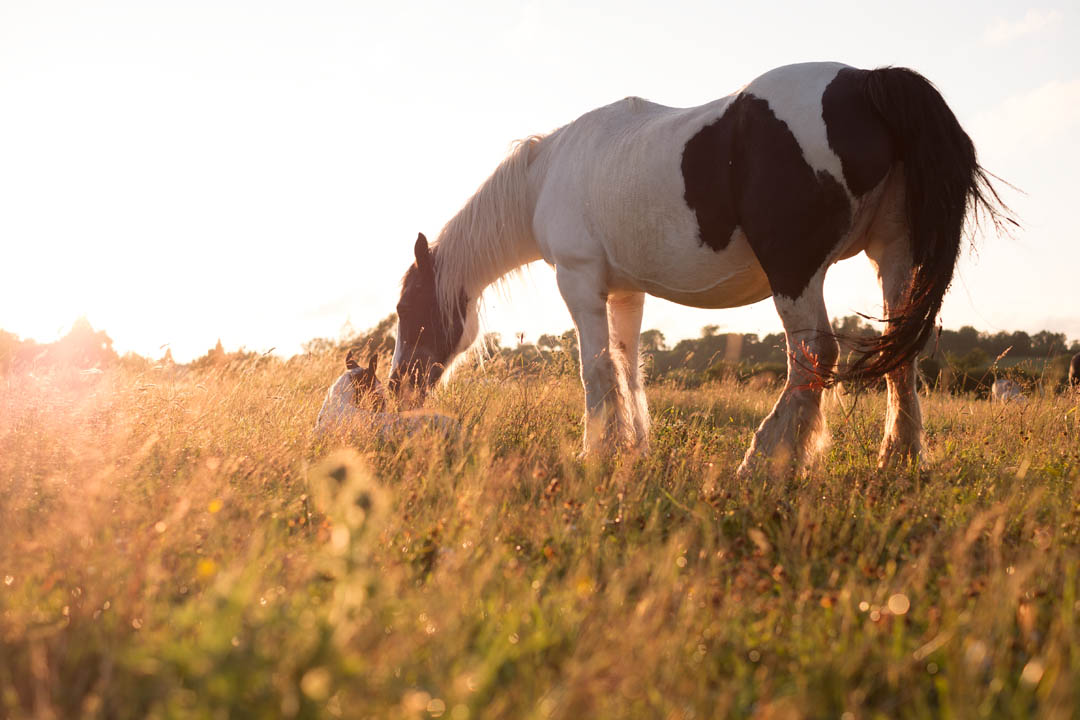
Shooting towards the sun, the sky is blown out white when the image is exposed for the subject
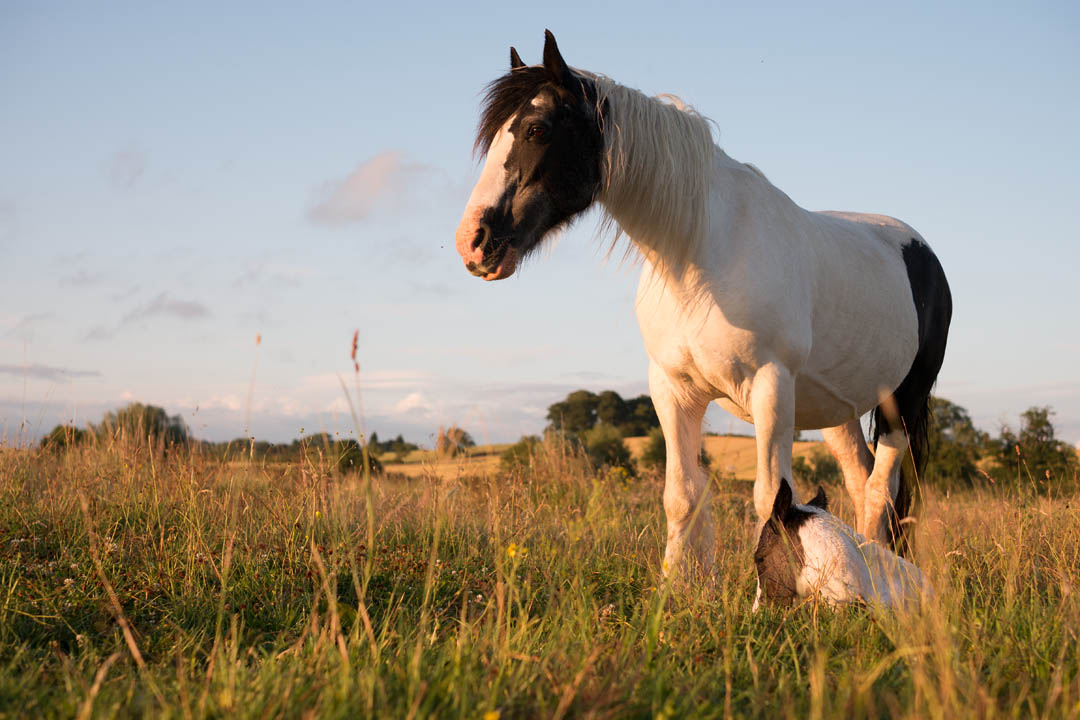
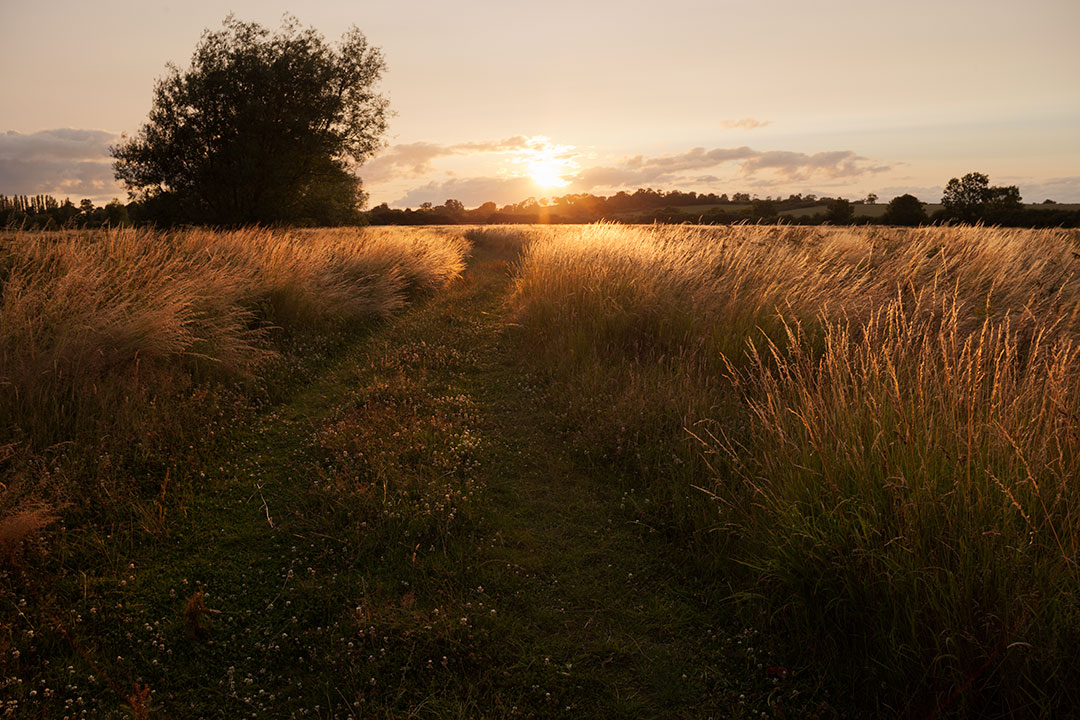
Shooting away from the sun, both the subject and sky fall within the exposure range of the image
If your subject is in shadow, which is quite likely when shooting against the sun, then choosing an exposure for the subject compounds the issue even more. The correct exposure for a subject in shadow is much greater than the correct exposure needed for the sky, resulting in a white sky.
Light your subject
If you can add light to your image, you can then expose for the sky, and add light to your subject so they are still exposed correctly. This won't really work for large subjects, as they are too difficult to light, but is a common technique used in outdoor portrait photography.
Exposed for the subject, the sky is overexposed
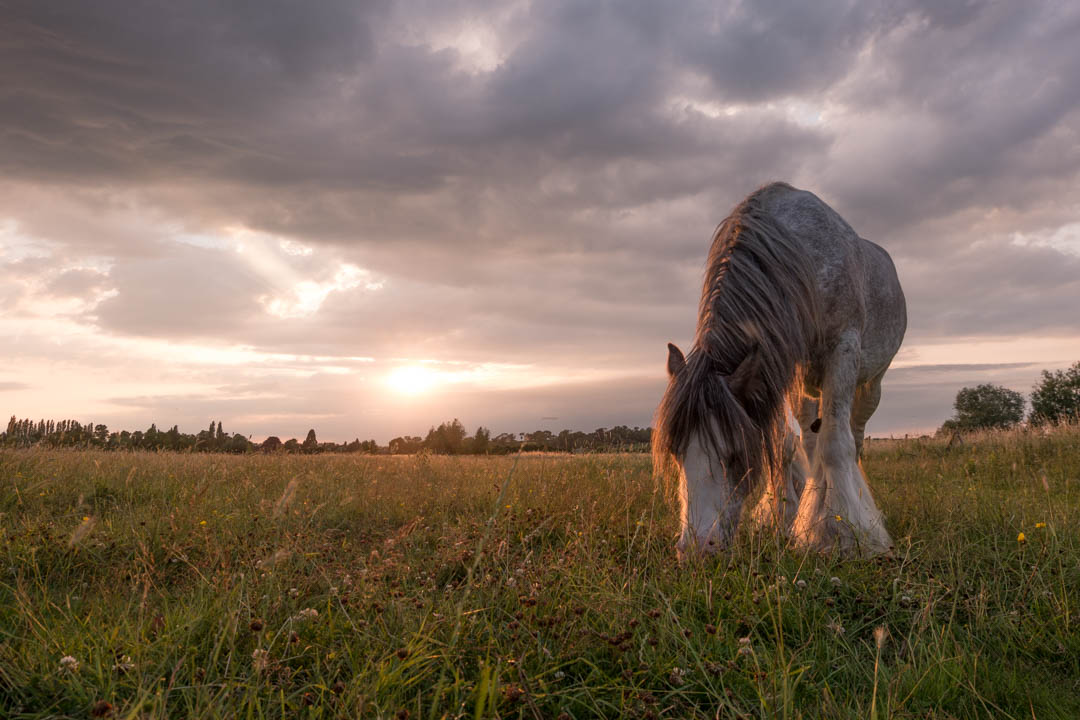
Exposing for the sky but adding flash to light the subject creates a more balanced exposure
In terms of adding light, sometimes just a reflector, used to reflect light back at the subject, can be enough. Otherwise a flash will work well. I wouldn't really recommend using the camera's built-in flash (though it is better than nothing) as the lighting can be quite flat. Ideally an external flash with some form of diffusion will work best in terms of creating a pleasing image.
Darken the sky
Instead of brightening your subject, you can darken the sky. This is a technique commonly used in landscape photography. Generally this is done by the use of a graduated neutral density filter. This is a filter that is clear up to the center, then gradually gets darker towards the top.
By positioning the filter in front of your lens so that the dark area of the filter covers the sky, the brightness of the sky will be reduced. This results in a photo where both the landscape and sky are exposed nicely.
Without a split ND filter the sky in this scene was overexposed

By adding a split ND filter the sky was darkened to bring the exposure in line with the landscape
Expose for the sky and brighten the rest of the image later
This solution can be carried out in camera, or later, using image editing software. The idea is that you take the photo so that the sky is exposed correctly (e.g. spot meter the sky or use exposure compensation as necessary). This will result in an image where the foreground is very dark, so you then brighten the foreground.
Most cameras allow you to do this to some extent in-camera. Look for an option in the camera menus named something like 'Auto lighting optimizer' or 'Dynamic range optimization'. Turn this on, and then your camera will automatically underexpose your photos and brighten the shadows.
Sometimes the in-camera method is not strong enough, or maybe you just like to have more control over exactly how the shadow areas are brightened. In this case you can use image editing software to boost the shadows. Most software allows shadows adjustments (sometimes termed as shadow fill), or you can use other tools such as Levels or Curves.
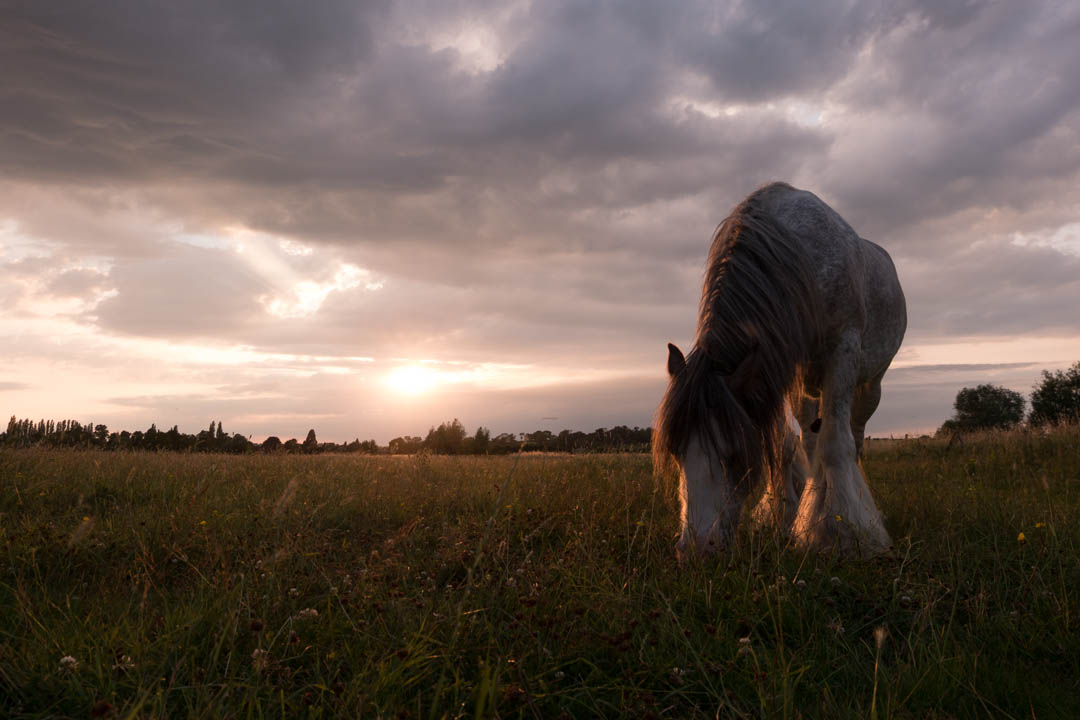
Image exposed for sky without any adjustments
Same image with shadows pulled up
The issue with this technique is that the more you brighten shadows, the more noise will become visible in those shadows. However, modern cameras can often cope quite well with this treatment when used at a low ISO setting.
Shoot RAW
If your camera supports recording photos in a RAW format, this can help record more detail in the sky. RAW format records more data than can fit in a standard JPEG file. This includes more highlight data, so where a JPEG image might record pure white for the sky, a RAW file might still contain color and tone information.
When converting the RAW file to a viewable format, such as JPEG, the highlights can be pulled down in software, revealing the extra highlight data. This is dependent on how overexposed the sky is in the image. Most RAW files contain around 1 stop of highlight data over a JPEG file.

Out of camera JPEG vs RAW with highlight recovery
Similarly, RAW files contain more shadow data than a JPEG file. So they are also preferred if you want to underexpose the image for the sky and then brighten the shadows as per the previous tip.
Use exposure fusion or HDR
Lastly we come to exposure bracketing or in-camera HDR. With this method you set your camera to take multiple photos at different exposure levels. Typically this would be one photo exposed normally, one photo exposed for shadow detail, and one photo exposed for highlight detail (the sky).
The images are then combined to keep the best parts of each image and end up with an image that is properly exposed, with no part too dark and no part too bright. This process can be done automatically in-camera on many models, or done using image editing software later.
There are two different techniques for blending the photos together. One is High Dynamic Range Imaging combined with tone mapping, the other is exposure blending / exposure fusion. Most modern cameras offer either one or both options, you select your method, then take your shot and the camera will automatically do all the work.
If your camera does not offer this option, or you prefer to take more control over the process, then you can to use auto bracketing to take the different exposures. Depending on how bright the sky is, how dark your subject is, and the exposure spacing your camera allows, you may need to take a number of shots to cover the full exposure range of the scene.
The exposures can then be blended together in image editing software. This can be done through simple use of layer masks, masking in the areas of each exposure that you want to keep.

Exposure bracketed images
Bracketed images blended together into a single image
Or it can be done by creating a HDR image from the exposures using software such as Photomatix. The HDR image must then be tone mapped to compress the range of captured tones down to what can be displayed on a monitor. This is quite a large subject in itself.
Or a third option is using exposure fusion to blend together the images. Software such as TuFuse or Enfuse can be used to this end. This blends the exposures in a way similar to using layer masks, but does the job automatically.
One thing to note with exposure fusion / HDR is that it works best with a static subject and the camera on a tripod. If the camera or subject moves during the exposures, this can create alignment issues when the images are blended together. This is true for both in-camera HDR / exposure fusion or bracketing shots and then creating an HDR / exposure fused image later in software.
Does it actually matter if the sky is white?
So now you know when you're likely to see the problem of a white sky, and how to fix it. Don't think that a white sky is bad in all situations though. It can work well for some subjects (such as flowers and people) to create a high key effect.

Lauren & Poss-12 by johnhope14 on flickr (licensed CC-BY)
If you are shooting in misty / dreary weather, a sky that is not white might just be plain gray with no texture. If there's no detail in the sky to capture, then it doesn't really matter if it's blown out white or not.
And in many situations, the sky is an unimportant part of the image. If photographing a subject with the sky in the background, it's important that the subject is exposed properly. Whether the sky is deep blue, gray, or blown out white doesn't really matter.
So, don't sweat it too much if the sky is blown out in your photos. If you want to capture detail in the sky, try one of the tips above (or a combination). Otherwise just focus on getting the exposure for your subject correct (and of course the composition), and don't worry if the sky is overexposed.


