Graduated Neutral Density Filters
Particularly for landscape photography, you can often come across a scene where the range of light is too great for your camera to capture. You end up having to choose between a properly exposed landscape and a blown-out white sky, or a properly exposed sky with a black silhouette of a landscape.
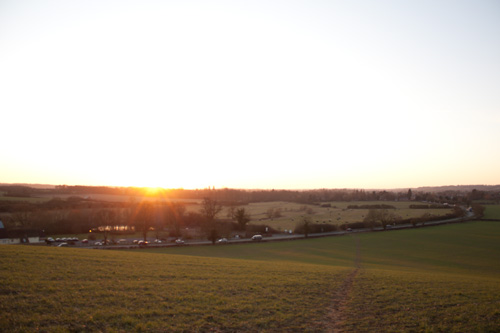
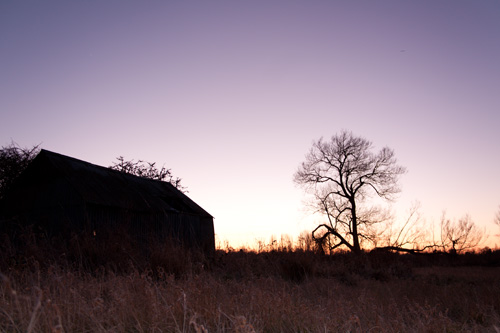
Photo with no filter - the landscape is exposed correctly, but the sky is too bright
One solution to this problem is graduated neutral density filters.
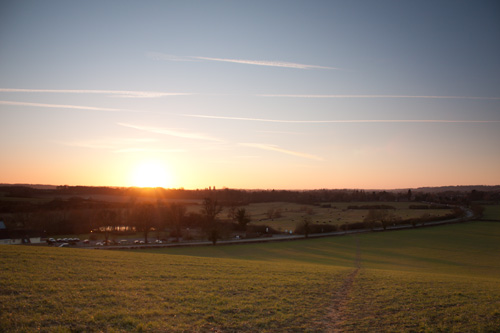
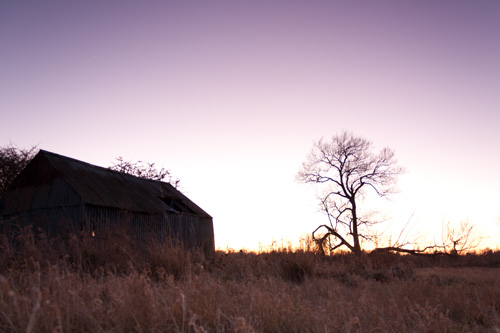
Photo taken with a graduated neutral density filter to darken the sky
These filters can be attached to the end of your camera's lens, with one half fully transparent, while the other half is darker. You position the filter so the darker half is over the area of the photo you want to reduce the exposure of (e.g. the sky).

Graduated split neutral density filters – ND0.3, ND0.6 and ND0.9
Neutral density filters are rated by their optical density, where 0.3 is equivalent to a one stop reduction in light.
- ND0.3 = 1 stop
- ND0.6 = 2 stops
- ND0.9 = 3 stops
For example, you might have an image where the correct exposure for the sky was 1/160s shutter speed with an aperture of f/8. But for the landscape, the correct exposure might be 1/20s. That would be a 3 stop difference in exposure. So you would want to use an ND0.9 filter to equalize the exposure between the landscape and sky.
Graduated Neutral Density filters are available in two varieties, hard edge and soft edge.
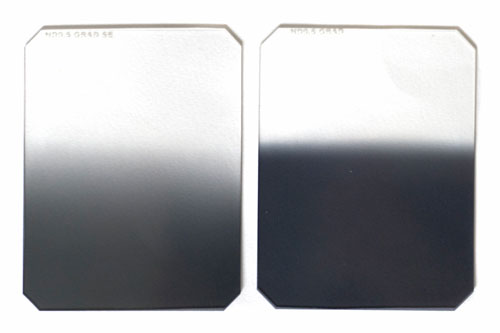
Hard edge and soft edge graduated split neutral density filters
The hard edge versions are better for where the sun is near the horizon. Whereas the soft graduated neutral density filters are more suited to when the sun is higher in the sky. They can also be used for effect when you want a sky that gradually darkens towards the top of the frame.
If there is an object that comes up from the landscape and is in front of the sky, a hard edge filter will show quite an obvious transition on the object. Soft graduated filters may be better in this situation.
No filter
ND0.9 hard edge graduated neutral density filter
ND0.9 Soft edge graduated neutral density filter

No filter but exposure bracketed and blended in Photoshop
A problem with graduated neutral density filters is that the graduation is in a straight line. So if you are trying to photograph something where the split between the subject and the sky is not straight, e.g. mountains, you may have some problems.
In cases like this you may be better off to use bracketing on your camera and then process the images for exposure later. For example, HDR, exposure fusion, or blending the images together manually using layer masks.
Graduated Neutral Density Filters are available in both screw-in versions, and slot-in versions for filter holders. The versions for filter holders are preferable because they can be moved up and down, allowing you to place the horizon / filter transition area anywhere you want in the frame.
With the screw in versions though, you are stuck with the transition wherever the manufacturer has put it. Often this is in the middle of the filter. Centered landscapes don't usually work as well as ones using the rule of thirds.
Thanks to the advent of HDR photography, and improvements in image editing software, graduated neutral density filters are no longer as essential as they once were. Still, they allow you to get an evenly exposed photo out 'in the field', saving time sitting at the computer to get the effect later.
Using filters also works much better for photos containing movement, e.g. leaves on a tree blowing in the wind. Processing an HDR of images that contain movement can lead to some strange looking effects. But with a filter you capture the whole scene in one shot, so no need to worry about movement between shots.


