Get It Right In-Camera
With today's modern cameras and image editing software, there is a lot we can do to rescue a poor photo. Images can be brightened considerably without ruining the image if the exposure was wrong. If we didn't pay attention to a messy background, we can fix it in software using the clone tool or content-aware fill.
But we mustn't let ourselves become "lazy photographers. Fixing a photo in software can take a lot longer than just spending a little more time to make sure we get it right in-camera. In this article I'll share a few points that you should consider when taking the photo, rather than trying to fix them later.
Please note that the photos included in this article are meant to demonstrate where the photographer has got it right in camera. I think this makes for a more interesting article than showing bad photos where the photographer got it wrong.
Crop
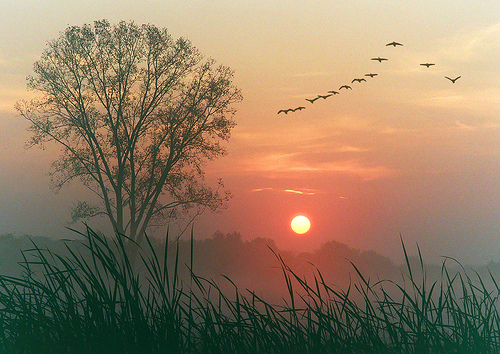
Today's high megapixel cameras capture such large images that you can easily crop a photo on your computer to enlarge a subject, or just to alter the framing somewhat. However, it is better to do this in camera.

This is my human, not yours! by Tomi Tapio on flickr (licensed CC-BY-SA)
If your subject isn't large enough in the frame, try to get closer or use a longer focal length lens. In some cases this won't be possible, but in most cases where people crop images, they could have just zoomed in a bit more or moved nearer the subject.
Likewise, make sure you get your composition and framing correct in camera. It is a lot quicker to get it right while you're shooting than it is to correct it later.
The exception to this would be when you want to use an unusual aspect ratio, in which case there is no choice but to crop the image later.
Exposure
If you shoot RAW format, you might not worry too much about exposure. You can pull back highlight information from the RAW data, and shadows can be brightened with only a minimum of image noise. But still, why go to this trouble when you can get it right at the time of shooting?
Autumn dawn by James Jordan on flickr (licensed CC-BY-ND)
Simply review the image after shooting, and check the exposure is correct. If there is a problem, then adjust the exposure as necessary and reshoot.
I like to use two image review features for checking the exposure - Histogram and Highlight clipping warning. On some electronic viewfinder (EVF) cameras these tools are available in the viewfinder before you take the image, so you can get the exposure correct without having to take a test image. You can read about how to use the Histogram and Highlight clipping warning tools here: Using your camera’s image review playback: Check the exposure.
White Balance
White balance is another one of those settings where you might not worry about it too much when shooting in RAW format. You can just set the correct white balance as part of the RAW conversion process. And doing this does not really add any extra time to the workflow process.
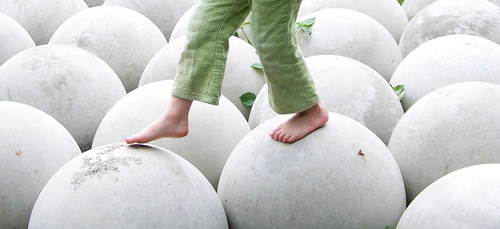
Free Child Walking on White Round Spheres Balance Creative Commons by D Sharon Pruitt on flickr (licensed CC-BY)
Setting the correct white balance at the time of shooting can still be a good idea though. It will enable you to get an accurate preview of what the image will look like on the camera's LCD. And, as I noted in the article What is White Balance? the correct white balance can help when judging exposure, as the histogram is based on the preview image, not the RAW data.
Shutter speed (avoiding blur)
If you are shooting handheld, it is important to pay attention to the shutter speed you are using if you want to avoid blurry photos. The faster the shutter speed, the less likely your image is to suffer from blur caused by camera shake or subject movement.
A good rule of thumb for avoiding blur caused by camera shake is that the shutter speed should be at least one over the 35mm equivalent focal length of the lens you are shooting with. So, if I was using a lens with a 35mm equivalent focal length of 100mm, I would want a shutter speed of at least 1/100s, and preferably faster than that.
Some superzoom and compact cameras do not tell you the 35mm equivalent focal length you are shooting at, instead they tell you the current zoom factor, e.g. 2x zoom. But camera manufacturers do tell you the widest and longest 35mm equivalent focal lengths that the camera's zoom can achieve. You can use this to work out the 35mm equivalent focal length.
For example, let's say we are using a camera that has a wide angle equivalent to 28mm. If we are taking a photo at 2x zoom, then our current focal length is around 2x28 = 56mm. So for a sharp handheld image, we want a shutter speed of at least 1/56s.
If you are taking photos of moving subjects, remember also to take that into account when checking if your shutter speed is fast enough. A fast moving subject requires you to pan with it, or use a fast shutter speed to freeze any motion.
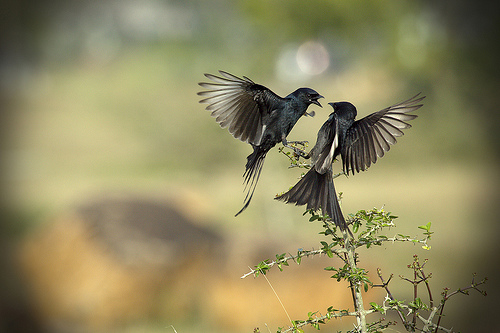
♥ The Drongo Love ♥ Happy Valentine's Day ♥ by VinothChandar on flickr (licensed CC-BY)
Fixing blurry images is incredibly difficult, so this is very important to get right in camera.
Background
When composing the image it is easy to focus on the subject and forget about the background. But fixing a bad background later can be a lot of work.
While you're lining up the shot, make sure you check the background for any distracting elements that might draw the eye away from the subject. Then recompose the photo or move the subject to eliminate any distractions.
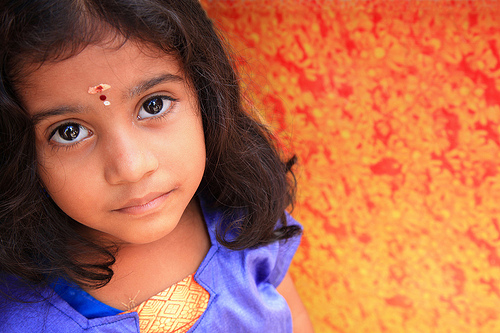
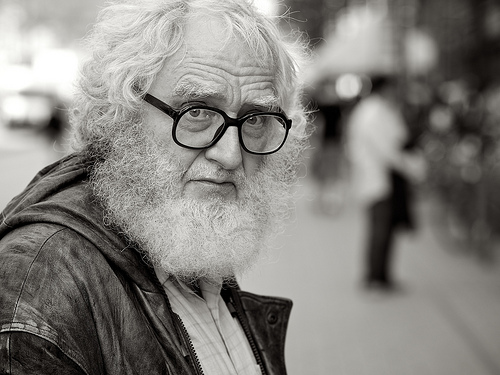
What a look! (Explored - Frontpage) by VinothChandar on flickr (licensed CC-BY)
It's not only the background you should pay attention to, but also check for any distractions in the foreground, and to the sides of the subject as well.
Shadows
Be sure to notice the way the shadows fall on your subject. This is particularly important for portrait photography. Strong shadows caused by harsh light can ruin an otherwise good portrait. Especially if the shadows fall in an unflattering way (e.g. harsh shadows underneath the eyes).
Changing the way a shadow falls after the fact is practically impossible, so make sure you get it right in camera. For portraits, shooting under soft diffuse light (e.g. on a cloudy day, in the shade, or using light modifiers to diffuse the light), can often result in a much better image.
I know sometimes we don't have the time to get all the settings just right, or we might miss the shot. But for most subjects, spend as much time as you can to make sure you get it right in camera. You'll be thankful later when you don't have to spend hours at the computer fixing your shots.


