How to add a vintage haze effect to your photos
Photos with a soft, low contrast hazy look seem to be very popular at the moment. You can purchase packs of film presets for most image editing software that allow you to easily create this look.
I've also seen several Photoshop tutorials that show how to create a similar look, making use of various adjustment layers. However, the look can also be achieved using only RGB curves, which are available in Adobe Camera RAW, Lightroom, Photoshop, GIMP, and the majority of image editing software. No need to purchase anything additional, and no need for multiple layer Photoshop documents.
In this article I'll cover both creating the hazy look in-camera and using RGB curves. Plus, I'll explain why the curves adjustments create the effect, so you'll better understand how you can modify the curves to fine-tune the effect.
Creating the haze effect in-camera
Creating a haze effect in-camera is pretty simple - you need to photograph shooting into a strong light source, or with a strong light source just outside the frame. Having a strong light source just outside the frame increases the chances of light rays bouncing around inside the lens, and creating veiling flare.
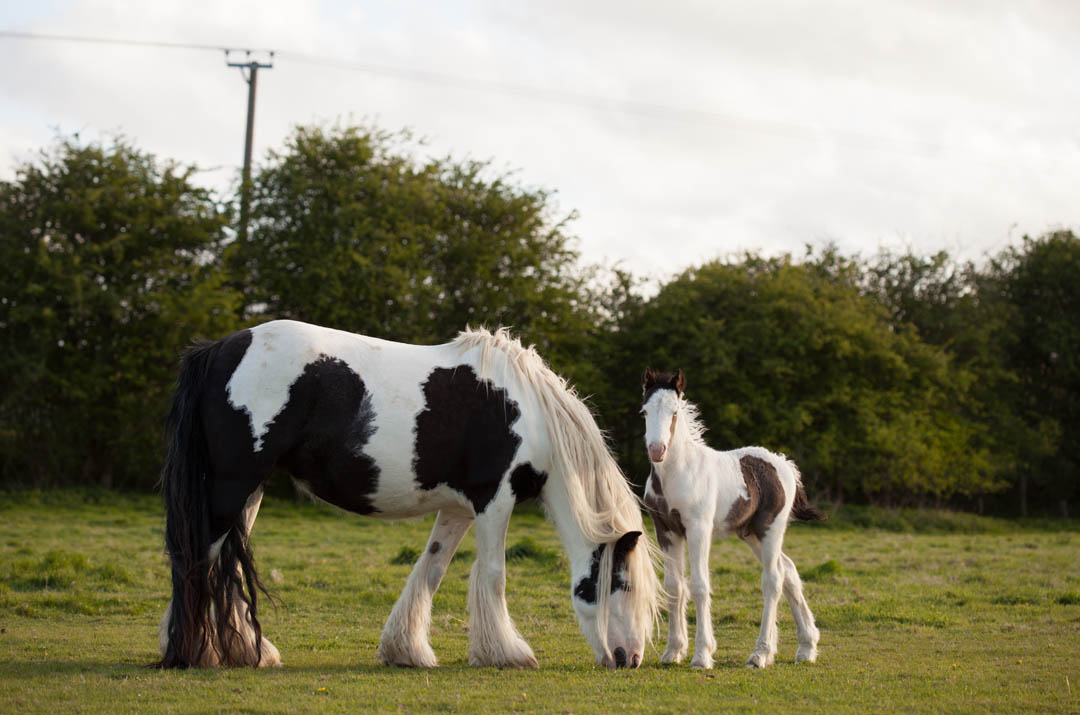
Image not shot into the sun - it is clear and contrasty
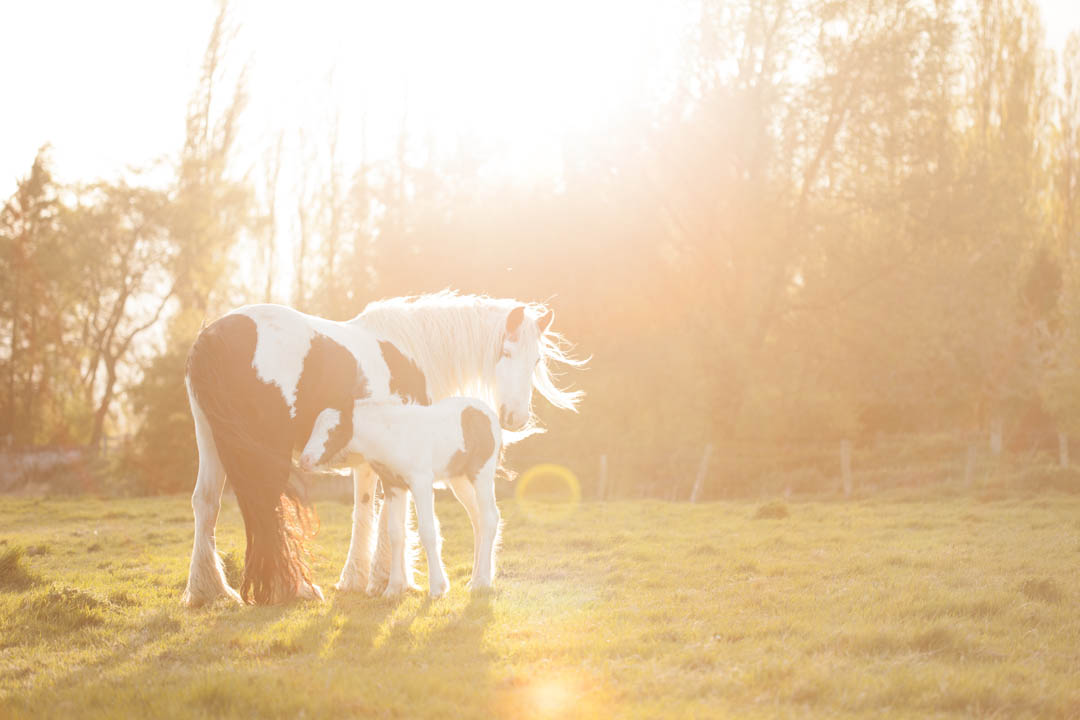
Image shot towards the sun - veiling flare creates a low contrast haze effect
It is the veiling flare that creates this low contrast hazy look. You are more likely to get veiling flare when shooting with old or cheaply made lenses, or with a cheap UV filter attached to the lens. Modern lenses and filters have many anti-reflective coatings in order to reduce the possibility of flare, which works against you when you are purposefully trying to capture an image with veiling flare.
A dirty lens (or filter) can also increase the chance of veiling flare. The main difficulty with achieving this look in-camera is that needing to have a strong light source just outside (or just inside) the frame rather limits what and where you can shoot.
Creating a vintage haze effect using RGB curves
Finding RGB curves in your image editing software
For the purpose of this tutorial I'll be using Adobe Camera RAW to process the image, however any image editing software that supports editing RGB curves can be used. Below I've detailed where to find the RGB curves adjustment in popular image editing software:
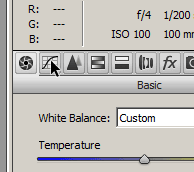
- ACR
Curves is the second adjustment panel. When on the panel select the Point tab.
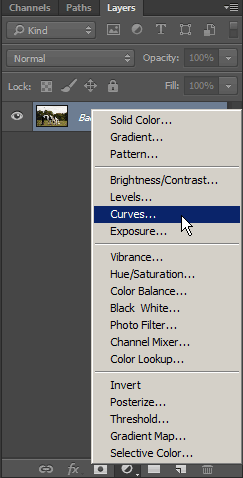
- Photoshop CS / CC
Click the half white / half black circle at the bottom of the layer palette to add an adjustment layer above your image, and choose Curves from the list of options.
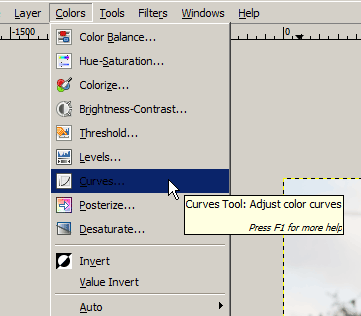
- GIMP
Go to Colors > Curves
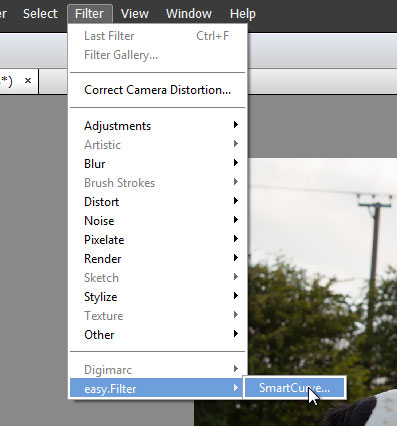
- PSE
Photoshop Elements doesn't natively support curves, you'll need to install the Smart Curves plugin and restart Photoshop. You can then access curves by going to Filter > easy.Filter > SmartCurve
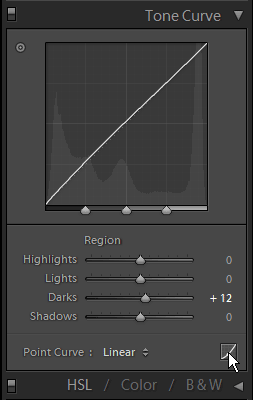
- Lightroom
By default 'Tone Curve' should be the second panel down, on the right-hand side of the Develop module, below the Basic panel. You need to be using a point curve, where rather than Highlights, Lights, Darks, and Shadows sliders, it just has a Channel option. You can change the curve type by clicking the little curve icon at the bottom right corner of the Tone Curve panel.
- Other software
Other image editing software may well include RGB curves editing. If you're not sure, just search the web for
Software name RGB curves
. If the software does not feature RGB curves, but is compatible with Photoshop plugins, then you can add the Smart Curves plugin and use that.
Using curves to add the effect
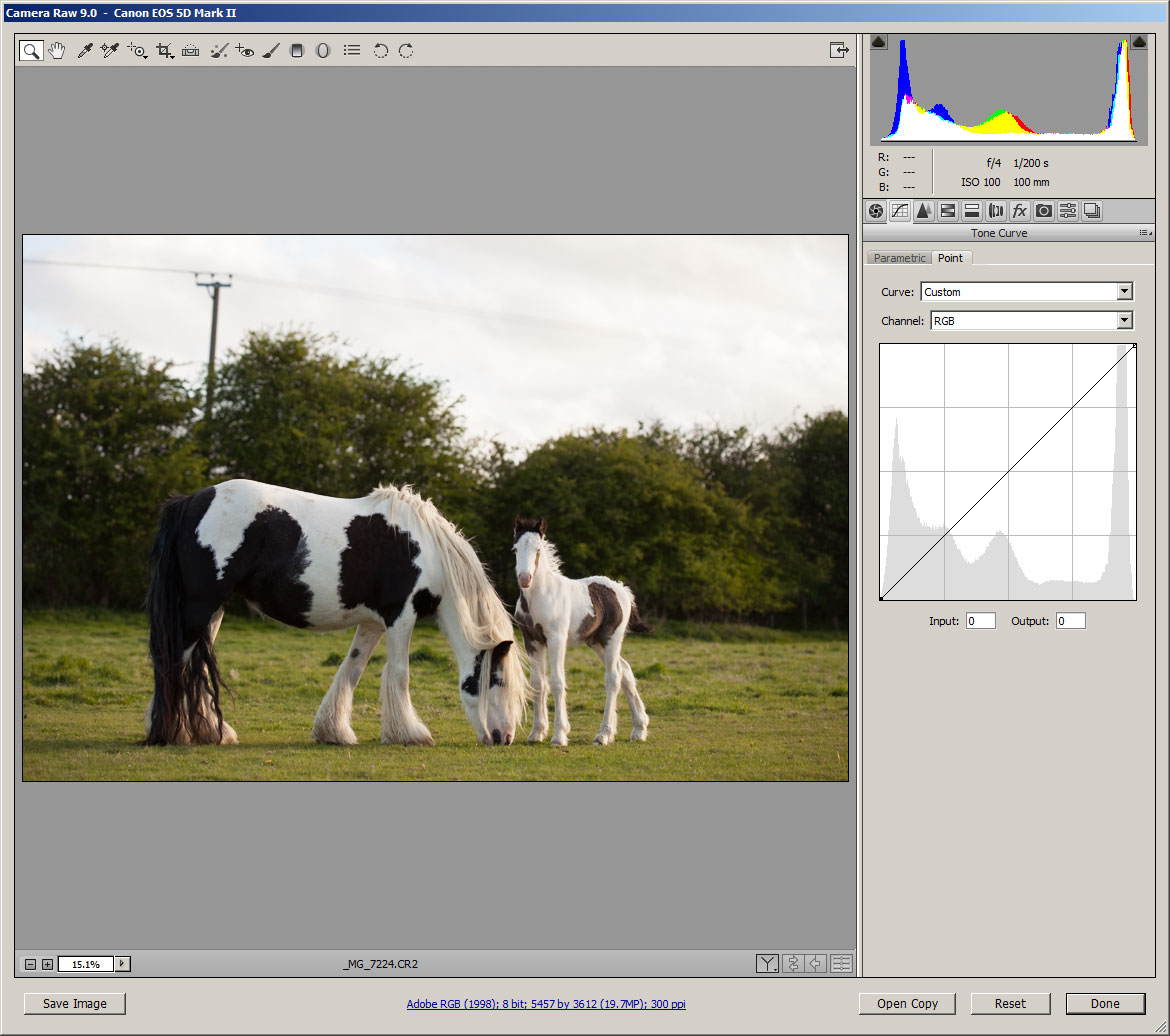
Before any adjustments
The first thing we want to do, which is the key to the haze effect, is to change the black point so that black is no longer black, but gray. This reduces the contrast of the image, giving a hazy feel. Click the point at the bottom left corner of the curve and drag it upwards.
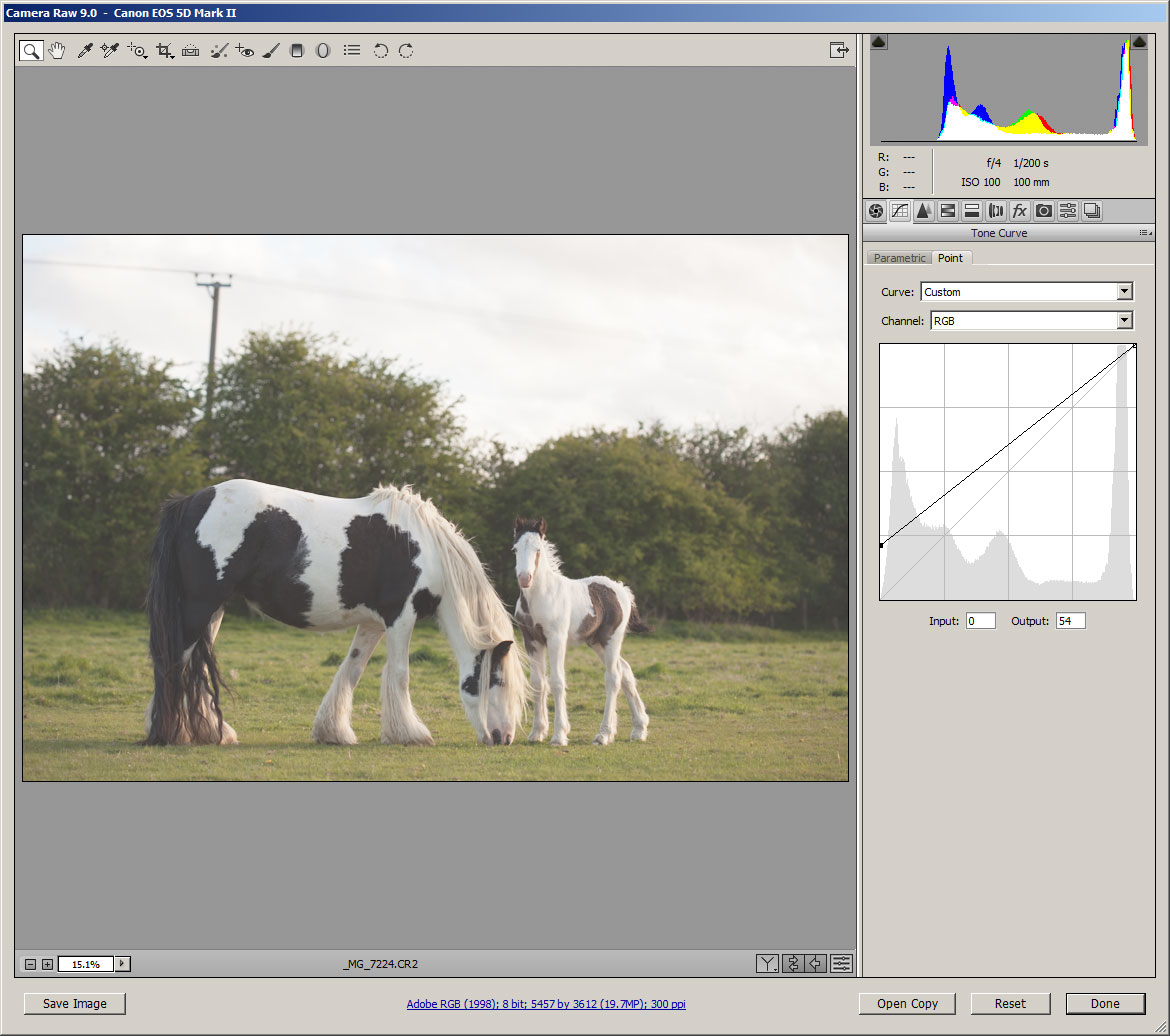
Black point on RGB curve pulled up
You can see below the curve that it gives input and output numbers. The numbers indicate the brightness level, on a scale of 0 (black) to white (255) for the currently selected point. By bringing the black point up from 0 to 54, we've changed both the black point, and the tones above it, to be much brighter.
The curve goes from black, on the left hand side, to white, on the right hand side. So by adding points to the curve at separate places (by clicking on it) we can adjust the white point, highlights, midtones, shadows, and black point separately. We're not going to do that at the moment with the RGB curve, but it is well worth knowing.
You can see how the new curve is slanted in comparison to the original 45° diagonal line of the curve. The increase in brightness we've applied by dragging up the black point brightens the shadow tones much more than it does the highlight tones.
Next we want to select the blue channel, and bring the white point of this channel down. This reduces blue in the highlights, making the image (particularly in the brighter tones) more yellow.
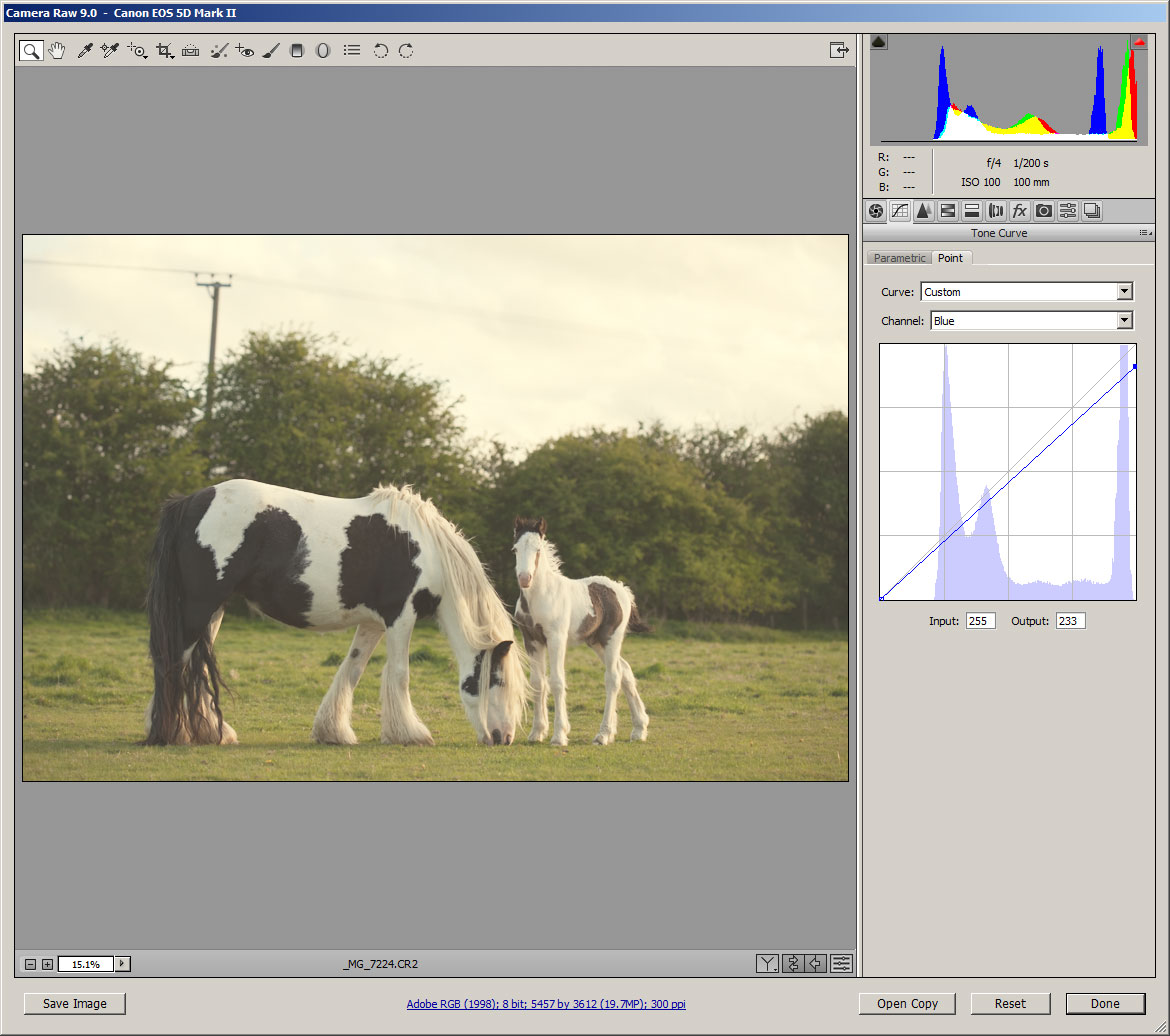
White point pulled down on blue channel curve
For the blue channel, pulling up the curve adds blue, while pulling it down adds yellow. For the red channel pulling the curve up adds red while pulling it down adds cyan. And for the green channel pulling it up adds green while pulling the curve down adds magenta.
(Technically speaking, pulling down the curve of a channel only reduces that color, and does not 'add' the opposite color. However, in terms of what it does to our images, it is easiest to think of it in terms of adding the color's opposite.)
Using this knowledge we can easily apply a split toning effect to our image, making the highlights more yellow while making the shadow tones more blue. Add an anchor point to the middle of the blue curve by clicking in the center of the curve.
Then click on the curve again to add another point between the center and the black point. Pull this point up to increase the blue tones in the shadow area, while leaving the highlights relatively unaffected.

Blue channel curve adjusted to bring up blues in shadows
Now go to the red channel, add a center point to the curve, and pull it up slightly. Combined with the blue curve adjustment, this adds more warmth to the mid tones.
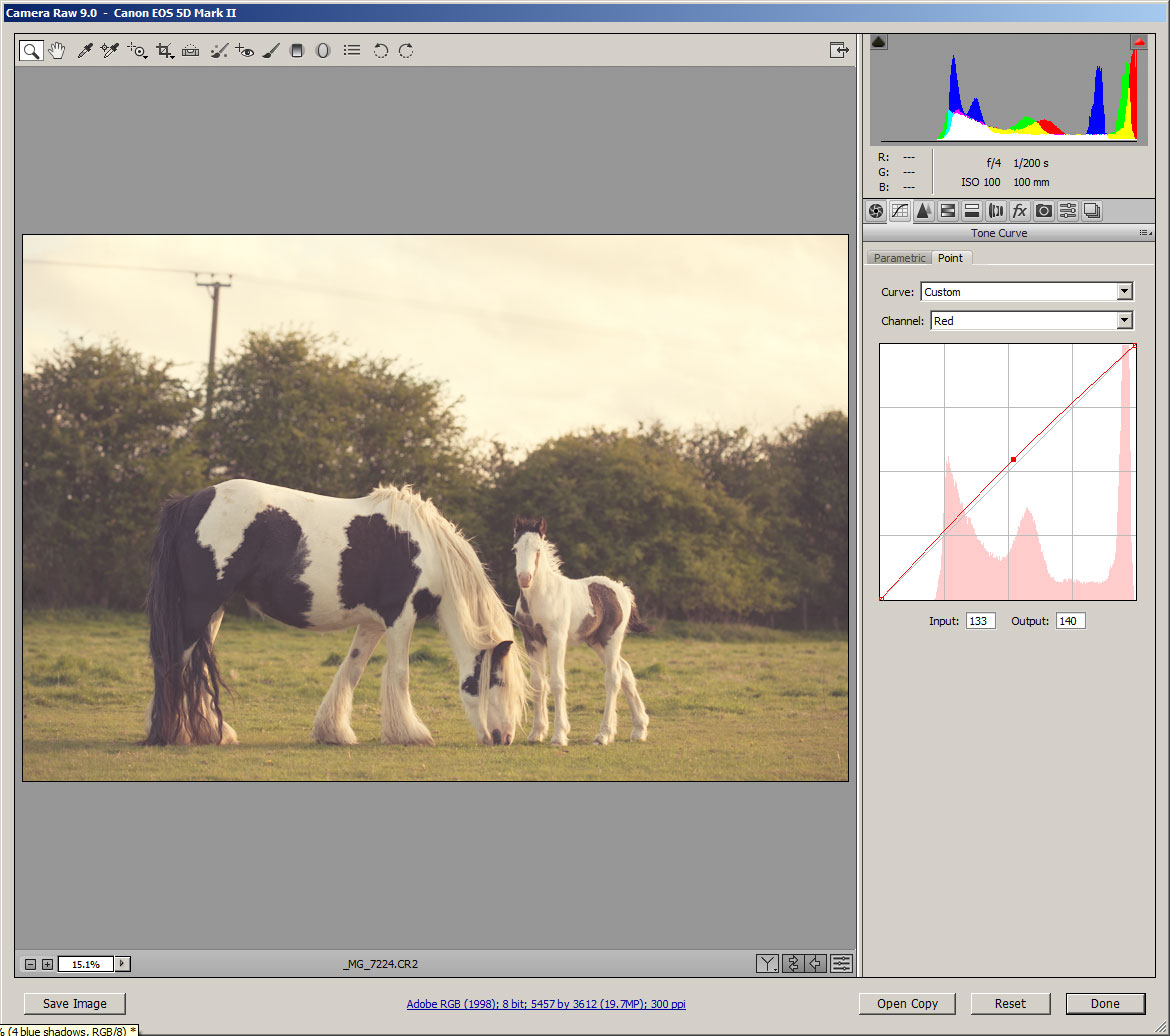
Red channel curve adjusted
I would say that the image is finished here. We've added a haze and a nice warmth, all through simple curves adjustments. You can play around with the curves to create a wide variety of different tonings. Remember that with each color channel you can add multiple points to pull the curve up or down and so control the color for the shadows, midtones, and highlights separately.
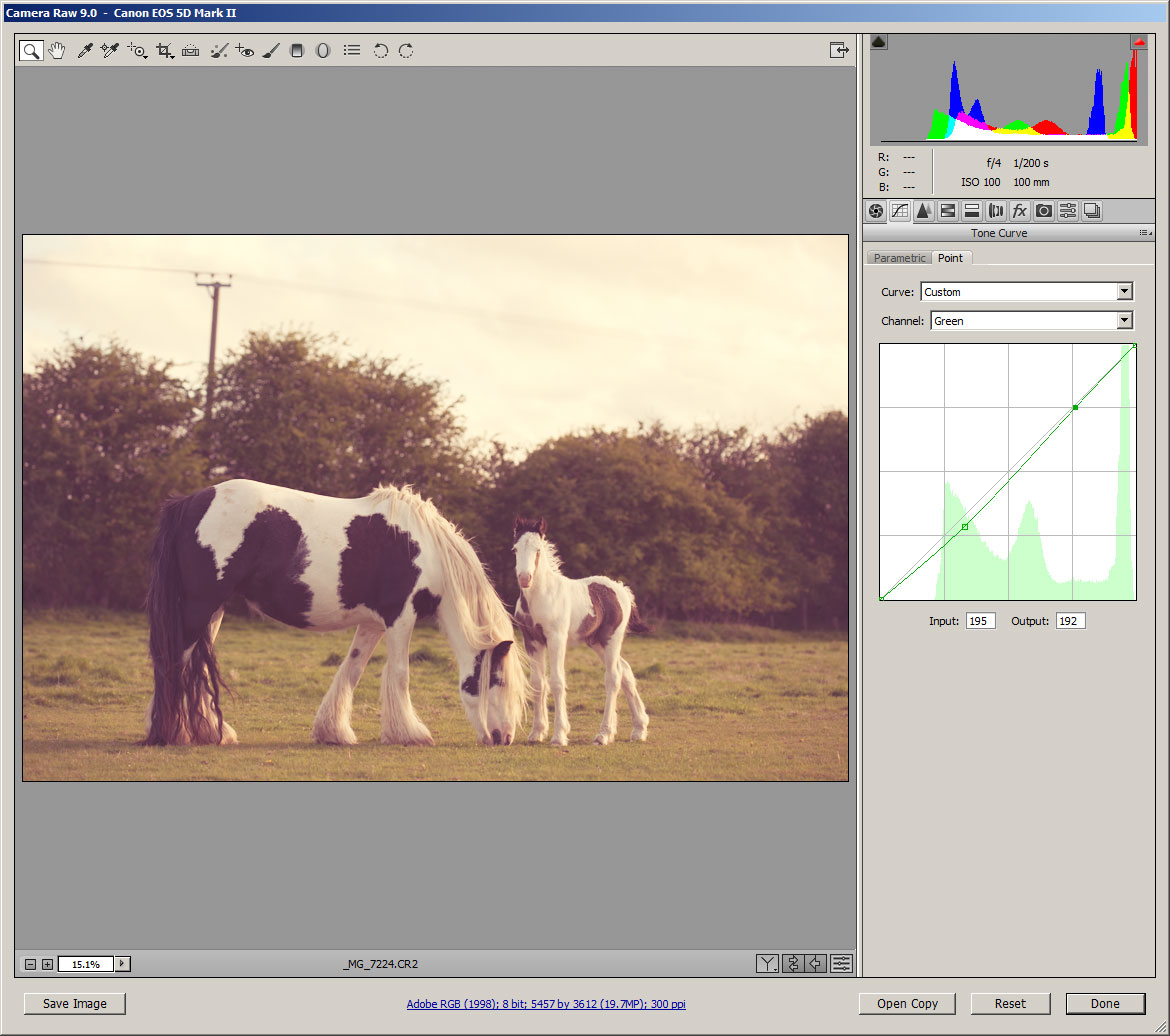
Curves adjustment made to green channel
Most image editing software will allow you to save your curves adjustments as a preset, so you can easily apply the same effect to multiple images when you've got something you like.


