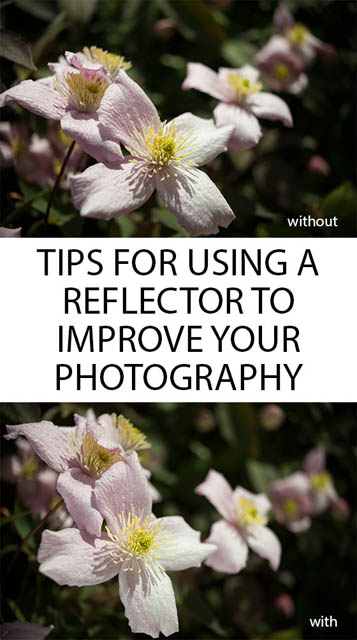
Tips for using a reflector to improve your photography
Reflectors are often used in natural light portrait photography, where they can act as an additional light source. But they can be used for much more than that. In this article we'll look at what reflectors are, some of the different types, and the various ways they can help you get better photos.
What is a reflector?
To put it simply, a reflector is anything that reflects light. In photography, whenever a reflector is mentioned, we are usually talking about a portable surface that reflects light. This could be a commercially produced photographic reflector. Or it could be a sheet of white card, or a reflective car windshield sun shade.
Because the main use of a reflector is in reflecting natural light outdoors, this means that a reflector needs to be easily transportable. Most reflectors fold up quite small, and can be easily fitted in a bag, then expanded to their full size when needed.
Commercially produced reflectors are often constructed of reflective material wrapped around a strip of spring steel. When the reflector is open, the steel strip creates a strong circular frame that holds the reflective material taut. This means that the reflected light can be quite directional - if the material was crumpled rather than taut it would reflect light off in all directions.
When not in use, the reflector can be folded in a figure of eight pattern to reduce its size, and stored in a small bag. This reduces the reflector's size by around 75% - very handy.
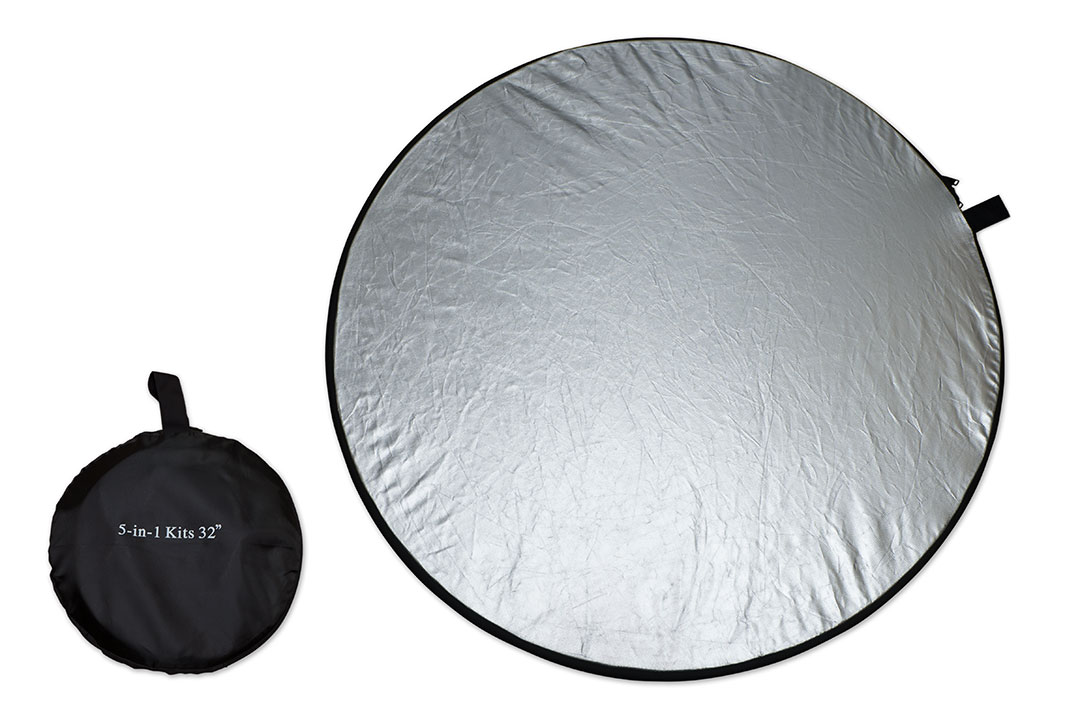
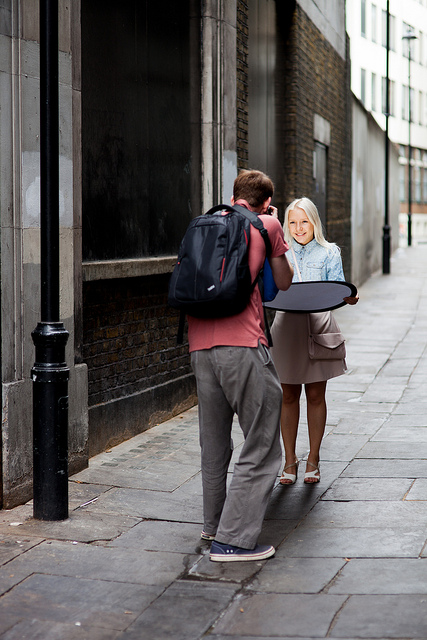
Comparison between size of reflector panel when expanded and the bag it fits in when folded down
When it comes to purchasing a reflector, you'll find there are many different types, different sizes, and different brands, at many different price points. Personally I would suggest going for a cheap 5-in-1 reflector. This will let you get started with using a reflector, and you can always purchase a larger or more expensive branded reflector in the future if you need to.
If you're after a larger reflector, then the cheapest options are large sheets of white card or reflective car windscreen sun shields. The windscreen shields are pretty cheap, and because they are rectangular in shape you can attach multiple together to form an even bigger reflective surface.
Ollie8_139 by uncle keith on Flickr (licensed CC-BY-ND) - light fired directly into a windshield reflector to create a larger, softer light source
Of course, large commercially produced reflectors are also available. These are easier to set up, look a lot more professional, but are also a lot more expensive.
When you're working in a studio (or your home), then the ability to move the reflector around is still important. But whether the reflector can be collapsed down to a small size is much less important. More rigid reflectors such as sheets of polystyrene or foamcore can be used - this may be more convenient and / or cheaper than using a collapsible reflector.

Setup by Derek Dysart on Flickr (licensed CC-BY)
Types of reflector
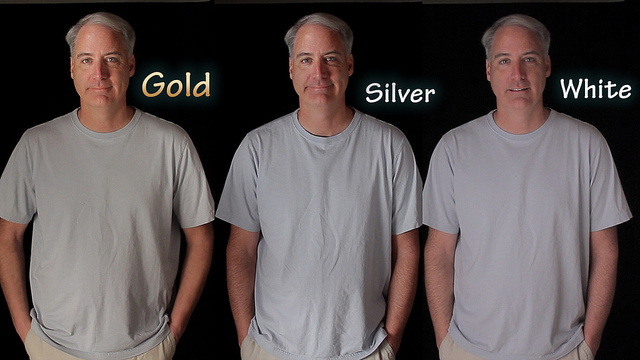
There are three types of reflector you're likely to come across - white, silver, and gold. If you purchase a 5-in-1 reflector, you'll also get translucent and black, though technically these aren't reflectors.
Oval Reflector Review by Dave Dugdale on Flickr (licensed CC-BY-SA)
White is very diffuse, bouncing back light that is soft. However, because it bounces light in all directions, the amount of light that bounces back towards the subject is quite low. You need to position the reflector very close to the subject for it to have much of an effect.
Silver is much more reflective than white, having a semi-diffuse surface. And so if it has bright harsh light (such as sunlight) hitting it, it will reflect back a stronger and harsher light than a white reflector. It's not like a mirror though - the reflected light will still be much softer than the light source it is reflecting. When used close to the subject, the effect of a silver reflector can sometimes be too much, in which case moving the reflector a bit further back from the subject will produce a better, more natural result.
Gold is virtually identical to silver - it is semi-reflective, so you have to be careful with its use and positioning to avoid introducing too much bounced light. The difference between gold and silver is that silver is neutral in color, while gold brings a warm tone to the reflected light. This can be useful for simulating the golden tones of sunset / sunrise light at other times of day.
Translucent is not used as a reflector, but rather a diffuser. You position it between the light and your subject. As the light hits the diffuser it spreads out, creating a softer light source. You do loose some of the light by using a diffuser, but it can work very well to diffuse harsh sunlight.
awaiting by John D. on Flickr (licensed CC-BY)
Black is not a reflector, rather it is the opposite. If your subject is standing near something that is reflective (such as a wall in a room), you can place the black 'reflector' between the reflective surface and your subject. This then blocks the light from reflecting back at the subject, creating deeper shadows on that side of the subject. It can also be used as a 'flag' when shooting with artificial light, to prevent the light spilling off on side (such as preventing a light aimed at your subject from spilling onto the background).
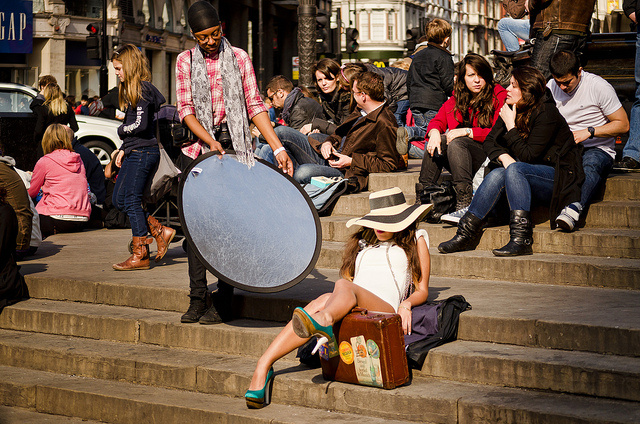
Test Shot by Karl Zemlin on Flickr (licensed CC-BY) - a black reflector was used to flag off the main light and prevent it spilling onto the background
Using a reflector
The use of a reflector is to bring an additional light source into your photo without having to add an actual light source. Although they are typically used in natural light portrait photography, they are handy for all types of photography, and not just when working with natural light either.
A common use for a reflector is to fill in shadows. By positioning the reflector to reflect the light back into the shadow areas, you can produce a more evenly lit image. Typically you don't want to lift the brightness of shadow areas to the same level as the fully lit areas, but in bright light a reflector can be very useful for brightening shadows that would otherwise appear almost fully black.
Waiting... by Pierre Vignau on Flickr (licensed CC-BY)
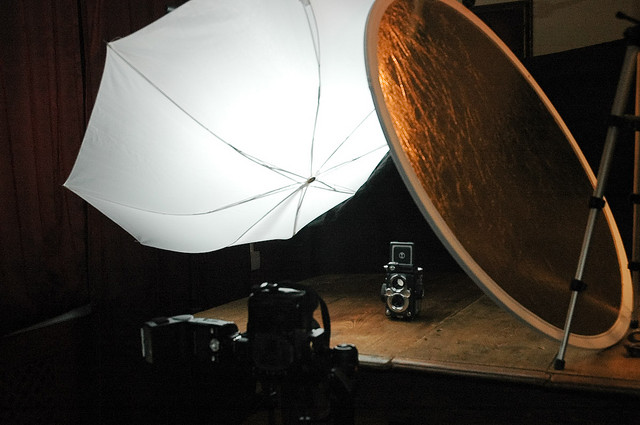
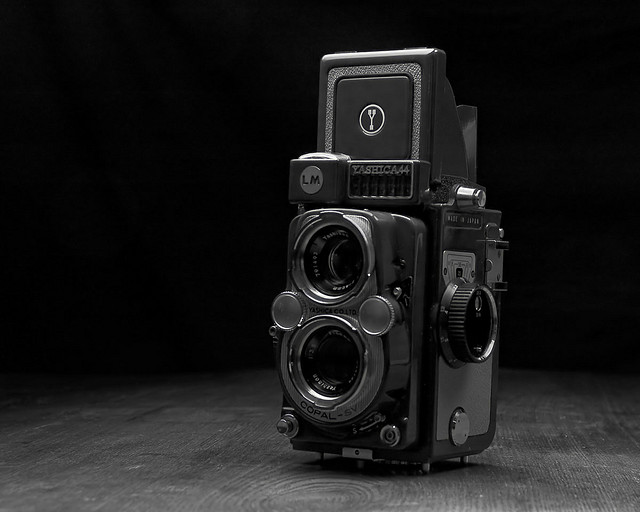
Set-up for Yashica 44 LM series by Pierre Vignau on Flickr (licensed CC-BY)
When used in portrait photography, a common use of a reflector is to reduce the appearance of dark shadows beneath the chin, nose, and the eye sockets. By positioning the reflector below the subject, light can be bounced back up at your subject's face, greatly reducing these shadows and giving a much more pleasing image.

New Avatar by rpavich on Flickr (licensed CC-BY)
Reflectors typically work best for portrait photography when the subject's face is in shade. If you're trying to photograph a subject where part of the face is in bright sun, it's going to be very difficult to reflect light back only into the much darker shadow areas. Having your subject with their back turned to the sun, so the sun acts a backlight, and the reflector acts as main light, can work very well for a great portrait.
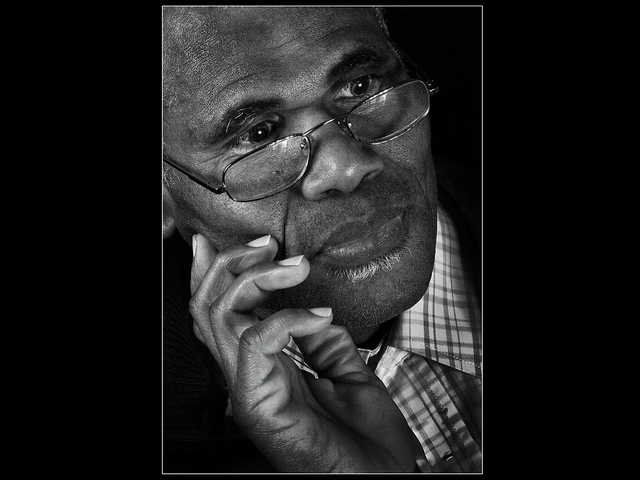
Der Hausmann by Hallenser on Flickr (licensed CC-BY)
Another use for a reflector in portrait photography is adding catchlights to the subject's eyes. When doing this, be careful how you position the reflector. You want to see the reflection of the reflector in the subject's eyes, but at the same time you don't want the light bouncing off the reflector to blind them. Positioning the reflector off to one side, while asking the subject to look straight at the camera will often work well.
When working with flash, a reflector can be used to create a fill light, in exactly the same way as with natural light. Another use with flash is to aim the flash at the reflector, and then use the reflected light as your light source. A reflector has a much larger surface area than a flash, so the reflected light from it is much softer than using direct flash. (The larger the surface area of the light source, the softer the light will be).
Rejects by Sean McGrath on Flickr (licensed CC-BY) - flash bounced into reflector used for fill light
The main problem with using a reflector is that you need some way of positioning it while also being able to operate the camera. In some instances you can just hold the reflector in one hand, while operating the camera with your other hand. This can work well for portraits where you're working very close to the subject.
If your subject is a person, and you're taking a head and shoulders shot, then you can ask the subject to hold the reflector themselves, pointing it up at their face to fill in the shadows. The closeness of the reflector to the subject depends on the brightness level overall and the amount of light hitting the reflector. Generally you want the reflector positioned as close to the face as possible (to create the softest light), but just out of the frame.
Colin using reflector in street work by Peter McConnochie on Flickr (licensed CC-BY)
For photographing flowers, you typically work quite close to the subject. You may be able to lean the reflector against your tripod (if using one), yourself, or a nearby shrub. Something like a plamp or the Field-Macro-Support System (a bendable arm that attaches to the tripod at one end or can be staked into the ground and has a small clamp at the other end) can also be very useful for holding a small reflector in place.

clitocybula ocula by Yankech gary on Flickr (licensed CC-BY-ND)
If you're working indoors, then positioning reflectors isn't usually too difficult as you can typically find something to hold them or prop them up with.
The best solution for positioning a reflector is having an assistant that can hold it in place wherever you want, and adjust the angle easily for the optimum results. For portraits this could mean asking a family member or one of the subject's colleagues to help you by holding the reflector in place.
Model and Assistant by Garry Knight on Flickr (licensed CC-BY-SA)
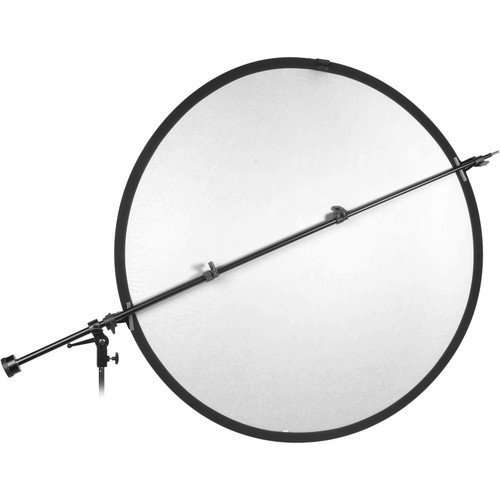
Another alternative is using a stand with a reflector holder - this is what is often used in studios. The reflector holder is just a boom arm that extends horizontally from the stand, and to which a reflector can be clipped.
Using a reflector outside when it is windy can be problematic. Because the reflector has a large flat surface, it can easily catch the wind. It can be difficult for someone to hold, blow over a stand it's attached to, or even blow away. There's not a lot you can do about this. If using an assistant it may be possible to position them so that the wind is blowing the reflector against their body (rather than out of their hands). But really you're best off moving to somewhere shielded from the wind.
I hope you've found these tips helpful, and realize how useful a fold-up reflector can be in photography. It doesn't take up much room, but being able to add an extra light source (in the form a reflector) to your images can really make a big improvement.


Thank you I needed to know this! Keep it coming as I wish to improve my photography.
Great tips! Thanks so much.
Just got mine today and this guide seemed so helpful can’t wait to get into using it tomorrow with my client