Flat Lay Photography Guide
Flat Lay Photography is a style of photography where a group of items are photographed from above, giving a top down view. Items are laid flat on the surface, facing the camera.
Flat lay photographs often have a minimalist aesthetic to them. They work well for showing off a collection of smallish objects and are most commonly used for lifestyle, product & food photography. Sometimes all the items in the photo will be of equal importance. But often there is one main element (such as a food dish or handbag) with extra elements that add to the story (such as ingredients or accessories).
Although flat lay photographs may appear relatively simple, there's more to a good flat image than just laying out a few objects then shooting down on them. In this article we'll look at some tips for creating great flat lay photos.

Composition
The most important part of a flat lay is the composition of the objects. You can't just randomly lay out the items and expect a good photo. Achieving a good composition will take time and experimentation.
While a flat lay photo can include many different objects, the objects all need to be related in some way. Usually this will be dictated by the purpose of the photo. For example, if the photo was for a blog post about the top 10 work tools, you might have a flat lay photo of those tools. The items all have a relation to one another of being work tools.
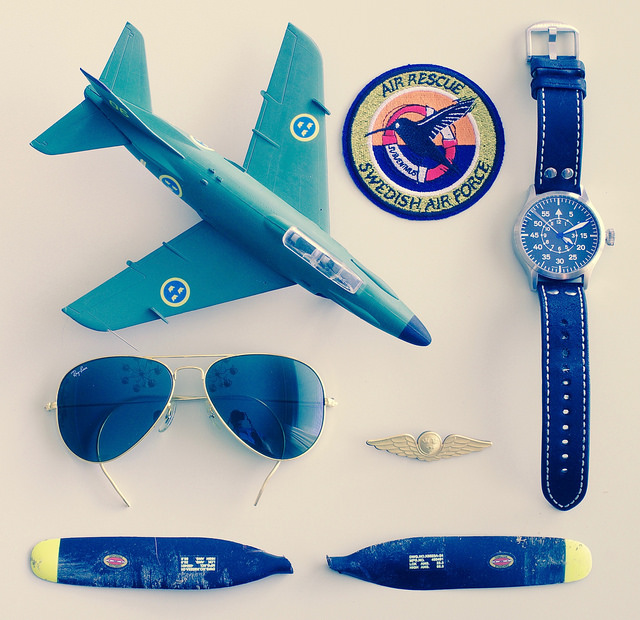
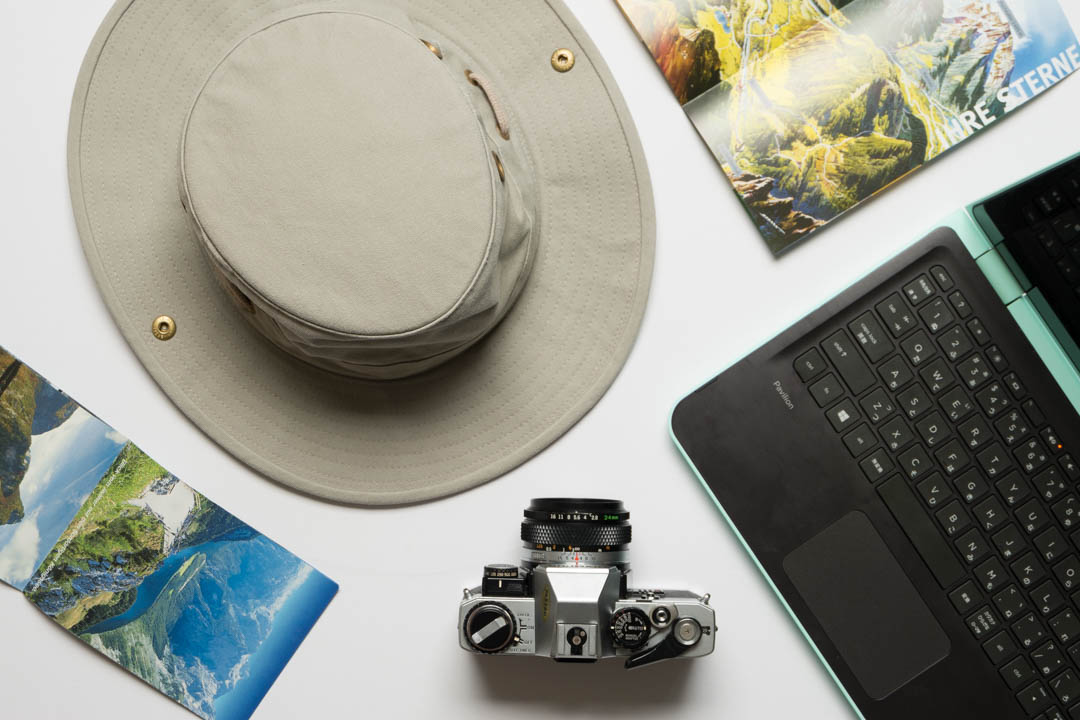
Flat Lay. Aviator's Attributes. by lmbythesea on Flickr (licensed CC-BY)
If you're just photographing for yourself rather than with a specific use for the shot, then you need to look for some commonality between the objects that will tie them together. For example you could photograph items that are essentially random and unrelated to one another, but are all the same color.
Leave some space between the items you're photographing. Some of the items can overlap, sure. But you don't want the composition to appear overly cluttered.

Coffee and egg by Maria Eklind on Flickr (licensed CC-BY-SA)
Try to create a balanced composition. If you have a large item on one side of the frame, try to place a similarly sized item on the opposite side of the frame. Think of placing a mirror across the center vertically, horizontally, or diagonally. Does the composition on one side of the frame mirror that on the other?
It shouldn't be exactly the same, but you want to try and achieve a roughly equal weighting on both sides of the frame. This relates not only to object size, but shape and color as well.
Flat lay by Ovan
Lay out the items, take a photo. Evaluate the image, adjust the composition, take another shot and compare. Is the shot better or worse? Repeat until you can't find any way to make the image better.
One particular style of composition that could be considered a sub-genre of flat lay photography is knolling. This is where items are laid out parallel or at 90° (occasionally 45°) to one another very neatly. For more on Knolling you can read: Knolling Photography – Photographing Neatly Arranged Items.
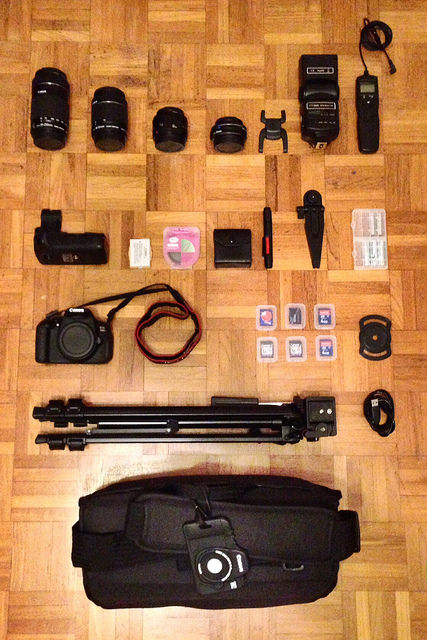
Knolling (camera equipment) by cchana on Flickr (licensed CC-BY-SA)
Background
The background should normally be relatively plain. It doesn't need to be completely plain though. It can have some texture or pattern - old worn wood grain is a popular background for flat lays. It should complement the items laid on it rather than distract from them.
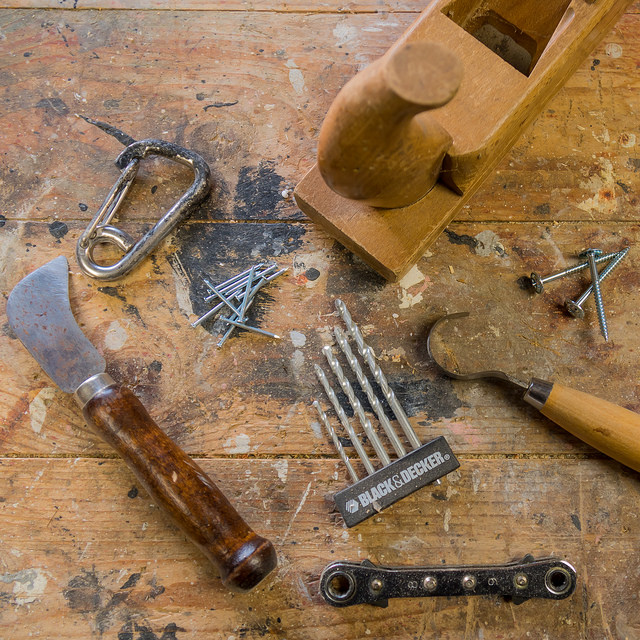
Time to work! by Susanne Nilsson on Flickr (licensed CC-BY-SA)
Lighting
No special lighting is required for a good flat lay image. You'll typically be shooting indoors, and window light provides a nice light source. You want indirect light though - not the sun shining straight through the window onto your flat lay.
Indirect window light provides a relatively soft light, but still with enough direction to it to bring your flat lay to life. Whereas direct sunlight (or any other type of light) will produce harsh shadows that often detract from the image.
Soft lighting - the shadows give a sense of depth, but are soft rather than hard edged.

Direct undiffused light gives hard edged shadows and highlights that are distracting.

On-camera (pop-up) flash doesn't often produce a nice result. It makes the photo too flat with no depth.
If your light source is too soft and even, then you don't get any shadows at all. Without the shadows you end up with a very 2D image - there is nothing to indicate depth in the image. In some cases this may be wanted, but typically this is a no-no.
You can work with flash or continuous artificial lighting if you prefer. For most people working with window light is easier. But artificial lighting offers you more control over the lighting, and is your only choice if shooting at night.
When using artificial lighting the same rules apply as with natural light. You want a relatively large, soft light source, but it should have some direction to it. A soft box will work well, or a light bounced against a wall or white card is another good choice.
Positioning the camera
Probably the second most difficult part of a flat lay photo is positioning the camera correctly to get a straight-down view of your composition. Keeping the camera pointing exactly down can be tricky, and framing the subject when you don't have a good view of the camera's screen is even more tricky.
Because you (usually) have to hold the camera out at arms length over your composition, you can't just look down at the camera's screen. If you have a camera with a flip-out screen this can be very useful for composing the image.
You might also want to try putting the camera on a tripod. This can be quite handy as once the camera and tripod are set up you can take a photo, adjust your composition slightly, take another photo, adjust again etc. And you can be sure that the camera is positioned correctly for each shot.
A tripod also keeps the camera stable for long exposures. Working with indirect sunlight, exposure times can sometimes be an issue. When hand-holding a camera, especially when holding it out at arms length, you can end up with blurry shots. A tripod will hold the camera completely steady so your shots come out nice and sharp with no motion blur.
The difficulty with using a tripod is positioning it so that the camera is straight down over the items. In some cases you can just position the tripod's head to point down between two of the legs and this will work fine. In other cases you might end up with a tripod foot in the image when doing this.
Another option is extending the tripod legs longer and then reverse-mounting the tripod's center column so that the camera is positioned underneath the tripod rather than on top of it. Note that not all tripods feature a reversible column though.
A third option is to use a boom arm. With a boom arm you position the tripod further away from the composition. Then extend the camera on the boom arm out over the composition, pointing down at it. You need to ensure you have a suitable counterweight on the other end of the boom arm, or you risk it toppling over.
The other thing to be careful of when positioning the camera is that you don't block the light. If you stand between the light source and your composition, then you're either going to get a photo with your shadow over the image, or a photo with extremely soft non-directional lighting (where your shadow covers the whole frame).
One of the good points about a boom arm is that it moves the tripod away from the composition, and so you are much less likely to get the tripod's shadow over the image. However, in most cases you don't need a boom arm. You just need to ensure that you photograph the composition standing on the opposite side of the light source.
Depth of field
For flat lay photography a large depth of field is needed to get everything in focus. Most flat lay photos are taken with camera phones. This is mainly just because camera phones are the most popular type of camera. But they are also well suited to this type of photography because their small image sensors give them a large depth of field.
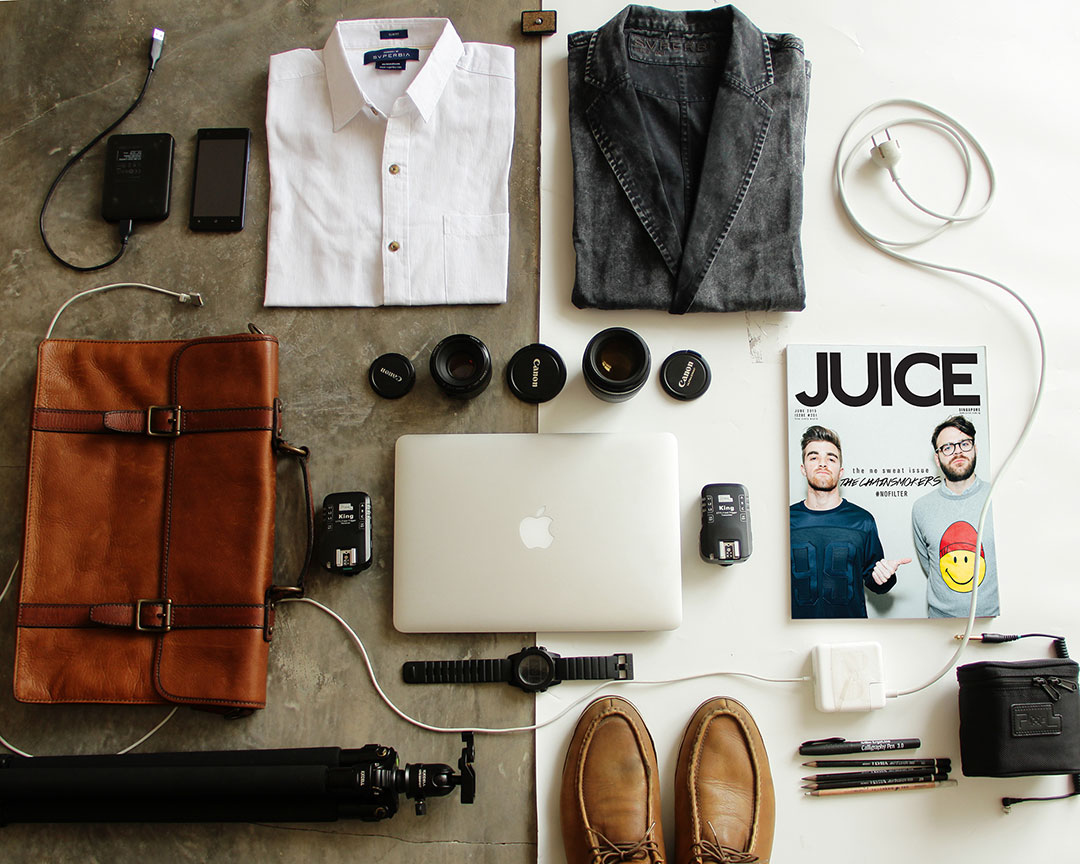
If you're using a DSLR or CSC, you'll probably want to use a medium - small aperture such as f/5.6 or f/8 to get as much in focus as possible. This does depend on your subject matter though. A flat lay photo of stamps or postcards doesn't need a large depth of field because there isn't much depth to capture. Whereas a photo of big boots and a watch would, because there is a large depth difference between the height of the boots and the height of the watch.
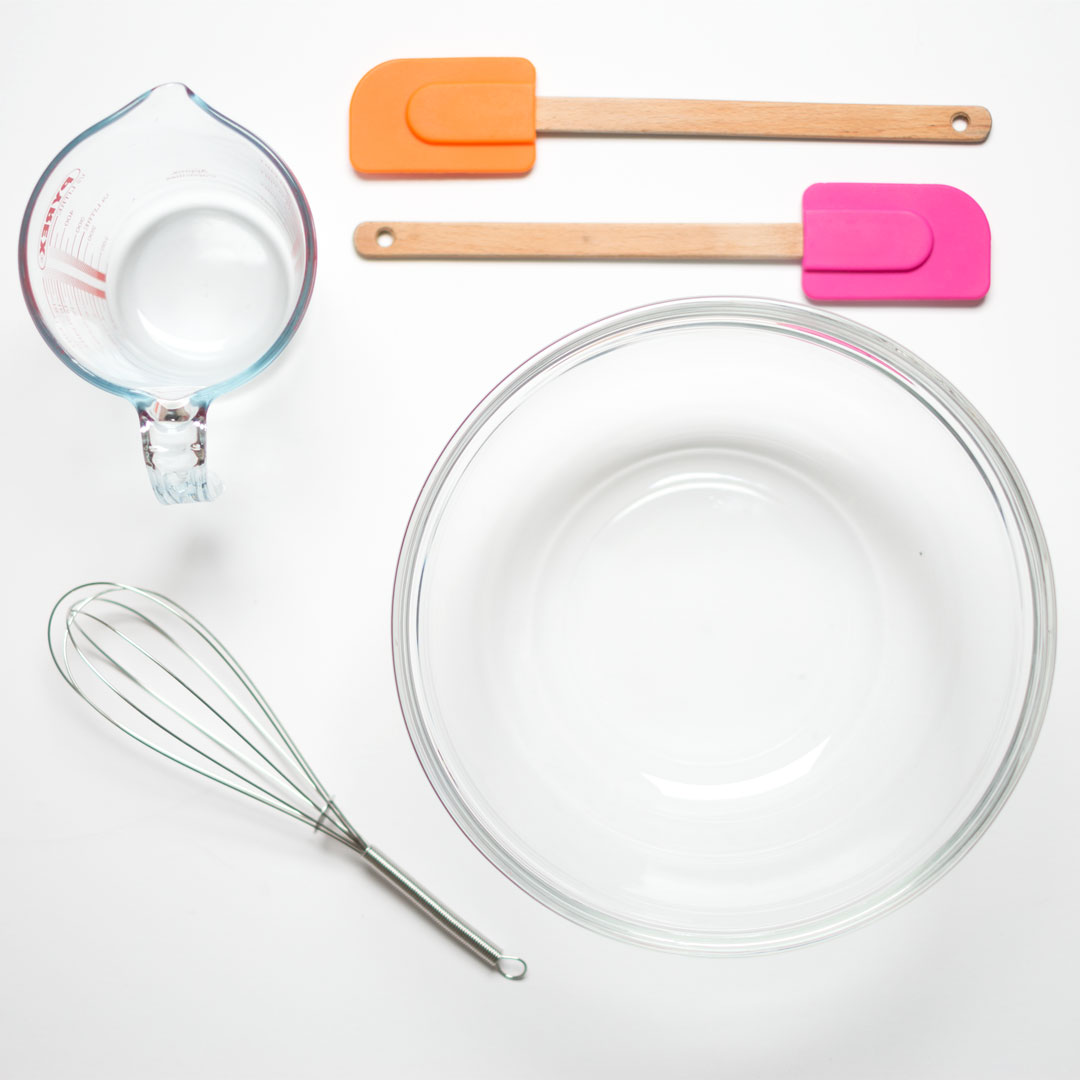
Here a large aperture was used and focus was placed on the edge of the bowl. This resulted in the items further back (the whisk and spatulas) being out of focus.
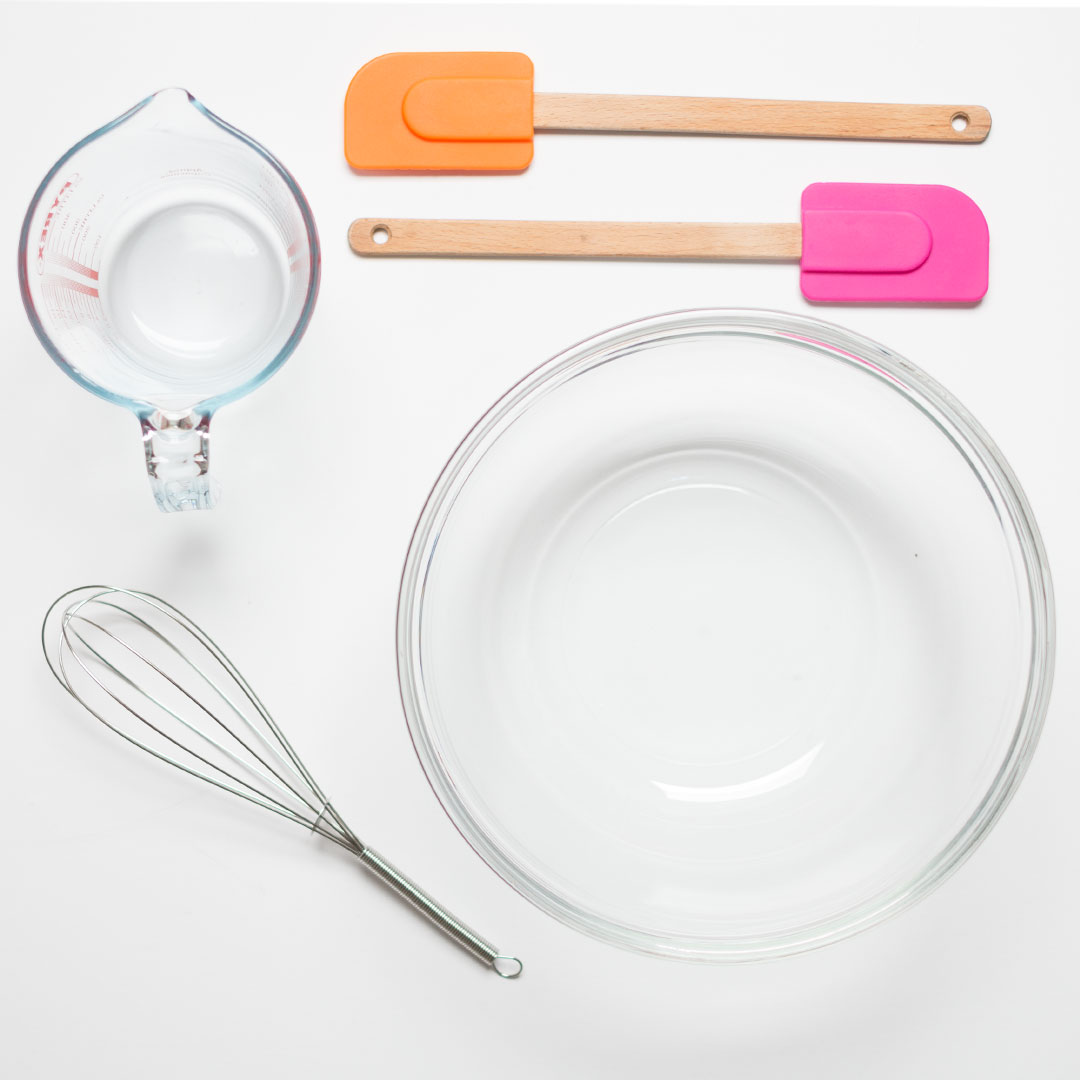
For this image a slightly smaller aperture was used and focus was manually placed about half-way up the bowl to maximize the amount in focus.
Flat lay can be a great technique for producing compelling photos of items without any expensive equipment. Of course, you can achieve better quality photos using professional camera equipment and lighting, but for images being shared online the difference will be minimal. The effectiveness of a flat lay photo lies mainly in how the items are arranged in relation to one another.
As always, the key to great flat lay photography is understanding the basics, then practice, evaluate, and practice some more. Through experience you learn what works and what doesn't, and arranging a good composition becomes more intuitive.


Liked the post. You’ve said all important points of flat lay photography.
For my flatlay photography I always concern about the right props. I like variety of flowers for the compositions. After finishing my flat lay composition, I prefer a little bit of photo editing that makes my photo more beautiful. I use photoshop and VSCO to edit them.