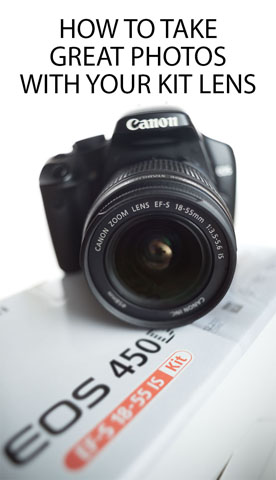
Taking great photos with your kit lens
Interchangeable Lens Cameras are often sold in kits containing a basic zoom lens. Because these lenses come with the camera as part of a kit, they are often referred to as 'kit lenses'.
The kit lens depends on the camera, but it is practically always a zoom. Often it is something like an 18-55mm for an APS-C camera, 24-100mm for a full frame camera, or 14-24mm for a m4/3 camera. These are all roughly equivalent.
The kit lens lets you go from wide-angle to short telephoto and everything in between. It's a good all-round general purpose lens.
Often you may read disparaging remarks about kit lenses. For sure, they're not the sharpest lenses around, and they don't have fast apertures for easily creating smooth and creamy out of focus backgrounds. But they're surprisingly useful and can give great results when you play to their strengths.
Wide angle, deep focus images
In terms of image quality, the main strength of a kit lens is typically when used at (or near) its widest focal length, with the lens stopped down a bit. Stopping down (using a smaller aperture setting, such as f/8 or f/11) increases the sharpness of the lens as well as putting more of the image in focus.
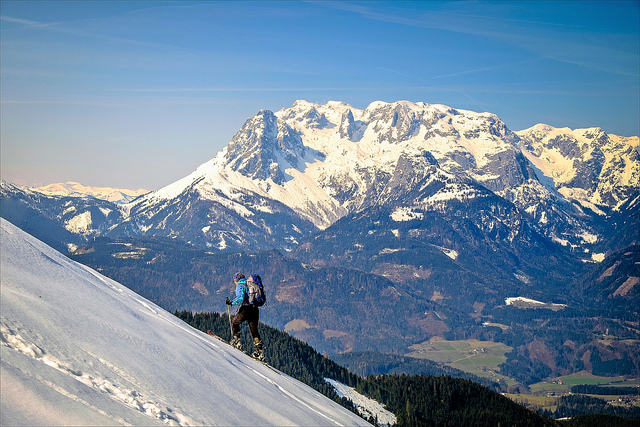
Aufstieg - Ascent by Heinrich Plum on Flickr (licensed CC-BY-ND)
This makes kit lenses well suited to subjects that often require a wide angle and large depth of field, such as landscape and architectural photography. The distortion inherent in kit lenses can cause a problem for architectural photography (straight lines appear curved), but this can be easily fixed in most image editing software. (Actually many cameras automatically correct for the distortion of the lens anyway).
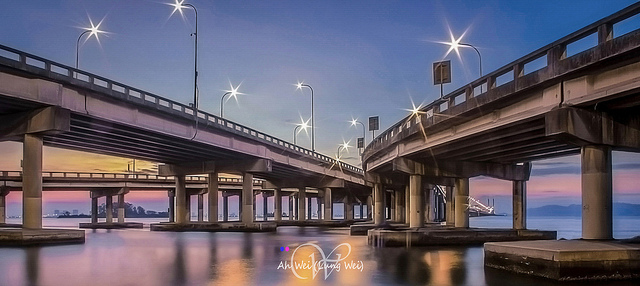
Penang Bridge by Ah Wei (Lung Wei) on Flickr (licensed CC-BY-SA)
If you need something wider angle than the widest focal length your kit lens will give you, that's no problem. Simply shoot a panorama, taking several images to cover the field of view you require. Stitch the photos together (either using an in-camera panorama feature, or using photo editing software) and you can get images as wide as you like. A bonus of this method is that you end up with a higher resolution image than if you'd just taken one photo using a wider angle lens.

WEMBURY BAY Panorama. Nikon D3100. DSC_0099. by Robert Pittman on Flickr (licensed CC-BY-ND)
For handheld work in lower light, the Image stabilization feature found in many kit lenses is a serious boon. Image stabilization counteracts camera shake from handheld shooting, enabling you to get sharp images at slower shutter speeds than you would otherwise be able to.
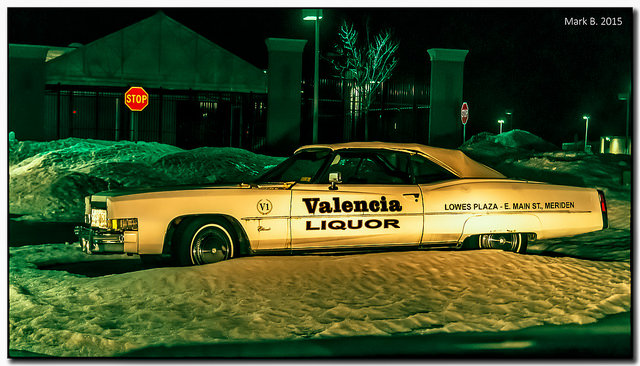
(229/365) Valencia's 1974 Cadillac Eldorado Convertible by Marcus Balcher on Flickr (licensed CC-BY-SA)
Often more expensive large aperture lenses don't feature image stabilization. So for low light use where you want quite a bit of the scene in focus, a kit lens with image stabilization will often produce better (sharper) images than a prime lens without stabilization.
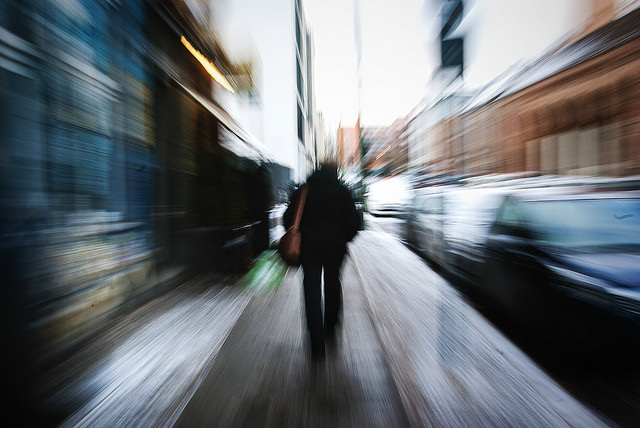
Workarounds for shallow depth of field
One of the areas where kit lenses don't work so well is when you want to use a shallow depth of field to help separate your subject from the background. Typical 'portrait' lenses have a large maximum aperture such as f/1.8, which makes it easy to create a nicely blurred background.
Kit lenses, on the other hand, have much slower maximum apertures towards their long end (which is generally preferred for portraits), such as f/5.6. This makes it more difficult to blur the background. But you can work around this limitation.
Zoom in as far as you can. While a longer focal length doesn't give you less depth of field, it captures a much smaller area of background behind the subject. This makes it easier to select a small specific area of background behind the subject that won't distract the viewer's attention.
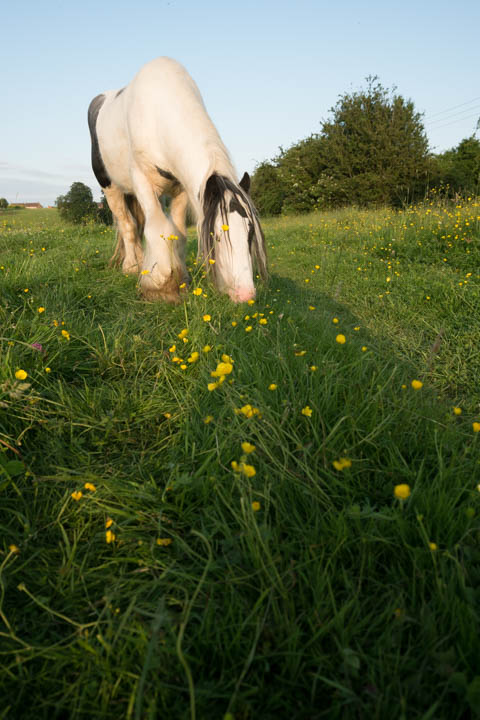
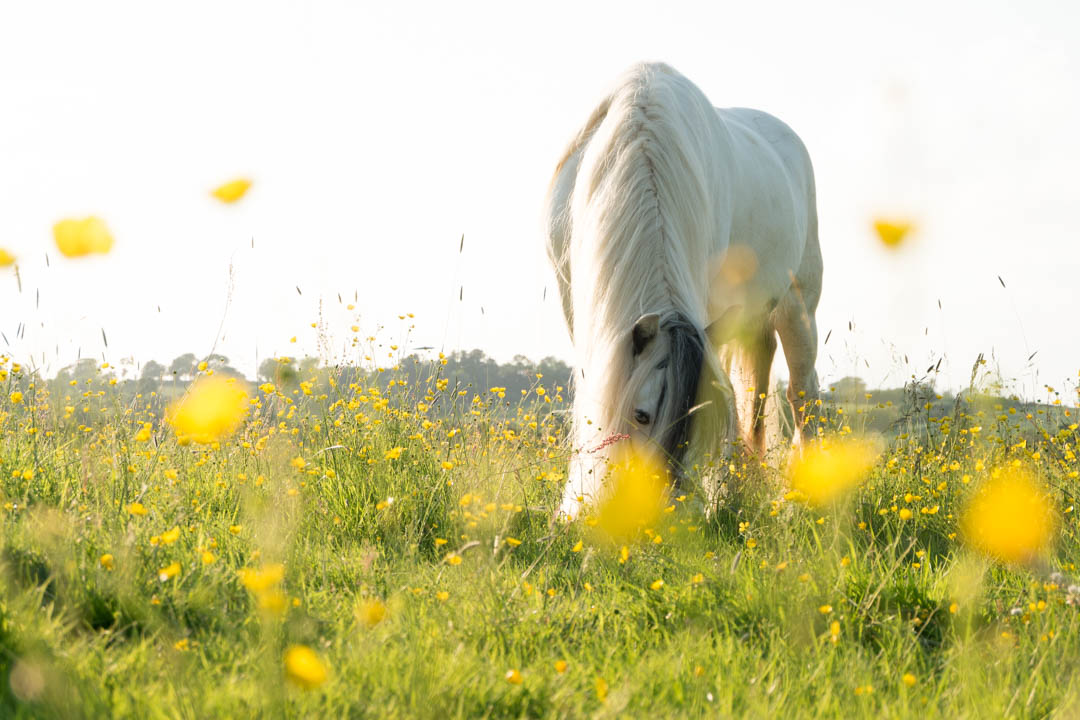
Zoomed out at a wide-angle setting, most of the image seems to be in focus
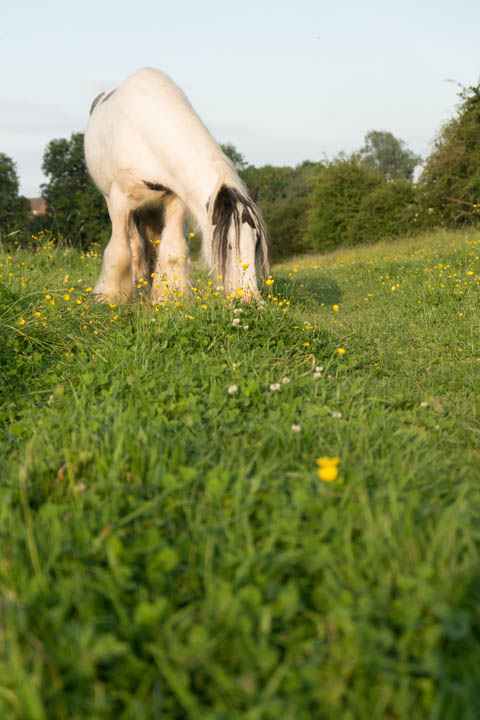
Using a longer focal length (zooming in) and moving further back to keep the subject the same size in the frame gives an appearance of shallower DoF
Set the aperture wide open and put some distance between your subject and background. The larger the distance between your subject and the background, the more out of focus the background will be.
Love myself by Omer1r on Flickr (licensed CC-BY)
Getting closer to your subject will also reduce the depth of field, making it easier to get an out of focus background. Having said that, if you're after a full length portrait, then getting closer to the subject so you're instead capturing a head and shoulders portrait may not be a practical solution.
Look Closer by Harsha K R on Flickr (licensed CC-BY-SA)
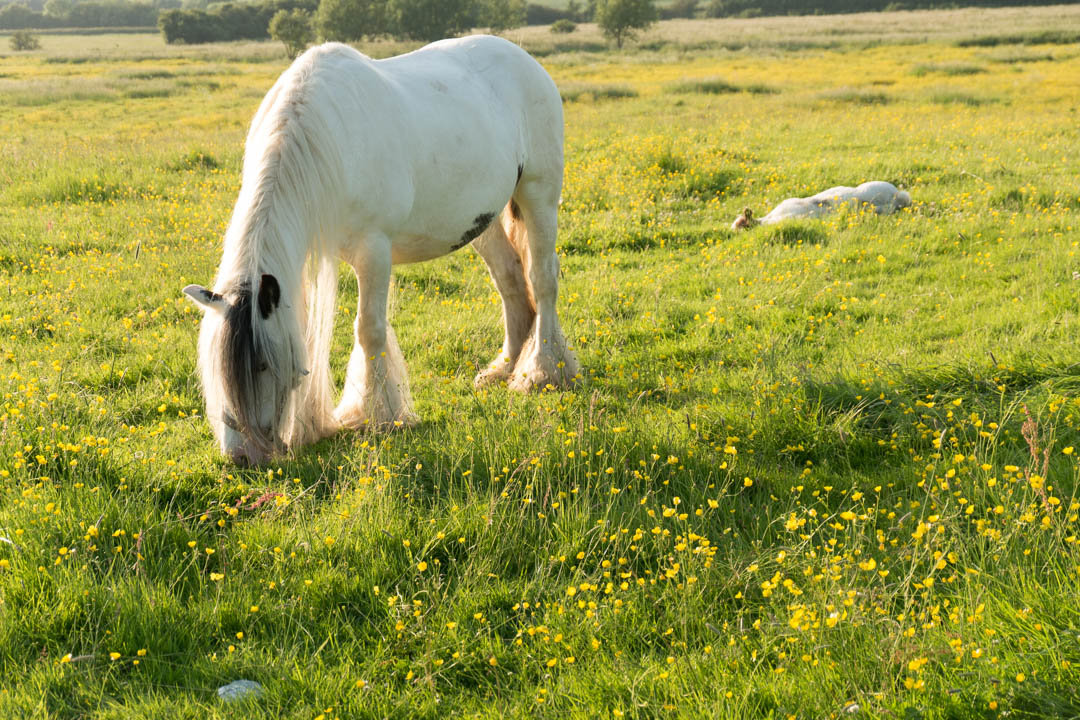
Something you may want to try is a technique called the 'Brenizer method', named after the photographer Ryan Brenizer who popularized it. With this technique you move closer to the subject, then shoot a panorama to cover the field of view you want. The result is an image with shallower depth of field than if you'd taken the image normally.

Photo taken normally
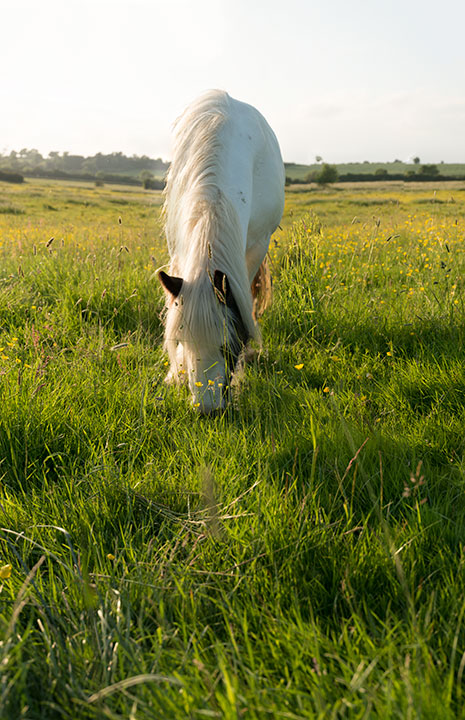
Panorama taken at the same focal length but closer to the subject. Depth of field is reduced (look particularly at the background).
The closer you get to the subject, the shallower the depth of field will be. But the more photos you'll have to take to cover the same field of view.
Another trick can be to compose the photo with out of focus items in the foreground close to the camera. Because they are close to the camera they will be quite out of focus, giving a good illusion of depth.
Taken at standing height, depth of field appears quite deep
Using a low angle, depth of field appears shallower
As a last resort, you can always use selective processing such as a selective blur or vignette round the edge of the image. While this doesn't reduce the depth of field, it can still have the same effect of helping draw the viewer's attention to your subject.

Autumnal Approach by Chez Eskay on Flickr (licensed CC-BY)
Work with Flash
Flash photography, whether it be for portrait, food, or product photography, very rarely relies on having a wide aperture lens. Typically most shots taken using flash will be around the f/5.6 - f/8 area - something kit lenses can achieve easily.
Power against the sun by Hallenser on Flickr (licensed CC-BY)
When using flash the idea is to draw attention to the subject by the way the image is lit, rather than relying on a shallow depth of field. So you can practice flash photography (and get great images) with your kit lens no problem.

Black & White by Justin Hee on Flickr (licensed CC-BY)
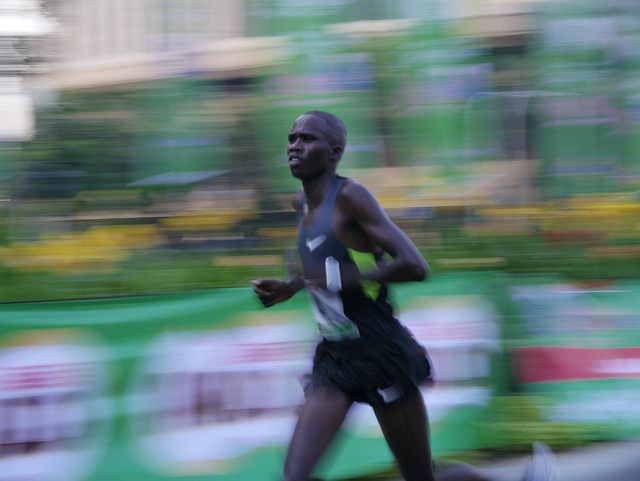
Panning
Another area where the lack of a fast aperture is not a problem is when taking panning photos of moving subjects. For this technique you use a relatively slow shutter speed, but track your moving subject as they move across the frame. The result is an image where the subject appears relatively sharp, but the background is motion blurred (in the direction you were panning in).
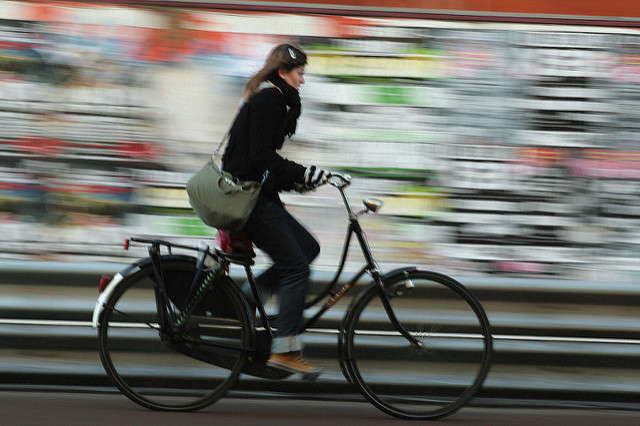
panned! by Pixel Addict on Flickr (licensed CC-BY)
For this technique you need a subject that is moving close to parallel to you. If they're moving towards or away from you, the technique won't work so well as the subject's size in the frame changes during the exposure.
You frame your subject in the camera, moving the camera with them to keep them in the same point in the frame. Then press the shutter to take the photo, continuing to move the camera at the same pace.
P1040304 by Seika on Flickr (licensed CC-BY)
This technique does require practice, and you'll likely get a lot of dud images. But it can produce photos that give a sense of movement and speed to an image, no matter whether you're using a cheap kit lens or expensive premium lens.
Zoom blur
This is a technique that can't be achieved with an expensive prime lens, but can be achieved with a cheap kit zoom lens. It's not something you'll want to use all the time, but it can produce impressive images.
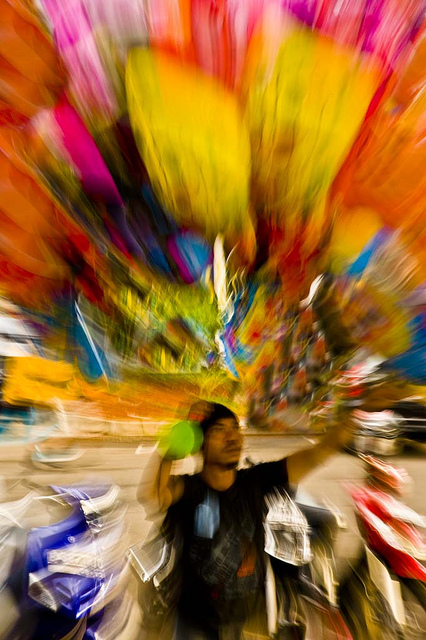
Balloon man by Tanti Ruwani on Flickr (licensed CC-BY)
You need to use a relatively slow shutter speed, and start taking a photo of your subject. Then zoom the lens during the exposure. This results in a a motion blurred image with the motion emanating from the center of the frame.
zoom by andreviebig on Flickr (licensed CC-BY)
You can produce quite a few variations on this technique, such as zooming in or out, how quickly you zoom, how long (if at all) you leave at the start or end of the image before you start / end zooming.
I hope I've given you some good ideas on how to make effective use of your kit lens in this article. If you think you need better gear to improve your photography but can't afford it, instead just try to play to the strengths of the gear you do have.


Very helpful. I was on a site that was telling me the 2 kit lenses were almost trash. I almost bought a ne lens after only having my camera a few months, I’ll give it a little longer now.