Summer Photography Tips
Summer can be a bit of a paradox in terms of its suitability for photography. In one aspect it's great for photography - it's nice weather for going out, there's often lots happening to photograph, and there's plenty of light.
On the other hand, the sun spends a lot of the day high up in the sky, creating harsh lighting and strong shadows. The light is very contrasty and capturing an image with detail in both the shadows and highlights can be nigh-on impossible.
In this article I want to look at how you can deal with the problems of photographing in the summer. I'll also look at some of the good points of summer photography compared to other times of the year.

Dealing with harsh light
I covered a few tips on coping with harsh light in my previous article Midday photography tips, however I'll just briefly go over those tips again here.
Capture the shadows
Make the harsh light work to your advantage by trying to photograph subjects where the strong shadows become part of the composition. This won't generally work well for portrait photography, but parts of buildings with things sticking out causing a shadow can give some very photos.

Everything Has A Purpose - Shadow S5141e by Harris Hui on Flickr (licensed CC-BY-ND)
Go B&W or abstract
The harsh contrast can be dealt with to some extent by going black and white. In black and white strong contrast tends to be much less objectionable than it does in color photography.
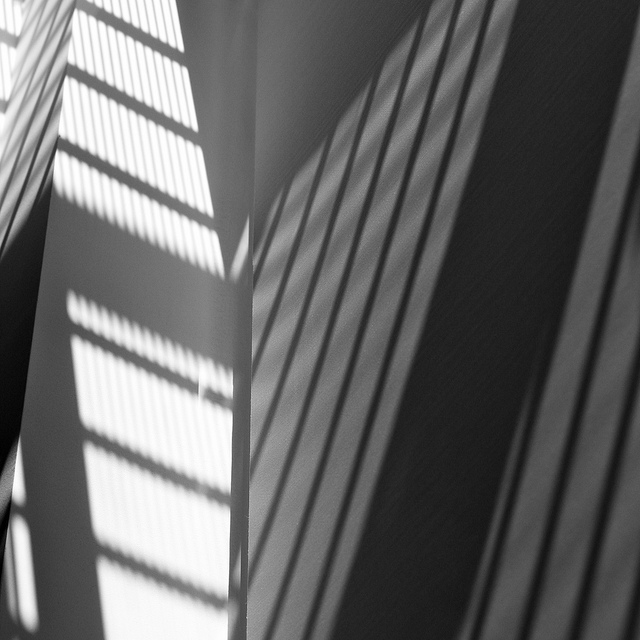
Chicago shadows by Kevin Dooley on Flickr (licensed CC-BY)
Abstract photography, where the photo is more of lines or shapes also often works well with the strong contrasty light you get in summer.
Use HDR
If you want to shoot during the daytime, but don't want to go for a high contrast image, then HDR or a similar technique may be the answer. One of the problem with harsh summer light is that the difference in brightness between the dark areas of an image and the bright areas (known as the dynamic range) can be too much for your camera to capture. So you end with an image that has blown-out highlights and / or blocked-up shadows.
The way HDR works is that you take both underexposed and overexposed images of the scene (without moving the camera). This then gives you detail in both the highlight areas and the shadow areas of the image. The images can then be blended together into a single image with detail in both the highlights and the shadows.

start your engines by Theodore C on Flickr (licensed CC-BY-ND)
Most cameras today offer an HDR mode that will take the multiple images and then blend them into a single image for you automatically. Alternatively you can use auto bracketing and then process the resultant images into an HDR image later. This second option gives you a bit more control over how the final image turns out, but involves more manual work.
Try some silhouette photography
The strong light in summer can make it relatively easy to achieve silhouette photos. Just position your subject (or yourself) so that the sun is behind your subject. Most of the time the camera will adjust for the brightness of the sky, and so give you an exposure where your subject becomes a black silhouette.
Late Summer Silhouette by SPDP on Flickr (licensed CC-BY)
If you find that you just get an image with your subject properly exposed but a blown out background, there are a couple of things you can try. The first is to just apply some negative exposure compensation and then take the shot again.
The other thing you could try is to switch over to manual exposure mode. Manually set a small aperture (e.g. f/8) and fast shutter speed (e.g. 1/1000s). This will reduce the amount of light the camera captures, and should result in a good silhouette photo.
Move into the shade
Summer is a popular time for both portrait and flower photography, but the harsh light is unflattering for both people and plants. The solution is simple - move into the shade.
It was one of those March days when the sun shines hot and the wind blows cold: when it is summer in the light, and winter in the shade. by Girish Suryawanshi on Flickr (licensed CC-BY-ND)
For people you can easily ask your subject to move underneath the shade of a tree or beach umbrella. For plants you may be able to shade the flower with your body while taking the photo. Otherwise a diffusion panel that can be held over the flower to soften the direct light can work wonders.
Large diffusion panels can be used for photographing people too. Though due to the size you will either need a stand or an assistant to hold the panel between your subject and the sun.
scrim by Jessie Pearl on Flickr (licensed CC-BY)
Use a polarizer
For landscape photography a polarizing filter is very useful. By polarizing the light it cuts down on specular reflections from foliage, resulting in deeper, more saturated colors.
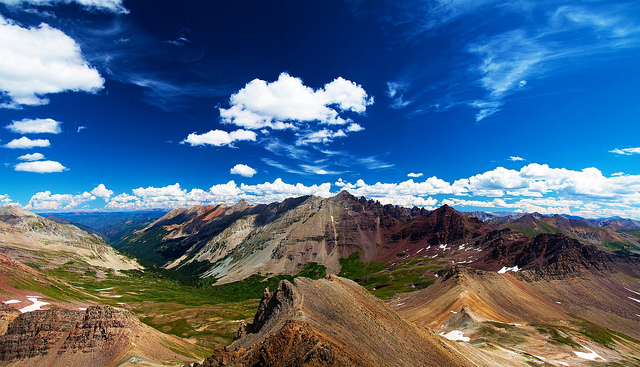
Mountain High by Zach Dischner on Flickr (licensed CC-BY)
It also turns the sky a deeper blue. This is particularly effective when the sky is filled with white fluffy clouds, which contrast against the dark sky.
Note that the effect of a polarizer is maximized when photographing at an angle of 90° from the sun.
Sunsets & Sunrises
While there's not anything particularly special about sunrise and sunset in the summer, the photography experience can be more pleasant at this time of year. The main thing is that after the sun sets the temperature still stays quite high. Whereas later (or earlier) in the year the temperature can drop quite quickly after the sun has set.
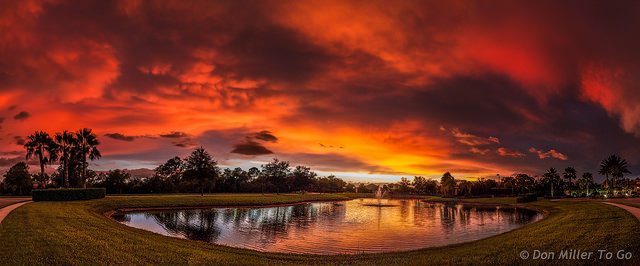
Sunset Lake by Don Miller on Flickr (licensed CC-BY)
The timing of sunsets is quite late, which makes them much more convenient to shoot. You're less likely to be coming home from work or having dinner during sunset than you are at other times of year.
The earliness of summer sunrises can be looked upon as a blessing or a curse. On the one hand you can easily get to a nice location for sunrise without worrying about traffic as it's so early. On the other hand, many of us find it very difficult to motivate ourselves to get up that early.
One possible negative of photographing sunsets in summer is the mosquitoes. Make sure you use some repellent before you go out to avoid coming back covered in bites.
Summer Storms
When I mention summer storms, I mean rainstorms rather than tornados or typhoons. While there are 'storm chasers' who capture awesome photos of these phenomena, I wouldn't recommend it unless you really know what you're doing.
Rainstorms, on the other hand, are relatively safe for photographing. You do need to be careful about lightning, but at least you don't have to worry about having a car blown into you.
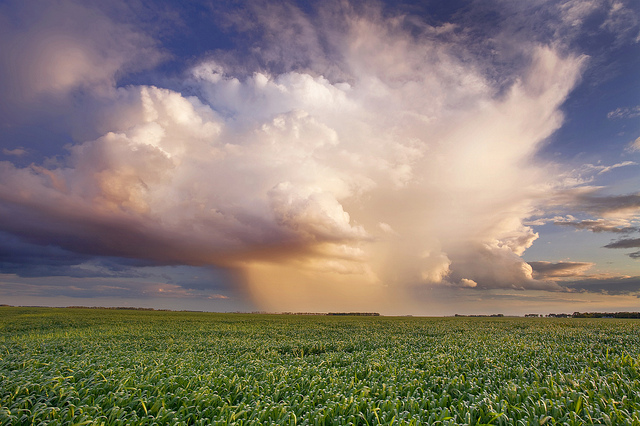
Summer storm by Gabriel Carlson on Flickr (licensed CC-BY)
These storms can make for some great photo opportunities, particularly at the end of a storm as the light starts to return. Keep an eye out for storms off in the distance too, as you can sometimes capture them dumping their rain on the fields or town below.
Look to capture both the storm itself, and also subjects with backlit or sidelit rain. (This helps the rain show up in the photo).
summer rain 01 by Zuerichs Strassen on Flickr (licensed CC-BY)
Go Infrared
Summer is the best time for infrared photography for a number of reasons. You have plenty of green foliage around, that will show up nice and bright in IR photos. The sky is often blue (rather than overcast), which will show up nice and dark in IR photos.
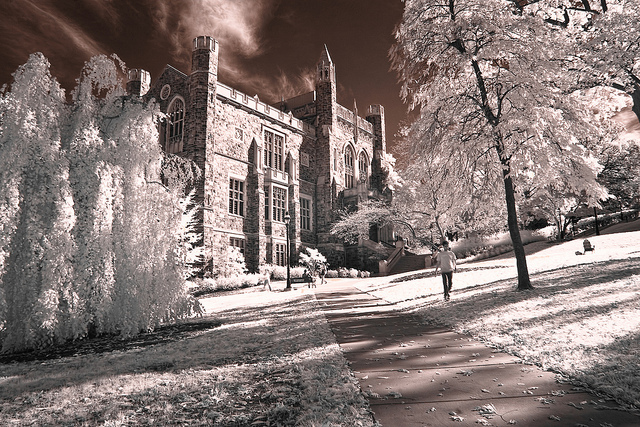
The Home of Humanities by Alan Strakey on Flickr (licensed CC-BY-ND)
And IR photos typically tend to have quite low contrast, so the strong contrasty light of summer is actually well suited to IR photography.
Sadly infrared photography is not quite as simple as most other types of photography - it requires a special filter and a suitable camera. However, many cameras can be used for infrared photography, so long as you don't mind putting up with a long exposure time. You can read more on the subject in this article: An Introduction To Infrared (IR) Photography.
Flowers and insects
Summer is also a great time for flower and insect photography, just because there are so many around at this time of year. For tips on photographing flowers please see Macro & Close-up Photography Tips – Plants & Flowers, and for tips on photographing insects: Macro & Close-up Photography of Insects.
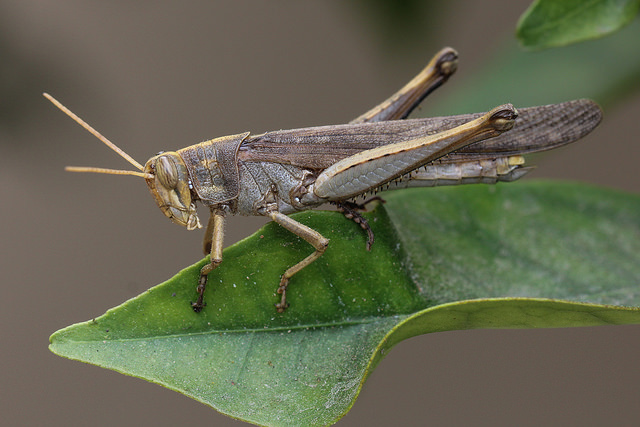
Grasshopper by siamesepuppy on Flickr (licensed CC-BY)
Be careful at the beach
One last point to take is to take care of your gear if taking photos at the beach. You really don't want sand getting in your camera. As well as jamming up dials and rings, sand can be quite sharp, and you could risk scratching your camera's lens (or even worse, the image sensor).
Salt water is also very bad for electronics as it is corrosive. If you do happen to get some on your camera, wipe it off with a cloth damped in fresh water. But better to be careful and avoid getting sea spray on your camera in the first place.
And wherever you're photographing, don't get too carried away with your photography that you forget about your health. Remember to use plenty of sunscreen, and take plenty of drink with you when going out to photograph in the heat.
Have fun taking photos in the nice summer weather, and I hope you find these tips useful.


