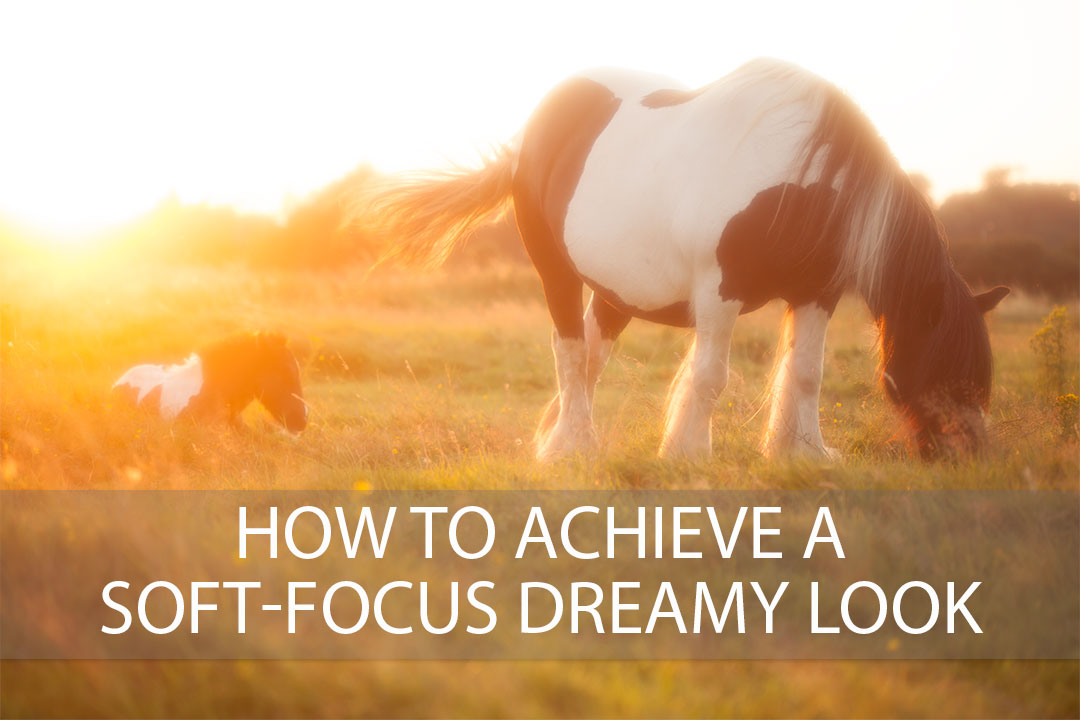
How to achieve a soft-focus dreamy look
Soft focus filters are used for reducing the local contrast in an image, and sometimes also for adding a kind of dreamy glow. The main use for this is in portrait photography - the filter reduces the appearance of fine detail such as skin pores, giving a smoothing effect.
The effect is not the same as just blurring an image. A good quality soft focus filter reduces the contrast of fine detail rather than blurring it away.
Soft focus effects were often used in Hollywood films in the 1950s for scenes with the leading actress. If you look closely when watching these films you can clearly see how the look of the image changes when a scene alternates between showing the male lead and the female lead.
Because of their heavy use in Hollywood, the look given by a soft focus filter is sometimes referred to as the 'Hollywood look'. In this article we'll look at several ways you can produce the same effect in your own photography.
Soft Focus Filter
Probably the easiest and most obvious way to achieve this effect is to purchase a soft focus filter. You may find these filters marketed as Soft, Diffusion, Mist, or Hollywood filters.
Like other filters, you place them in front of your camera's lens. They are available from a range of manufacturers, and in both screw-in and square (e.g. for the Cokin P filter system) varieties.

Untitled by Victoria on Flickr (licensed CC-BY)
Generally these filters are quite high quality, reducing the contrast of the image and adding a slight glow, while not having much effect on the resolution. On the other hand, they can be expensive, and if you want to adjust the amount of softness, you'll need to purchase multiple filters in different strengths.
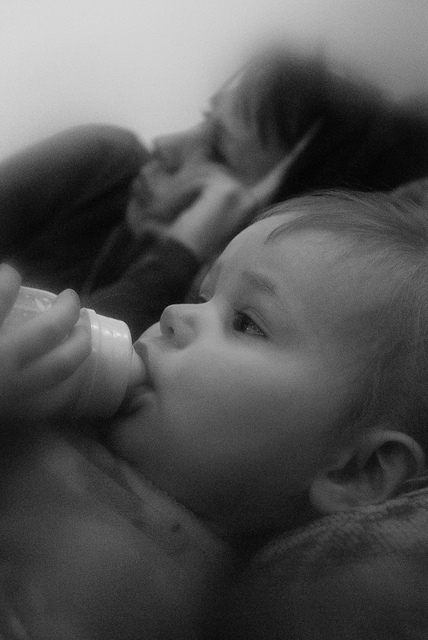
Clear filter plus vaseline
An alternative to using a purchased soft focus filter is to create your own. This can be done by using a clear glass filter and then smearing vaseline (petroleum jelly) on it.
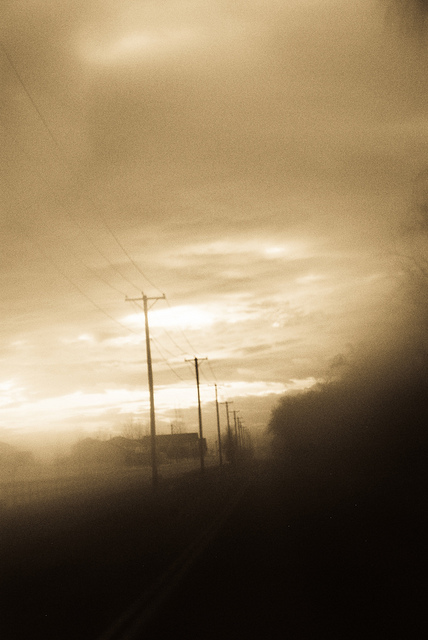
blurry-misty-roadway.jpg by r. nial bradshaw on Flickr (licensed CC-BY)
For the glass filter, I would suggest using a cheap UV filter. You can purchase these very cheaply from a site like eBay. The optical quality won't be great, but as you're going to be smearing vaseline all over the filter, that doesn't really matter too much.
You don't want to add much vaseline on the filter (unless you want a really blurred effect). I find it best to just touch the vaseline with my finger to get the tip of the finger slightly 'wet'. Then smear this on the filter.
This tiny amount is still enough to give a really strong effect. Using a tissue to rub the filter will take off some of the vaseline. A wipe or two will usually take enough of the vaseline off to give an image with a nice soft glow.
D80_39911_sooc by r. nial bradshaw on Flickr (licensed CC-BY)
One of the good things about this technique is that you can easily control what area of the frame will have the softening effect applied. If you only smear the edge of the filter, then you can get an image with a sharp center and soft edges. Or you could create an effect where half the image is soft and half sharp by just smearing one half of the filter.
The other good thing is that you can control the amount of blur / glow by adding or removing vaseline from the filter. The negative is that you need to be quite careful not to get vaseline on any of your lenses. Getting the amount correct for the amount of blur you want can take some trial and error too.
Stockings over the lens
Another cheap DIY alternative to a commercially produced soft focus filter is to stretch a piece of stockings / tights over the front of the lens. This thin material with its fine mesh acts as a diffusion filter, creating the softening effect.
Just cut a piece of the stockings out large enough to stretch over the front of the lens and down the sides a bit. Then use an elastic band to hold it in place round the lens.
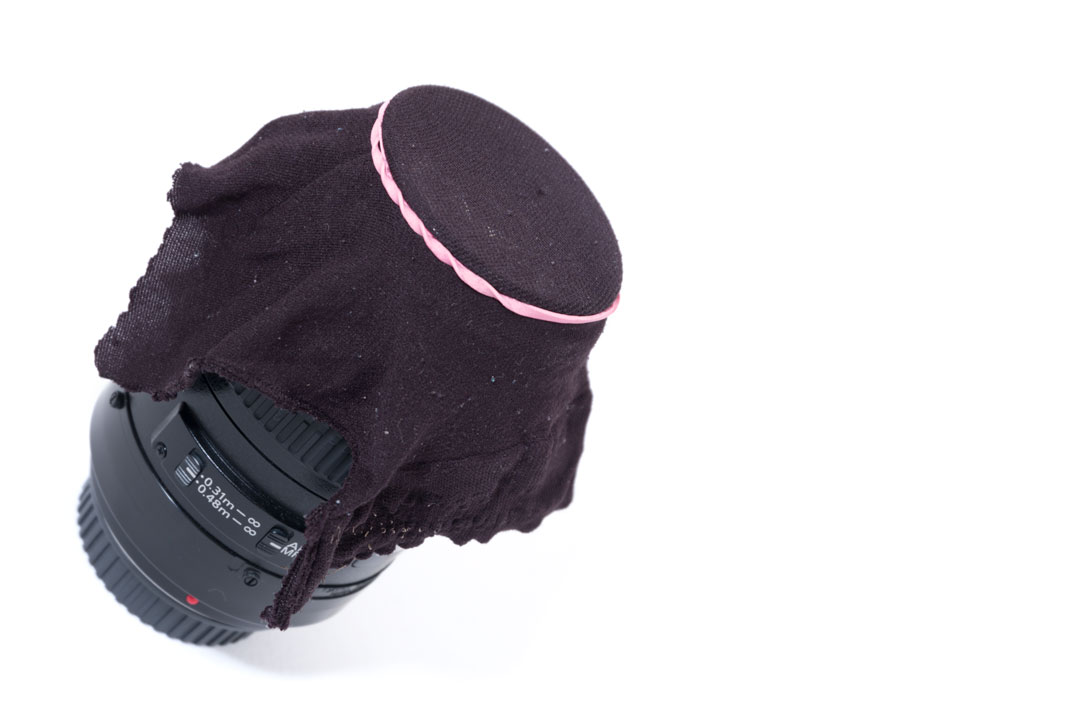
Lens with piece of black stocking stretched over the front
The tighter the stretch, the less of an effect they will have. That's not to say you don't want to stretch them much - even a very tight stretch will still have a quite noticeable effect.
I have read that you can stretch the stockings over the rear element of the lens rather than the front, and this reduces the effect. However I haven't tried this, and it would be quite tricky to do safely without risking damaging the lens.
Bear in mind that the color of the stockings chosen can affect the color balance of the image. Black / gray stockings will be relatively neutral, while more flesh colored stockings may introduce a warmer color cast (which is many cases can be a good thing).
The stockings will reduce the amount of light the camera receives, so you will need to adjust your exposure to compensate. (Or the camera will automatically adjust the exposure to compensate if you're using an auto exposure mode).
An alternative to using stockings is tulle netting, the material used for making bridal veils. This is available in a wide variety of mesh sizes and mesh shapes. If you're really into soft-focus imagery you may want to purchase a few different types as they will each give you a slightly different effect.
Adding the effect in post processing
A soft focus effect can also be achieved by taking an image shot normally, and then adding the effect using image editing software. One of the easiest ways to do this to use the clarity control present in Adobe Camera RAW / Lightroom. The same control is also present in some other software, though it may have a different name, such as tonal contrast.
The clarity control affects the microcontrast of an image. By using a negative clarity value, this reduces the microcontrast in a similar way to using a real soft focus filter.
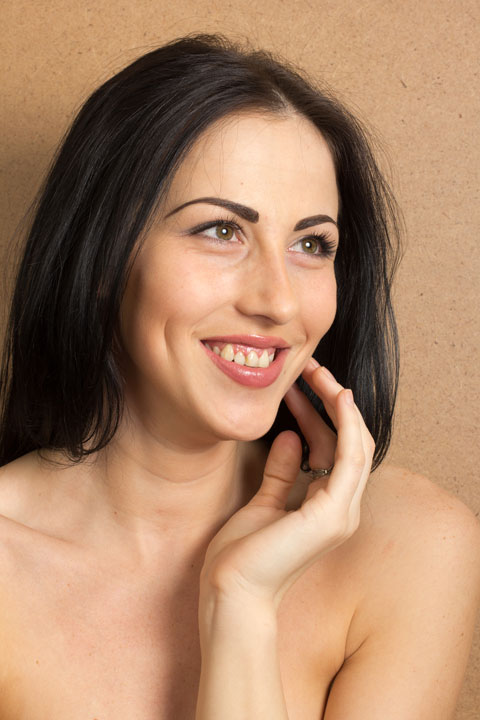
Photo before applying negative clarity - Portrait by Belovodchenko Anton
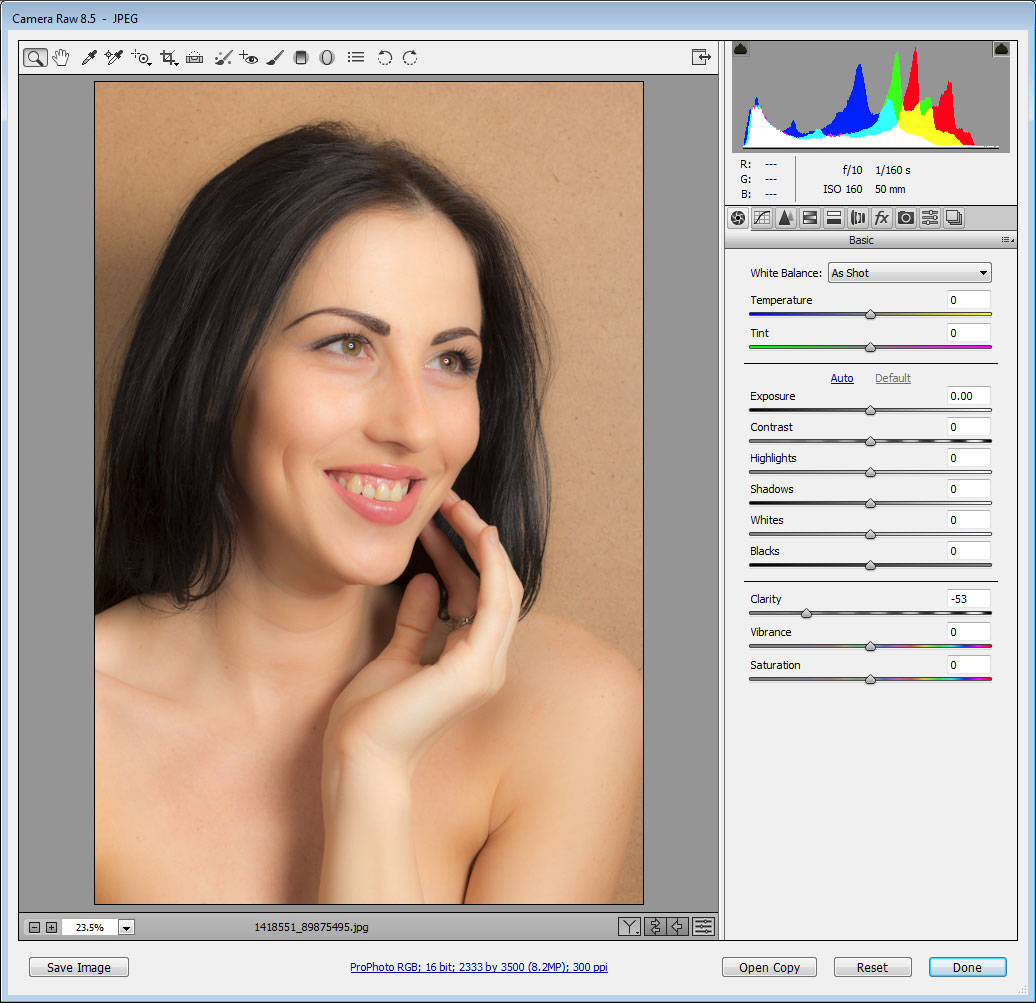
Photo with negative clarity applied
The benefit of this technique is that you can dial in exactly how much soft focus you want. With tools such as the adjustment brush in Adobe Camera RAW / Lightroom, you can even paint in the effect on only certain areas of the image.
And of course, applying the effect in processing also means that you have a standard version of the photo in case you decide / your client decides they don't actually like the effect.
There are also numerous other ways you can add a soft focus effect in processing, but negative clarity is probably the fastest and easiest method. I covered a method here that results in an image with high global contrast but low microcontrast: Photoshop tutorial: Create a dreamy glowing effect portrait.
Use a soft focus lens
There are various soft focus lenses available that can give you soft images without the use of a soft focus filter. Many of these lenses allow you to control the degree of softness in an image.
There are a variety of designs, but typically these lenses allow you to undercorrect or overcorrect for spherical aberration. This also affects how the out of focus areas behind and in front of the subject appear.
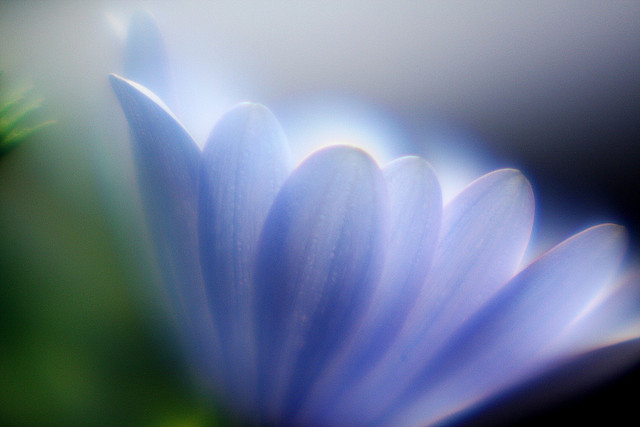
african daisy, soft focus by brx0 on Flickr (licensed CC-BY-SA)
I don't want to go into detail on these lenses as due to their specialist nature they tend to be quite expensive. But I thought it was worth letting you know that they exist.
(soft lens) by つだ on Flickr (licensed CC-BY-SA)
Another, cheaper option, is any old lens that is not well corrected for spherical aberration. The MF Lens forums can be a good source of information on old lenses, often with example photos taken on modern cameras.
Make your own simple lens
An alternative to using an old lens that is soft is to create your own simple lens. The easiest way to do this is using a close-up diopter lens. These lenses are designed to screw in front of a standard camera lens, to enable you to focus closer. But placed the correct distance away from a camera with no lens attached, they can become a taking lens in their own right.
You just need to add a tube between your camera and the close-up lens to stop light coming in from all sides and destroying the image. The best way to do this is using extension tubes or bellows. However you can use something as simple as the cardboard tube from toilet roll or kitchen roll, provided you can figure out some way of keeping it attached to the camera at one end and the close-up lens at the other.

Close-up diopter filter mounted on a variety of different extension tubes / adapters to turn it into a lens
The slightly tricky bit could be working out how much distance you need between your camera and the close-up filter. Most close-up filters actually give their focal length either written on them, or as part of their name. For example, the Canon 500D close-up filter has a focal length of 500mm. The diopter filter I used, the Raynox DCR-250, has a focal length of 250mm.
In practice, you may well find you can just hold up the filter in front of your camera (with no lens attached). Then move the filter further away from the camera while looking through the camera's viewfinder, until an image starts to form and things get in focus. This then lets you see how far away from the camera the filter needs to be.
A simple lens created like this will usually be a bit soft and give you a slight glow. The amount of softness and glow are dependent on the lens' quality. So in this case a cheaper close-up lens may work better than a more expensive well corrected one.
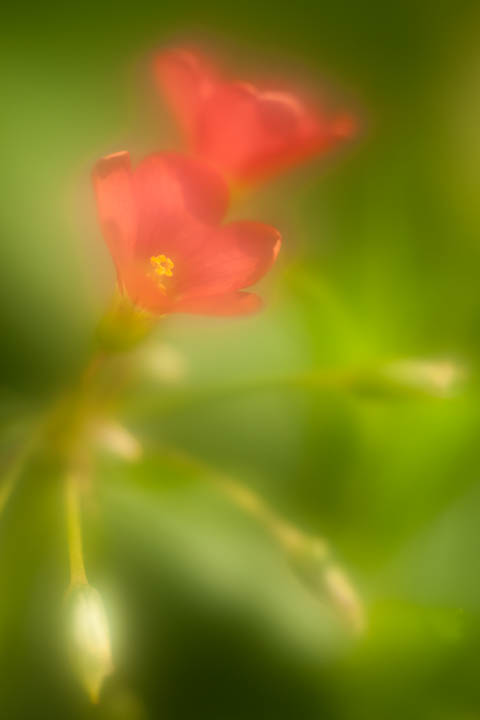
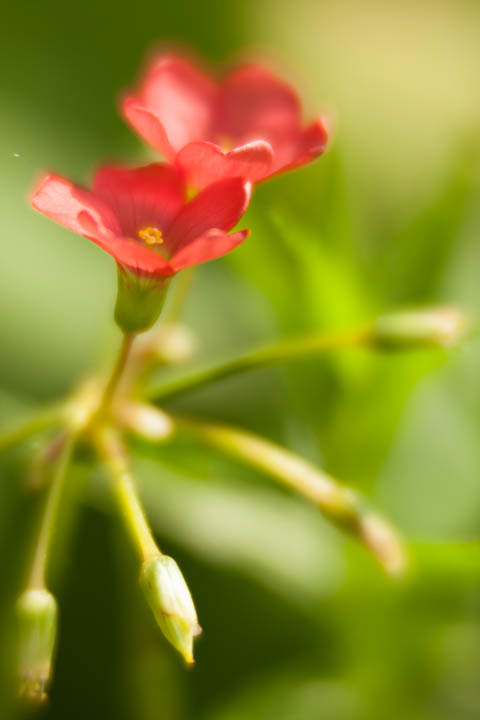
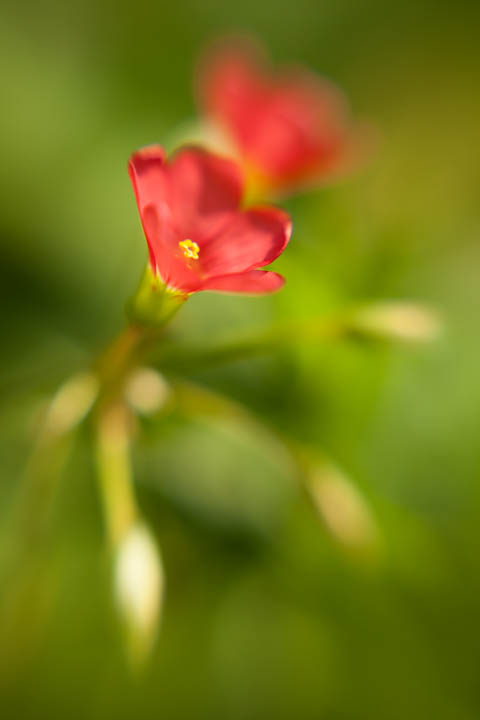
Comparison images
Here are some comparison photos of a flower to give you an idea of how some of the different soft-focus techniques compare in practice. Unfortunately I don't have a soft-focus lens to include in the comparison, but I have included a photo taken with a Lensbaby.
The photos were taken in harsh sunlight. Note particularly the effect the different soft-focus techniques have on the strong highlight on one of the gone-over flowers near the bottom of the image, the overall softness of the image, and the amount of glow.

Bare lens, no filters

With soft focus filter (Nikon New Soft filter)

With black stocking / tights over front of lens
With UV filter smeared with small amount of vaseline
Diopter lens (Raynox DCR-250) on extension tubes used as a lens
Lensbaby Double glass optic (with +10 close-up filter). The Lensbaby soft focus optic would have been a more appropriate choice for this comparison, but I don't own that lens.
Diffusion strength in relation to focal length
When considering a soft focus filter, or using the stockings or vaseline techniques, you should note that the strength of the effect will vary with the lens you are using. A wider focal length will typically require stronger diffusion to give the same effect as weaker diffusion on a longer lens.
So if you buy a soft focus filter that gives just the right amount of softness and glow on your 50mm lens, you might find that effect is too strong on your 100mm lens and not strong enough on your 24mm lens (to give an example).
If you plan to shoot soft focus images with a variety of focal lengths, then it can be worthwhile to purchase a range of soft focus filters in different strengths. Or to work out the optimum smear amount / stretch amount for each focal length separately if going the vaseline / stockings route.
The vast majority of portraits today are not taken using soft focus, though some skin softening may be applied in post production. But the soft focus technique can give images a nice glow as well as 'softening' details.
The technique is not solely reserved for portraits either. Landscapes can take on a dreamy, ethereal feeling when photographed with a soft focus filter. And photos of flowers and foliage can often work well with a soft focus effect.
With a cheap UV filter and vaseline, or using an old pair of stockings / tights, the effect can be achieved quite cheaply. So why not give it a go sometime?


