Product photography on the cheap with only one light pt. 1 – Taking the photo
I've written a few articles regarding product photography previously. In this article I want to look at how to achieve a good product photo on a white background (suitable for catalogs, websites etc.) at the lowest cost.
Because the aim is to produce a good product photo as cheaply as possible, we'll be using just one light. We take multiple photos of the subject, focusing on getting the lighting we want just in one single area at a time. These photos can then be combined into a single image that looks like it has been lit with multiple lights.
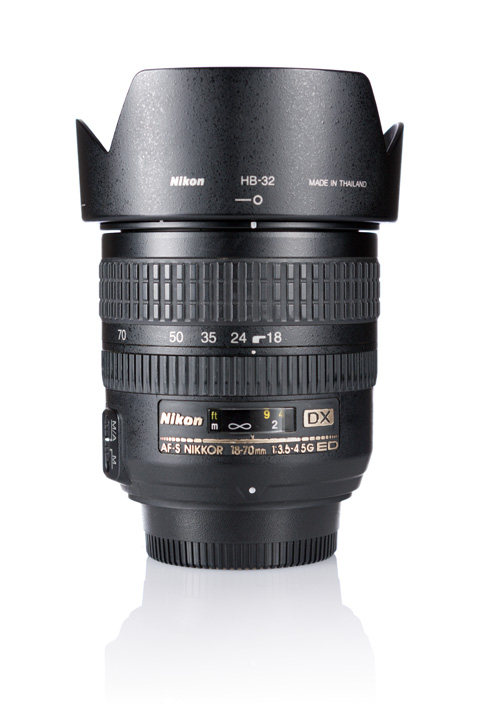
For this tutorial I'll be creating a photo of a camera lens, when the photo is finished it will look something like this:
The equipment needed for this type of shot are as follows:
- Large piece of flexible white card
This will be used for our backdrop. You should be able to pick this up from a large stationery supplier or an art supplier. Cost about $5.
- Reflector
This will be used for controlling the light. Anything solid and white or silver colored will work, I used a sheet of polystyrene that had been used for packing. Cost about $1.
- Camera
A DSLR or camera that allows manual control of exposure settings is greatly preferred, though not essential. I am using a Canon 450D DSLR with its kit lens, which you can pick up for about $250 on eBay
.
- Blower and brush
For cleaning any dust off your item. Cost about $3.
- Lighting
A light that you can easily control the position and strength of is needed for lighting the product and background. I am using a $15 Vivitar 283
- Tripod
A tripod to keep your camera steady and in a fixed position is needed. I cheated a bit here by using an expensive tripod, but a cheap one will be okay. A cheap tripod can be picked up for about $15, but I would recommend spending as much as you can on a good tripod. Generally the more expensive the tripod, the more sturdy it will be.
- White acrylic sheet (optional)
This can be placed under your subject to add a reflection. Cost around $5.
To start off with, we need our shooting table. The table should be pushed up against a wall. Place the flexible white card so that the top half is up against the wall, while the bottom half is flat on the table's surface.
The card should curve from the table's surface to the wall. This creates a seamless transition with no hard edge visible. Add your product on the white card, reasonably far forward, away from the background.
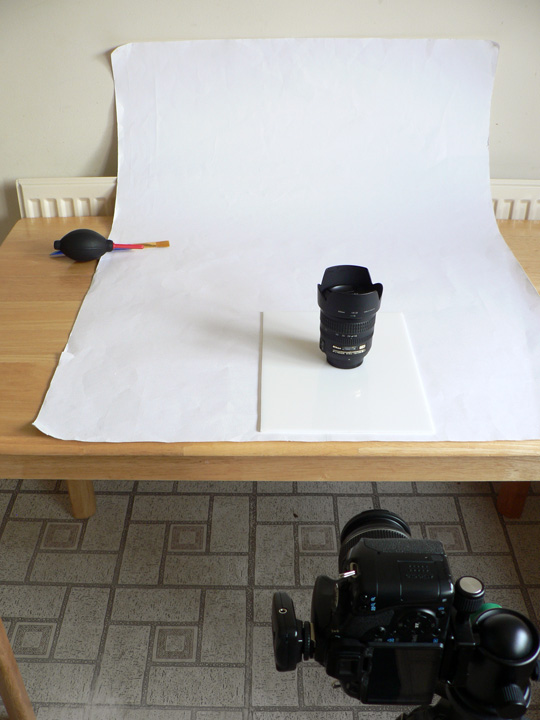
The white card backdrop on the table. I have also used a piece of white acrylic under the subject.
Set up your tripod and camera. You want to use a longish focal length (zoom in). This limits the amount of background that will be visible in the image. The longer the focal length, the smaller the field of view, and the so the smaller the area of background that needs to be lit well for the photo.
Since I am using a camera with an 18-55mm kit lens, I set the focal length of the lens to 55mm. A 100mm or 150mm macro lens is ideal for this sort of photography, but is a lot more expensive.
Set the camera to manual exposure mode, as we want to control the exposure, rather than letting the camera decide what is best.
Often in product photography you will want most of the product in focus. This means using a small aperture for a large depth of field. I set the aperture to f/8.
Since I am using flash, I set a high shutter speed. This reduces the effect of any ambient light in the photos, and ensures that the lighting captured will be that output by the flash. I set the shutter speed to 1/160s.
If you are using continuous lighting, you should ensure that you can block any ambient light. Otherwise your lighting will be a mixture of your lighting and the ambient light. You will likely need a slow shutter speed for continuous light.
Focus your camera on the subject, and then lock your camera's focus (if possible). This ensures that the focus can't change between shots. For best focusing results, I recommend using manual focusing if possible.
When everything is set up, it is time to clean your product off. You want to clean it when you are ready to shoot. If you clean the product before you set up then you risk more dust settling on the product while you are setting up.
Brush the product with a soft brush to brush off any larger particles and loosen dust. Then use a bulb blower to blow dust off the product.
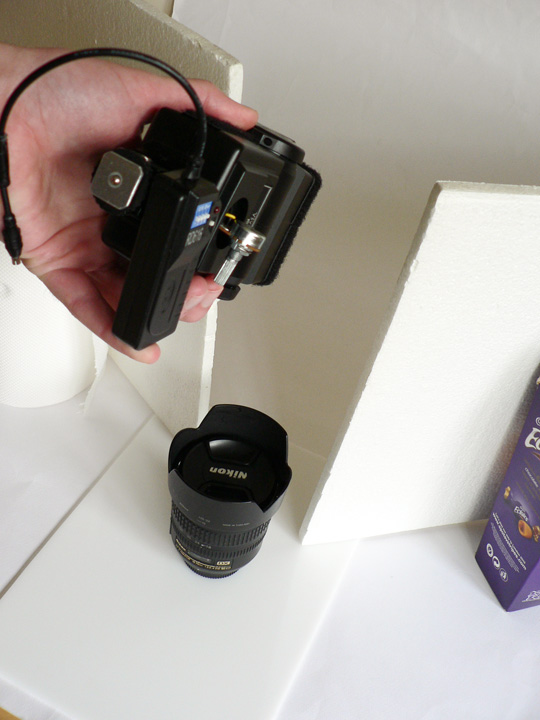
Now we are ready for our first shot. This will be a left highlight. Position your reflector (piece of white polystyrene in my case) to the front-left of your product. Point the lighting (flash in my case) at this reflector from behind. The light will hit the reflector, bounce off, and then hit the product.
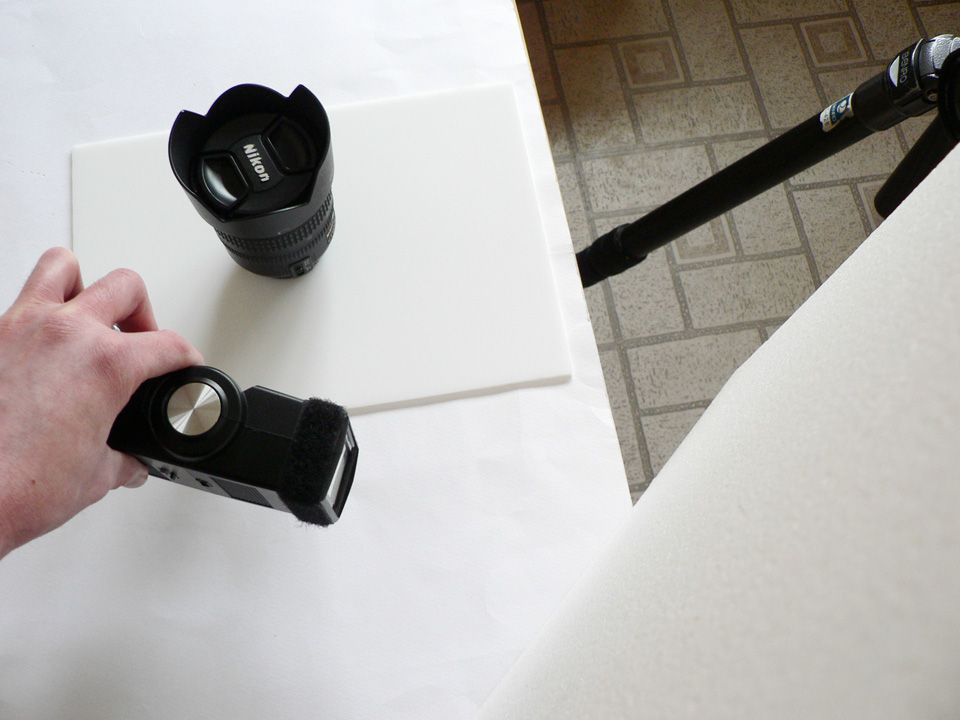
Here you can see the product in the top left. The piece of polystyrene I used as a reflector is in the bottom right corner. I pointed the flash at the polystyrene so the light will hit it and bounce back towards the subject.

Here is another photo showing the piece of polystyrene I used as a reflector.
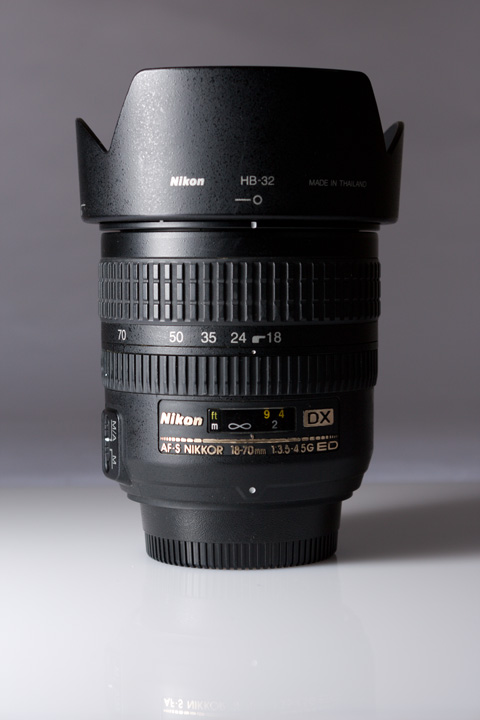
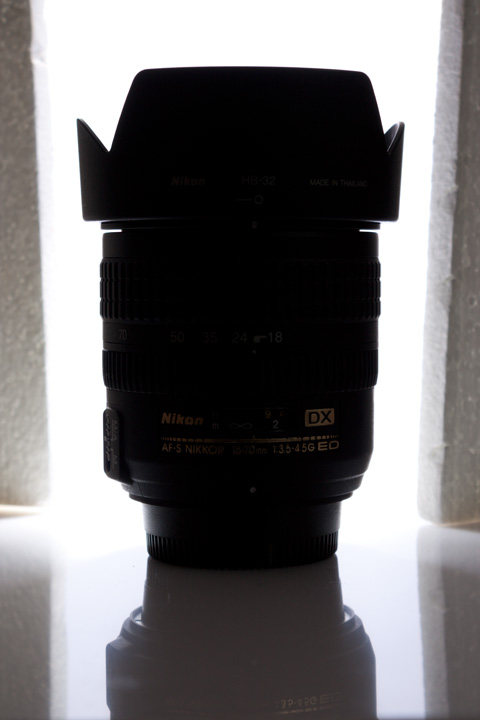
The resulting photo looks like this.
The reason for bouncing the flash from a reflector is to diffuse the light. Direct flash would give quite a harsh light. The bounced light is much softer, and gives a nicer, smoother gradient on the product where it is lit.
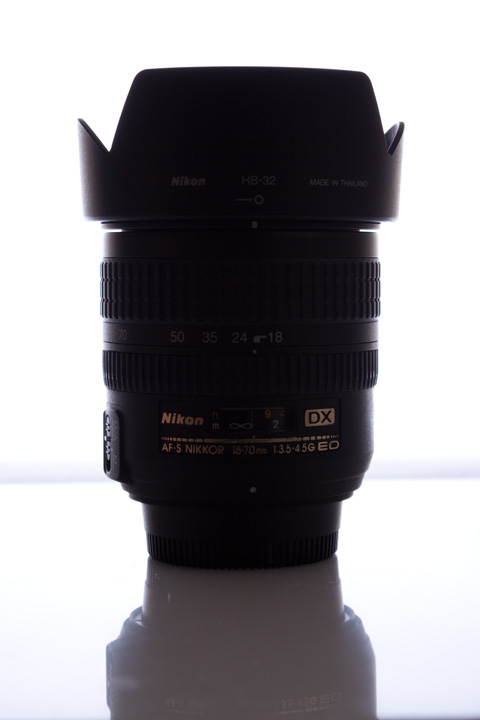
I repeated the above technique for the other side of the product as well, just switching the reflector and flash to the right.

Photo of lens lit from the right.
Now we have the photos of our subject lit properly, it is time to get a photo with the background white.
To prevent light spilling from the background round the edges of our product too much we will use something to block the light around the subject. Black poster board is ideal, but I used two sheets of polystyrene (the same as my reflector).
Lighting the background
Point the light (the flash in my case) at the background behind the product, and take the photo. The lighting should be powerful enough to blow out the background to pure white, but don't use more power than is necessary or you'll increase the amount of light spill around the product's edges.
The resulting photo - we don't need to worry that the polystyrene sheets blocking light from the background are in the shot. As long as there is a gap between the product and the polystyrene (or whatever you're using) it will be okay.
For comparison, here is a shot without the polystyrene sheets blocking light spill from the background. Look at the edges of the product and you can see they are brighter. (Sometimes this might be what you want).
The next step is to combine all the images together into a single image. While you can use Photoshop for this, I want to keep this as cheap as possible. So I'll show you how to composite the images together in GIMP (similar to Photoshop, but free) in the next article, which will be published in a few days.


