How to use Manual Exposure Mode
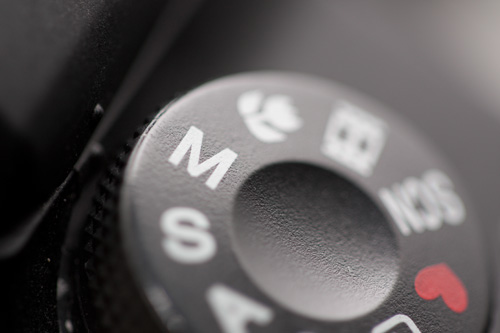
Most cameras offer you a range of different exposure modes. These often include a fully automatic mode, Program (P), Aperture Priority (A or Av), Shutter Priority (S or Tv), and sometimes some scene modes. In this article I want to explore the Manual exposure mode, usually indicated on the mode dial by a capital 'M'.
Why would you want to use a manual exposure mode when your camera features fancy algorithms to work out the exposure in automatic modes? Read on to find out.
Using your camera's exposure metering system in manual exposure mode
The first thing to point out is that by using Manual exposure mode, you are not loosing the use of the camera's internal metering system. (The system the camera uses to work out the exposure in the automatic modes).
The camera will indicate what it thinks is the correct exposure (above or below your current settings). You can then adjust the shutter speed, aperture, or ISO to achieve the same exposure as the camera's metering system recommends. (For more detail on the 'exposure triangle' see Photography Basics – Exposure).
The way the camera will indicate the exposure setting is through a small exposure scale. This is normally displayed in the settings view on the camera's rear LCD and also at the bottom in the camera's viewfinder.
The exposure scale goes from -2EV (underexposed) to 0EV (correctly exposed) to +2EV (overexposed). If the current settings are more than 2 stops (EV) under exposed or over exposed, then the current exposure indicator will flash at the left or right edge of the exposure scale.
The camera's metering system needs to be active for the current exposure setting to be shown. This is normally achieved by just half-pressing the camera's shutter button.
The short video below gives a demonstration of using the camera's metering scale in manual exposure mode. I start by half pressing the shutter button to active the camera's metering system. This shows that the exposure is over 2 stops underexposed.
I then adjust the shutter speed setting until the meter reaches 0EV for a correct exposure. After this I reduce the shutter speed still further, until the meter reads overexposed by over 2 stops. Then I increase the shutter speed until the meter reaches 0 (correctly exposed) again.
If you have a camera with an electronic viewfinder, or you use your camera's rear LCD for composing your photos, then you don't need to worry so much about reading the camera's meter. You can see any changes made to exposure on the screen, so it's easy to see if the current settings would result in an underexposed or overexposed photo without looking at what the meter says.
Auto exposure doesn't know what you're thinking
While cameras have quite advanced metering systems, they don't always guess the 'best' exposure correctly. A common problem is underexposed images when shooting bright subjects like snow and sand.
Taking control of the exposure allows you to set exactly the exposure you want. Maybe you want to create a silhouette image, or a low key image. Just dial in exposure settings that will create a dark image. Ignore the camera's meter telling you that the image will be underexposed, as this is what you want!
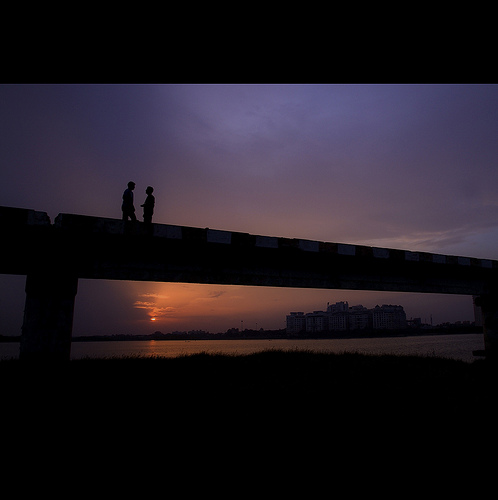
Twilight Friends! | Explored by VinothChandar on flickr (licensed CC-BY)
The same thing goes for creating a very bright or high key image. With manual exposure mode you can adjust your settings to create this look easily without having to worry about the camera's metering system.
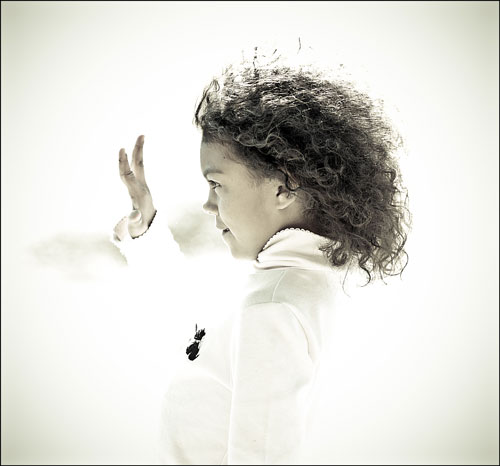
Live Long & Prosper? by jDevaun on flickr (licensed CC-BY-ND)
In a semi-manual mode, such as Aperture Priority or Shutter Priority, you can use exposure compensation to adjust the brightness or darkness of an image. But this is not as flexible as full manual mode. Exposure compensation will normally only let you adjust the exposure by ±2 or ±3 stops. In manual mode you can adjust by as many stops as you like.
Long exposure
In low light conditions, camera metering systems seem to get increasingly unreliable, often resulting in an underexposed image. Instead, it is usually better to rely on manual exposure.
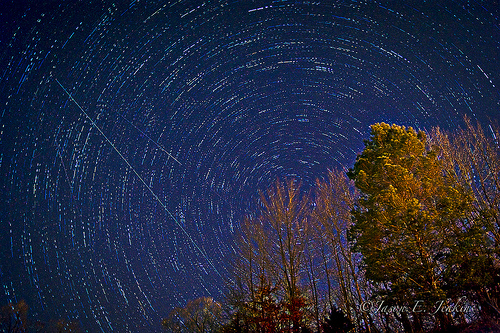
"Geminid Spiral" by j-dub1980(THANK YOU FOR 50k+ Views) on flickr (licensed CC-BY-SA)
The majority of cameras only allow down to 30s as the longest possible shutter speed. After that you are required to use 'bulb mode', where the shutter is held open until you release it. (Usually holding down the shutter button for the period of the exposure, or sometimes pressing the shutter once to start and then again to finish). So for long exposures over 30s you have no choice but to use manual exposure.
Panoramas
Panoramic images can be created by taking multiple overlapping photos and then stitching them together. Many cameras today have a panorama option that can produce good results automatically. But this doesn't work well in every situation, and in some cases you may be better off taking individual photos and then stitching them together on the computer.

Sunset puddle at Farndon Fields by David Kennard Photography
In this case, it is important that the same exposure settings are used for each photo. If you use an automatic exposure mode, it's unlikely that the camera will select the same exposure for each photo. This will result in a panorama where there are visible transitions between the images used as they are of different brightness.
In an automatic exposure mode, you can use exposure lock to keep the exposure the same for the images. But it is often more convenient to just use manual exposure mode. The exact way exposure lock works depends on your camera settings. But it will involve either holding down the exposure lock button while taking the photos, or taking all the photos quickly one after the other, or having to remember to press the button again once you're done (and hoping that you don't accidentally press the button at any other time). Manual exposure is easier.
Moving subjects
If you are shooting a subject moving where the background is changing in brightness, then manual exposure can be handy. This will let you lock the exposure based on the correct exposure for the subject.
An example could be a bird leaving its nest, flying past some dark trees, then flying across the bright sky. The dark and bright backgrounds would likely fool the camera into overexposing and then underexposing the subject. With manual mode, once you've got the correct exposure for the subject dialed in, you don't need to worry.
When you want to control both shutter speed and aperture
It doesn't happen very often, but there may be some occasions where you want to control both the shutter speed and aperture. For example, you might want to use a relatively small aperture (e.g. f/8) and a fast shutter speed to capture a tackle in a football game while having both players in focus.
Unless the pitch was very brightly lit, the semi-manual exposure modes would not work very well. Shutter priority would let you choose a fast shutter speed, but would choose a wide aperture (e.g. f/2.8) to achieve a good exposure. Aperture priority would let you choose a small aperture, but would choose a slow shutter speed to achieve a good exposure.
In manual mode you can choose both the aperture and shutter speed as you like, then rely on boosting the ISO or the use of flash to give you a good exposure. Most cameras today feature auto ISO as well, so you can still rely on the camera setting the correct exposure by automatically adjusting the ISO setting if you like.
Using 'dumb' or external flash
Most modern speedlight flashes feature what is known as TTL flash. This means that the flash can communicate with the camera, so that the camera can include the output of the flash in its exposure calculations. But if you're using an older flash, a cheap off-brand speedlight, or using the flashes not connected directly to the camera, then it makes sense to use manual exposure mode.

9/52 Uber Lens - NIKON 80-200mm by BurgTender on flickr (licensed CC-BY-SA)
The camera will not take into account the light output of the flash when using a 'dumb' flash unit. So using manual exposure mode lets you adjust the exposure to compensate for the flash output.
If you're shooting in a dark room, an automatic exposure mode would choose a slow shutter speed or wide aperture. In manual mode you can choose whatever shutter speed or aperture you want, and then rely on the flash to light the scene, adjusting the flash power or ISO as needed.
Most of the time manual exposure mode is unlikely to be the mode you'll want to use. But it's certainly worth giving it a go so that you'll know how to use when it is needed. You might even find yourself learning how to judge exposure manually instead of relying on your camera's meter!


