Twilight photography tips for amazing night skies
While many people enjoy taking photos of the sunset, often they will pack up and go home after the sun has disappeared below the horizon. But by doing this you miss out on all the great photos can be taken during twilight - after the sun has set, but before it gets dark.
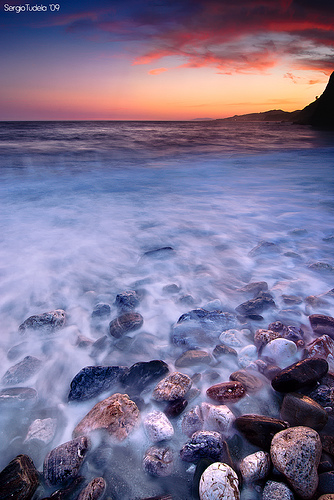
Crematorium by Sergio Tudela Romero on flickr (licensed CC-BY)
The magic of twilight is that it is dark enough to allow you to capture the lights of a city at night, and light streaks from moving vehicles. However, it is still bright enough to give a beautiful blue tone to the sky, and let you capture photos with a shutter speed measured in seconds rather than minutes.
For twilight photography it is best to make sure you are set up early, as twilight typically doesn't last very long. Exposure times will be quite long, so you will want a tripod to keep your camera steady. Find your location and set the camera up before or during sunset. Bring some extra clothing as well as the temperature can cool down quite quickly once the sun has set.
Your camera's autofocus probably won't work very well in the dim light of twilight, and the lack of light can also make manual focusing difficult. So choose your focus point and set the camera's focus while it still light.
When taking the photos, use a shutter release cable, or the camera's self timer. The exposure time needed for a twilight photo will likely be well over a second, so you want to avoid risking moving the camera.
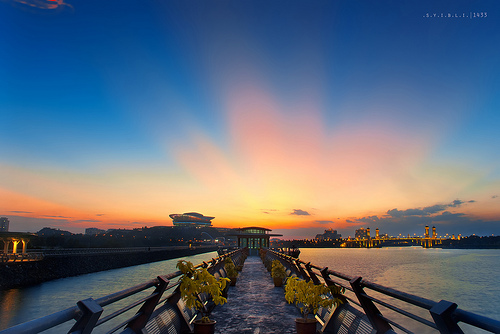
Putrajaya Dam || .T.W.I.L.I.G.H.T. by Syibli on flickr (licensed CC-BY-ND)
As the night draws in and the light fades, you will find that you gradually need longer and longer shutter speeds. So keep reviewing the photos on your camera's LCD and increase the exposure time for the next shot if necessary.
Set your camera's white balance to daylight. This will allow you to capture the twilight sky as a deep blue and any tungsten lights as a warm yellow / orange. The aperture setting you will want to use depends on what you are photographing, but generally for landscape and cityscape twilight photos you will want to use f/8 - f/11 to maximize your depth of field.
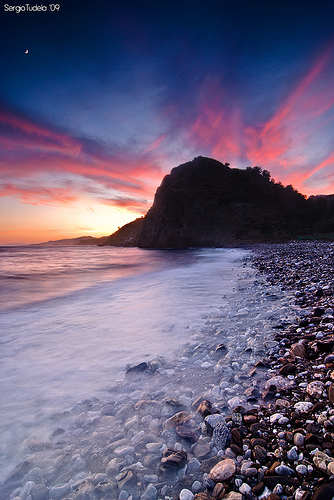
Explosions in the sky by Sergio Tudela Romero on flickr (licensed CC-BY)
Use an ISO speed of around 100. This ensures clean, noise free images, and gives longer shutter speeds. The longer shutter speeds help you capture movement such as light streaks from moving cars, blurred images of people moving, and blurred clouds moving across the sky. Capturing movement is one of things best done at twilight - earlier in the day it is too bright to use slow shutter speeds. And later in the night shutter speeds are so slow that moving objects just blur into nothingness unless you are photographing in a well lit area.
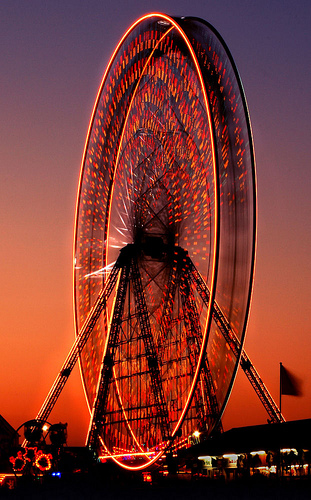
Fatal Attraction! by Andrew Hurley on flickr (licensed CC-BY-SA)
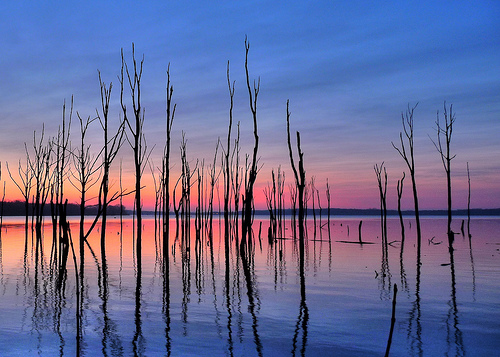
Landscape photos can work very well at twilight, particularly on days with scattered cloud where the clouds pick up the remnants of light from the sun below the horizon and turn deep orange or purple. Anything in the foreground will likely become a dark silhouette, so bear this in mind when you are looking for a subject.
Squan sunrise by b k on flickr (licensed CC-BY-SA)
If you want to expose both for the foreground, and the twilight sky, you will need to use a technique to equalize the exposure. A split neutral density filter attached to your lens will allow you to do this at the time of capture. Alternatively, you can try bracketing your exposures and then using HDR or exposure fusion processing to keep detail in both the sky and foreground.
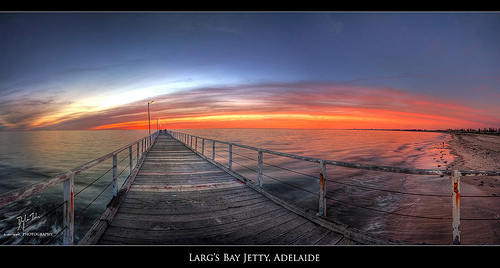
The world of Larg's by Dylan Toh on flickr (licensed CC-BY)
Cityscapes also work well at night, with tungsten lights giving everything a nice warm glow. Around busy roads you can capture the light streaks left by moving vehicles.
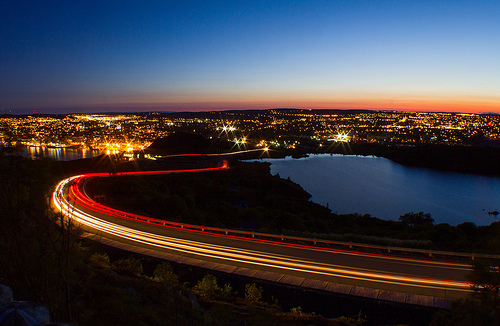
Light Trails at Twilight by Brian Summers on flickr (licensed CC-BY-ND)
For taking a portrait photo during twilight, you will need to use a high ISO or flash to prevent your subject blurring through movement (no-one can stay perfectly still for a multi second exposure). If you use a high ISO, remember that this will also reduce the blur of any moving cars etc. in the background.
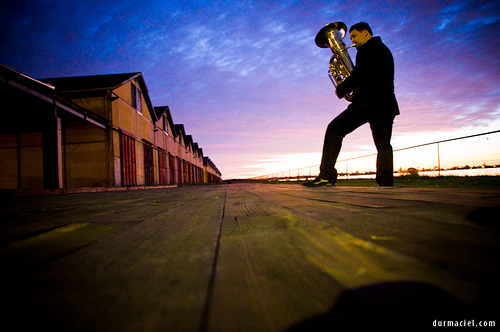
sunset player by d u .r. M a c i e l on flickr (licensed CC-BY-NC)
If you use flash you can continue to use a long shutter speed while using the short sharp burst of light from the flash to keep your subject sharp. You can also trying increasing your shutter speed to darken the background slightly while keeping your subject exposed properly.
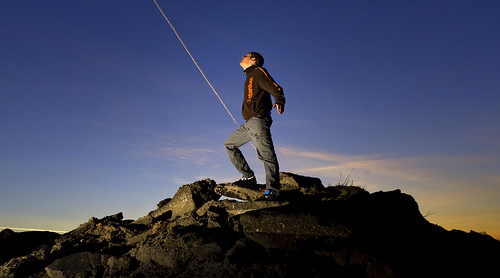
A Little Bit About Me by The World According To Marty on flickr (licensed CC-BY-ND)
Flash photos at twilight can make it quite obvious that flash was used. For a more natural look, try using a warming or tungsten gel on your flash. This can make it look more like your subject is being lit by a street lamp than a flash.
You can also experiment taking portraits at twilight with flash and movement - ask your subject to move during the exposure and you'll get a ghostly trail leading up to / from the point your subject was when the flash fires. You can set your camera to fire the flash either at the start of the exposure (first curtain sync) or at the end of the exposure (second curtain sync), each will give a different effect.


