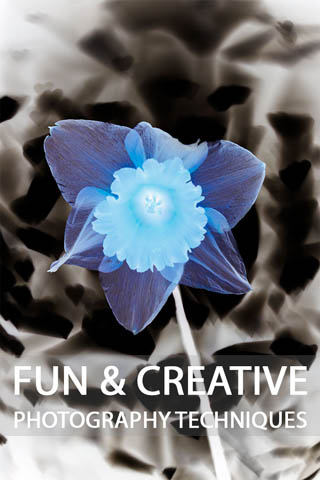
Fun and Creative Photography Techniques to try with your camera
Whether photography is a hobby for you, or a career, it's highly like that you take photos because you enjoy it. One of the enjoyable aspects of photography is trying out new techniques, and capturing images that show a different view of reality to that you see with your eyes.
In this article I'll share five techniques that are fun, creative, and can result in some great 'out of this world' photos.
Custom bokeh
Custom bokeh allows you take photos where out of focus points of light look like a shape of your choosing (rather than the circular, hexagonal, or octagonal shape you'd get in a standard photo). To get this effect you need a camera with a relatively large image sensor - if your camera has interchangeable lenses (such as a DSLR) then it should be fine. But phones and most compact cameras aren't suitable for this technique.
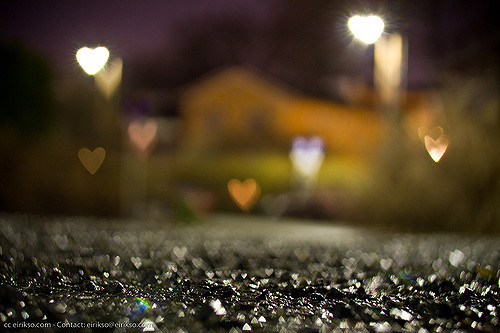
Hearts by Eirik Solheim on Flickr (licensed CC-BY-SA)
The other thing you need is a fast lens with a large maximum aperture and a medium to long focal length. A 50mm f/1.8 or f/1.4 lens is ideal - 50mm f/1.8 lenses are available fairly cheaply as far as lenses go.
Take a piece of black card that will fit over the front of your lens and cut a small shape in the center. The shape needs to be smaller than the lens glass. This shape will become your custom bokeh shape.
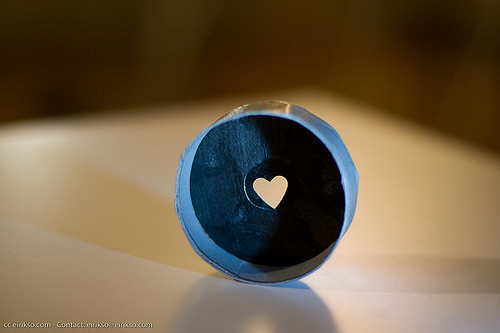
custom bokeh by Eirik Solheim on Flickr (licensed CC-BY-SA)
Either tape the piece of black card to the front of your lens, or just hold it in place. Ensure that the hole you cut in it is over the center of the lens. This now acts the same way as the aperture in your lens does normally, except that you can't vary its size, and it has a non-circular shape.
Set your lens' built-in aperture to fully open (e.g. f/1.8). Find a subject that has some point light sources in the background (or foreground) that you can put out of focus. Fairy lights are a favorite, but it can be something as simple as sunlight reflecting from drops of dew on grass in the early morning.
Take your photo, and you'll find that the out of focus points of light take on the shape of the custom aperture.
Light painting
Light painting is a form of long exposure photography where you gradually build up light in the image over the course of the exposure - which may last several seconds to several minutes. There are two types of light painting. One is where you paint a scene with light, the other where the light source itself becomes the actual subject.
For painting a subject with light, you need a dark location, such as a room with the curtains shut and lights turned off, or anywhere at night that is not well lit. Your camera must be on a tripod to prevent any movement during the long exposure.
You start the exposure, then use a light source (typically a flashlight) to paint light onto your subject. Simply shine the light over the subject to paint light onto it. Areas you want brighter in the final photo, paint for a longer period of time. Areas you want darker be sure not to paint for very long.
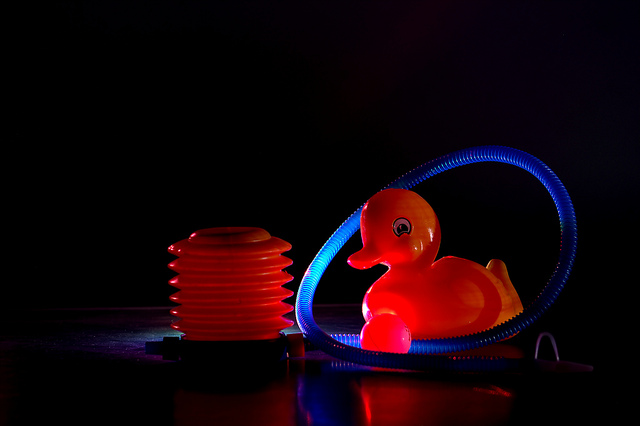
ducky by Jaro Larnos on Flickr (licensed CC-BY)
Stop the exposure and check the resulting image. If it's too bright, either reduce the amount of time you are painting light for, reduce the ISO, increase the aperture, or add a neutral density filter to cut down on the light. If it's not bright enough do the opposite - either increase the amount of time you are painting light for, increase the ISO, or use a larger aperture setting.
It can take some experimentation to get right, but can result in some great image with lighting you can't achieve any other way.
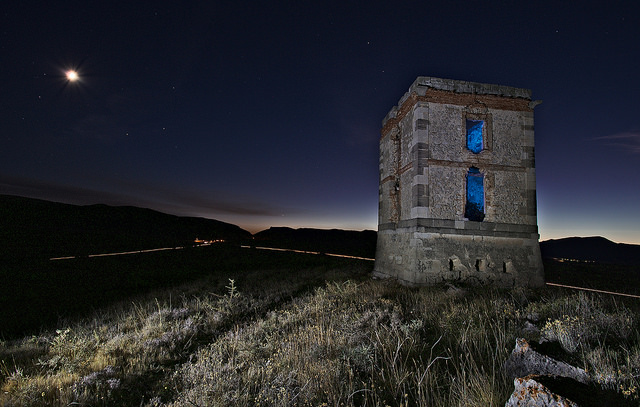
Torre de Telegrafos by Alfredo on Flickr (licensed CC-BY-ND)
The other type of light painting is very similar in technique - you need a dark location and your camera on a tripod. But rather than shining your light source at a subject, you shine it at the camera.
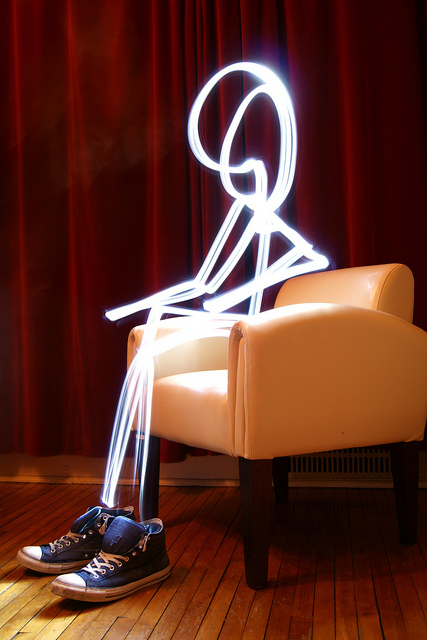
75/365 Just Sitting Here by Joe Lodge on Flickr (licensed CC-BY)
You then draw in the air with the light source. You can draw figures, or just create lines around an object. You can use multiple colored lights to add some variation to the image. You can even use the screen of a tablet computer to add complex shapes floating in mid-air.
Again, it requires quite a bit of experimentation to get really good results, but can definitely give great images, as well as being fun to play around with.
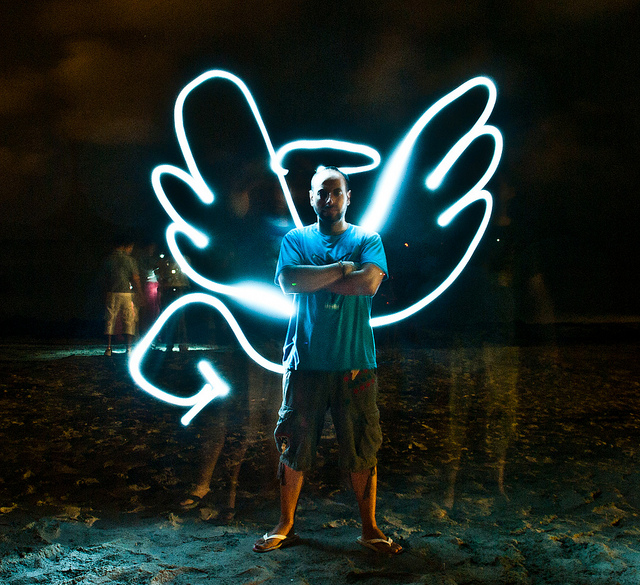
Light Painting by Cabrera Photo on Flickr (licensed CC-BY-SA)
Selective color
Selective color is a great way to draw attention to a certain part of a photo. It involves capturing a color photo, then turning most of the black and white except one part.
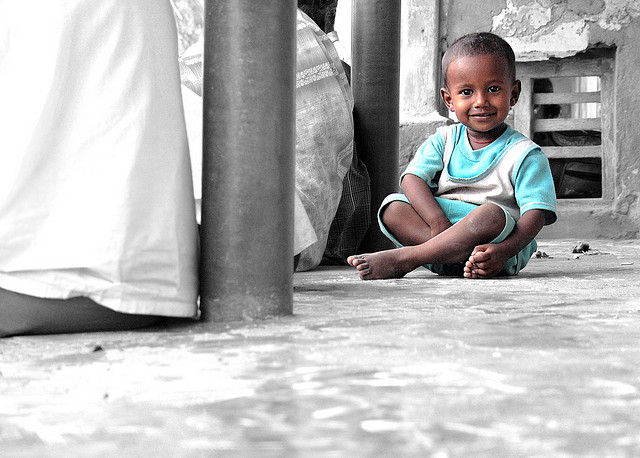
A young pilgrim resting on thinnai by Simply CVR on Flickr (licensed CC-BY-ND)
To do this is pretty simple in most image editing software. Open up your image. Add a Hue / Saturation layer and set the saturation to zero. Or duplicate your background layer, and then adjust the saturation of that layer to zero. Then add a layer mask to the layer.
Now paint black on the layer mask where you want the color to be revealed. If you make a mistake on the mask, just use white to paint back in the layer.
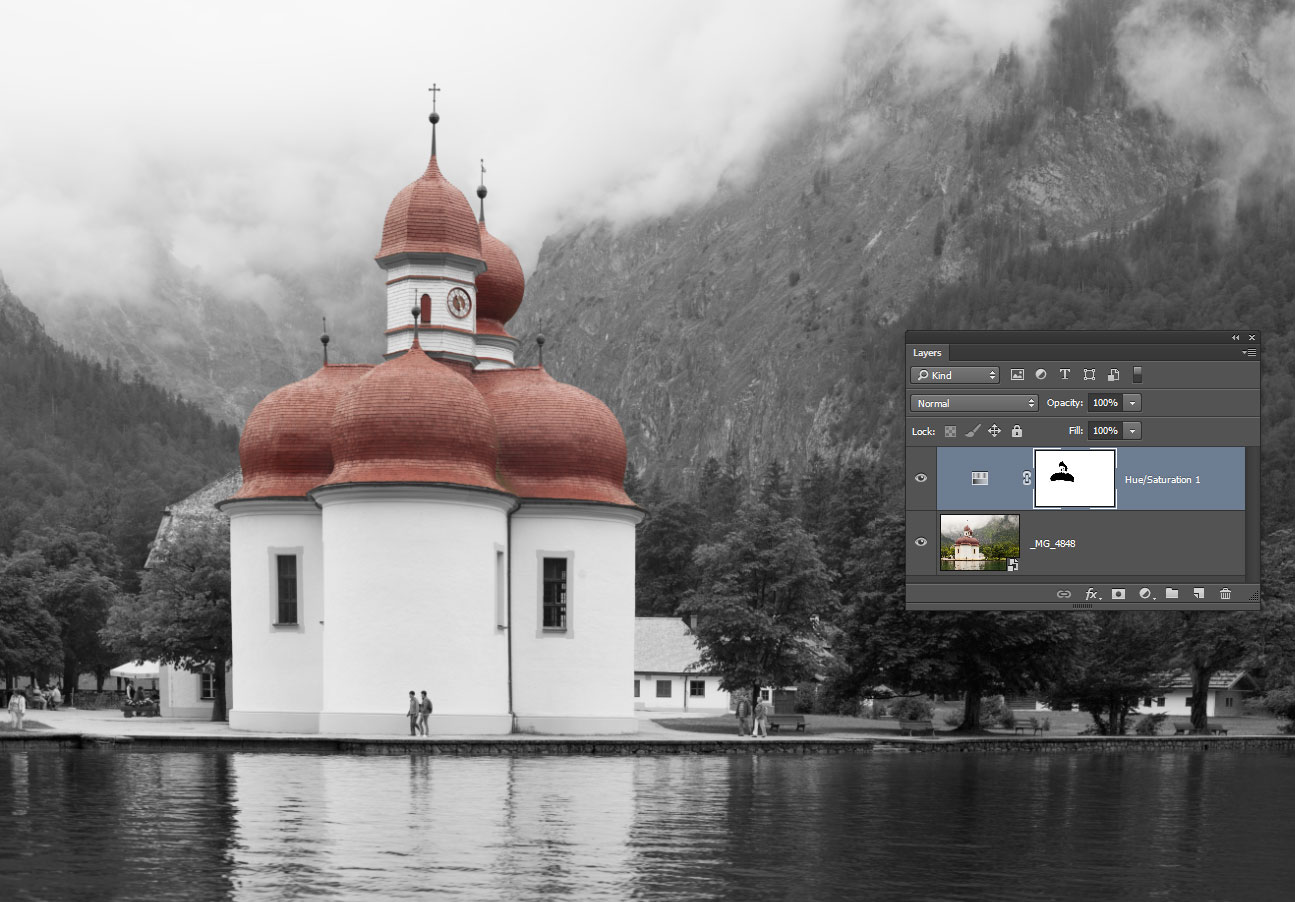
Example using a layer mask on a Hue / Saturation adjustment layer in Photoshop
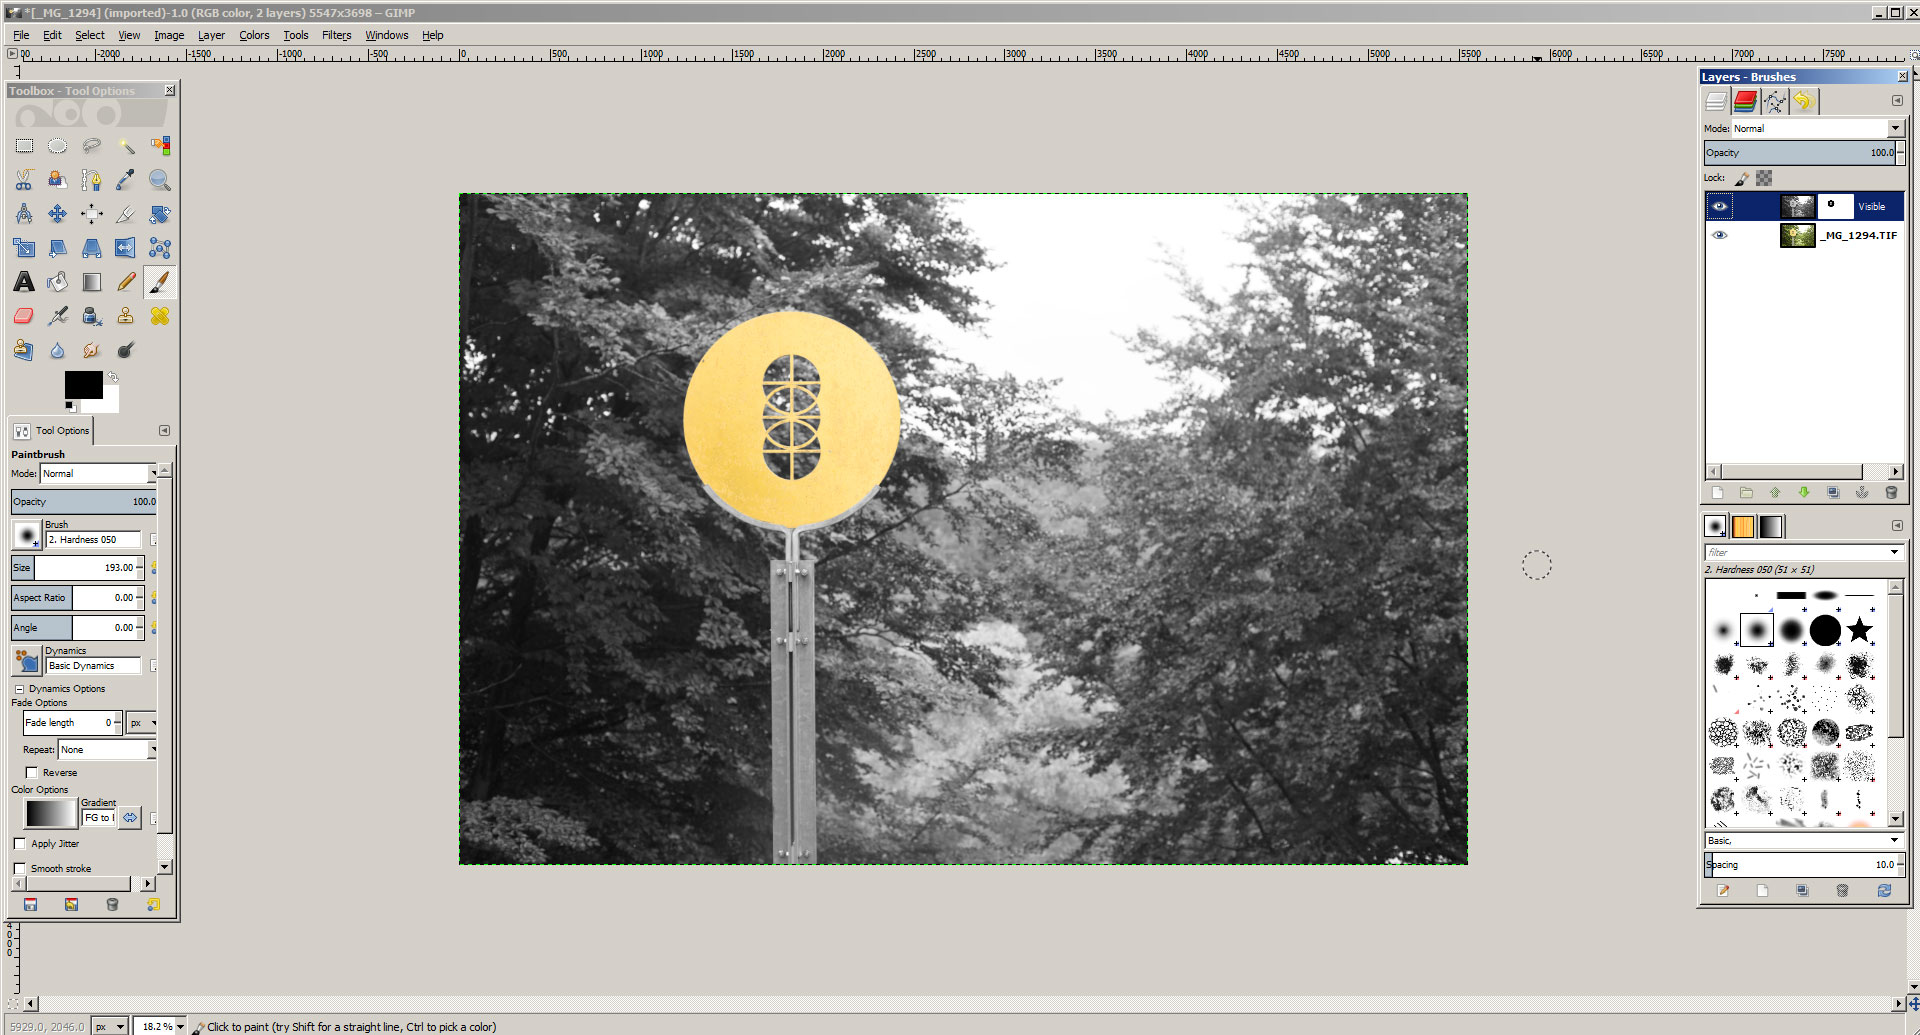
Example using a layer mask on a duplicated desaturated layer in GIMP
This technique is simple but effective. Depending on the subject, painting the mask may be quick or take a long time. But don't overdo it with this technique. If all your photos are selective color, it can get old quite quickly.
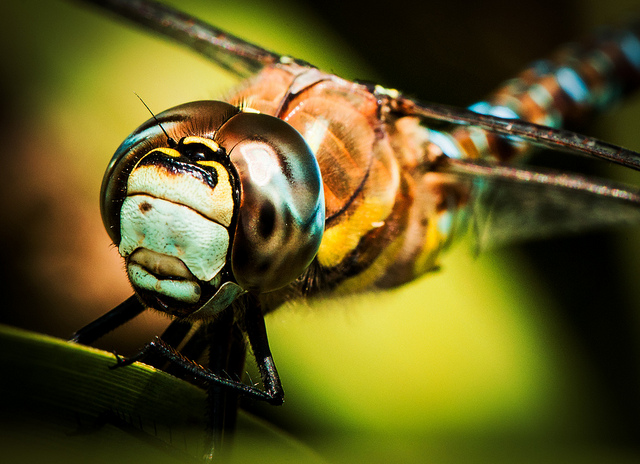
Macro
Macro photography can open up a new world of potential subjects right in front of your eyes. Simple household items can take on a completely different appearance when viewed close-up. Insects can look like giant monsters from another planet. And there are abstract photos almost everywhere when shooting macro.
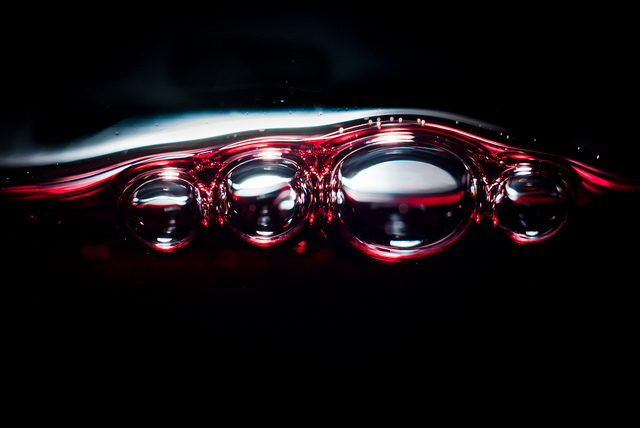
Age like a fine wine by Derek Gavey on Flickr (licensed CC-BY)
The vast majority of cameras are capable of close-up photography. For interchangeable lens cameras you can purchase macro lenses that focus much closer than standard lenses. Or you can purchase extension tubes or bellows that fit between a standard lens and the camera, and make the lens focus much closer than it would normally.
Or you can purchase close-up diopter filters that attach in front of your camera's lens, allowing it to focus much closer. Versions of these are even made for phone cameras. Some compact cameras also feature a macro mode that allows you to get very close-up photos without any accessories at all.
Macro photography can be great fun, just discovering all the intricate details of subjects that you can't normally make out with the naked eye.
Kiss me!! by Sander van der Wel on Flickr (licensed CC-BY-SA)
Photograms
A photogram is a photo that is somewhat like an X-ray image, except that it doesn't let you see through solid objects. Typically photograms are black and white, though they can be color too. Solid objects appear pure white in the image, while semi-transparent parts appear as shades of gray, all against a pure black background.
To capture a photogram you need a solid bright white light source behind your subject(s). If you're photographing small subjects that can be laid down (which is the case for most photogram subjects), then you can lay them flat on top of a lightbox.
If you don't have a lightbox you can use a piece of translucent white acrylic as your surface, with a light source underneath it. Or a sheet of glass with a sheet of white paper on top, and lit from underneath. This acts as both the background and the light source.
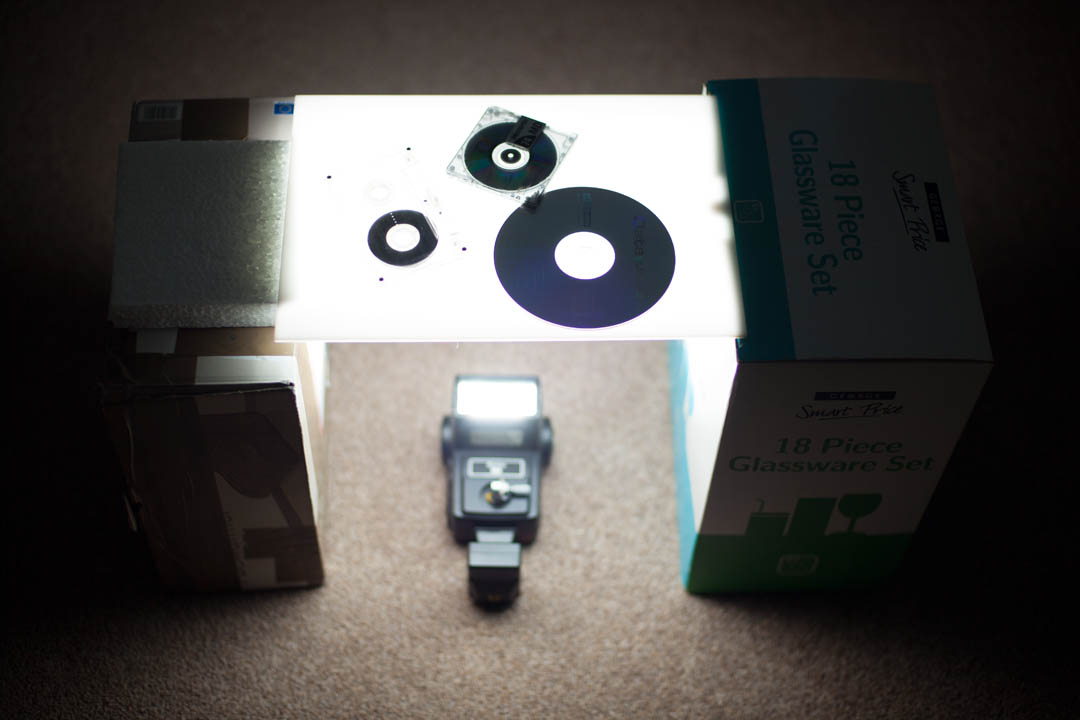
Set up your camera so that it is looking down at the subject(s), laid on the flat backlit surface. Close the curtains and turn off any lights in the room, so the subjects are only being illuminated from below. Take a photo.
You should get an image where solid objects appear pure black and the background is pure white - the opposite of a photogram. You can then use image editing software to invert the image, achieving the photogram effect.
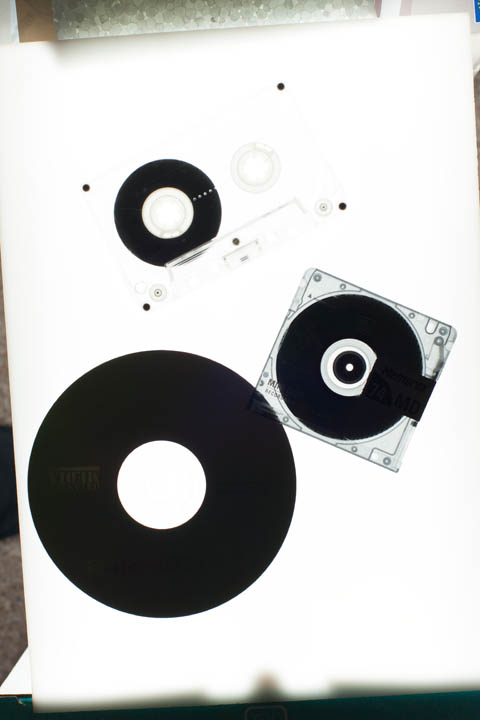
Image out of camera

Inverted and cleaned-up image
None of the techniques described in this article are likely to be useful for general photography. But they can be good fun to play around with, especially if you're feeling a bit bored with your photography. So if you feel like your creativity is waning, or you just want to try something different, why not give one (or more) of these techniques a go?


I love the custom boke. It gives you excitement and chill while doing your DIYS camera lens effect, The most famous is the heart shape its really cool, especially when employing it to capture the city lights it’s kinda romantic!