What is macro photography?
Macro and close-up photography provide a way to make the unseen visible. It can highlight details and show us beauty we would otherwise have missed. Essentially macro photography is taking photos that magnify these small items and details so that they can be seen easily.
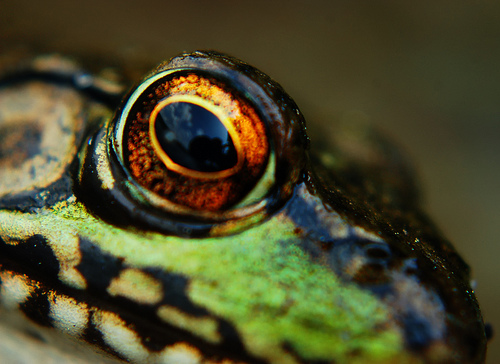
Macro by Hachi Gatsu on flickr (licensed CC-BY)
If you want to learn more about macro photography, there are some common terms used when discussing it, which it can be helpful to understand what they mean. In articles about macro and close-up photography, and in online discussion forums, you will often come across terms such as:
- true macro
- magnification ratio
- life size
- ratios such as 1:1 and 1:2
In this article I want to explain what these terms mean how they relate to actual photographic practice.
What is the magnification ratio?
Before we look at the definition of macro photography, we need to understand the magnification ratio. This ratio (also known as the reproduction ratio) refers to how large an object is in real life, compared to how large it is captured on your camera's image sensor (or film for film cameras).
It is important to note that the magnification ratio is always expressed in terms of the image sensor size, not the size when viewed on screen. An object that is captured at the same size on the image sensor as it is in real life gives a magnification ratio of 1:1.
An object that is captured at half its actual size on the image sensor gives a magnification ratio of 1:2. An object that is captured at twice its actual size on the image sensor gives a ratio of 2:1.
A magnification ratio of 1:1 is often referred to as 'life size'. This is because the size of the object captured on the image sensor at this magnification is the same size as the object in real life. Of course, when displayed on screen, the object will actually appear larger than it does in real life.
Examples
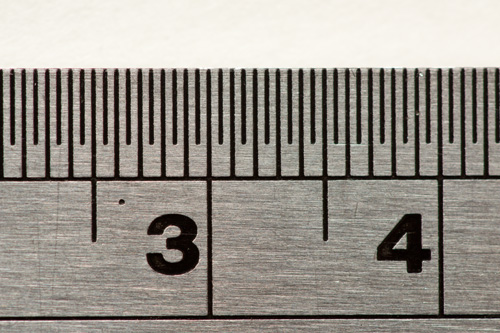
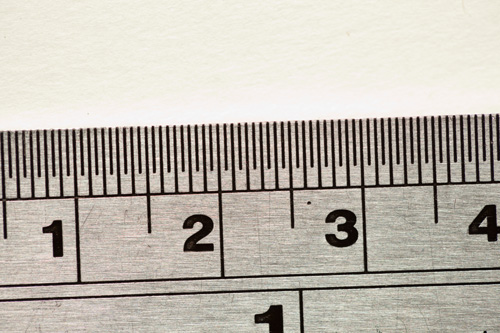
This first photo was taken with a camera that uses an APS-C sized sensor. The sensor size is 22.2mm horizontally, and the length of the object in the image measures about 22mm in real life. So this photo was taken with a magnification ratio of 1:1.
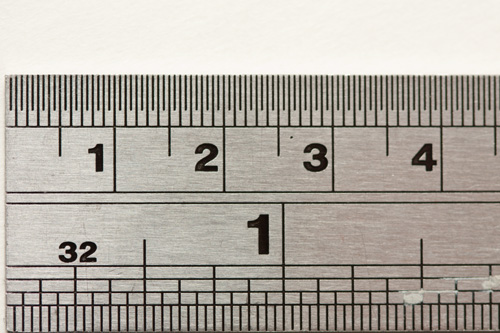
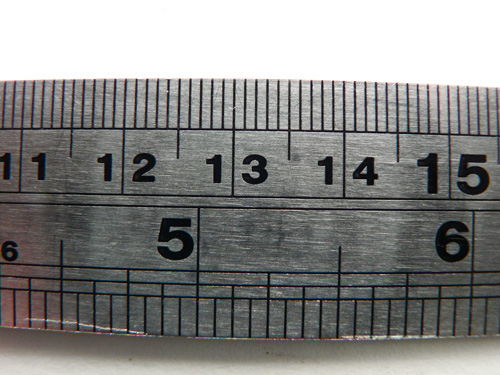
This photo was again taken with a camera where the image sensor size measures 22.2mm horizontally. In this image the length of the object is about 46mm in real life. So the magnification ratio is around 1:2 (half life size).
The above photo was taken with a camera with a larger image sensor, measuring 36mm horizontally. The object in the image measures around 36mm horizontally in real life, so this image was taken at 1:1 magnification.
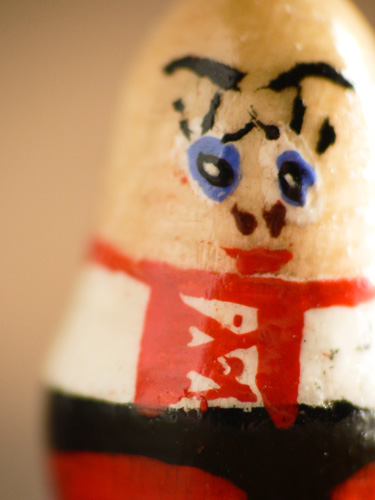
This last photo was taken with a camera that has quite a small image sensor - 5.76mm in width. The object in the image measures about 47mm in real life. This gives a magnification ratio of around 1:8.
Hopefully these examples help show how the magnification ratio works. Although an object might appear much larger on screen or in print than it is in real life, the magnification ratio is only concerned with the size of the subject compared to the size of the image sensor used to capture it.
The last image taken with a small sensored camera reproduces the subject about the same size on screen as the image taken with an APS-C sensored camera at 1:2 magnifcation. But the image taken with the small sensored camera has only a magnification ratio of 1:8 because magnification ratio is not concerned with reproduction at screen size.
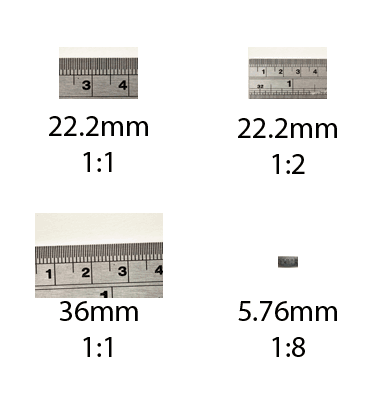
The above image shows all four of the previous images resized to the same sizes as the image sensors that captured them.
What is the magnification ratio used for?
The maximum magnification ratio obtainable is often given for lenses designed for close-up / macro work. So you can use this ratio to give you an idea of how large a lens will let you capture an object (when used at its closest focusing distance).
If you are looking at lenses (particularly older ones) for sale online, be aware that the aperture can also be expressed as a ratio. For example, if you see a lens described as 200mm 1:4
. This could mean a 200mm lens with an aperture of f/4, rather than a lens capable of a magnification ratio of 1:4. If you're unsure, then check with the seller.
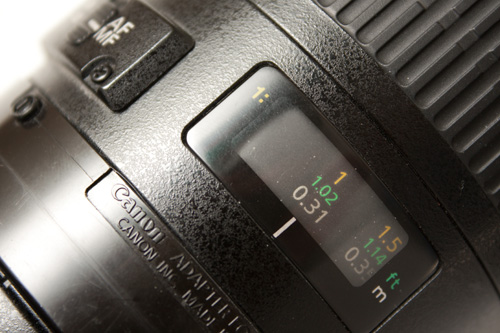
Some macro lenses include the magnification ratio on the focusing scale. On the lens above the scale shows the magnification ratio, focus distance in feet, and focus distance in meters.
Although the magnification ratio may seem a bit obtuse by using the image sensor size, there is not really a better way it could be expressed. The size that people display their images at (the final magnification) varies quite a bit. You can also choose to crop your images to increase the final magnification. Just remember that the magnification ratio always refers to the magnification ratio at the point the image was captured, not when the image is displayed.
So the magnification ratio can give you a good idea of how large you will be able to enlarge a subject when you display the image at its final size. You do need to know the sensor size of your camera, but this can often be found pretty easily with a quick web search.
If you know the magnification ratio that a photo was taken at and the size of your camera's image sensor, then you can use this information for working out how large the subject is. By looking at how much of the frame the subject fills up, you can get a good approximation of its size. This is useful for photos of insects and other invertebrates, as the size can be helpful in obtaining an id of the subject.
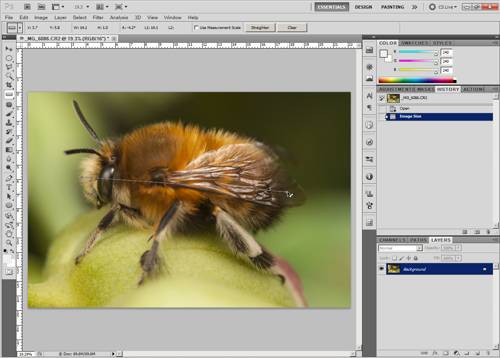
Because I know that this photo was taken at a magnification of 1:1 with a camera that has an image sensor that measures 22.2mm horizontally, I can use Photoshop's ruler tool to determine the subject size of this bee - around 14mm in length.
The magnification ratio is also used to define macro photography, which we'll look at next.
What is macro photography?
Strictly speaking, Macro photography refers to images captured with a magnification ratio of 1:1 or greater. However, it is also often used to refer to any image where the subject will appear above life on screen or in print.
For this reason, images taken at 1:1 magnification or greater are sometimes referred to as true macro
, to distinguish them from images taken at lower magnifications.
Does it matter?
Does it matter if a photo you have taken is a true macro or not? Well, ultimately, no. What is important is that the photo is aesthetically pleasing or interesting (or both). However, if you want to enter your photo to a competition or photo group, then it may become more important.
Some groups on photo sharing websites only allow photos to be added to them if they are a true macro photo, i.e. 1:1 magnification or higher. Similarly, if you enter a specialist macro photography competition, they may only accept true macro photos.
But for most intents and purposes, the reproduction size of the subject when viewed on screen / in print is more important than the magnification ratio the subject was captured at.

The top image above was taken with a camera that uses a large image sensor at a magnification of 1:1 (life size). The bottom image was taken with a camera that uses a small image sensor at a magnification of 1:2 (half life size). But when viewed at normal sizes, the image taken at a lower magnification shows a closer view of the subject. Does it really matter that it's not a true macro
image.
So if your close-up photo gets rejected from a macro photo group for not being a true macro photo, at least now you'll understand why! Hopefully macro photography articles and discussions will also make a bit more sense to you now you understand what these terms mean.
I hope to publish some more articles relating to macro photography equipment and techniques as we move into Spring (in the northern hemisphere). If you have any suggestions or questions, please leave a comment below or send me a message.


