Breaking the rules of photography
There are many 'rules' of photography (I prefer to think of them as guidelines) that we can follow in the effort for outstanding photos. But sometimes not following the rules can result in a more interesting and engaging photograph.
Now, I'm not saying that you shouldn't bother learning the 'rules' of photography, or that you should ignore them completely. Rather, once you have learned the rules, and how they work, you will then know when to make a conscious decision to break a rule.
- Bad: Breaking a rule because you don't know any better.
- Good: Breaking a rule because you want (or don't want) to achieve a certain effect.
With that out of the way, let's look at some examples of where breaking the rules can work well.
Rule of thirds
A common guideline used when composing a photograph is the rule of thirds. This is where you divide your image into thirds horizontally and vertically. And then compose the image to place the most important part of the scene at an intersection of a vertical and horizontal thirds line.
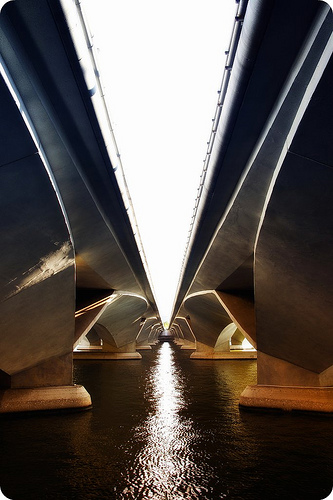
This works well for the majority of images, but some images work well even when the composition doesn't comply with the rule of thirds. Images displaying symmetry often work better if they are centered, which enhances the symmetry.
Life by OiMax on flickr (licensed CC-BY)
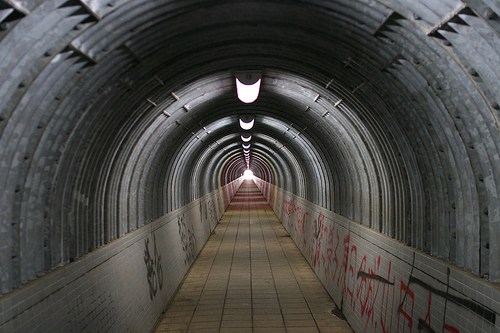
In the image below you can see that they have used part of the rule of thirds. The horizon is placed approximately on the bottom third line. But the main focus point (the far end of the bridge) is placed centrally instead of at an intersection between a vertical and horizontal thirds line.
Symmetry [revisited]. by digitalpimp. on flickr (licensed CC-BY-ND)
Subject in focus
When you take a photo, you nearly always want your subject to be in sharp focus. But sometimes it can pay to do a little experimentation, and put your subject out of focus.
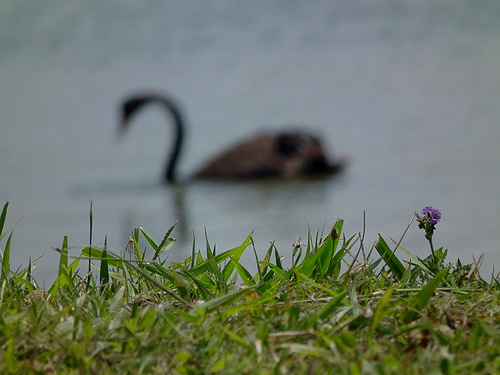
Swanny by bareego on flickr (licensed CC-BY)
For this to work, you need a reasonably good contrast between your subject and its surroundings, so that it will still stand out even when it's out of focus.
This method can be quite effective for some portraits, where you can focus on something behind or (more often) in front of the person, instead of their face. An example would be a couple holding hands, with the focus on their hands.
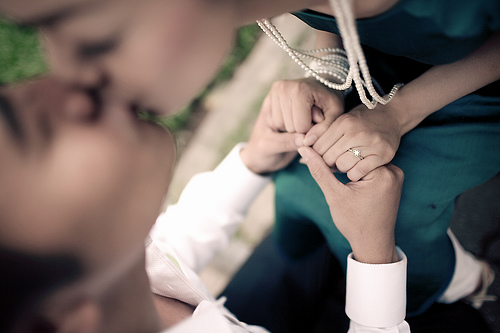
engaged by linh.ngan on flickr (licensed CC-BY)
For creating more abstract images, it can sometimes work well to have most or all of the shot out of focus.
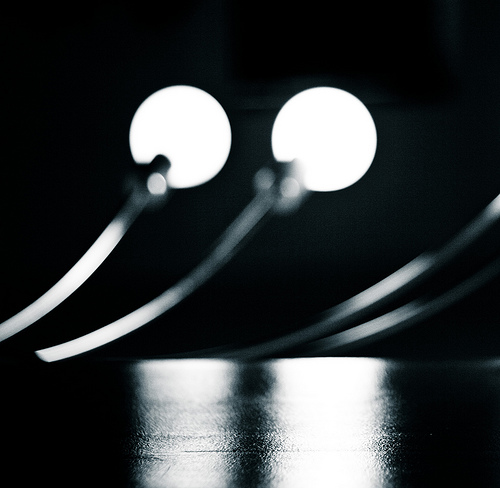
Bokeh Lights OOF Series-2 - VoxEfx by Vox Efx on flickr (licensed CC-BY)
Get exposure correct
When taking a photo, most people will review the image on the camera's rear LCD, to make sure it isn't too dark or bright. If it is, then they'll adjust the exposure as necessary and take another shot.
But exposing an image so that the subject is the correct brightness is not always the best way. You may have heard of the term Expose to the right
, or ETTR for short. Using this exposure method, you expose so that the image is as bright as possible without clipping the highlights. (Exposed so most of the image data is on the right side of the histogram).
The reason for doing this is that digital cameras capture more image data and less noise in the highlight range than they do in the shadow range. After taking the photo, the exposure can be pulled back on the computer to give an image that is the brightness wanted.
The ETTR technique is only really useful in certain situations, but it is an example of a situation where you don't want to get the exposure 'correct' at the time of shooting.
In some situations though, you may want to consider dramatically under-exposing or over-exposing your photo. This technique is known as high key for bright photos, and low key for dark photos.

Cecilia by Astragony on flickr (licensed CC-BY)
Over exposing for a high key photo works well to soften the subject. It is sometimes used for female portraits, and also some floral photos.
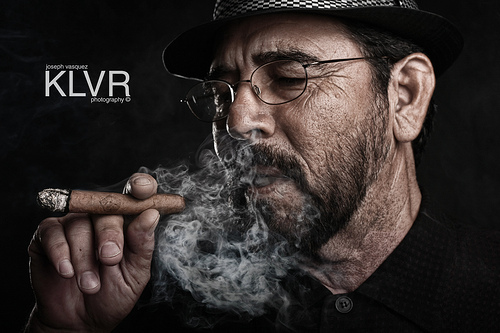
Blowin' Smoke by JOE-3PO on flickr (licensed CC-BY)
Underexposing can work well for subjects with texture you want to bring out. Silhouettes are another example where you'll want to underexpose the shot.
So, don't forget the rules of photography. But once you've learnt them, don't be afraid to break them either. Experiment and have fun with your photography, it will result in better photos.


