What is aperture priority (AV mode)?
Most digital cameras offer a range of shooting modes, going from M (Manual), through A or Av (Aperture priority), S or Tv (Shutter priority), to P (Program mode - automatic). In this article we'll look at the Aperture priority mode, and why you might want to use this mode on your camera.
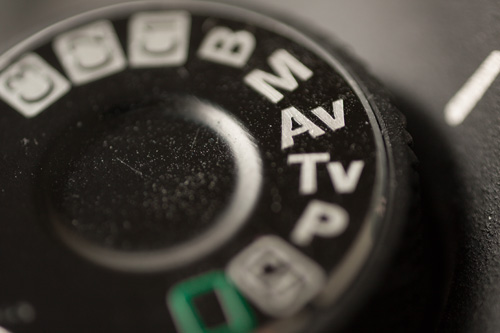
On cameras that feature a mode dial, aperture priority mode is normally indicated by an 'A' or 'Av'. On cameras without a mode-dial you will need to go into the menus to change the shooting mode. The vast majority of cameras support aperture priority mode, but note that it may not be available in some basic compact cameras.
Aperture priority mode is a semi-automatic mode. It lets you select the aperture you want to shoot at, and the camera will automatically choose the corresponding shutter speed for a good exposure. The benefit of Av mode is that by controlling the aperture, you can control the depth of field in your image (how much of the image is in focus).
A large aperture, e.g. f/2.8 gives a very shallow depth of field, so that only a slim portion of the image is in focus. A small aperture, e.g. f/16 gives a large depth of field where nearly everything in the image, from a few feet away, all the way to infinity, will be in focus.
Silk Road #13 by Jonathan Kos-Read on flickr (licensed CC-BY-ND)
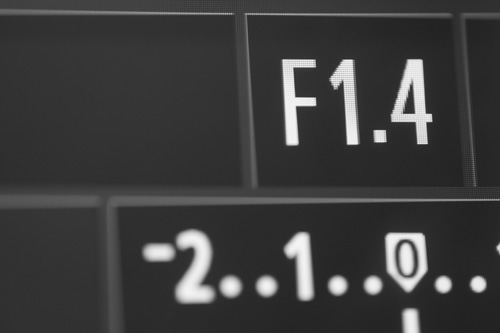
With the camera in aperture priority mode, most cameras will let you change the aperture using a control wheel. Rotating the wheel left selects a larger aperture, while rotating right selects a smaller aperture. Some cameras use a four-way controller instead of a control wheel. If you're not sure how to control the aperture in Av mode, check your camera manual for instructions.
As you change the aperture, the current value will be displayed in the viewfinder (if your camera has one), or on the camera's LCD screen.
Aperture and sensor size
When we are talking about depth of field, it is important that we consider how it is affected by the size of the camera's image sensor. A camera with a small image sensor (e.g. most compact cameras) has a very large depth of field compared to a camera with a large sensor (e.g. DSLRs and MILCs).
So, changing the aperture on a compact camera does not have much effect on the depth of field. At f/4 on a compact camera you probably already have enough depth of field to get everything from a few feet away to infinity in focus.
This means that achieving a shallow depth of field on a compact camera is very difficult. (One of the reasons why people pay more for larger, bulkier DSLRs is their larger sensors that do allow for a shallow depth of field).
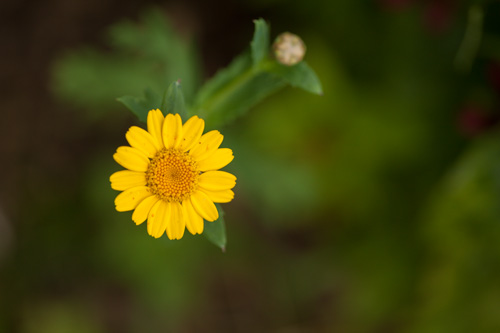
Photo taken at an aperture of f/2.8 with a DSLR camera that has a large image sensor

Photo taken at an aperture of f/2.8 with a superzoom camera that has a small image sensor
The examples of small and large apertures given in the sections below are with regards to cameras with large image sensors.
If you want a shallow depth of field on a compact camera, you need to use a wide aperture, and get very close to your subject. As time moves on, we are starting to see more enthusiast compact cameras with larger image sensors though (e.g. the Canon G1X).
When to use a small aperture
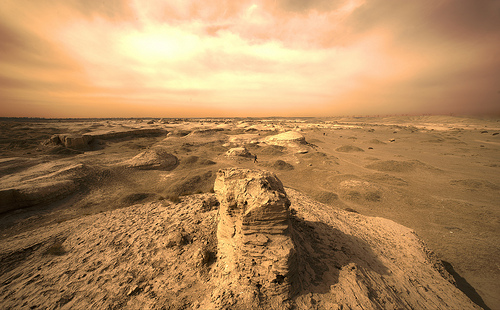
A small aperture (e.g. f/11) gives a large depth of field, so is suitable when you want everything in the scene to be in focus. The main example would be landscape photography. Using a small aperture you can get a depth of field that extends from rocks in the foreground to the horizon in the distance.
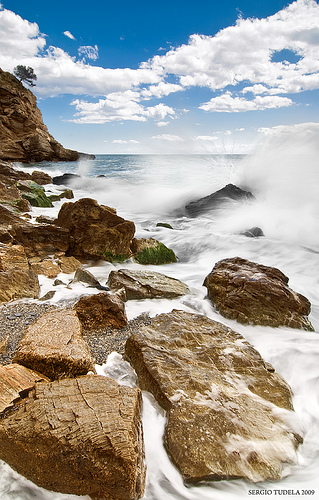
Beach jungle by SergioTudela on flickr (licensed CC-BY)
Architectural photography is another area where a small aperture is often wanted, to get as much of the building as possible in focus. Small apertures are sometimes used in portrait photography, this is usually for studio shoots where you have control over the background. A small aperture (e.g. f/8) makes sure that all of your subject is in focus.
Imagine by Gemma Stiles on flickr (licensed CC-BY)
Macro photography normally requires a small aperture to get as much of your subject in focus as possible. This is particularly true for subjects where you want to capture a lot of detail, such as small insects. At close focus distances depth of field is very shallow, so you need to close down the aperture as much as possible.

Ant by Il conte di Luna on flickr (licensed CC-BY-SA)
When to use a large aperture
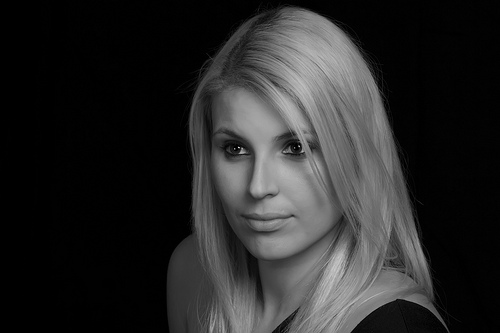
A large aperture (e.g. f/2.8) gives a shallow depth of field, so it is useful when you want to draw attention to just one part of a scene. A good example would be environmental portraiture. By using a large aperture, the subject can be rendered in focus, while the background behind will be out of focus. This is a good way to avoid busy backgrounds distracting the viewer's attention from your subject.

Little Yafa by stevetulk on flickr (licensed CC-BY)
Close-up photography is another form of photography where shallow depth of field can be put to good effect. Using a large aperture renders the rest of the image out of focus and draws the viewer's eye to the subject.
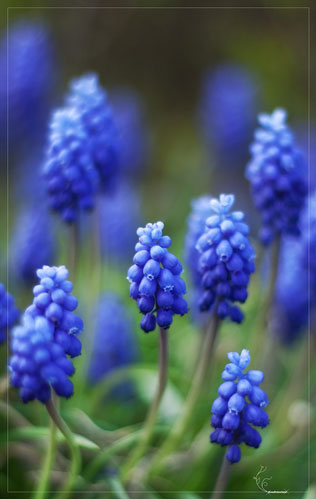
say it with flowers by fRandi-Shooters on flickr (licensed CC-BY)
Large apertures can also be useful for some forms of abstract photography, or creating a soft, dreamy look. A leaf or flower with only a very small portion in focus can create a great abstract photo where the subject is barely identifiable.
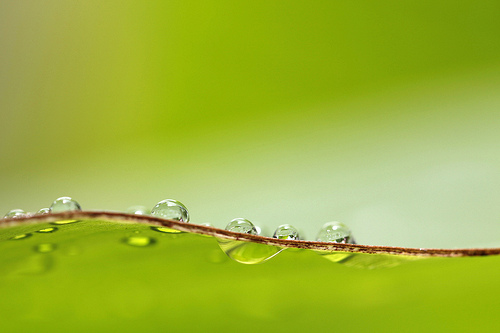
wave by jenny downing on flickr (licensed CC-BY)
Low light photography does not require a shallow depth of field. However, if you are hand-holding the camera, you want to let as much light into the camera as possible. Using a large aperture is advisable, as this will let you use a faster shutter speed, and be less likely to get blurry photos.
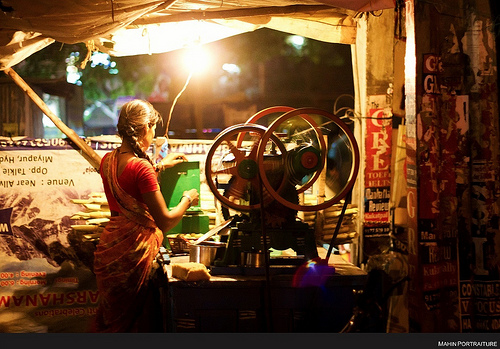
Sugarcane juice vendor in Hyderabad, India. by A.M.F. photo on flickr (licensed CC-BY)
When to use a medium aperture
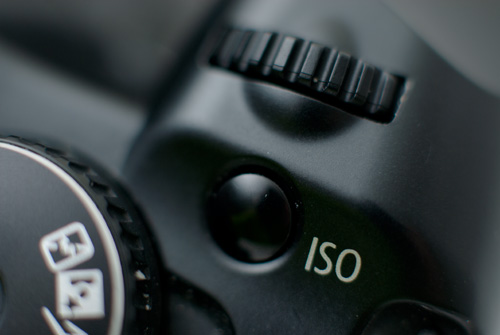
For standard snapshots, an aperture around f/5.6-f/8 will cover most situations. This puts most of the scene into focus. In daylight conditions it should let enough light into the camera for a good hand-holdable shutter speed as well. (Though this also depends on the focal length of the lens and ISO setting).
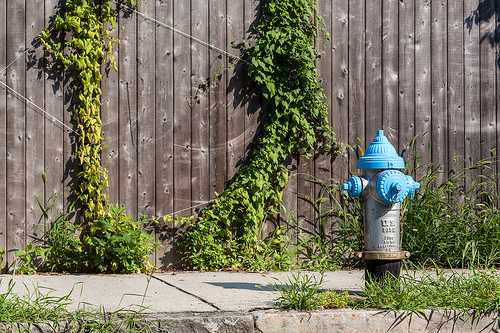
Yet Another Fence [216/366] by timsackton on flickr (licensed CC-BY-SA)
This sort of aperture range is quite popular for street photography as well. It provides a good depth of field, so that if focus wasn't quite spot-on, the subject will still be in focus.
Diffraction
Diffraction refers to light rays spreading out as they enter through the aperture hole of the camera / lens. At large apertures (e.g. f/2.8) the diffraction effect is small enough not to be noticeable. But at small apertures (e.g. f/22), it may be noticeable, and result in a softening of image detail.

European Garden Spider (Araneus diadematus) Aperture f/10 With Tubes by kevincole on flickr (licensed CC-BY)
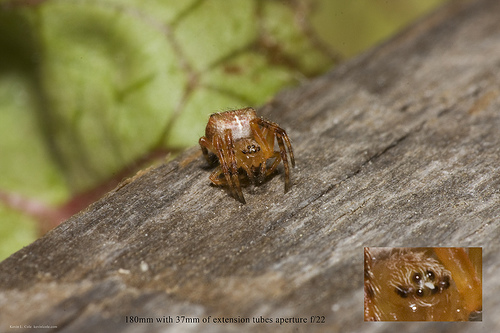
European Garden Spider (Araneus diadematus) Aperture f/22 With Tubes by kevincole on flickr (licensed CC-BY)
The point at which diffraction softening starts to become visible is known as the diffraction limit. Cameras with smaller image sensors hit the diffraction limit earlier than cameras with larger sensors. This is because cameras with smaller image sensors have their pixels packed more closely together.
So, using a small aperture on a compact camera is not advisable. Compact cameras already have a large depth of field thanks to the small sensor size. Using a small aperture will not bring much visible increase in depth of field, but it will bring a visible increase in diffraction softening.
Whether diffraction softening becomes visible is also down to how many megapixels your camera has, and how closely you look at the images. If we shoot the same image with a 10MP and 20MP DSLR, both at an aperture of f/16, then view them both at 100%, the 10MP image may not show much diffraction softening, while the 20MP image will.
However, if we downsize both images to the same size for display on the web, neither image will show diffraction softening, and they will both look the same. Likewise, if we print both images to the same size and view them from the same distance, both images will appear the same.
What to do if the camera selects a low shutter speed
In aperture priority mode, you select the aperture, and the camera selects the shutter speed to make a good exposure. But sometimes this shutter speed might be too low. Maybe you are shooting handheld, or trying to capture fast action. One solution would be to switch to Shutter priority or Manual mode. But this article is about aperture priority mode, so let's look at how we can sort this in Av mode.
One solution is to use a higher ISO setting. The camera will automatically compensate, and increase the shutter speed accordingly. You can also add light to the scene by using flash. Again, the camera will automatically compensate for the fact the flash is on, and increase the shutter speed.
Lastly, you can use a larger aperture setting. This lets more light into the camera, so the camera can select a faster shutter speed.
What to do if the exposure is too dark
If the camera selects a shutter speed that results in the image being too dark, you can fix this by using exposure compensation. Some cameras have an exposure compensation button, others you need to go into the menus to adjust it.
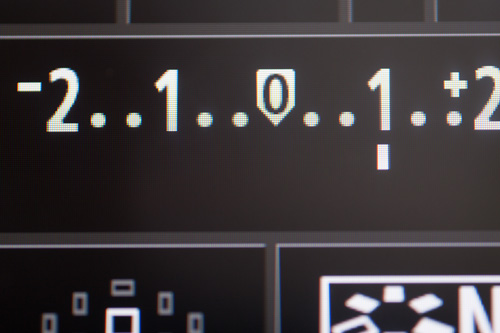
Just dial in some positive exposure compensation (e.g. +1). The camera will then automatically adjust the shutter speed to result in a brighter image. If your image is too bright, then just do the opposite, and dial in some negative exposure compensation.
Aperture priority is a very handy shooting mode, and is the most popular semi-automatic mode. With our photography we normally want to control the depth of field more often that we do the shutter speed, and this is why aperture priority mode is so popular.
If you've been using one of your camera's automatic modes, give aperture priority a try. Get creative, and try making images with large and small depths of field.


This is really amazing and just want to say one thing keep it up with good work