Seascape Photography Tips
Seascape photography is really a subtype of landscape photography, with the emphasis on the sea and coastline. Most landscape photography tips also apply to seascape photography. However, there are a few things you should pay particular attention to for eye catching seascape photos.
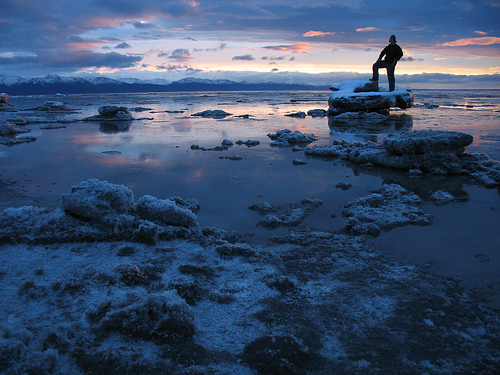
"Captain of Kincaid." Kincaid Park, Anchorage, Alaska by Paxson Woelber on flickr (licensed CC-BY)
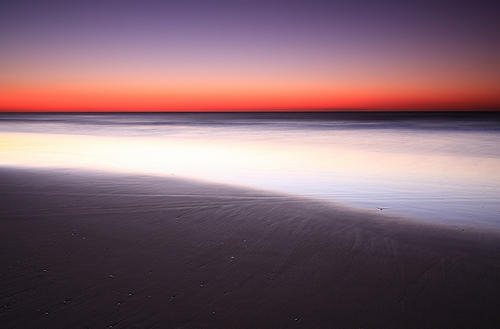
The first issue, which is quite a common problem, is how to stop the image looking flat. A photograph of a plain beach in the foreground with the sea behind it can look very two dimensional, with no depth.
Abstract Seascape
This type of shot can actually work quite well as an abstract shot, where the focus is not on the scene itself, but rather the colors, lines, and textures. A flat beach, the sea, and the sky split the photo into 3 sections of color. A shingle beach will also differentiate the bottom section by texture.
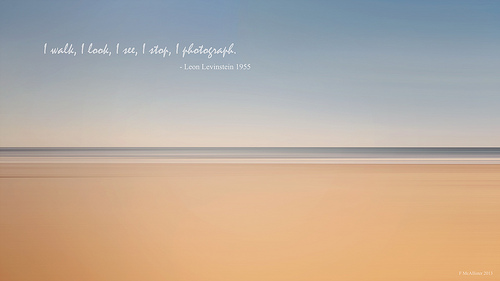
I walk, I see, I stop by Fiona McAllister Photography on flickr (licensed CC-BY)
For a shot where the beach, sea, and sky all appear quite smooth, try panning the camera. Use a fairly slow shutter speed, and move the camera horizontally, panning along the horizon. Depending on how long your shutter speed is, you might need to pan the camera back and forth. This gives a very smooth shot as all detail is blurred away. The look is almost painterly.
Showing depth
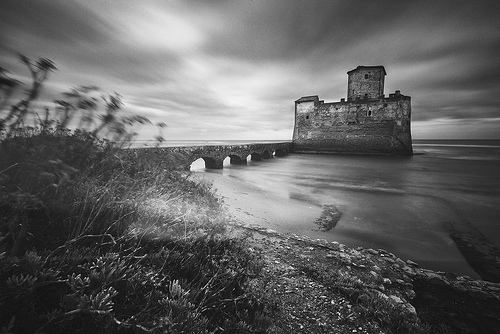
While the lack of depth cues works to the benefit of an abstract photograph, they are very important for a 'standard' seascape photograph. Adding depth cues is what brings a photograph alive, and brings out the three dimensionality of a scene in a 2D photograph.
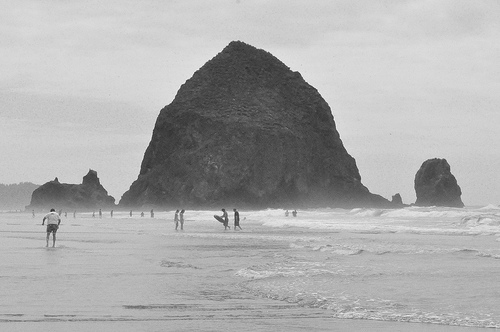
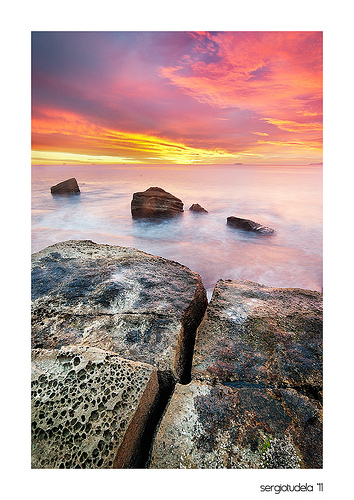
Including distinguishable areas of foreground, middle ground, and background is a good way to add depth to an image. What can you use to indicate these different areas? Anything really, but the sorts of things you might find on the beach that work well are rocks, plants, pieces of driftwood, and even people.
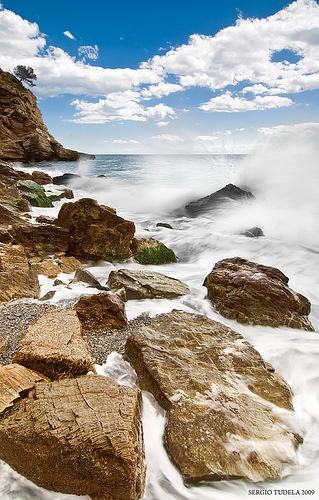
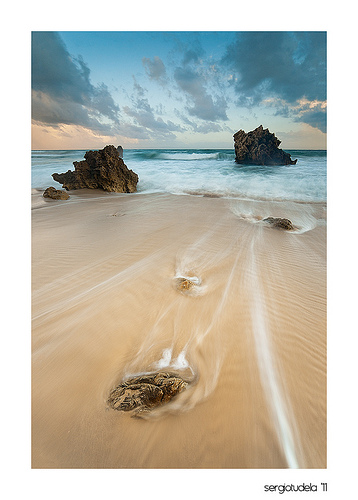
Beach jungle by SergioTudela on flickr (licensed CC-BY)
In the photo above, note how Sergio composed the image to include rocks in the foreground, more rocks (particularly the one in the sea) for the mid-ground, and the horizon and large rocky edge work well as the background.
Another good way of showing depth, which I have mentioned before, is to include people in the image. This gives a good sense of scale to the image, since we know how large a person is, and can extrapolate from that dimensions of other objects in the image.
You goonie by Richard Fraley on flickr (licensed CC-BY-SA)
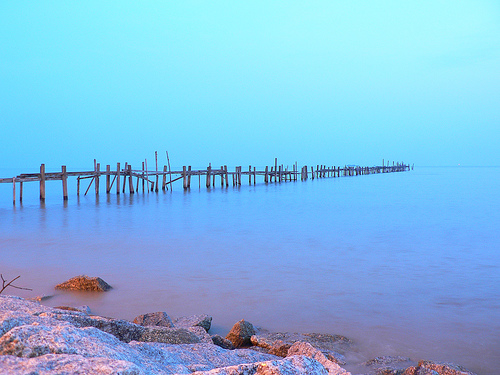
Leading lines and converging lines can also be a good way of adding depth to an image. This could be sea breakers leading off into the sea. Or it might be a channel cut by seawater through rocks. Or even just the lines of seawater receding down the beach by the edge of the sea.
No offside by SergioTudela on flickr (licensed CC-BY)
P1040722 by eugenethephotobug on flickr (licensed CC-BY-SA)
Time of year
Generally the best time of year for seascape photography is Spring and Autumn. Winter can be too cold and stormy and in summer the coasts are often packed with tourists. Winter and Summer aren't bad times for seascape photography though, just not quite as good as Spring and Fall.
Spring and Fall also have a couple of other advantages. The sun doesn't rise quite so early as it does in Summer, making it easier to get up in time for a sunrise photography session. You are also more likely to get cloudy skies, which often makes for a more interesting shot than a plain sky.
Time of day
Typically sunrise and sunset are the best time for seascape photography. A beautiful sunrise or sunset reflecting off the sea or wet sand can look fantastic.

Port Lincoln Jetty at Dawn by Jacqui Barker on flickr (licensed CC-BY)
You are also more likely to find misty conditions early in the morning and late in the day. If you can get some shots before the sun burns the mist away (or even as the mist is being burnt off), they can make for great photos. The mist acts as another depth cue, the further away something is, the paler it will appear.
A misty morning! by Pavel ahmed on flickr (licensed CC-BY)
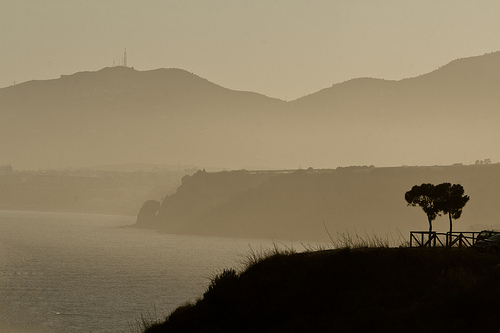
Maro & Cerro gordo by Sierpe on flickr (licensed CC-BY-SA)
Locations
If you're going on holiday to the coast and plan to take some seascapes, it is a good idea to plan ahead. If you want to take a shot of a lighthouse, and then when you get to the location, find there is no way to get near the lighthouse, you'd be out of luck.
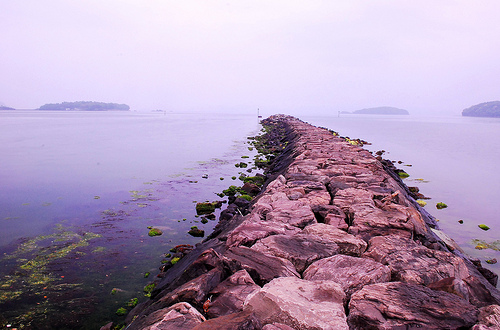
Similarly, it is good to know whether the beaches are sandy, shingle, or rocky, where interesting rock formations are, are there piers or jetties that might make for good photos, etc.
Lowa by Daniele Zedda on flickr (licensed CC-BY)
Searching the location online before you visit can be a good idea. Look for shots of interesting locations, and see if information on where the photo was taken is available. With a website such as panoramio, all photos are geotagged, so you can easily see where any photo was taken. Personally I also like using Google Earth for this purpose.
You can also ask the locals, or staff at the hotel / B&B where you are staying. They might well have an idea of good locations that you wouldn't know about otherwise.
Straight horizon
With seascapes it is particularly important to get the horizon straight. Because the sea horizon is a straight line, it is very easy to see if it is crooked. And a sloping sea doesn't look quite right.
If you are photographing handheld, it can be a good idea to frame your image loosely. Leave a little extra space round the edge of the image. Then the photo can later be straightened without cropping off important image information. (The more wonky the horizon, the more will be cropped off the edges of the image when you straighten it).
With a tripod you can take the time to make sure your horizon is straight. For cameras with a hotshoe you can purchase a hotshoe bubble level. This can aid in getting your camera level. Ultimately though, you'll probably want to check the image on the camera's rear LCD.
Using the rear LCD, zoom in on the image and move the view to one side of the horizon. Now scroll the view horizontally across the image. You should be able to see if the horizon line stays in the same place across the image, or if it is sloping.
The One and Only East by lrargerich on flickr (licensed CC-BY)
Even on a tripod, making the small adjustments necessary for a perfectly straight horizon can be tricky. But if you do find you need to straighten the image later, it should at least be only a very small adjustment that shouldn't loose much of the image edges.
Misty / Silky water effect
A reasonably common effect in Seascape photography is where the water appears to have a very silky smooth texture, sometimes looking almost mist-like.

Sunrise at Swine's Den. by Jonathan Combe (Back on, Catching up) on flickr (licensed CC-BY)
This effect is achieved by using a slow shutter speed. Over the long exposure, the movements of the water are smoothed out, creating this silky smooth water effect. The longer the shutter speed, the smoother the water appears. The photo above had a shutter speed of 58s, while the one below only 6s. Can you see the difference in how smoothed out the water is?
Puzzle by SergioTudela on flickr (licensed CC-BY)
Twilight is often the best time of day for capturing images like this. The light levels are less, which allows you to use a slow shutter speed without over exposing the image.
If you find there is too much light for the shutter speed you want, you can use a neutral density filter. This is a neutral colored semi-transparent filter that you mount in front of your lens. It cuts down on the amount of light that your camera receives, so allowing for longer exposures.
There are plenty of other interesting subjects to photograph at the beach, such as beach huts, fishermen, fairground rides, etc. If you don't live by the coast, then a trip to the beach can open up a lot of interesting photographic opportunities for shots you wouldn't normally be able to get.


