Creating a sunburst sunset poster background in Photoshop
Recently I was asked to create a poster to advertise an event. As a background image for the poster, I decided I wanted a nice sunset image with sunbeams emanating from the clouds.
Looking at my (rather meager) stock library of cloud photos, I couldn't find anything that looked like what I wanted. But I knew that with a little help from Photoshop I could get the image I was looking for.
So, I thought I'd share how I created the background image for the poster. Hopefully you will find it helpful.
This is what the final image will look like when finished:

The above was created from the image below, quite a difference I hope you'll agree. (Click the image to download the full size one if you'd like to follow along with the tutorial).
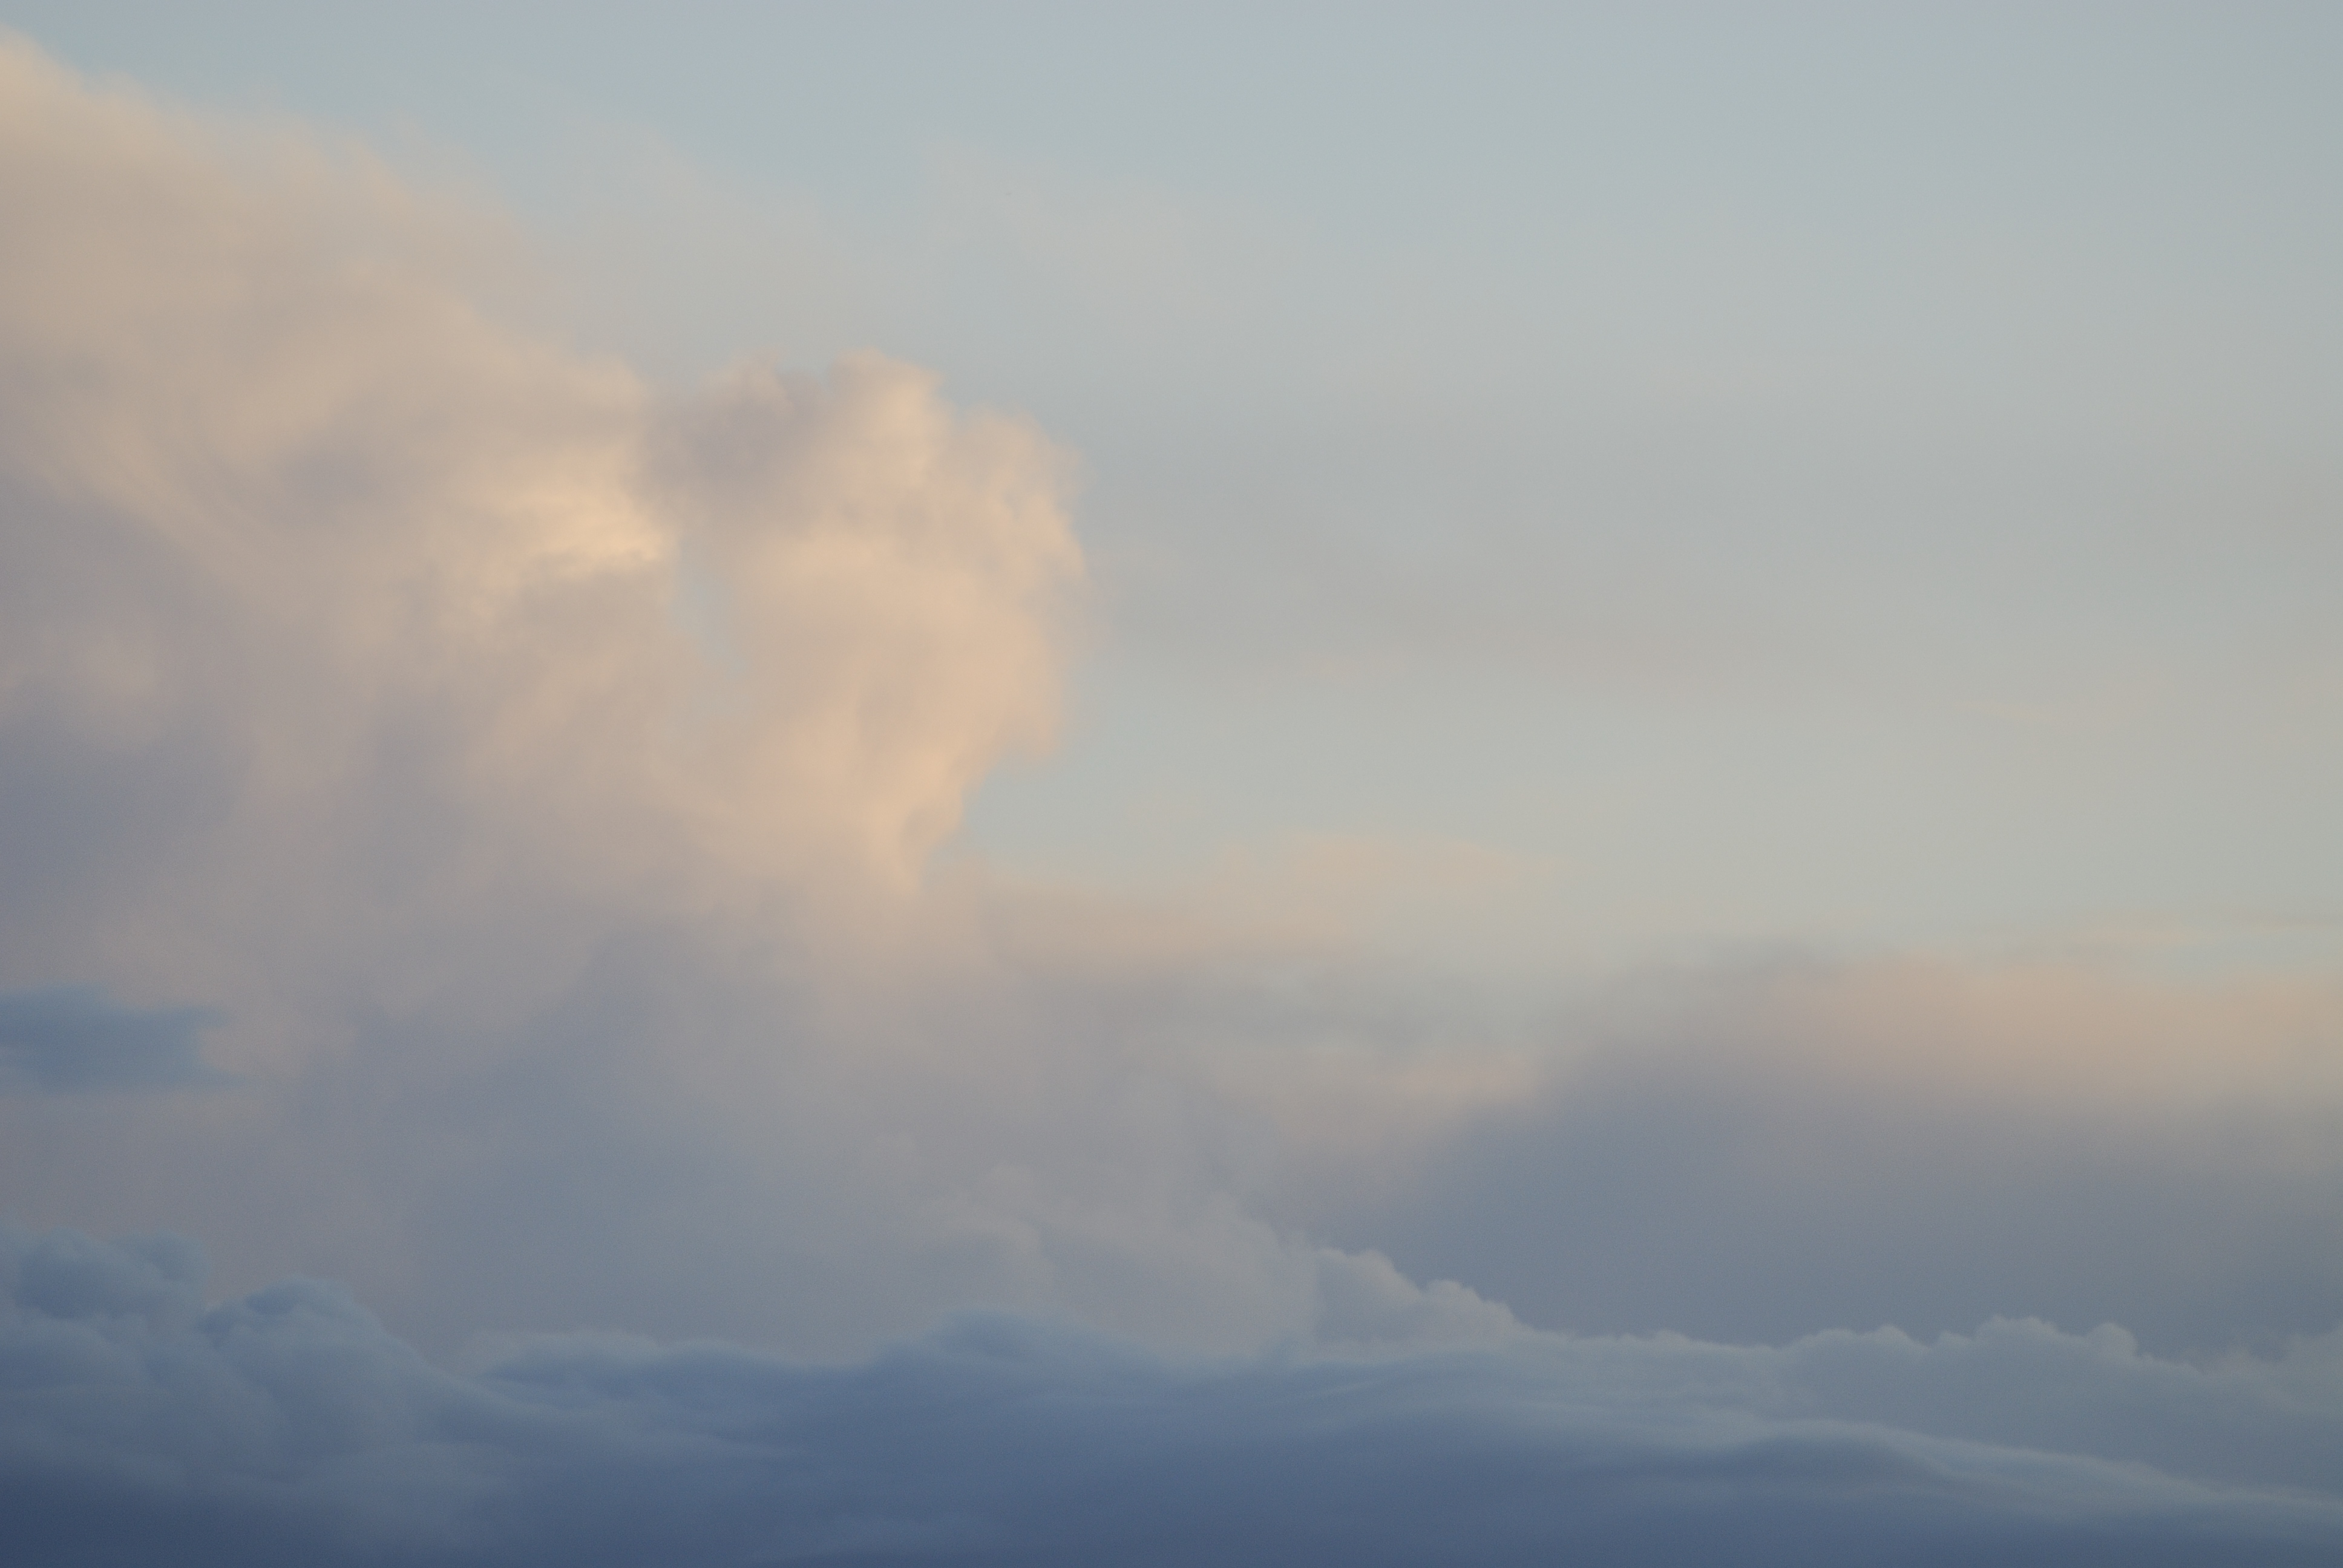
The screenshots I'm sharing in this tutorial are from Photoshop CS5, but the process is the same in Photoshop Elements. For Photoshop Elements users, you'll need to download and install the free Smart Curves plugin as you'll need this for part of the process.
I'm pretty sure the same effect should also be able to be replicated in GIMP, and probably Paintshop Pro as well. But the names of filters and exact parameters they offer in those programs may be quite different to what Photoshop uses.
Creating the poster document
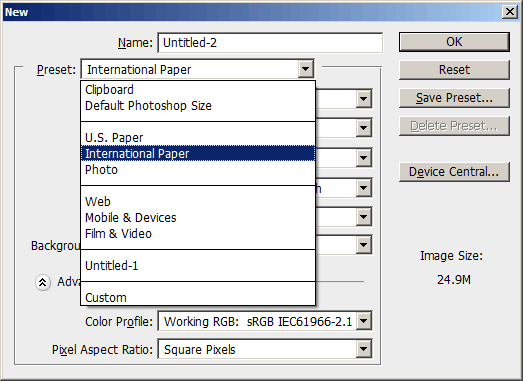
To start, we need to create a new Photoshop document the same size as our poster. Go to File > New... or just press Ctrl + N. If you click on the Preset option in the new file dialog, it will give you a variety of document sizes that you can choose from. Otherwise you can set your document dimensions manually.
The next step is to bring in our clouds image for the sunset. Open the clouds photo in Photoshop. You need to be able to have both the clouds image and the blank document visible in Photoshop at the same time. In Photoshop CS, you can do this by clicking and dragging the title of the image to pull it off into a separate window. In Photoshop Elements you'll need to go to Windows > Images > Tile.
With the clouds image selected, click on the layer thumbnail in the layer palette, then drag it to the empty document.
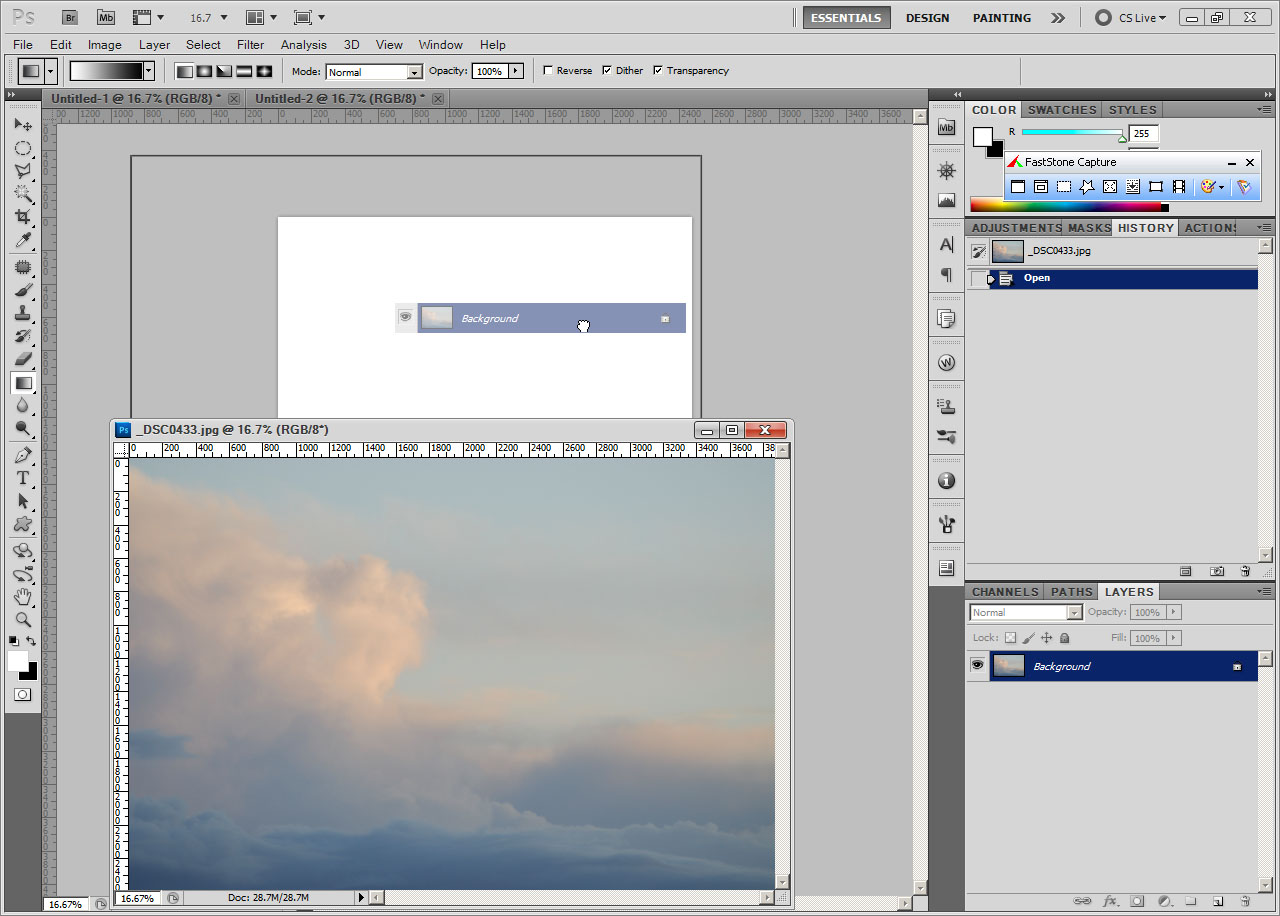
You should now have the clouds image as a layer above your background layer in the previously blank document. You can close the clouds image now.
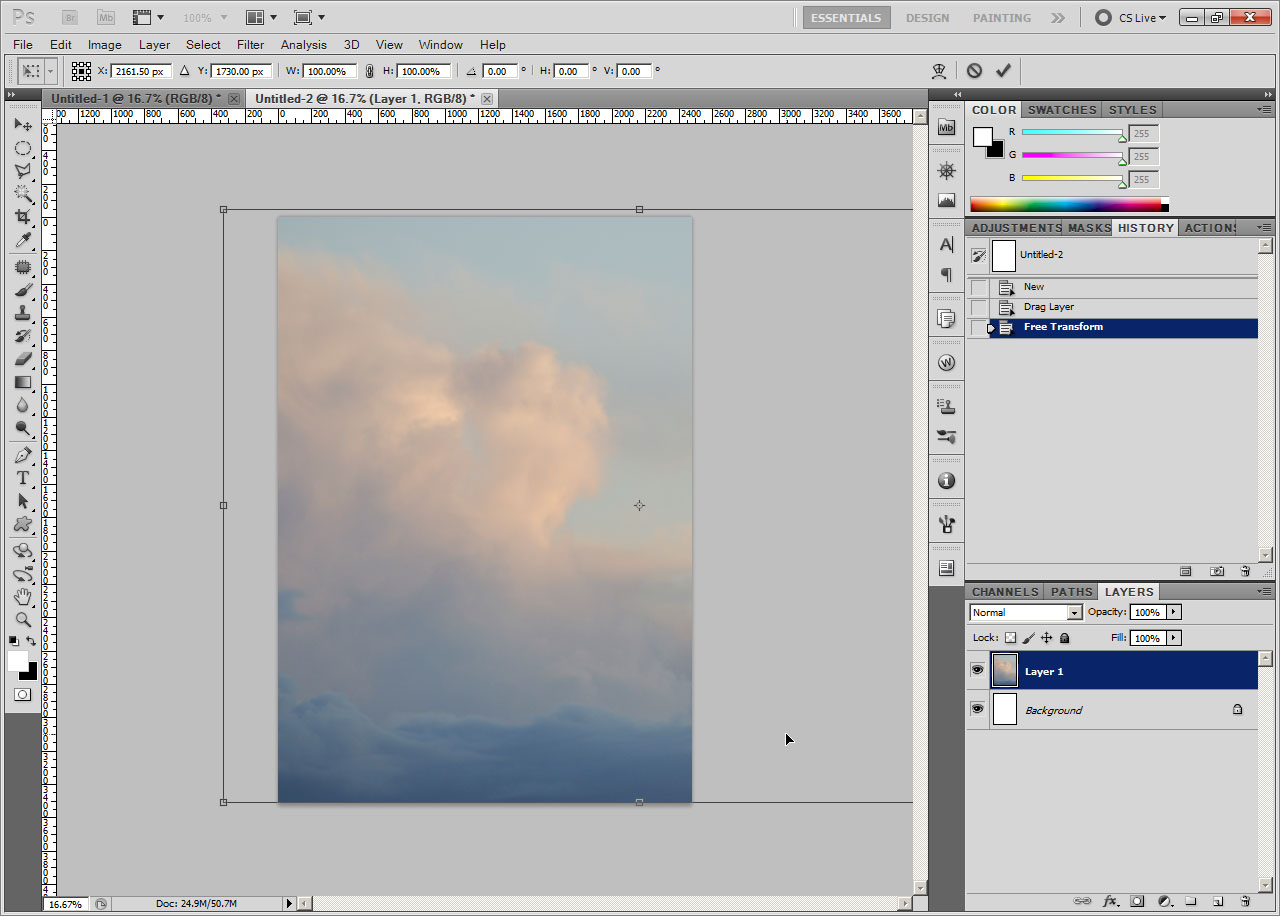
Because I'm using a landscape orientated image, but the poster is portrait orientation, the clouds image doesn't fill up the full poster space. To fix this, resize the image. With the image layer selected in the layer palette, press Ctrl + T, or on the menu go to Image (in PSE, Edit in PS CS) > Transform > Free Transform. Click on one of the little handles at the corner of the image and drag it to resize the image.
Hold down the shift key while resizing if you want to resize the image proportionally. For this image I didn't resize proportionally, you can't really tell if clouds have been stretched a little more vertically than they have horizontally.
To move the image, click on the image and drag it. I moved the image so that the half of the image that contains most of the clouds was filling the poster space. When finished, press Enter on the keyboard to apply the transformation.
The next step is to give our clouds a warm glowing sunset feel. This can be achieved by using a curves adjustment. For Photoshop CS users, you can create a new curves adjustment layer. For Photoshop Elements users, duplicate your image layer, then go to Filter > Smart Curves.
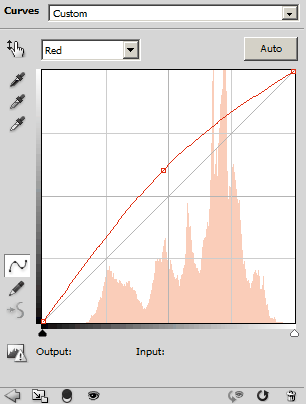
In the curves dialog, select the Red channel and boost this. Just click on the middle of the graph and drag it upwards.
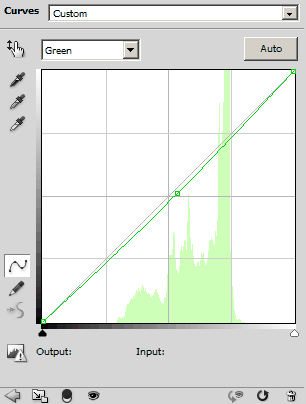
Next select the Green channel. We'll decrease this a little, which makes the image slightly more magenta colored.
Now select the blue channel. Click near the center of the curve and drag the point down to make the image less blue (and more yellow).

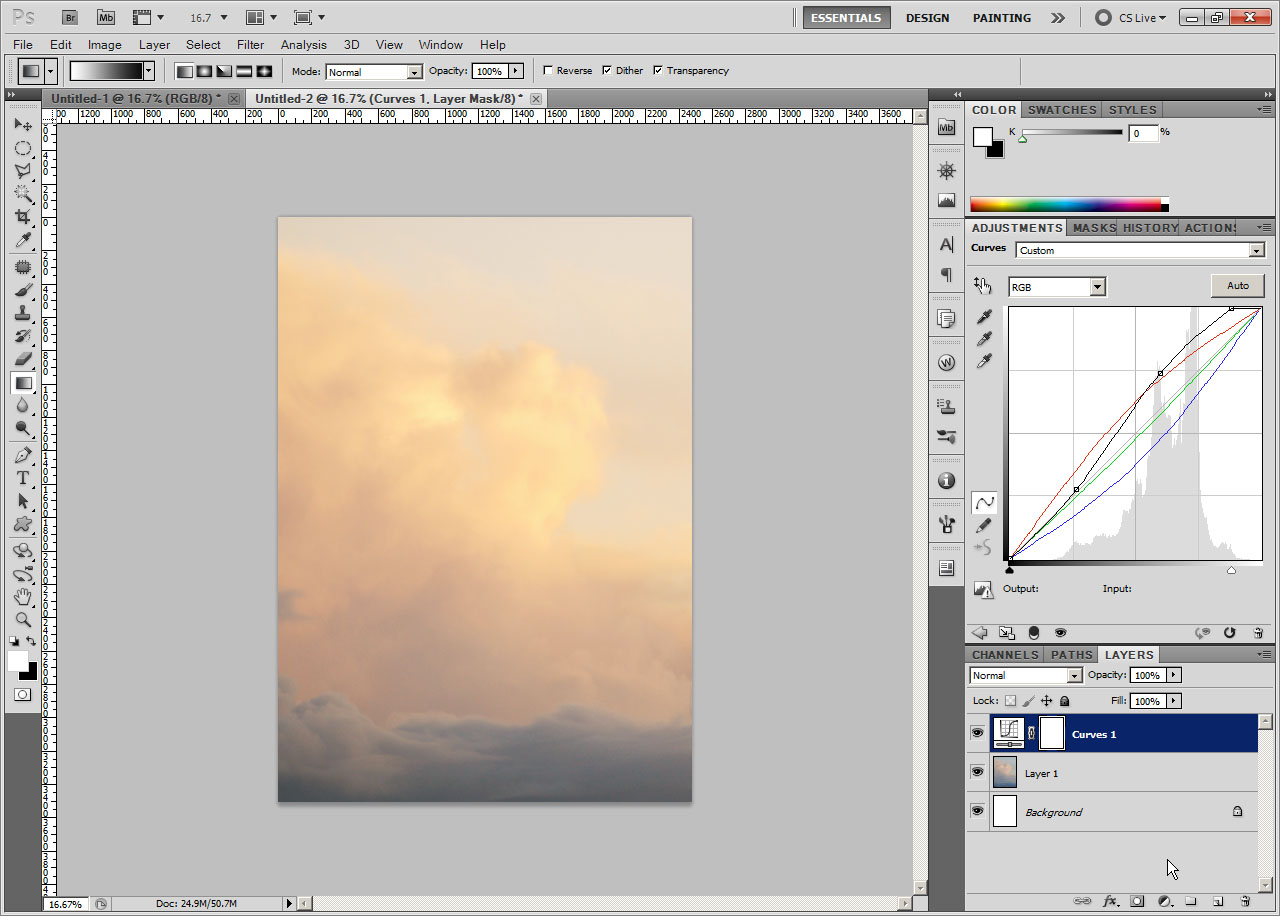
Finally, select the RGB channel. Pull in the white point to the right-hand edge of the histogram. This will brighten the image. Click on the middle-right of the curve to add a point, and pull this up a bit to brighten the image a bit more. Click on the middle-left of the curve, and pull this down to darken the dark tones, and add a bit of contrast back in. In the image below you can see how the image looks with the curves adjustment, as well as the curves adjustment settings.
Creating the sunburst / sun rays
I wanted to add rays of sunlight coming from the clouds, so let's work on that next. Create a new document that is the same dimensions as the longest dimension of your poster. My poster document is 3508 pixels high, so the new document I created had both a height and width of 3508 pixels.
On the background of your new document use the gradient tool to create a gradient from white at the top to black at the bottom.

On the menu go to Filter > Distort > Wave. The Wave Filter dialog has quite a lot of settings:
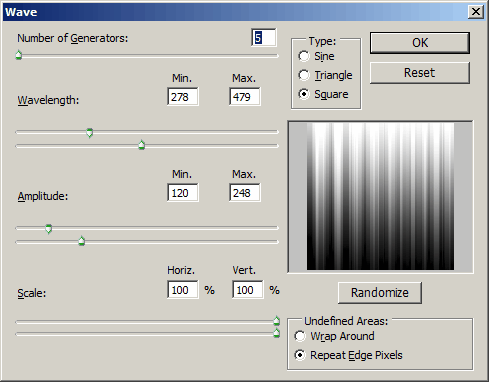
- Type This controls the type of wave. Set this to Square
- Generators This controls how many different waves are used. You can leave this set at the default value of 5
- Wavelength This controls the minimum and maximum distance between the crest of one wave and the next. I used a minimum of 278 and maximum of 479
- Amplitude This sets the wave strength. I used a minimum of 120 and maximum of 248. A lower setting will result in less well defined waves, while a high number will result in waves with strong edges.
- Scale Sets the height and width of the wave effect. I used a value of 100%.
- Undefined areas should be set to 'Repeat Edge Pixels' as otherwise you'll get some nasty artifacts.
You can play around with the above settings, but it is difficult to envision what the result will look like after the image has been converted to a sunbeam effect. After you have applied the wave filter, the image should look something like this:

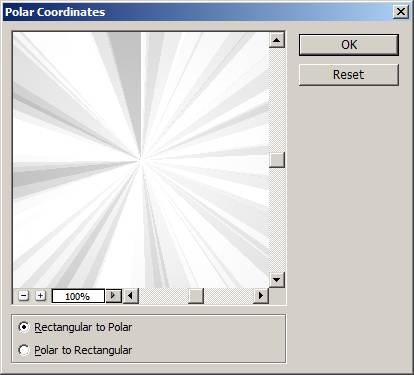
Now to go to Filter > Distort > Polar Coordinates. Make sure 'Rectangular to Polar' is selected (it should be by default), then click OK.
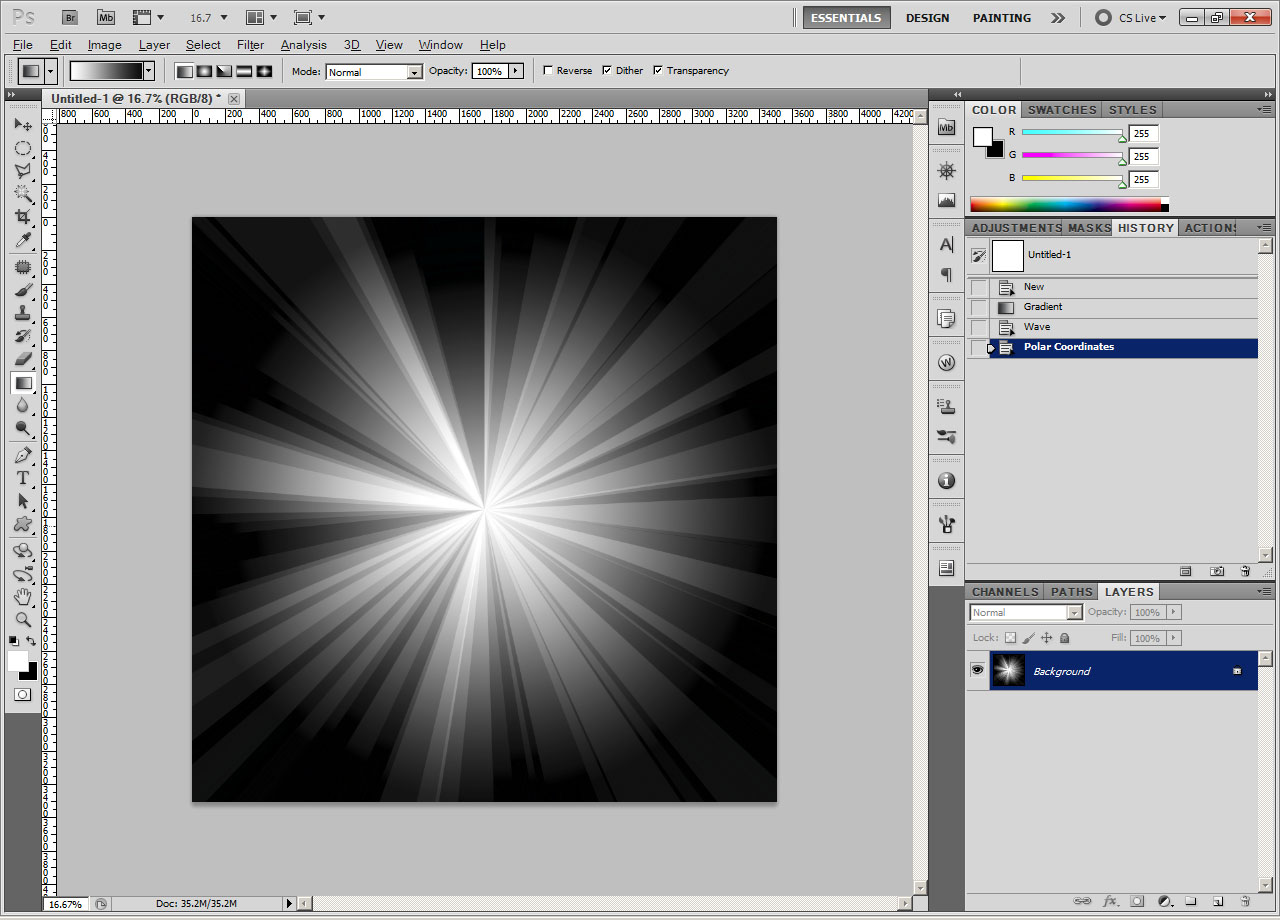
After applying the filter, you should have an image similar to below. Now the image has a much more sunbeam like effect.
Adding the sunbeams to our image
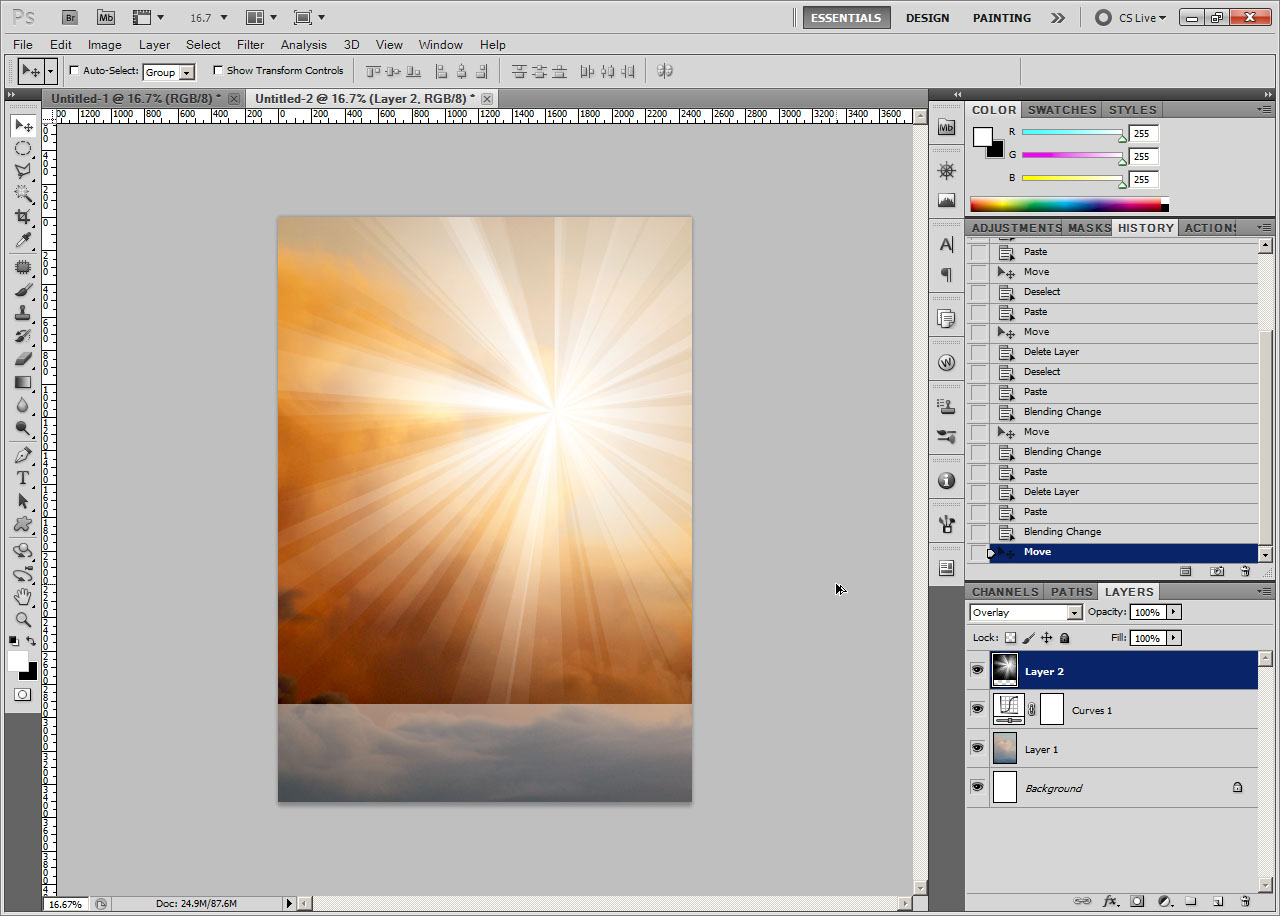
As you did when dragging the cloud image into the poster document, drag the layer from the sunburst document into the poster document.

Change the blend mode of the sunburst layer to overlay, and move the layer so that the center of the sunburst is where you want it. For this image, I wanted the appearance of the sun just peaking out from behind the clouds, so I placed it near the top of the clouds.
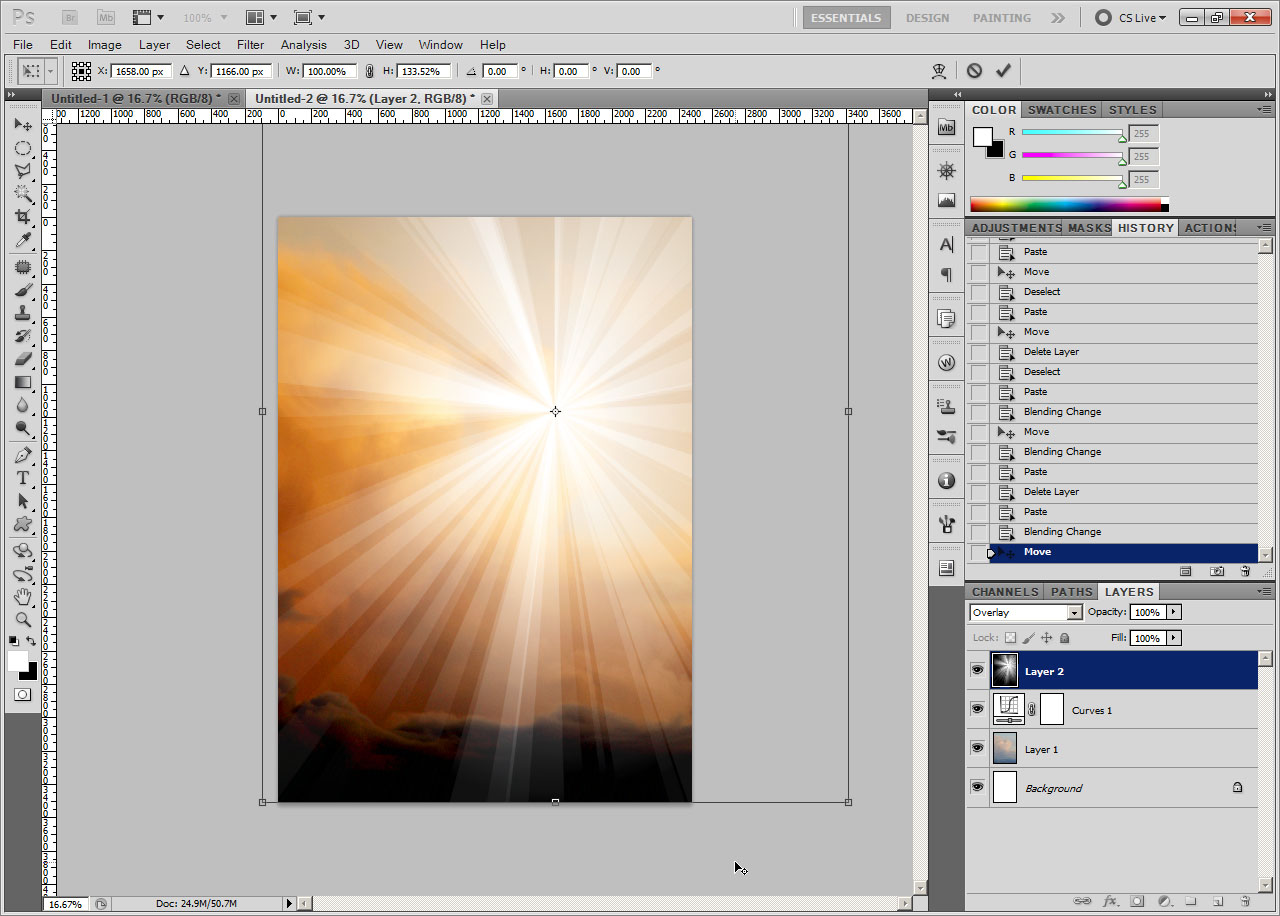
As you can see, the sunbeams stop very abruptly near the bottom of the image now we have moved the layer. So resize the layer to fill the image. Press Ctrl + T for free transform (or on the top menu go to Image (in PSE, Edit in PS CS) > Transform > Free Transform). Click on one of the little handles at the corner of the image and hold down the Alt key (on PC, Option key on Mac) while dragging it to resize the image. Holding down the Alt key centers the transform, so the center of the sunburst will stay put, rather than moving as you resize the image.
Next add a white color fill adjustment layer. If you don't have this available, a new layer filled with white will do the same job (and add a layer mask to this layer).

Hide the new layer (click the little eye icon next to the layer in the layer palette). Select the sunburst layer in the layer palette. Press Ctrl + A or on the menu go to Select > All. Now press Ctrl + C or on the menu go to Edit > Copy.
Holding down the Alt key (or Option key on a Mac), click on the layer mask thumbnail for the color fill layer. Now press Ctrl + V, or on the menu go to Edit > Paste.
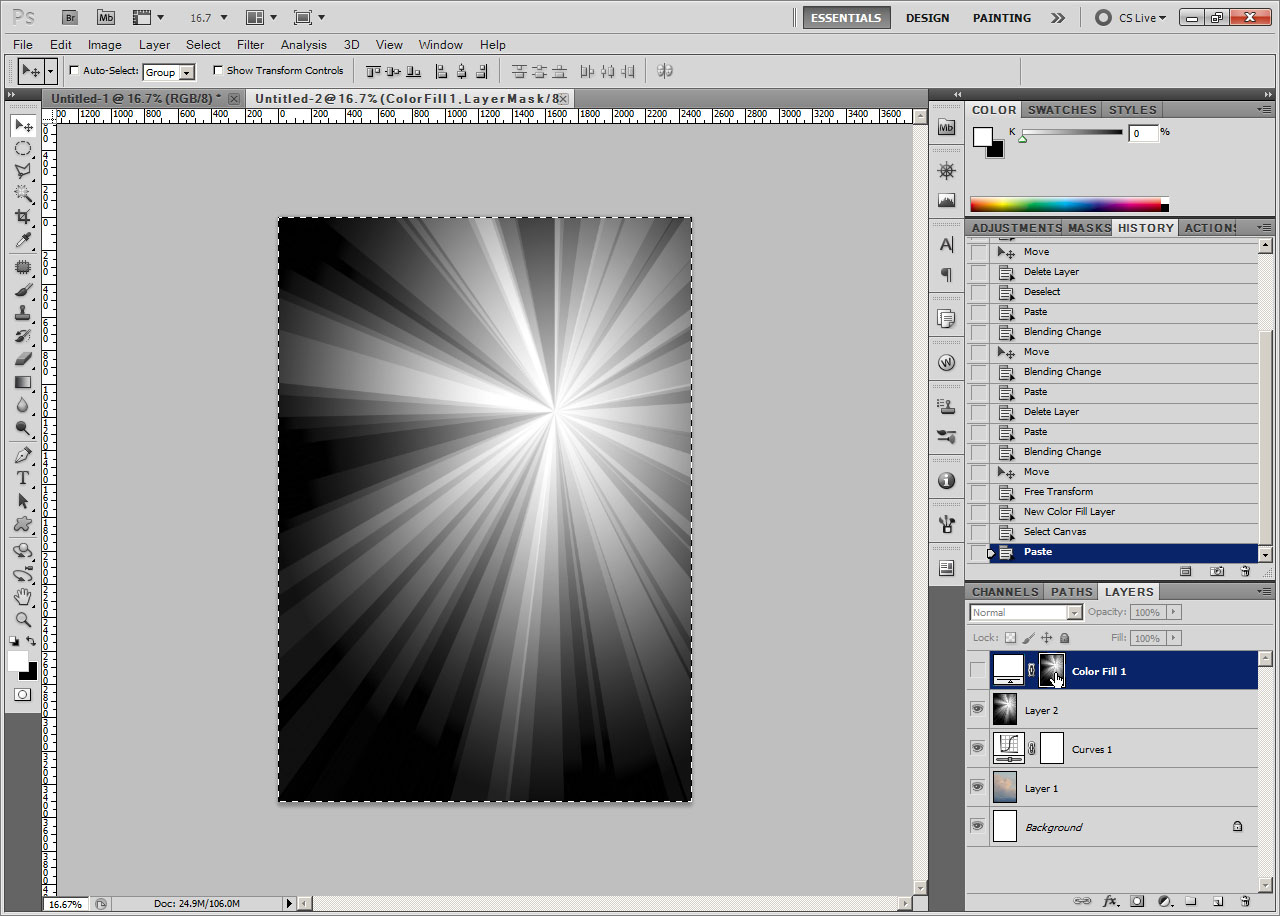
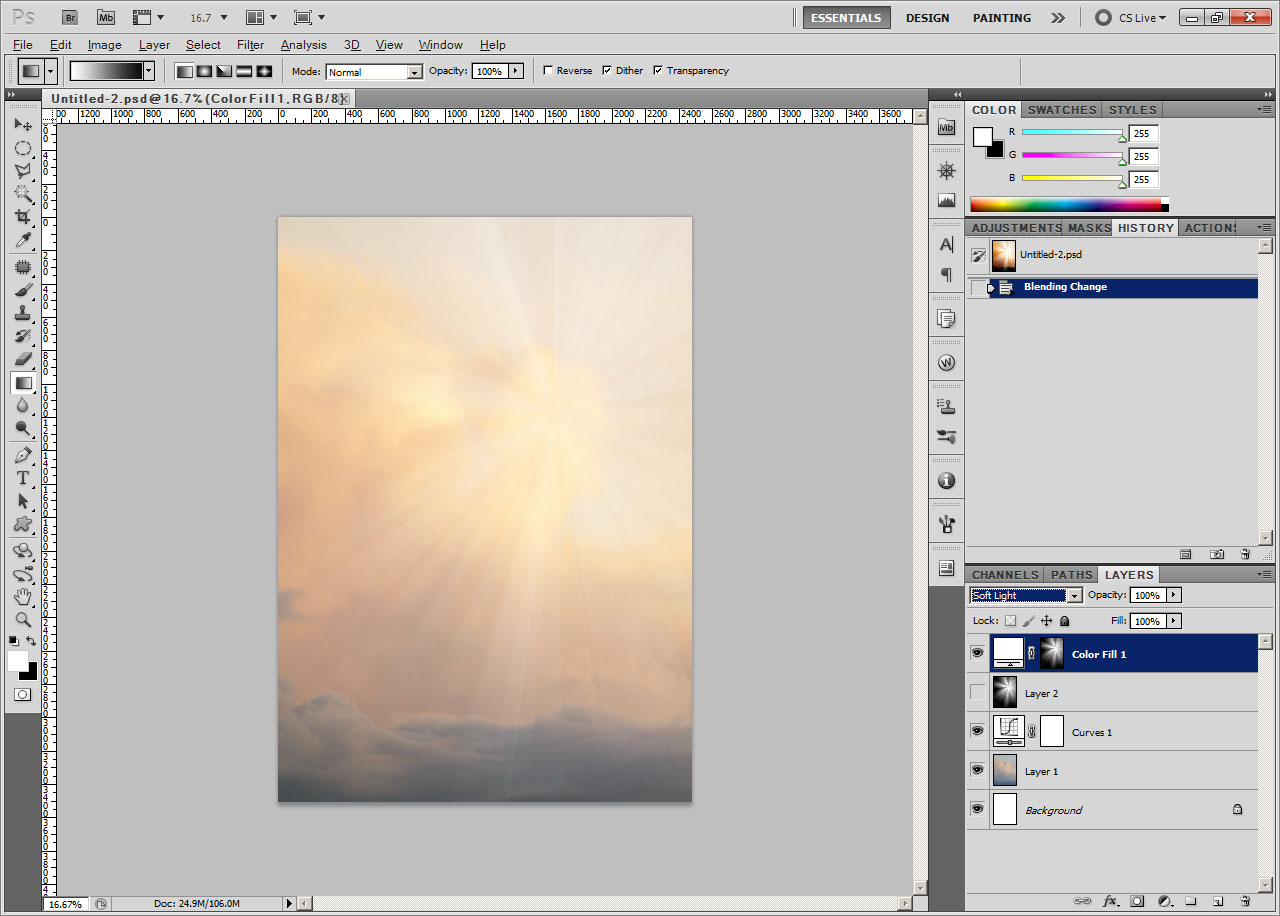
Hide the sunburst layer, show the white fill layer, and change the blend mode of this layer to soft light.
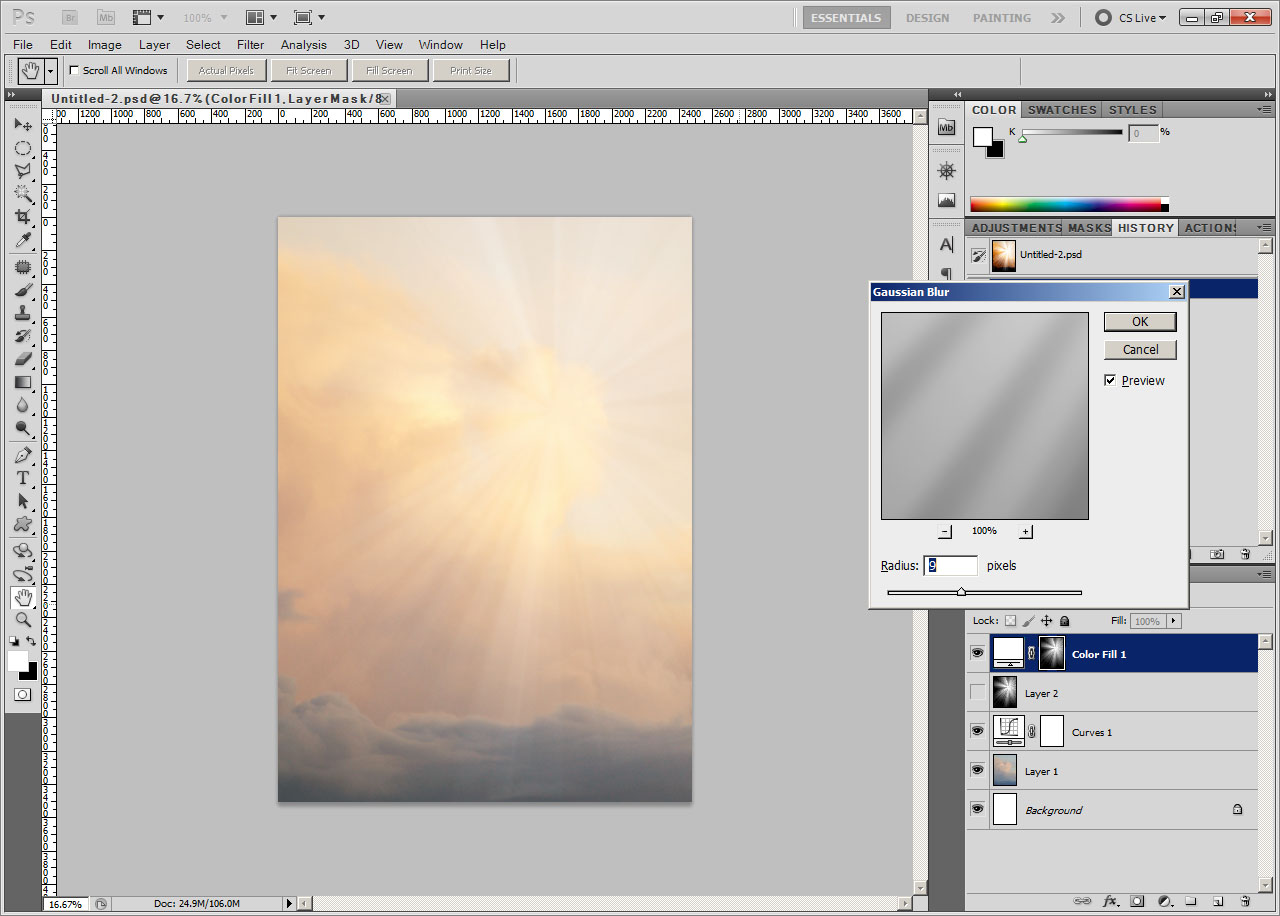
In the layer palette, select the mask of the color fill layer. Then go to Filter > Blur > Gaussian blur. We want to soften the edges of the sunbeams so they are not so harsh. For this image, I find a radius of around 9 pixels works well.
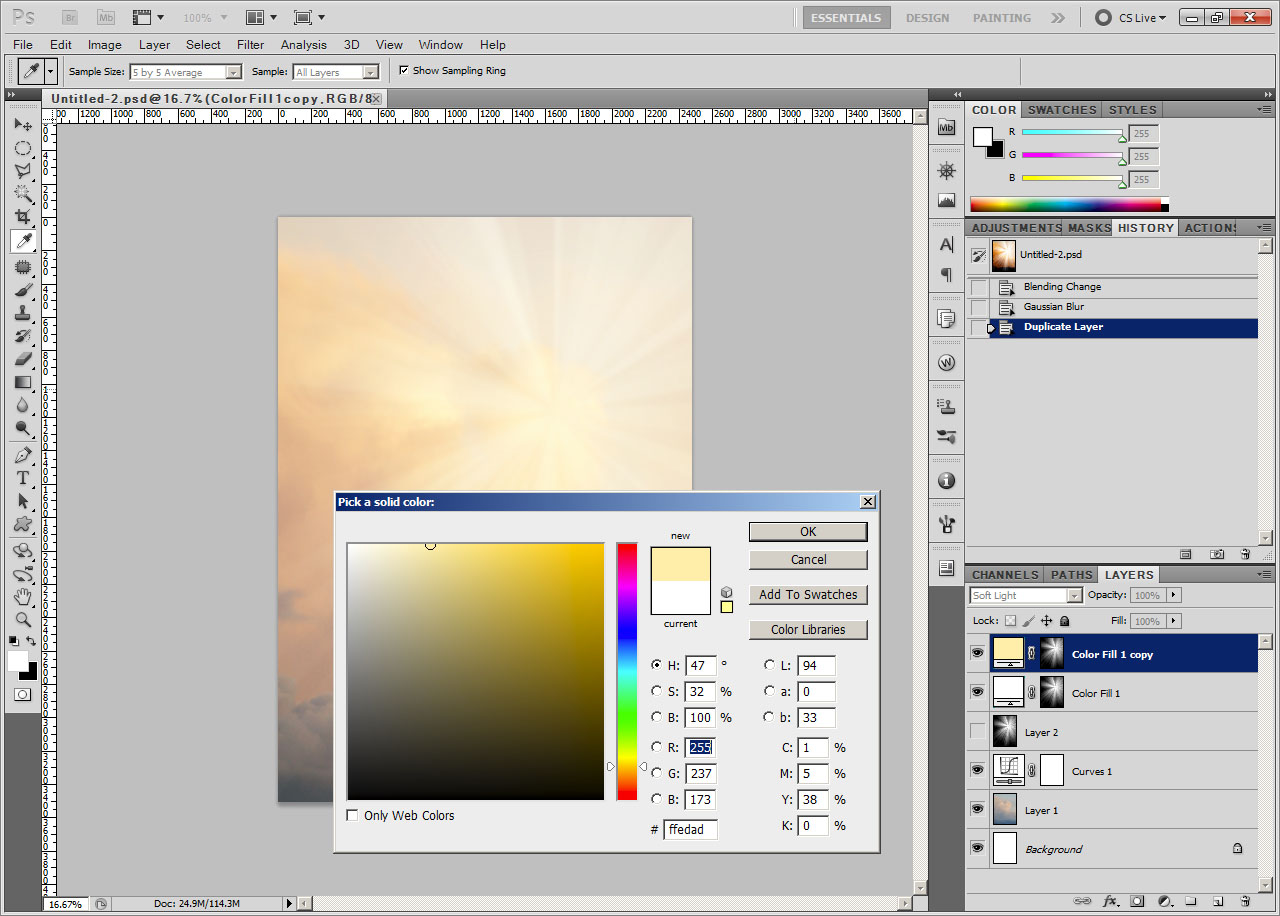
The sunbeams are not very strong, so duplicate the color fill layer. You can do this by pressing Ctrl + J, or drag the layer down to the new layer icon of the layer palette, or on the top menu go to Layer > Duplicate Layer...
Change the color of the duplicated layer to a slightly warmer color. (Double click the color fill layer thumbnail in the layer palette to open up the options).
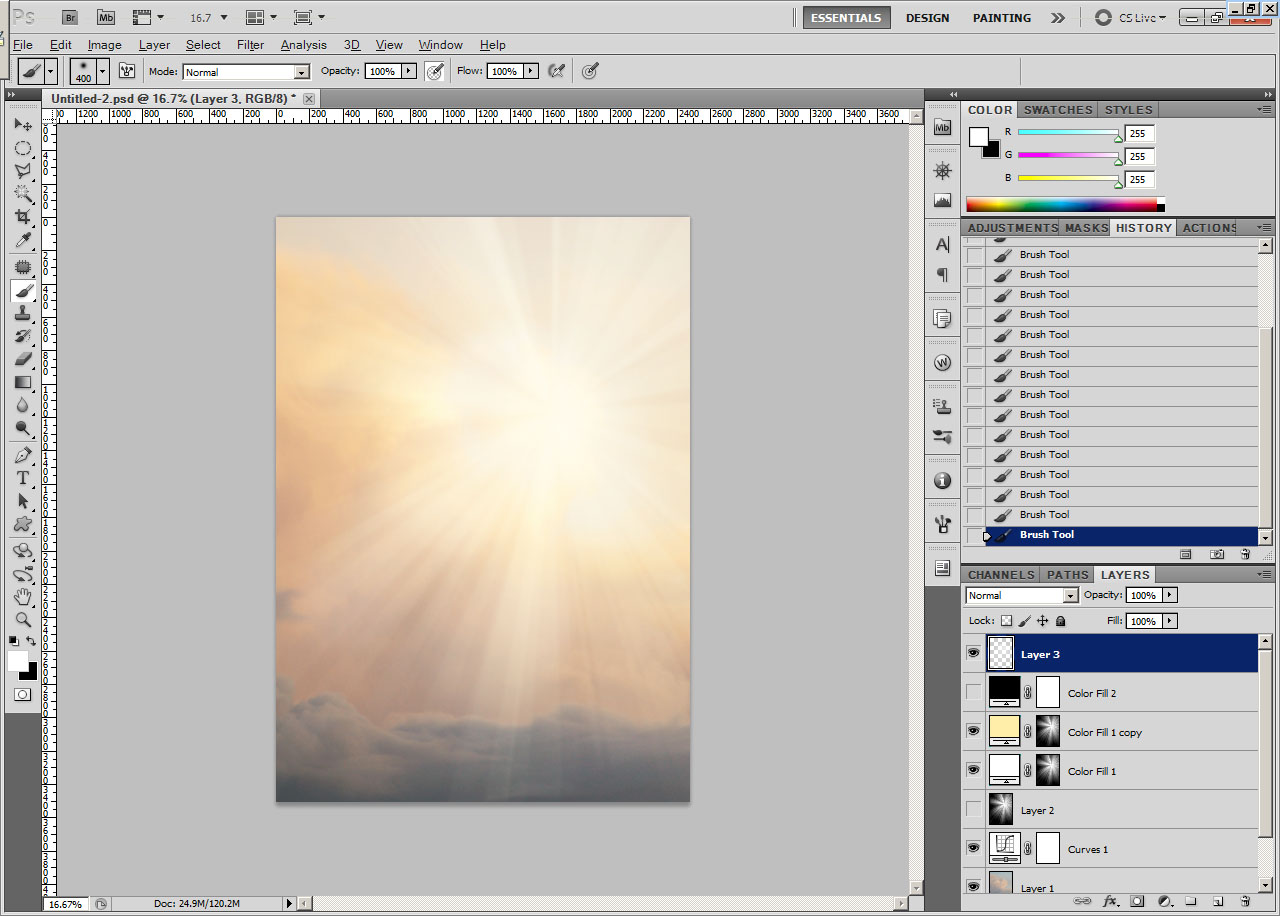
To finish off, let's brighten the center of the sunburst. Create a new layer and set the blend mode to overlay.
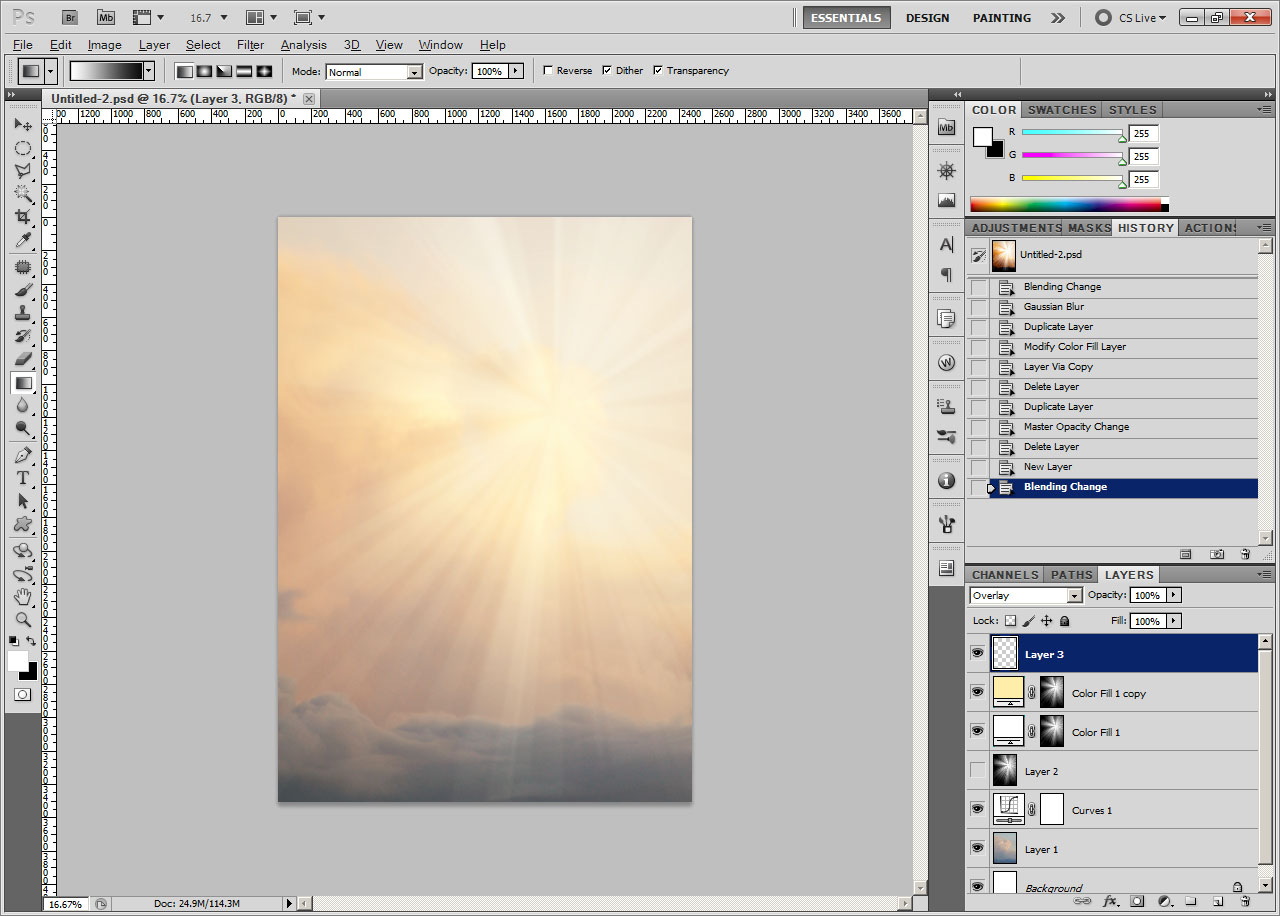
Use a soft brush at a low opacity with white paint to paint around the center of the sunburst to brighten it. I have a graphics tablet that I can use for varying the brush opacity depending on how hard I press the pen down. So I leave the opacity set at 100% and vary the opacity through the pen pressure. If you're using a mouse, set a low opacity e.g. 5%, and then make multiple strokes to build up the 'paint' as needed.

After painting the overlay layer, I end up with an image like this:
Then it was just a case of saving the image, and selecting to use the saved image as the document background in my word processing software. After that I could add the poster text using the word processing software. (Or you could add the text using Photoshop's text tool and complete the whole poster in Photoshop).
I hope you found this tutorial useful. We covered a number of Photoshop techniques, such as use of layers, blend modes, using curves to adjust color and contrast, resizing, and making a sunburst / sun beams. If you have any comments or suggestions, please leave a comment below.


