How to get people or traffic free photos
Famous locations (such as the Eiffel Tower in France and Mesa Arch in Utah, for example) can make great photographic subjects. But the problem is, there are likely to be plenty of other people there as well, getting in your shot. Even relatively unknown tourist destinations can get pretty busy.
So, how do you stop all the other tourists (who have as much right to be there as you) getting in the way and ruining your photo? Sometimes getting to the location really early in the morning, before anyone else is up, can be good enough to secure you a tourist-free photo.
But other times, this is not enough, or the location is not open early in the morning. In this case, we have to rely on the wonders of Photoshop (or similar image editing software).
To create a tourist or traffic free photo in a busy area, we take several photos of the scene. Then we blend these together to mix together the bits from each photo that don't have any tourists or traffic in. For this to work, we need the following:
- The tourists or traffic must be moving. If you have someone sitting on a bench in all your photos, then they cannot be removed using this technique.
- There must be gaps in the tourists or traffic. If there is a constant stream of people, then this technique will not work. The smaller the gaps between people moving, the more photos you will have to take to result in a people free image.
- The camera must be kept in a single position. This means using a tripod or resting the camera on a surface, and using a remote shutter release to trigger the camera.
- The light should remain constant throughout all the photos. This is not essential, but is highly recommended. Lock exposure or set the camera to manual exposure mode.
As people move around, take a number of shots. You want to ensure that people aren't in the same part of the image for every photo. It is better to take too many photos and be sure that you have enough shots than later find out that a small part of the scene had someone or something in front of it in every shot you took.
Depending on how busy the area is, you may need to take a lot of shots, or you may need just a few. You might also need to take the shots over a long period, or you might be able to get it done quite quickly. It depends how long people hang around in the same spot for.
The next job is to blend all these photos together, taking the parts from each image that are tourist free. In the Extended version of Photoshop this can be done automatically, though in the standard version of Photoshop and other image editing software, you'll need to do it manually using layer masks.
Using a median stack in Photoshop Extended
Load all your images into one document as layers, and make sure that the layers are aligned correctly. In the layers palette, select all the layers, then on the top menu go to Layers > Smart Objects > Convert to Smart Object.
Photoshop will take all the layers and put them inside a single smart object, this might take a while. Next, on the top menu go to Layers > Smart Objects > Stack Mode > Median.
This will create a new image merged from all the original images, which should be free of people. If you have other moving objects in the scene (such as clouds), these might look a bit strange. Just add back in one of the original images, then use a layer mask to mask out this image apart from the sky.
Using layer masks
Load all your images into your photo editing program as layers in a single image. I'll be using Photoshop CS6 for this tutorial, but the process is essentially the same in Photoshop Elements, Paintshop Pro, GIMP, etc.
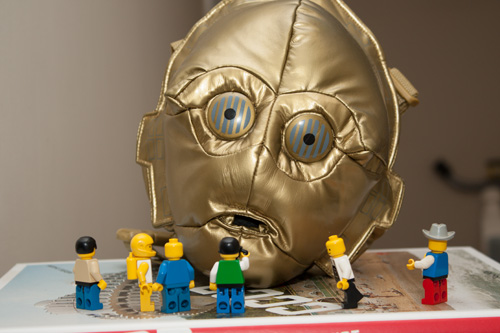
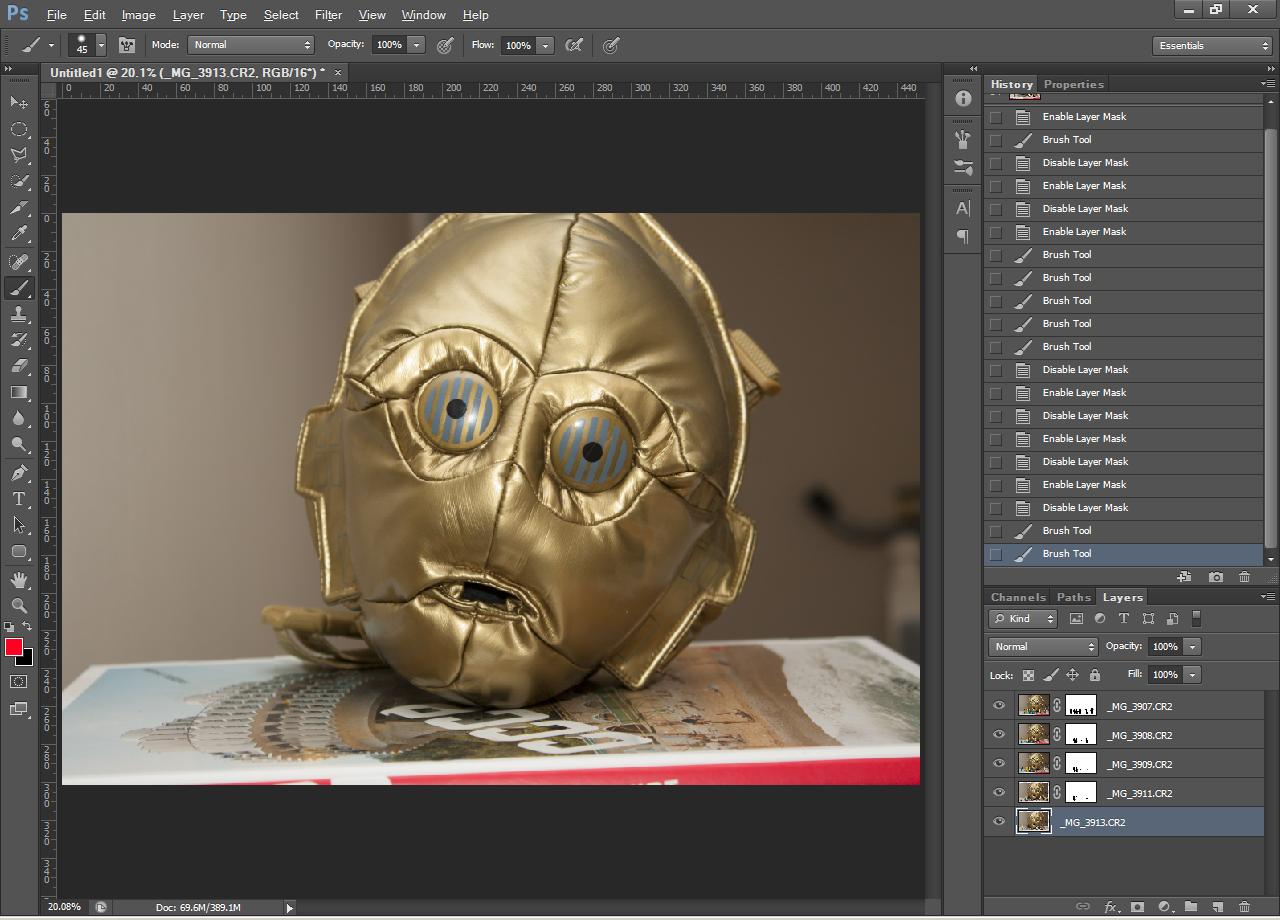
Here are the images I'll be using. At great expense I flew all the way to the Al-muharabi desert to take photos of the famous giant C-3PO head there. Unfortunately there were also a lot of other tourists there, which I now want to remove from my image.


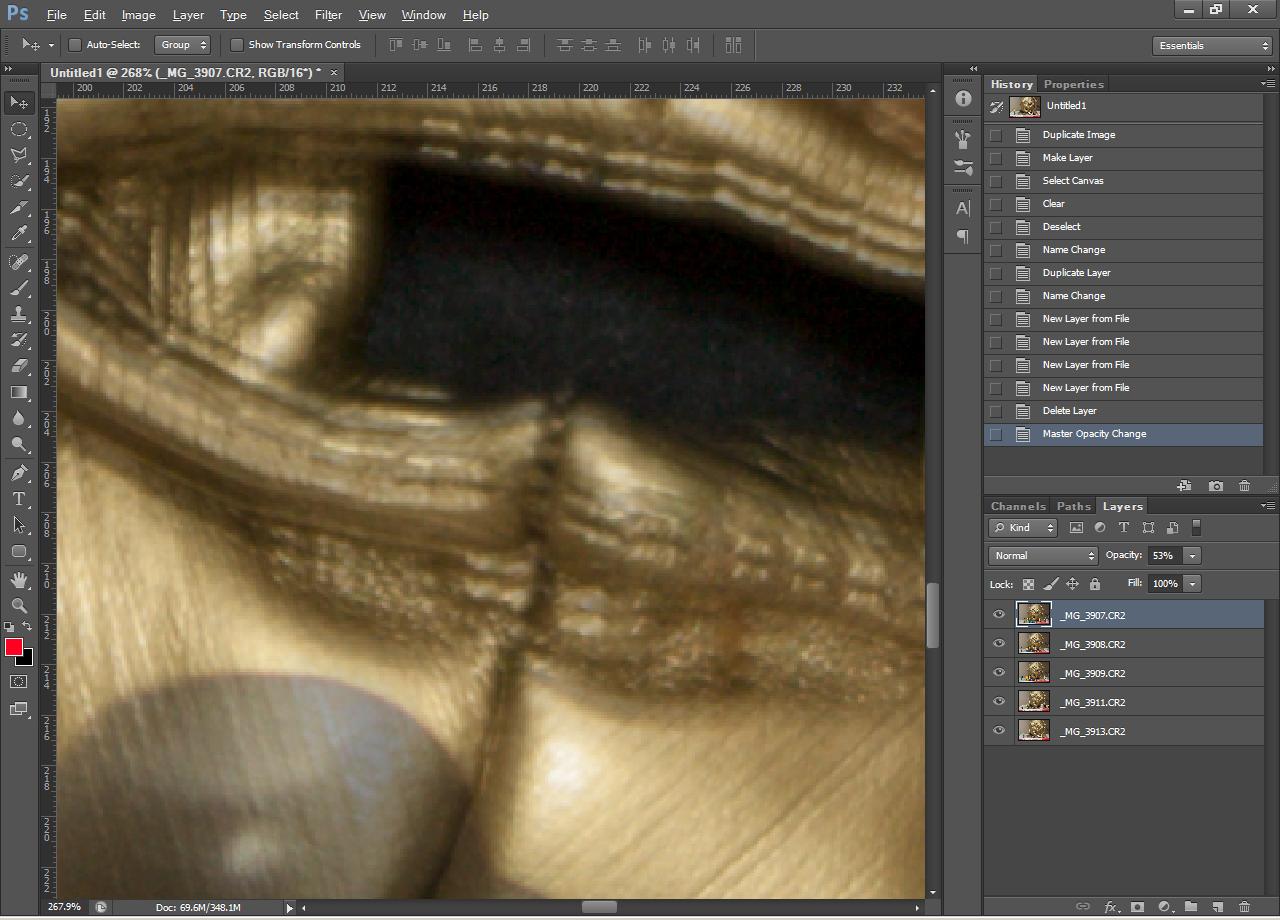
You might notice that I actually moved the camera a bit while taking the photos. It's better to keep the camera completely steady if you can. Since I didn't the first job is to align the photos. If you made sure the camera didn't move at all you can skip this bit as the images will already be aligned.
In the full version of Photoshop this can be done automatically by going to Edit > Auto Align Layers... But this option is not available in other image editing programs, so I will show you how to do it manually.
With the top layer selected, reduce the opacity of the layer to 50%.
Now select the layer underneath, and use the move tool to move the layer until it is aligned with the layer above.
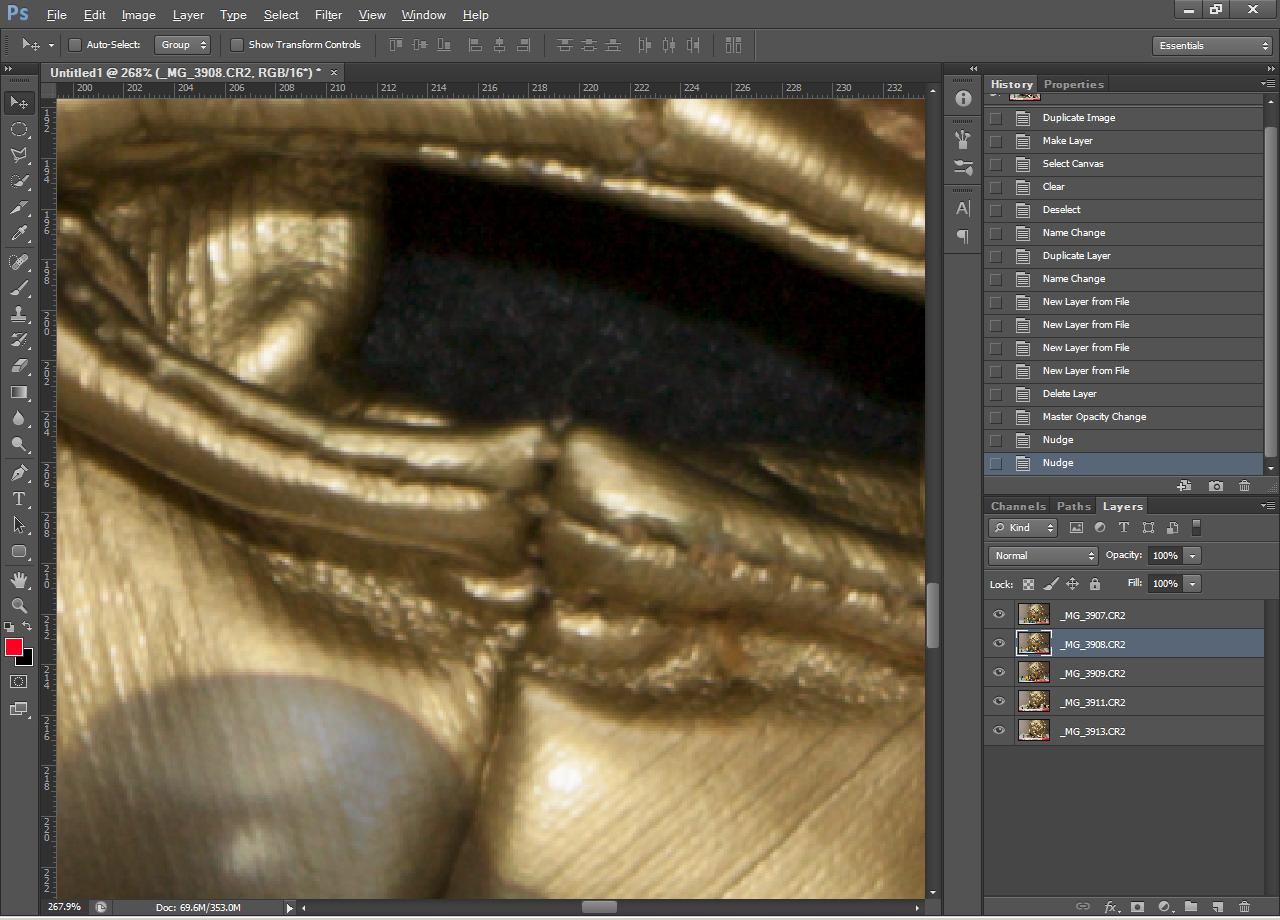
Hide the second layer, and now move the third layer so that it is aligned with the top layer. Then hide this layer and align the fourth layer, etc. until all the layers have been aligned with the top layer.
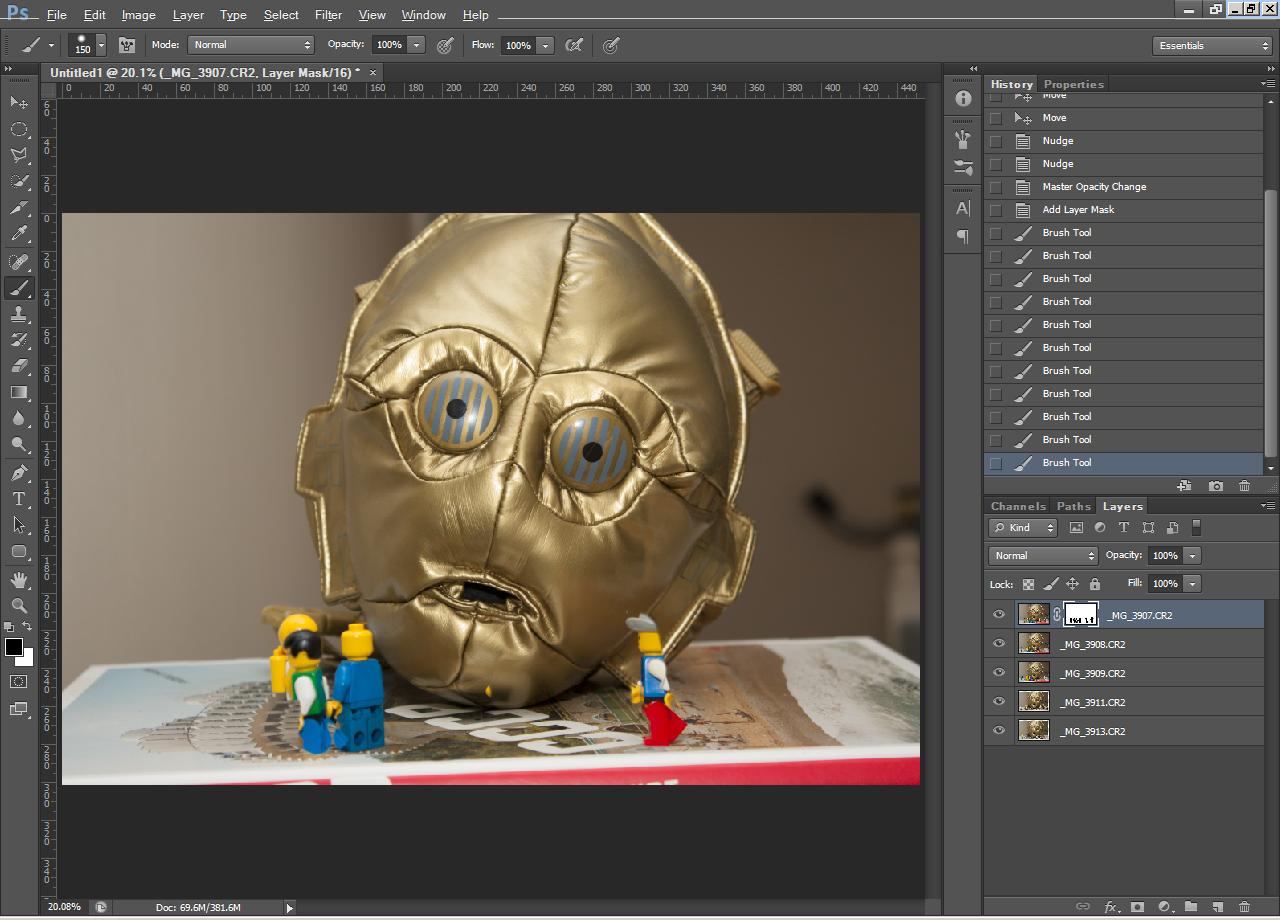
When all the layers have been aligned, unhide them all, and change the opacity of the top layer back to 100%. Create a layer mask on the top layer. Then using a brush with black as your color, paint out the people on the mask.
Create layer masks and paint out the people on the other layers as well where they are showing through the holes in the top layer. After doing this, my image looks like this:
Because I didn't keep the camera steady for all the shots, there is a small problem on the surface. We can touch this up using the clone tool. The clone tool can also be used if there are any areas that have someone in part of it in all your photos.
Create a new layer on top of all the other layers. Select the clone stamp tool, and in the clone tool options, ensure it is set to Sample 'All layers' or 'Current and below'.
In Photoshop, you use the clone tool by alt-clicking on the area you want to clone from. Then use like a normal brush to paint from the area you are cloning from. After using the clone tool, the image looks like this:
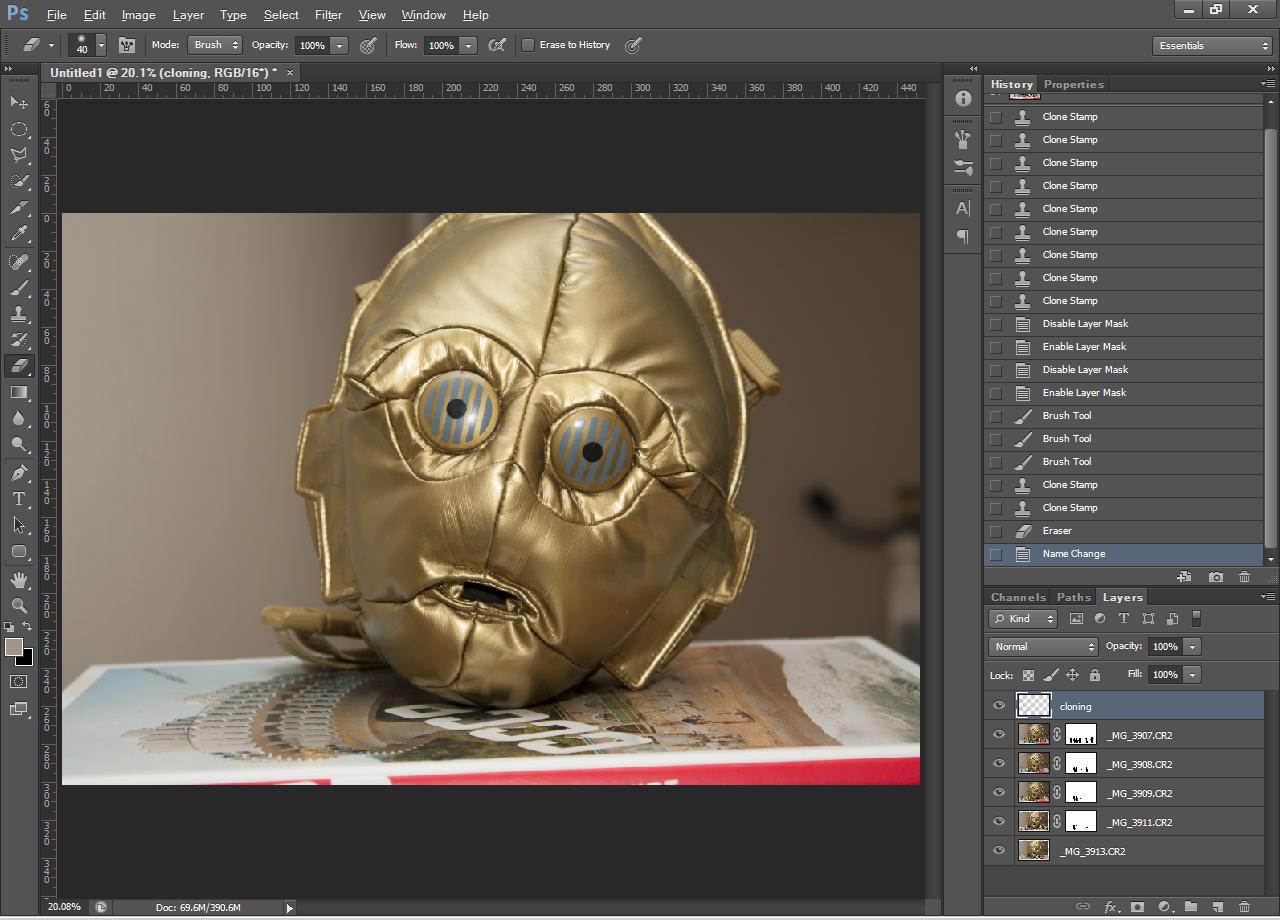
All the other tourists have been successfully removed!
An alternative to the method of taking lots of shots is to just take one shot with a really long exposure time. As people move about, so long as they don't stand in the same spot for too long, they will just blur into nothingness.
However, you do need a very long exposure time for the people to become blurred into nothingness instead of being blurred into colored streaks. Even a 10 stop neutral density filter won't give a slow enough shutter speed in daylight.
Finally, you should consider whether it is really worth the trouble of removing the tourists from your photo. It really depends upon what you are trying to portray. If you are trying to show a peaceful temple hidden away on a mountainside, then removing the tourists will help the image portray those feelings.
But for popular attractions, particularly those in cities, the tourists are really part of the scene. They show the popularity of the attraction, and an image without the tourists might end up just looking strange.


