Waterfall Photography tips
Waterfalls can range from giant thundering torrents to small serene cascades, with everything in between as well. They can make for great photographic subjects, and this article I'll share some tips on photographing waterfalls to make them look their best.
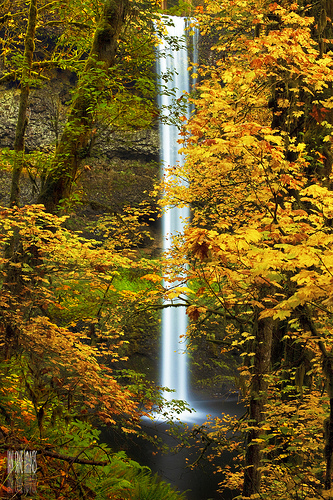
Yellow by Ian Sane on flickr (licensed CC-BY)
Smooth waterfalls
To get the smooth, silky texture that you find in many waterfall photos, you'll need to use a long shutter speed. Use a tripod to keep your camera steady, and use a remote shutter release cable or the camera's self timer to trigger the shutter. This ensures you won't get any camera movement blurring the image.
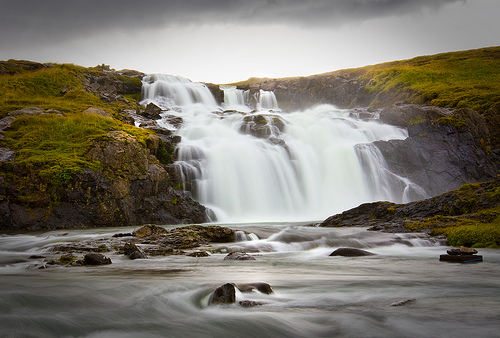
Iceland = "waterfall heaven" by Doxi on flickr (licensed CC-BY-ND)
By using a slow shutter speed, the movement of the water is captured rather than just freezing the moving water. Use the lowest ISO setting that your camera allows, a small aperture e.g. f/11, and a shutter speed between 10 - 30 seconds.
If it is not dark enough for a long exposure, you may need to use a neutral density filter. These screw on to the front of the lens and are made of dark glass or optical resin. You can purchase variable neutral density filters that allow you to determine how many stops light loss the filter causes by rotating it.

If your photo contains a lot of foliage, which becomes blurred in the wind during a long exposure, you can fix this by taking two photos. Take one long exposure for the silky water. Then take a short exposure to capture the foliage.
In image editing software blend the two photos together to use the water from the long exposure, and the rest of the image from the short exposure. You can read more about blending images together using layer masks here: How To Use Photoshop Layer Masks.
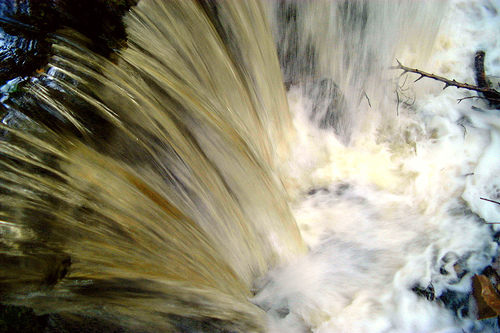
Whitewater waterfalls
Another trick that involves blending multiple photos together can be used for capturing the whitewater aspect of a waterfall. Take multiple shots of the falls using a fast shutter speed. The camera should be mounted on a tripod, and use a remote shutter release to prevent any camera movement between the images.
Add the photos as layers to a single image, and change the blend mode of each layer (except the bottom one) to lighten. This means that only the parts of each layer that are brighter than the layers below will show through. Unless you are shooting a very dirty waterfall on a chalk cliff, then the brightest parts will be the splashes of water as it cascades down the fall.
By doing this you increase the apparent volume of water that is coming down the falls. It gives the photo a good whitewater effect, and can be quite effective compared to a single photo shot with a fast shutter speed.
Waterfall mist rainbows
On sunny days, look for rainbows in the mist / spray caused by the waterfall. Rainbows form at a radius of 42 degrees around the antisolar line, relative to the viewer. To explain this, if you stand with your back to the sun, imagine a straight line from the sun that extends through your eyes. This is the antisolar line. If water droplets occur at a radius of 42° from this line, then you should see a rainbow.
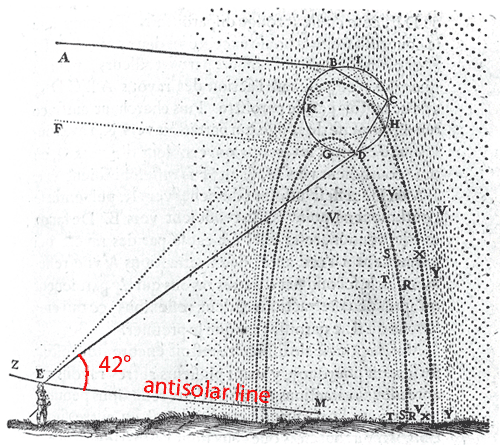
For this reason, you are more likely to see a rainbow in the spray when the sun is low in the sky. A high vantage point above or part-way up the waterfall also means you will be more likely to see a rainbow.
A polarising filter can be used to intensify the colors of the rainbow. Rotate the polarizer so the colors are at the their strongest. The rainbow will also have a much greater impact if you can compose the photo so that it is against dark rocks as a background.
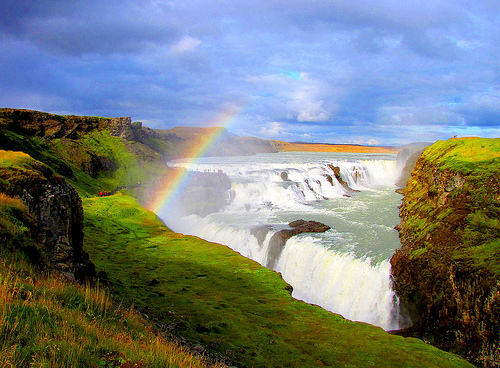
Gullfoss waterfall - Iceland by o palsson on flickr (licensed CC-BY)
Show the scale
Particularly for large waterfalls, include something in the image that shows the scale of the waterfall. Some waterfalls may have trees nearby that can give a good sense of scale when included in the photo.
If you have someone with you, a person is a great way to show the scale of a waterfall. Have them stand near the bottom of the waterfall, possibly looking up at the falls. Get some distance between yourself and the person, and use a medium focal length lens to capture the photo.
Don't use a wide-angle lens and take the photo standing next to the person. This will exaggerate the size of the person, and won't show the scale of the waterfall.
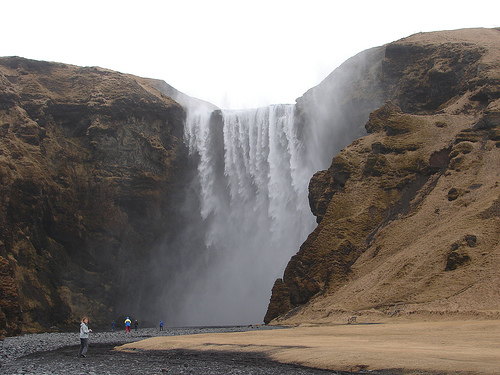
Skogarfoss, Iceland by gripso_banana_prune on flickr (licensed CC-BY-SA)
Dealing with water spray
When photographing waterfalls, getting some spray or mist on the camera and lens is almost a given. Make sure you carry a soft microfiber cloth that you can use to dry your equipment. Using a lens hood on the lens should reduce the amount of water drops that hit the lens.
If getting water droplets on the lens is unavoidable, you can use a shallow depth of field (e.g. f/2.8) so that the droplets on the lens become out of focus. They will still affect image quality, but it should result in an image with slightly lower contrast rather than having visible droplets on the lens.
Of course, you may want to go the other way, and have water droplets visible on the lens. For this use a wide angle lens (a fisheye lens is ideal), and use a small aperture (e.g. f/22) for a large depth of field. Set the lens to focus relatively closely, so that as much of the drops are in focus as possible while still keeping the background of the waterfall in focus.
Don't neglect the top view
Most photos of waterfalls are taken from the bottom looking up, but you can also get some great shots from the top looking down. What you need to be careful of, is not getting too close to the edge, and keeping out of the fast flowing river. Although a stream might look very calm before it flows over the edge of a waterfall, the currents can be surprisingly strong.
Forsakar Waterfall, Degeberga, Sweden by Marcus Hansson on flickr (licensed CC-BY)
Although most of us don't photographs waterfalls often, it is worth knowing how to make the best of one when you do.


