How to add a texture to a photo in Photoshop
Adding a texture overlay to a photo can be a quick and easy way to create a distressed, vintage look. Depending on the texture and any other effects applied, you can achieve looks from a slightly old photo to a painting on canvas.
In this article I'll cover how to add a texture to a photo in Photoshop Elements / CS. The process is very similar in other image editing software as well, so if you don't have a copy of Photoshop, hopefully this guide will still give you a good idea of how the texturing process works.
The texture
The first thing you need for this technique is a texture. It is a good idea to take photos of interesting textures when you see them, and create your own texture library.
Textures that work best tend to be those with a grungy sort of look. Things such as crumpled paper, old paper, dirty walls, peeling paint all work well for most images.
If you don't have any suitable texture images yourself, there are plenty available on the internet. For free textures try free stock photo websites like sxc.hu, or the Textures resources section on DeviantArt. There are hundreds of websites offering both free and paid texture resources.
If you are using a texture created by someone else, make sure you pay attention to the license terms of the image. Some images may be licensed for non-commercial use only (so you can't use them in paid work or for producing prints that you will sell). Most will require that attribution is given to the texture creator for their work. And some may require that you contact the creator to receive permission before using the file.
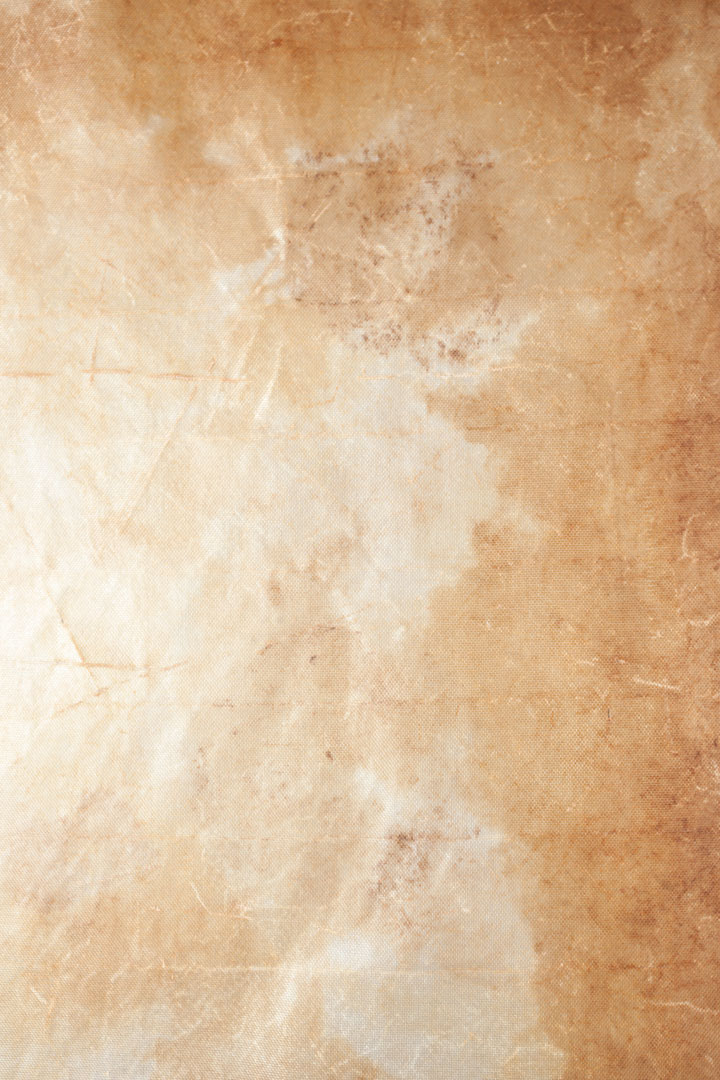
For this tutorial, I am going to use an image from my own texture library. This image is of a well-used non-stick baking sheet. You can download the file here.

The photo
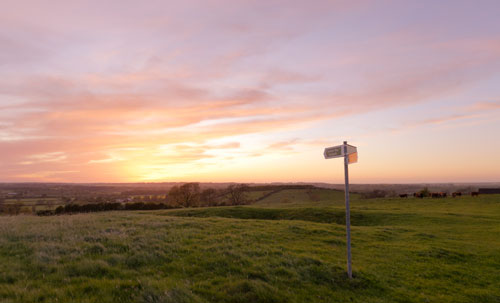
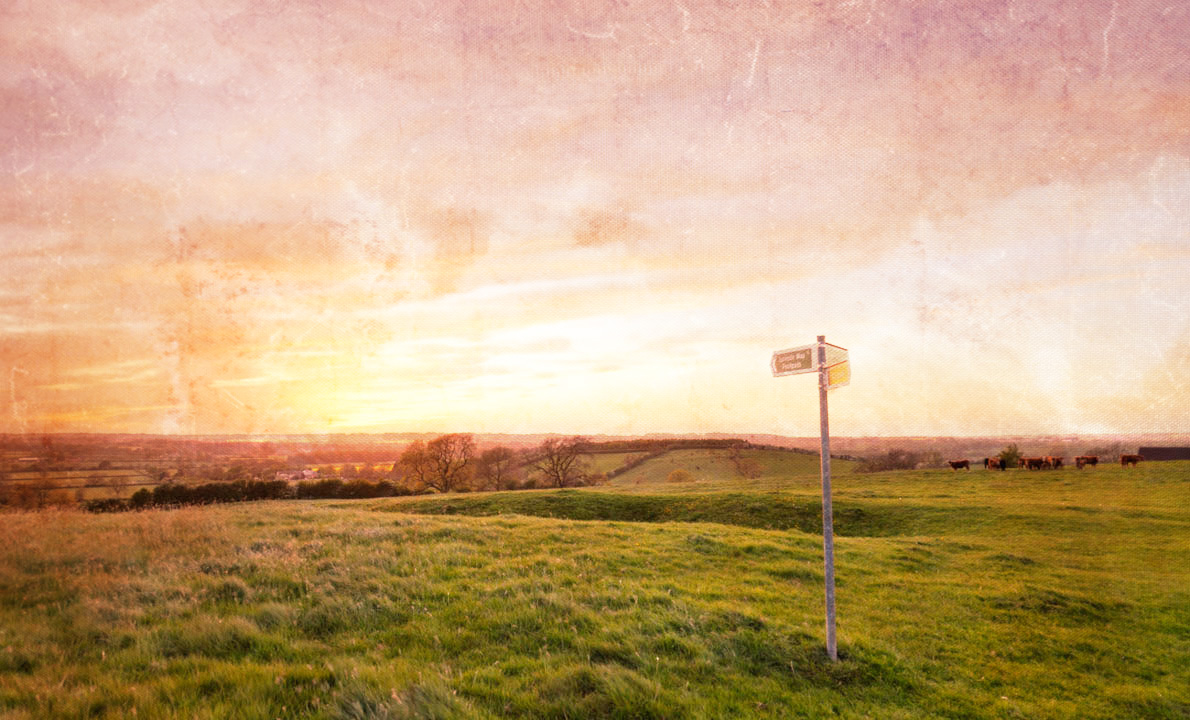
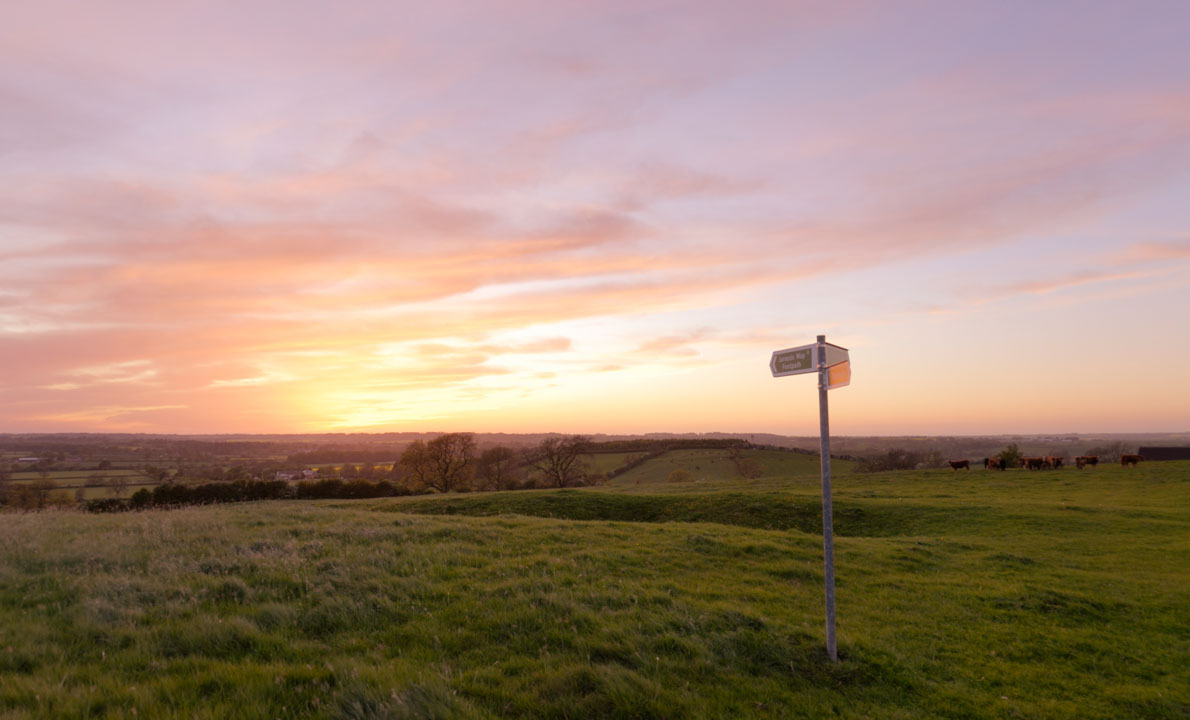
Photos that work best with textures are those that have some space with no details in. For this tutorial I am going to use this photo of a sunset. Although the sky does already have some texture from the clouds, it is flat enough that an overlaid texture will show through.
If you'd like to follow along with the tutorial, you can download the image here.
Applying the texture to the photo
Open both the photo and the texture in Photoshop.

On the menu go to Windows > Images > Tile. This brings up both the photo and the texture side by side. Select the texture photo. In the layers palette select the background layer and click and drag it onto the window containing the photo.
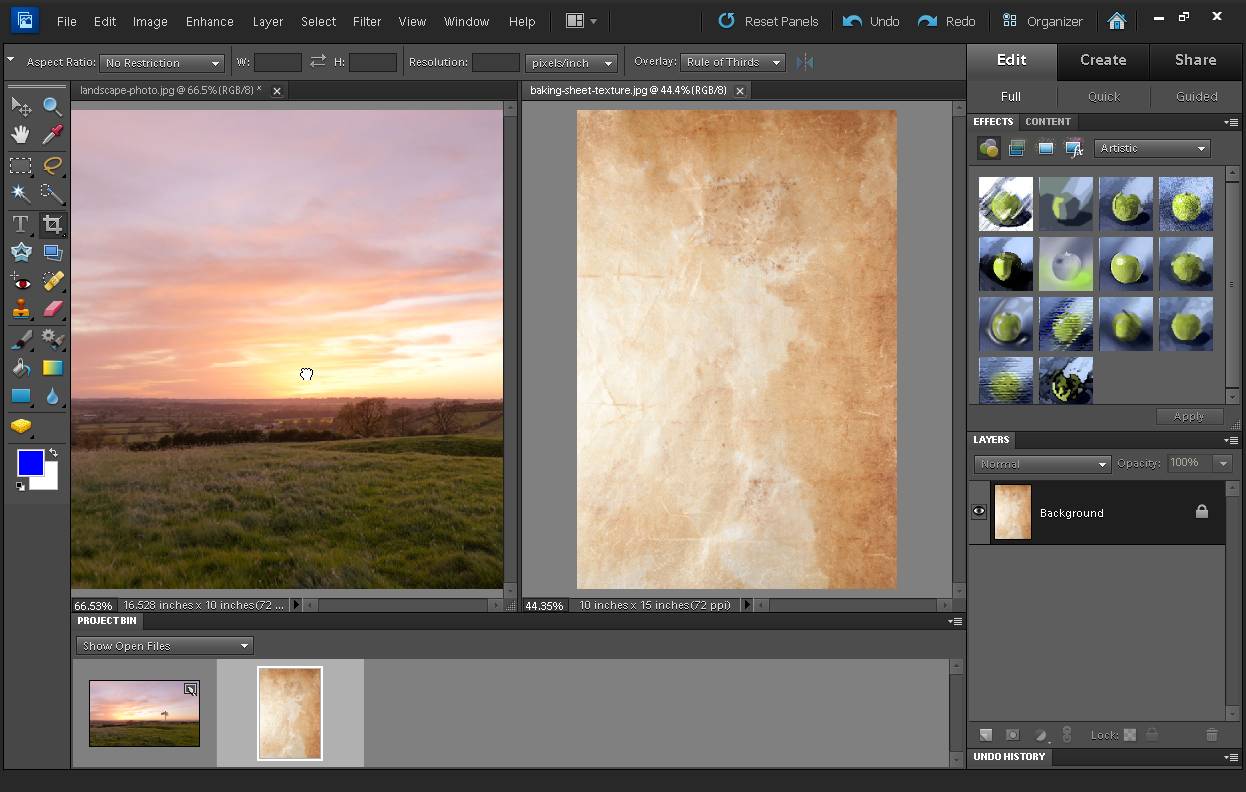
This will add the texture image as a new layer above our photo. With that done, we can close the texture image.
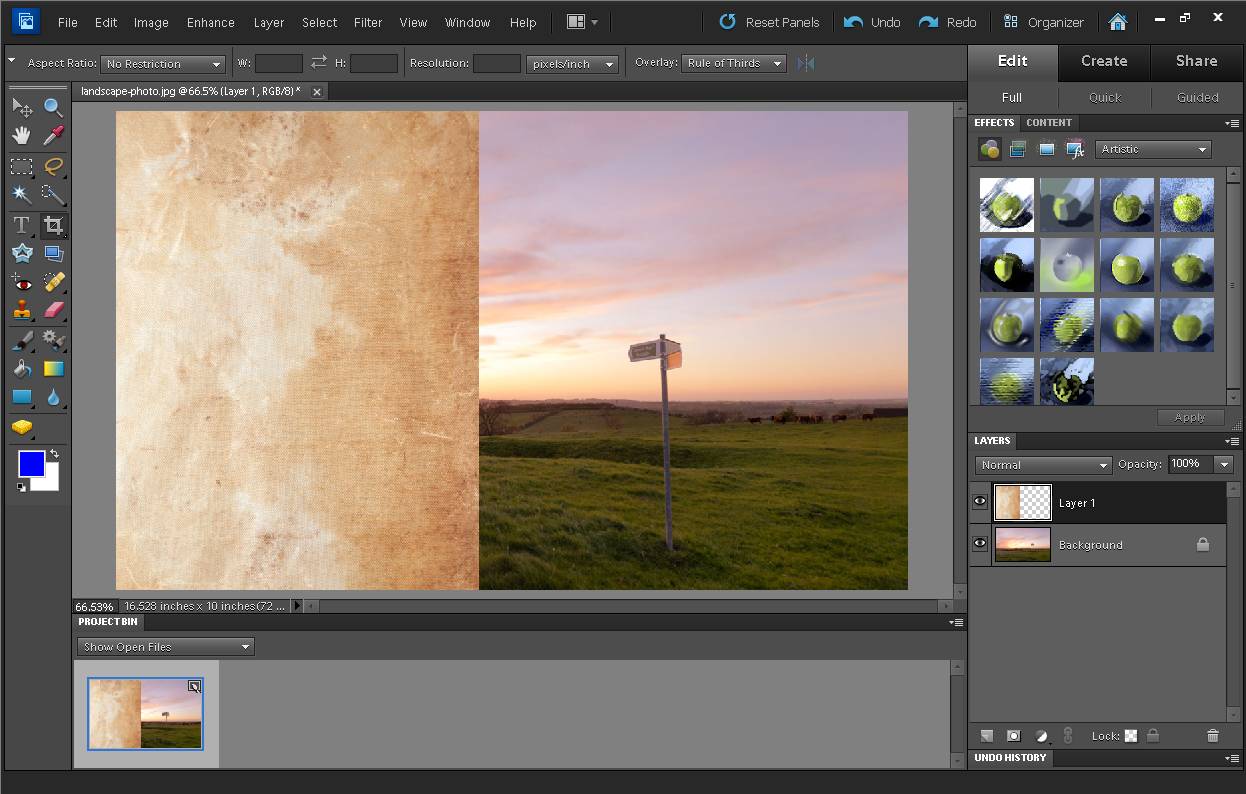
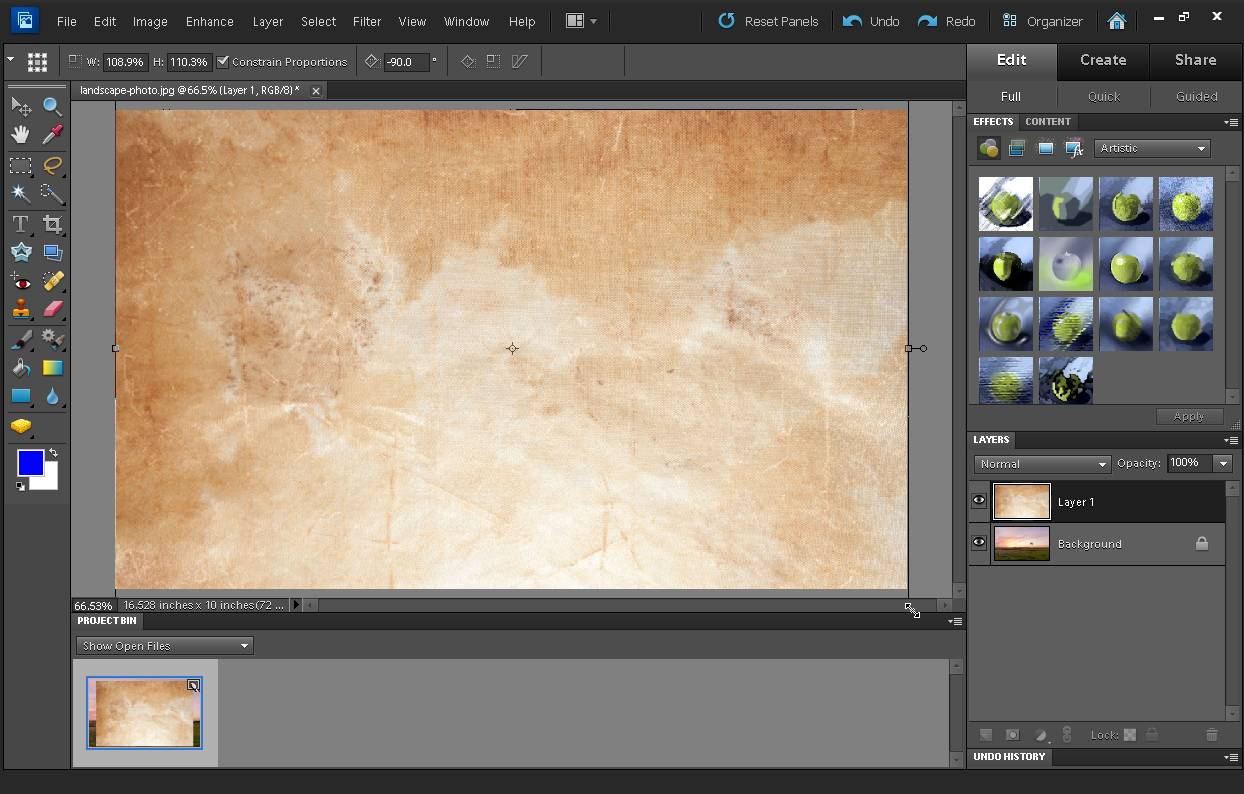
Next resize the texture so that it covers your photo. In this case, our texture is in portrait orientation, while our image is in landscape orientation. So we need to rotate our texture layer 90°. With the texture layer selected, press Ctrl + T (or go to Image > Transform > Free Transform). Place the mouse cursor outside of the texture image, and it will turn into two curled arrows. Click and drag to rotate the texture layer as needed. Holding down the shift key will make the image snap to a 90° rotation when you have rotated approximately 90°. Alternatively, you can enter the angle of rotation in the free transform tool options (red arrow in image below).
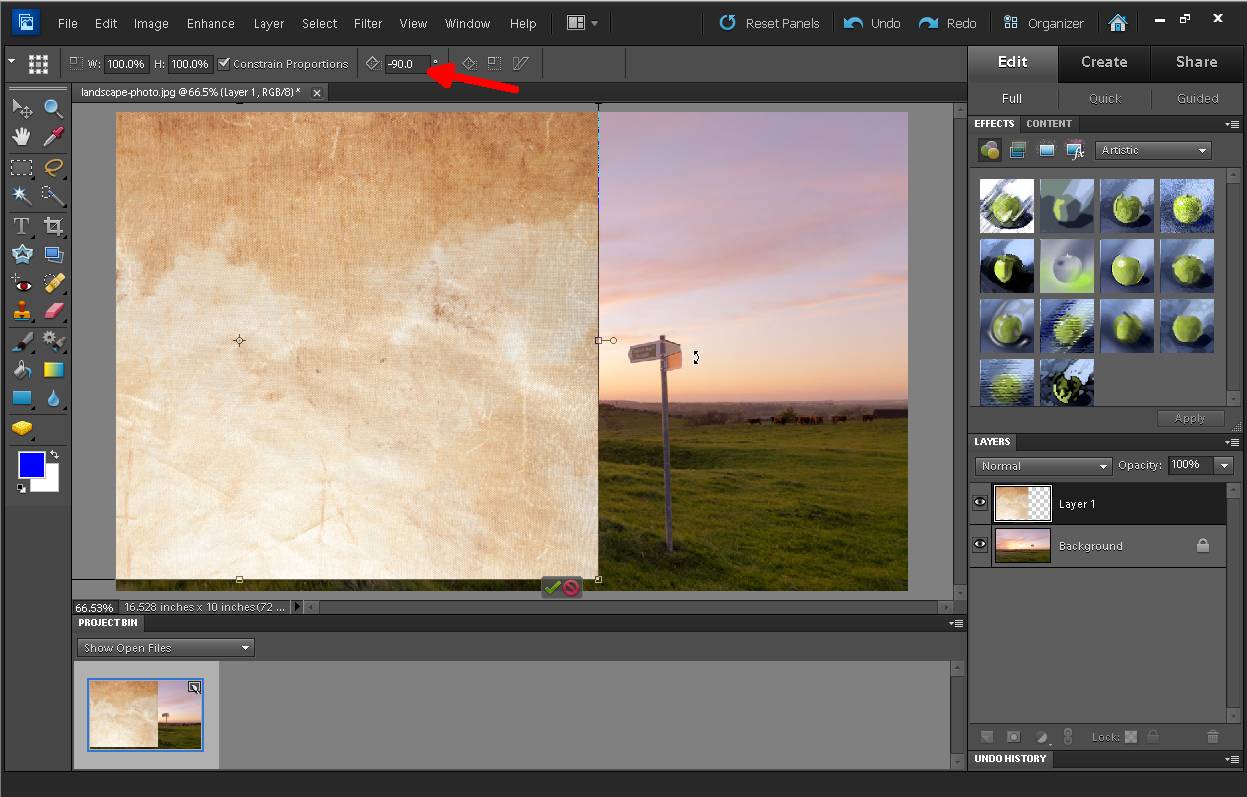
With the free transform still active, click on the texture and drag it so that it is centered in the image. The texture is a little less wide than our photo. We can either enlarge the texture, stretch the texture, or shrink the photo.
Enlarging
To enlarge the texture, click on one of the handles at the corner of the texture. Ensure that 'Constrain proportions' is checked in the free transform tool options. If it is not, you can either check it, or hold down the shift key while performing the transformation. Hold down the alt key (option key on a mac) to center the transform. Drag the corner out until the texture fills the photo.
Stretching
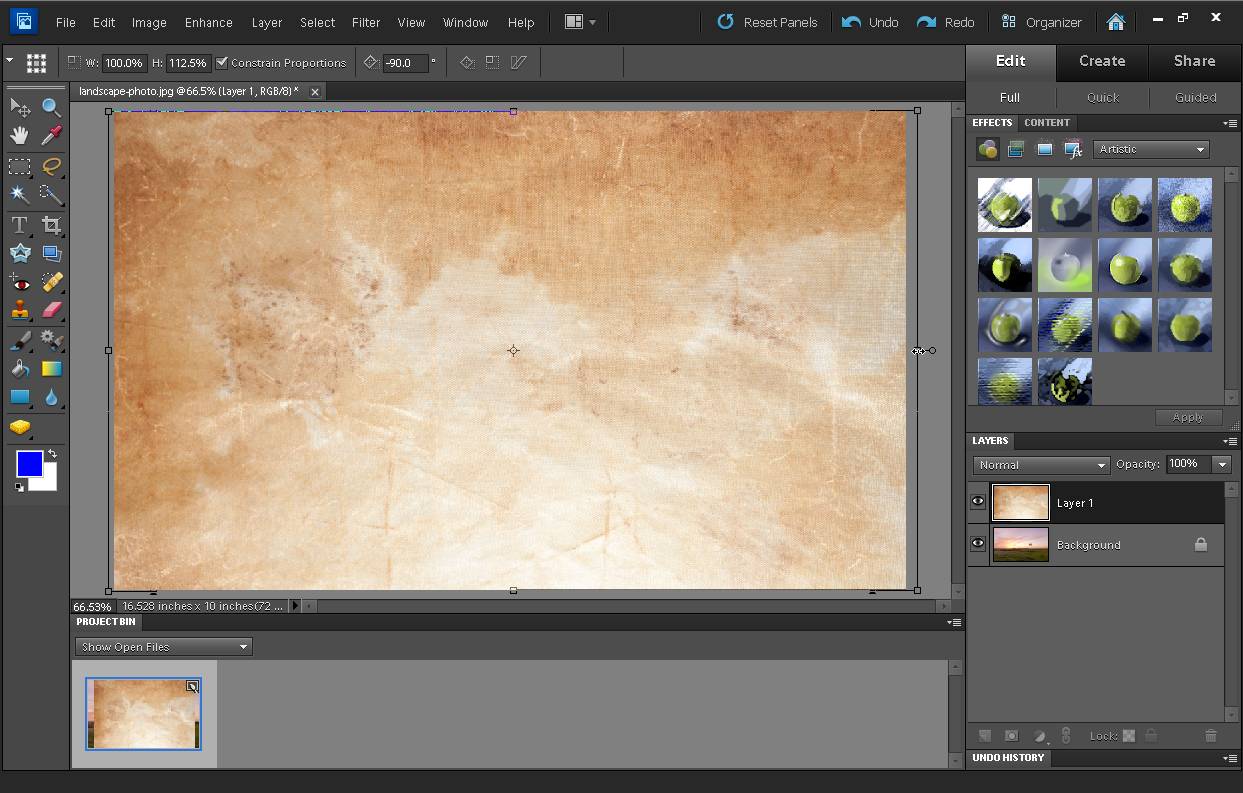
To stretch the texture, click on one of the handles at the side of the texture. Drag the handle out to stretch the texture. Hold down the alt key (option key on a mac) to center the transform. Drag the side out until the texture covers the image.
If your texture is larger than your photo, you can either leave it as it is, or transform it to make it smaller. (Just drag the transform handles inwards instead of outwards to shrink the texture).
For this image I decided to stretch the texture to fit over the photo. When you've done any transforming needed, click the green checkbox at the bottom of the image, or just press enter on the keyboard.
In the layers palette, change the blending mode of the texture layer. Overlay normally works best, while soft light and multiply modes quite often work well. It is worth experimenting with the different blend modes to see which works best. For this image I have chosen the Overlay blend mode.
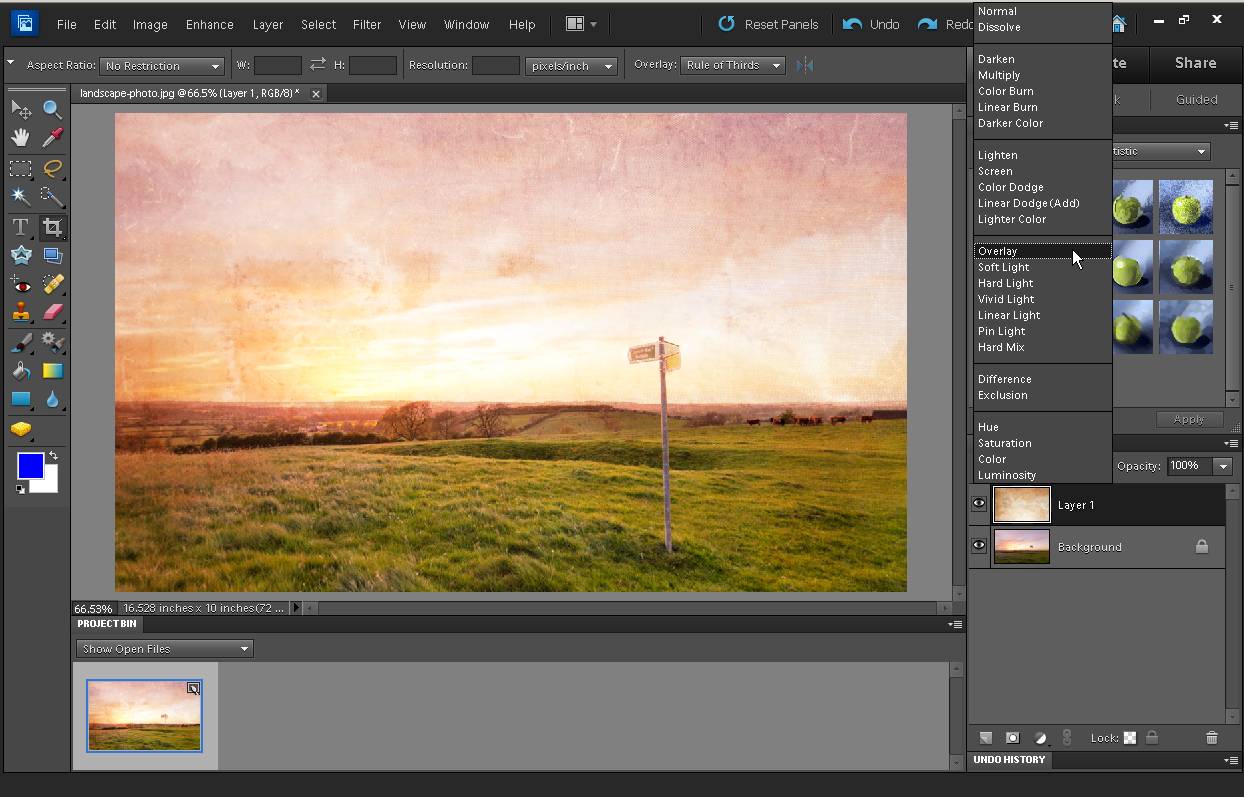
Change the opacity of the layer to reduce the effect if needed. In this case, I like the effect at 100%. Here is the final image:
You can perform much more advanced edits using textures if you wish. You can use layer masks on the texture layer to show or hide the texture in certain areas of the image. You can use multiple texture layers and different blend modes for layered effects. For a more advanced Photoshop tutorial that covers applying a texture to a person's face, see my previous post: Photoshop tutorial: How to apply a texture to a face by using a displacement map. There are no rules, just experiment and see what works well.


