Surreal Photoshop techniques
Surrealistic photography has been around almost since the invention of photography. Where techniques used to involve in-camera tricks, special processing techniques in the darkroom, and even cutting up and re-arranging of photos, many surreal effects can now be achieved much more easily and quickly using image editing software.
In this article we'll look at five different techniques for taking a normal photo and making it into something surreal.
I'll be using Photoshop CC for the examples, but most of the techniques can also be achieved in other software such as GIMP. I should also point out that while I'll do a step-by-step guide for each of the examples, I strongly recommend experimenting and varying how you apply the techniques. What works well for one particular photo does not necessarily mean the exact same settings and procedure will work just as well for another image.
Flipped difference
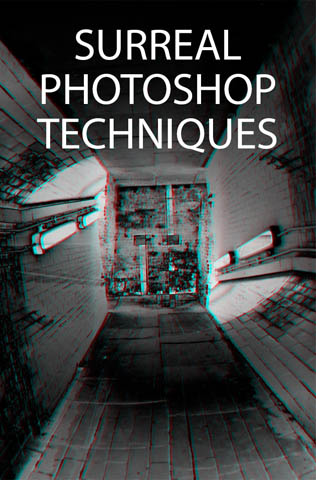
For this technique we create an image where the original is duplicated, flipped, and partially overlaid over the original. The result can be pretty strange.

Final image, based on Studio Portrait by ZoeLouisePhotography on Flickr (licensed CC-BY)
To start off with, open your image in Photoshop. I'm using the image Studio Portrait by ZoeLouisePhotography, which is licensed CC-BY, allowing for modifications.
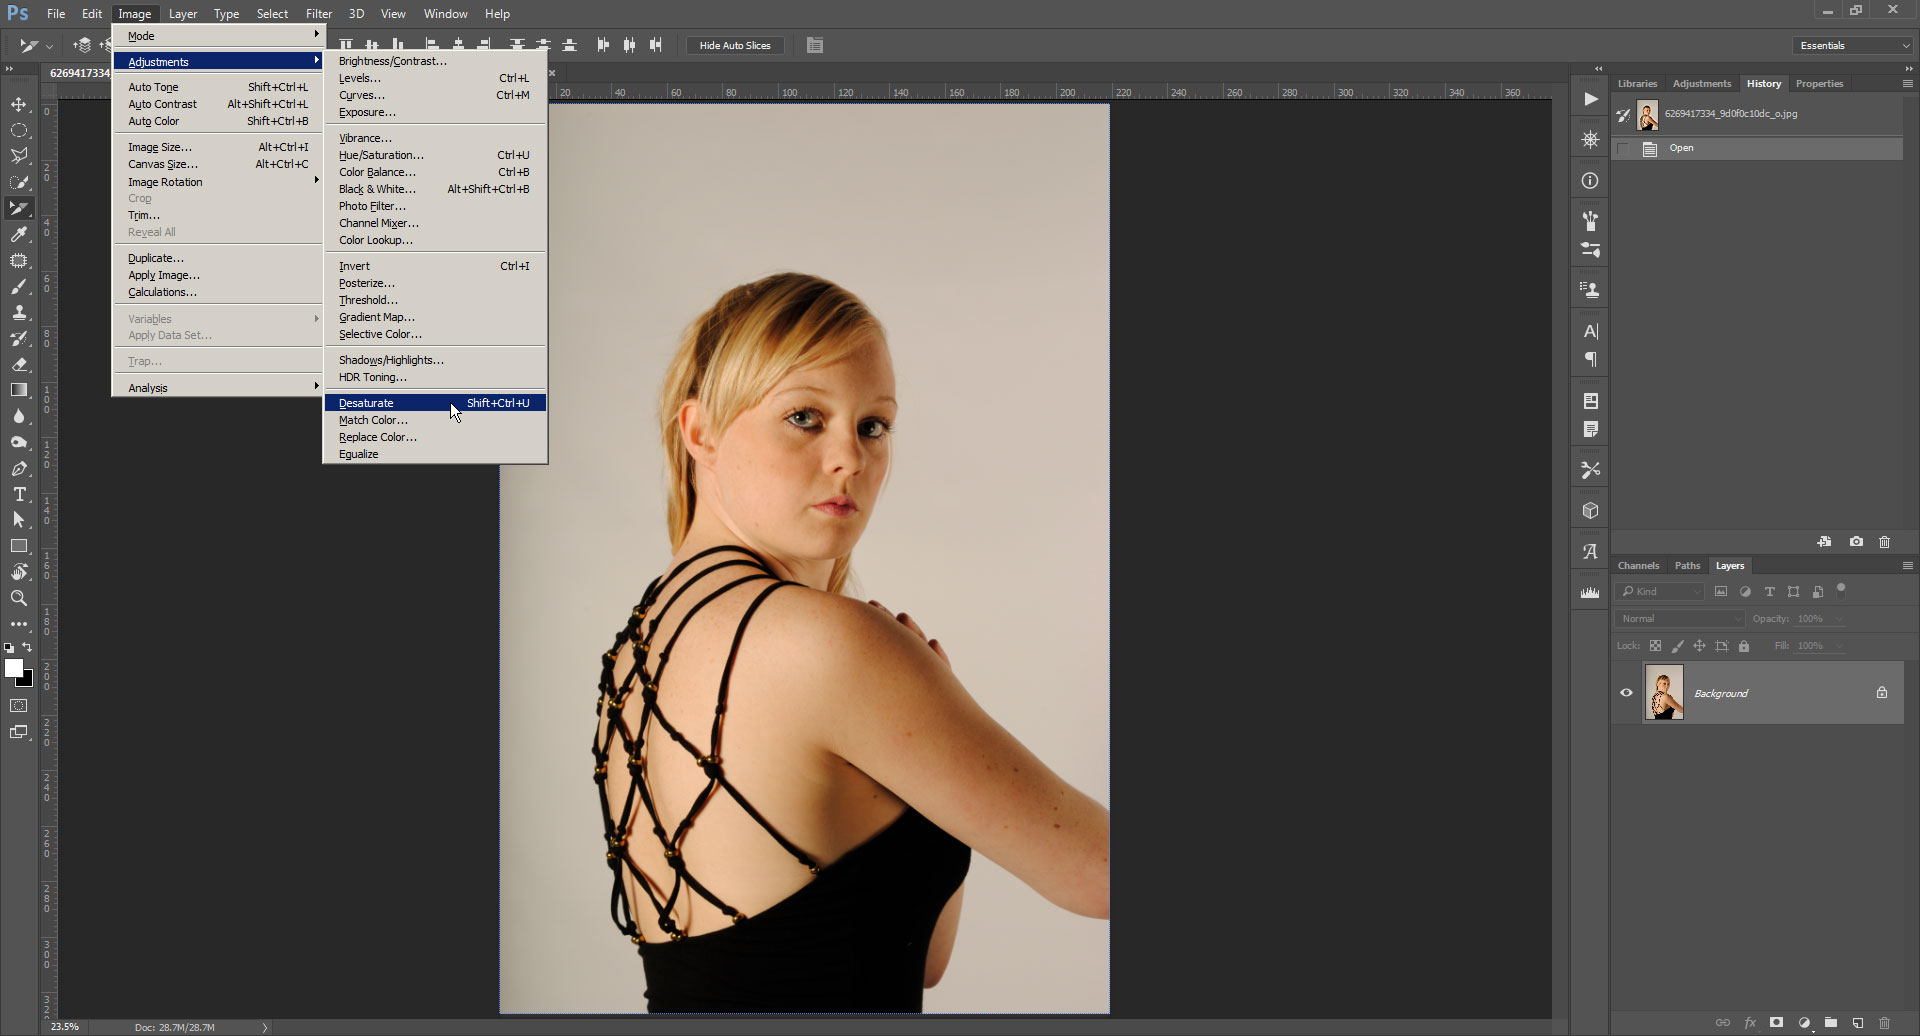
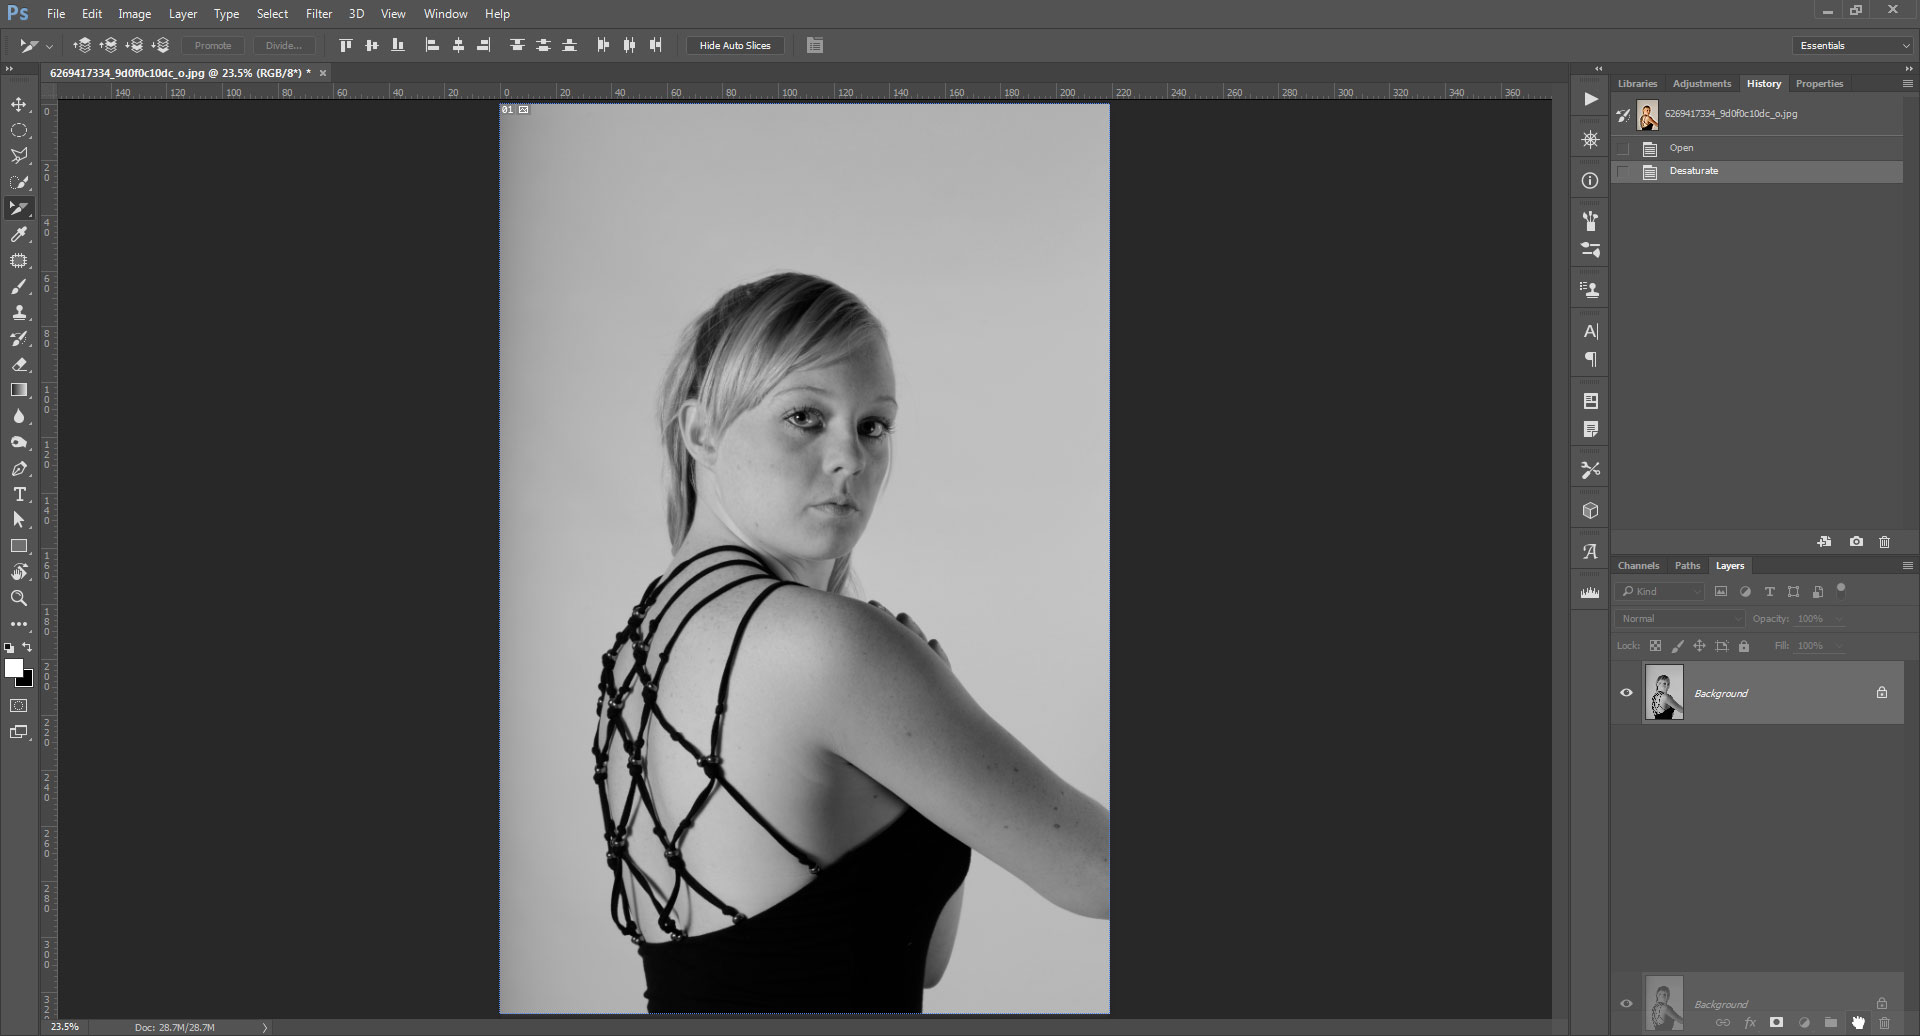
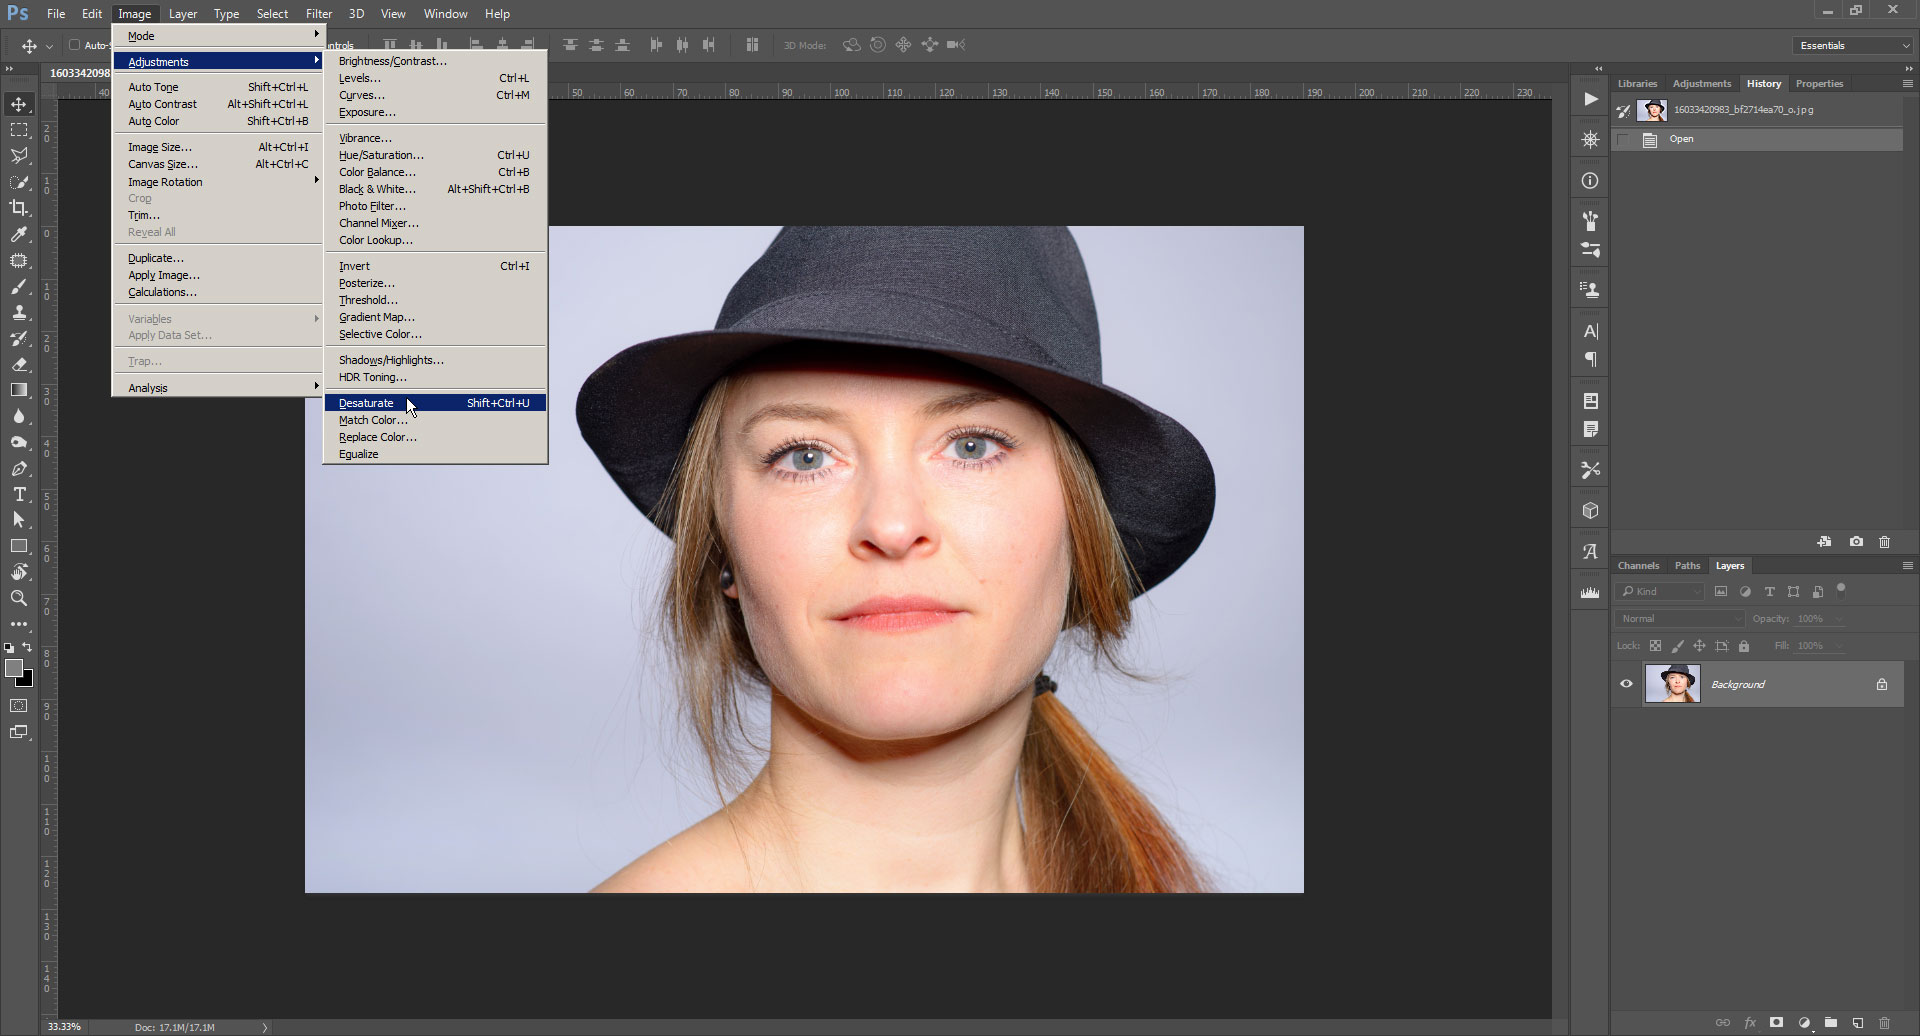
Desaturate the image, Image > Adjustments > Desaturate.
Duplicate your background layer. The easiest way to do this is to select the background layer in the layer palette, then hit the keyboard shortcut Ctrl + J (PC) / Cmd + J (Mac). Alternatively, you can click the layer and drag it down to the new layer icon at the bottom of the layer palette.
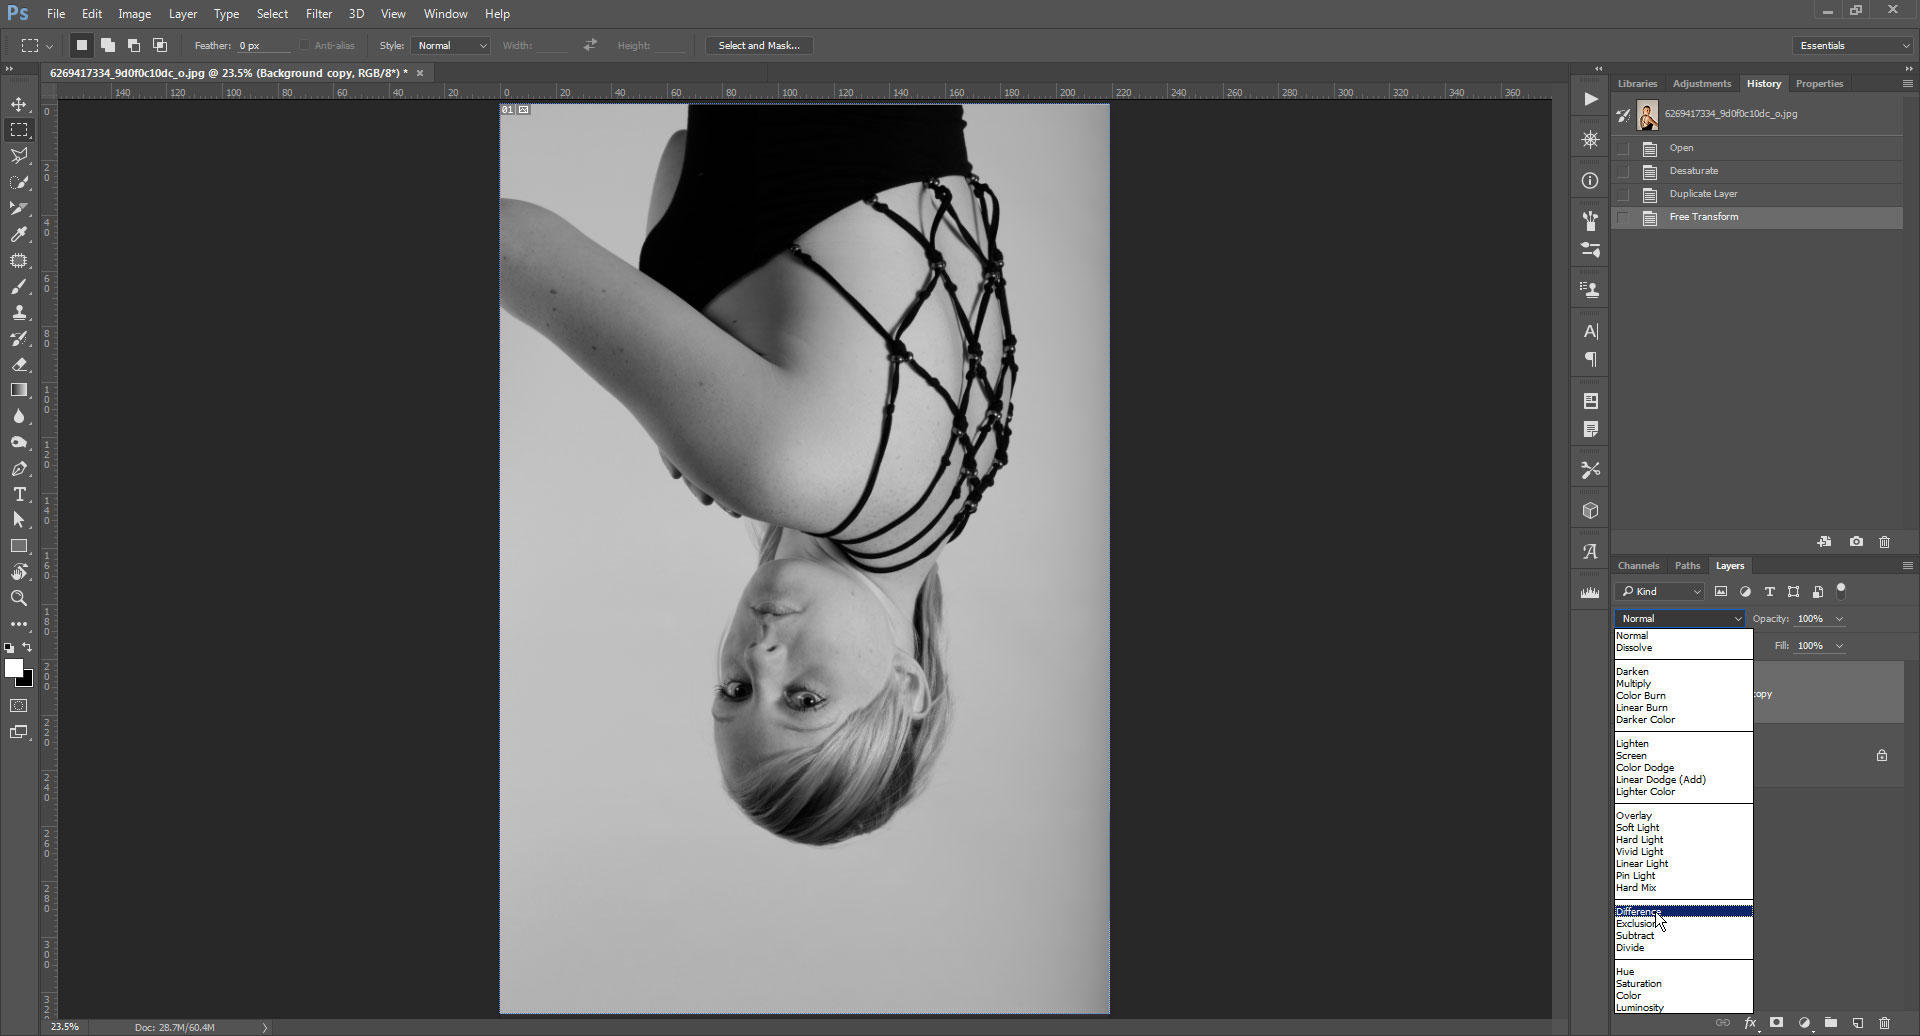
Select your new layer in the layer palette and rotate it 180° so it is upside down. To do this you can press Ctrl + T (PC) / Cmd + T (Mac). Place the mouse cursor outside the photo so it looks like a curved two headed arrow. Then click and drag in an anti-clockwise motion to rotate the layer. Hold down the Shift key when rotating to keep the rotation constrained to increments of 15°. When finished press the Enter key.
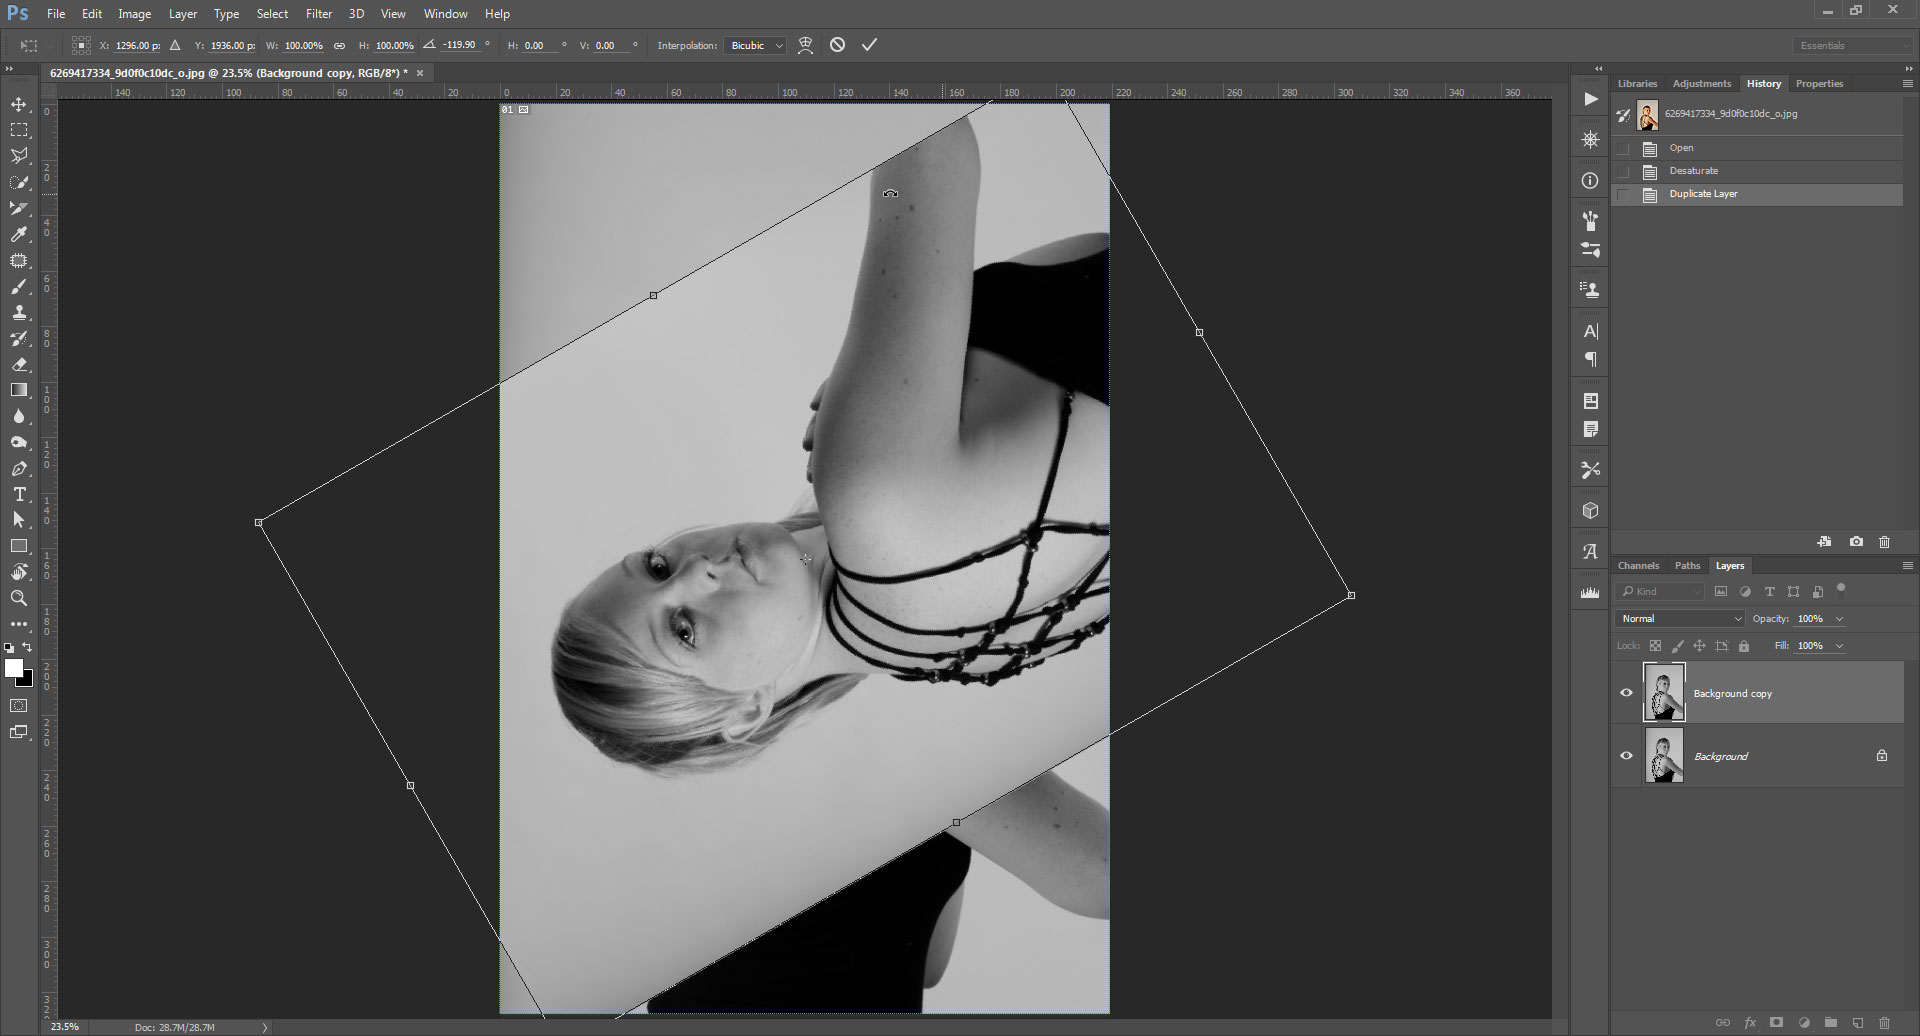
Alternatively, just go to Edit > Transform > Rotate 180°.
Change the blending mode of your upside down layer to Difference.
Difference blend mode makes areas completely opposite in tone (to the underlying layer) show white, while those with completely the same tone (as the underlying layer) show black. Differences between the two extremes show as shades of gray. Lighter the larger the difference between the two layers, darker the smaller the difference.
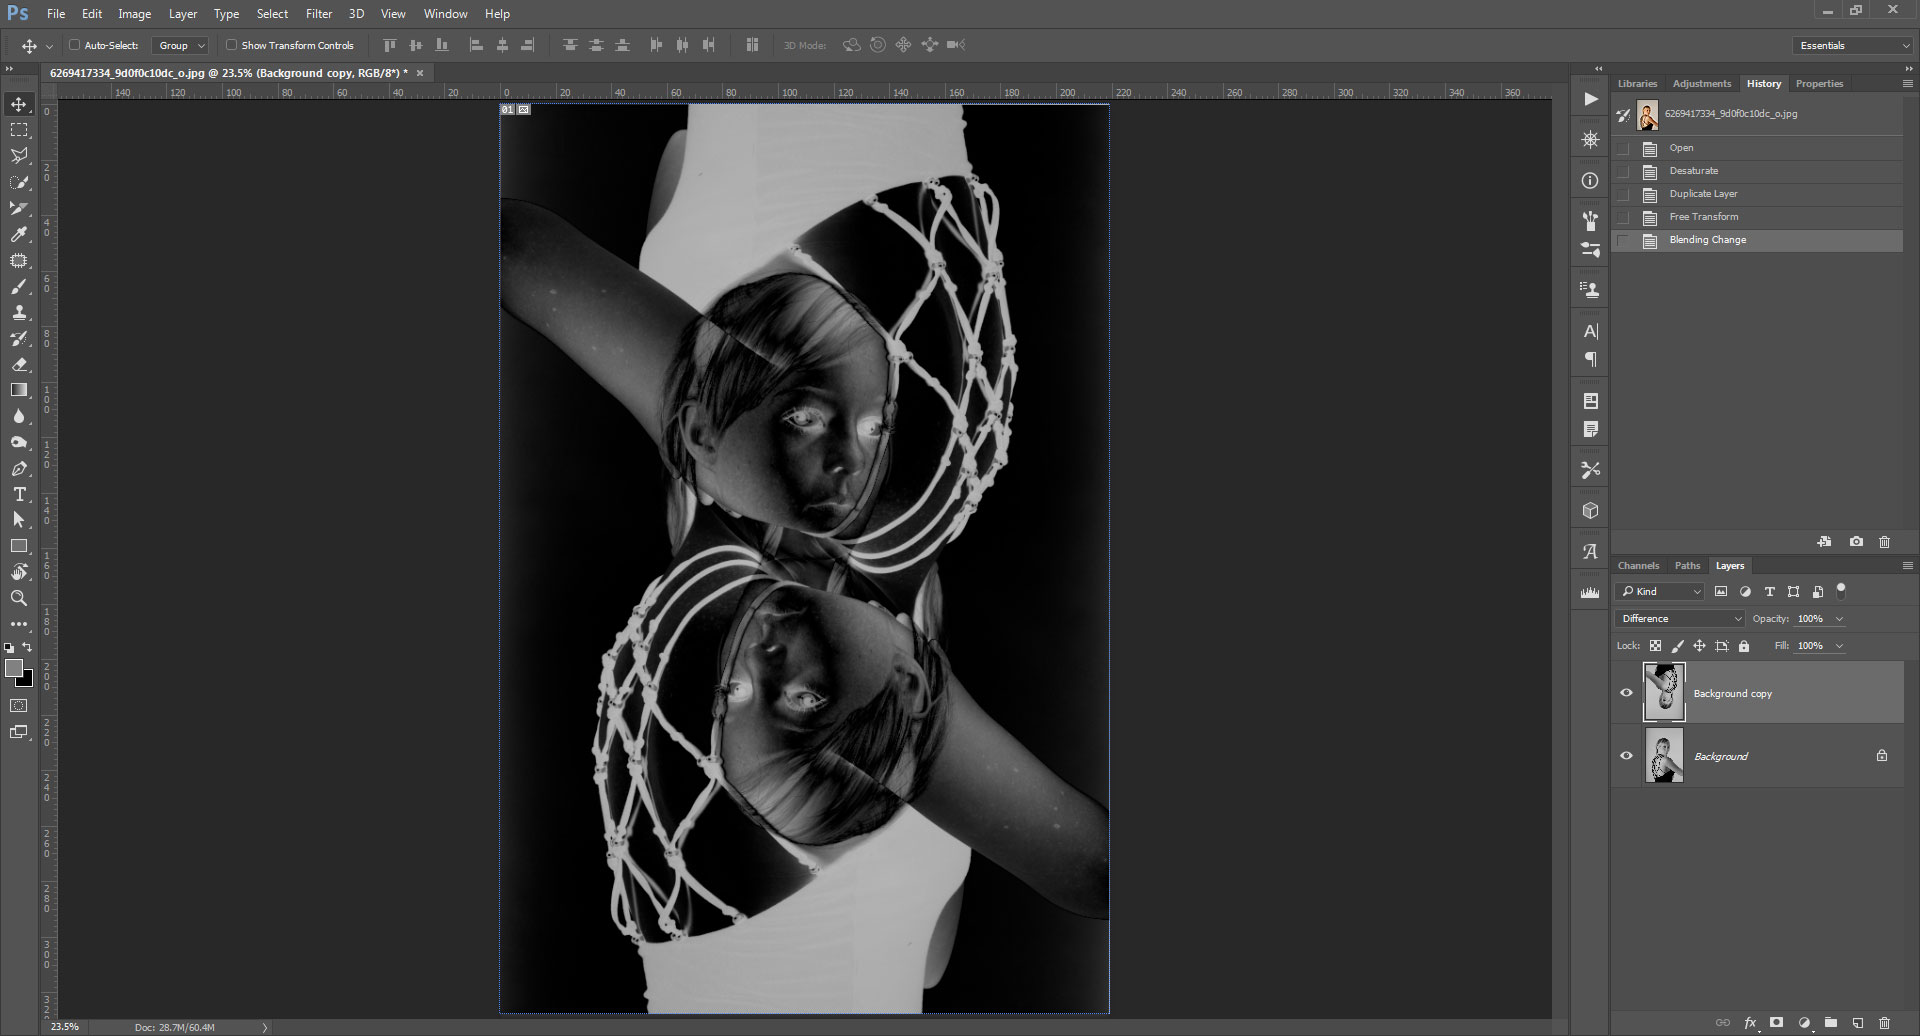
Now move the upside-down layer up so that the heads of the two layers overlap one another.
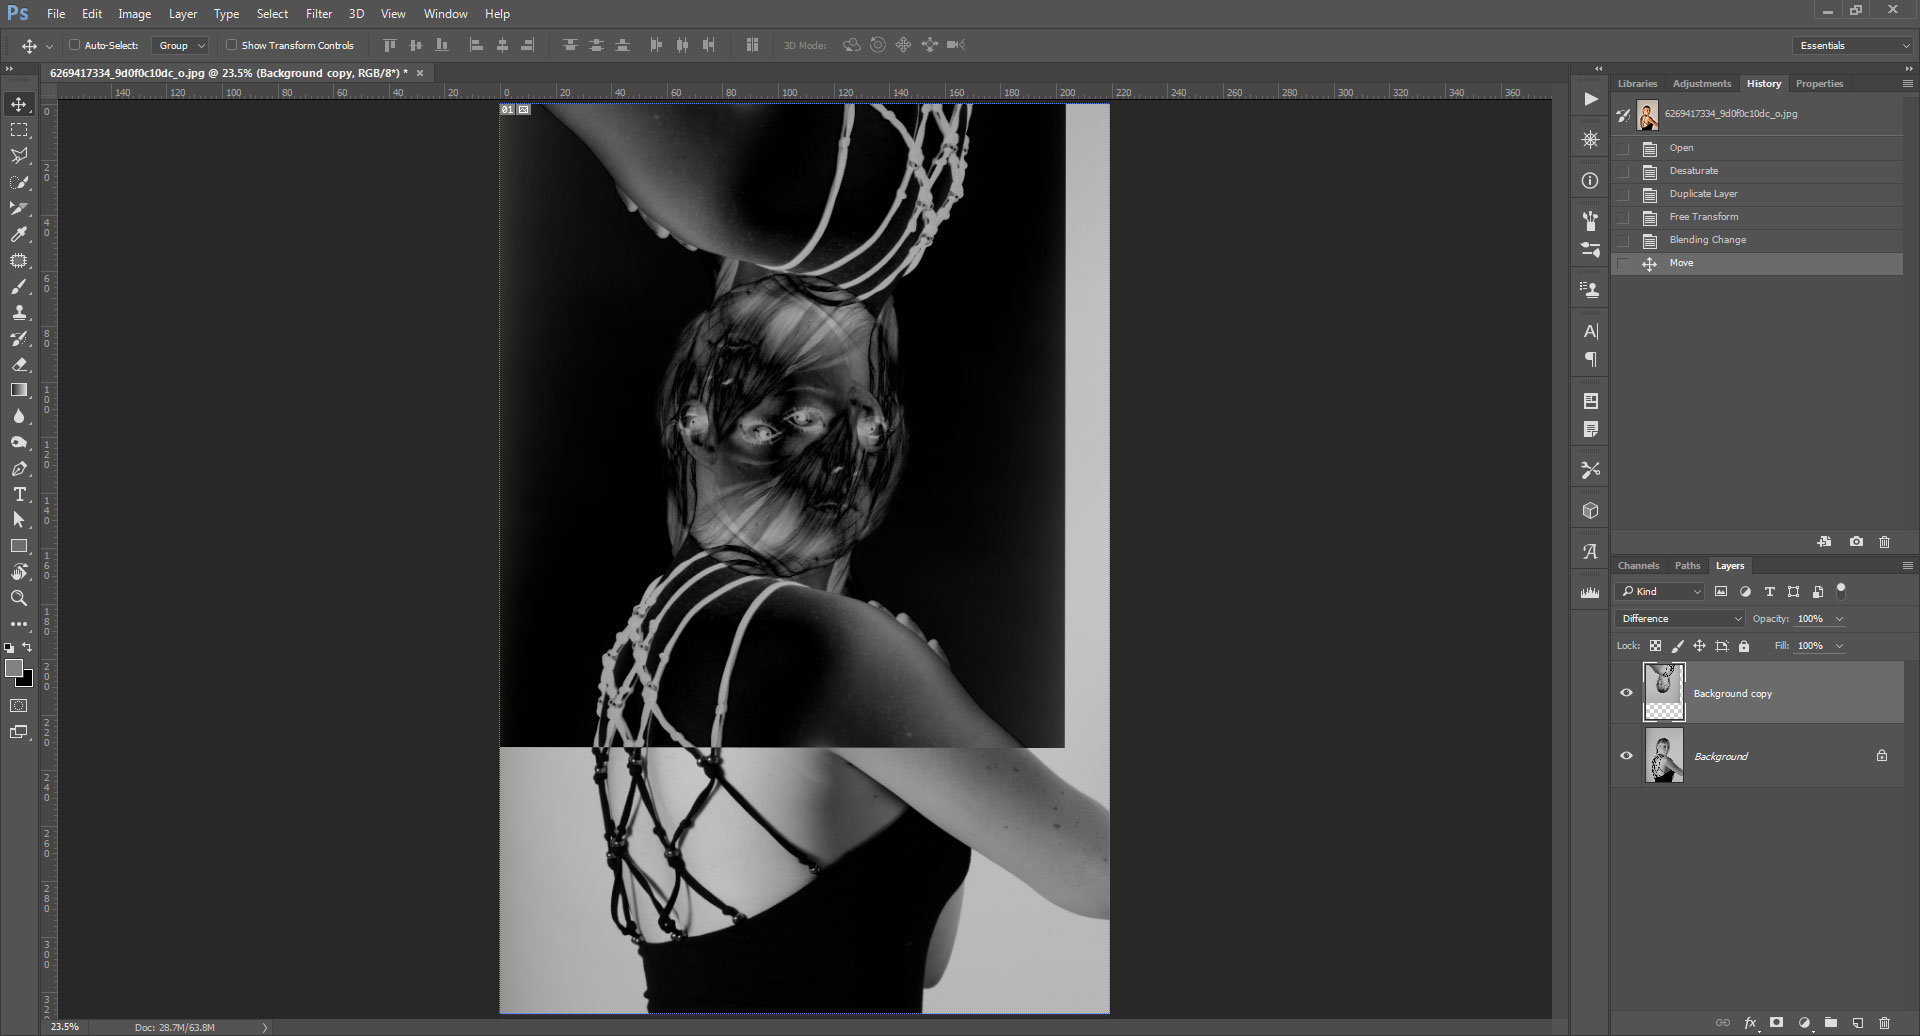
Use the crop tool to crop the image so that only the area where both images overlap is included.

Finally, add an invert adjustment layer so that the darks become lights and lights become darks.
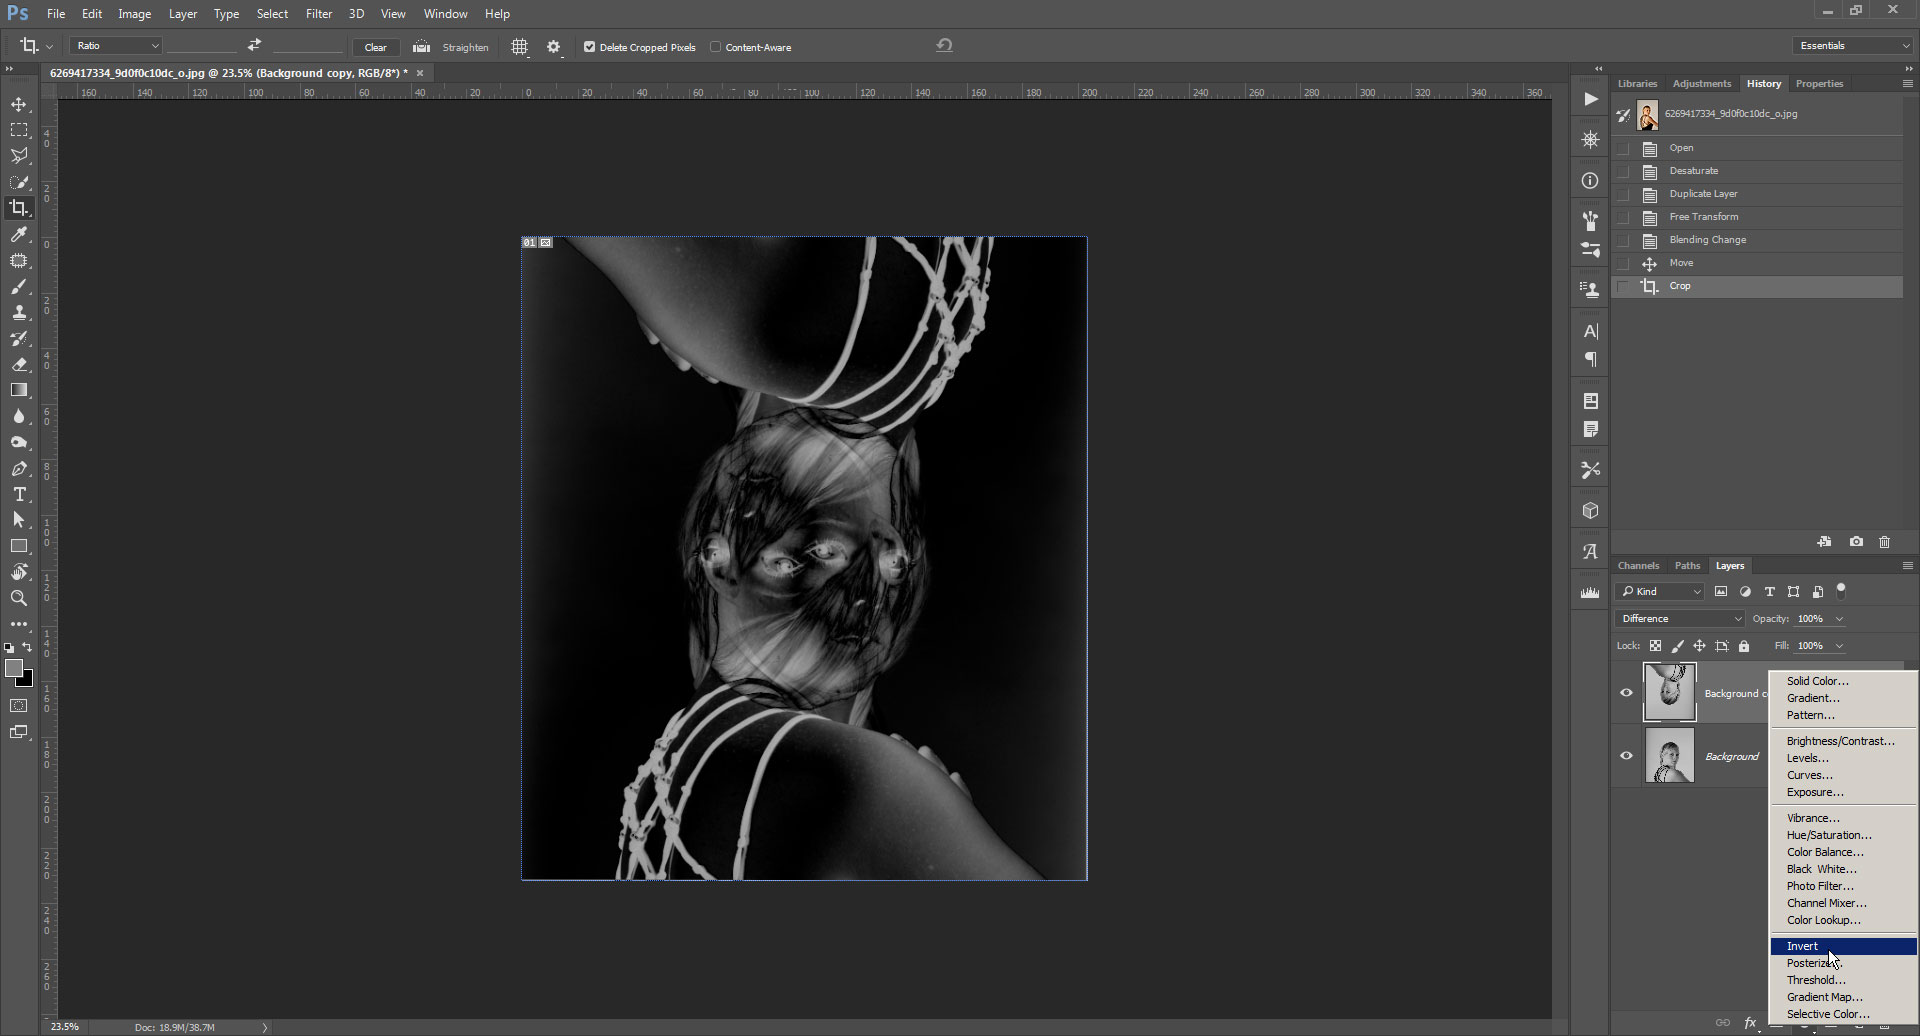

The final image
The same technique can also be used for abstract compositions created from landscape photos.

Modified from A tree in the fields by stanze on Flickr (licensed CC-BY-SA)
For this image I've flipped the image (Edit > Transform > Flip Vertical), and left the image in color rather than going for black and white. The image was not inverted as a final step either.
Unreal colors using Channel Mixer
The channel mixer is commonly used when processing false color infrared photos. However, you don't need to take infrared photos to create a false color image. You can use the same technique for standard images.
This technique can't be used in Photoshop Elements, as PSE is missing the channel mixer adjustment. But the full version of Photoshop and GIMP will both work fine.

Based on Forest by Emily Dupre on Flickr (licensed CC-BY)
If you'd like to follow along with this tutorial, the image I'm using is Forest by Emily Dupre, which has a CC-BY license allowing modification.
Open the image, then create a channel mixer adjustment.

Change the Output Channel on the Channel Mixer Adjustment to Red. Then adjust the values to +100 green, 0 Red, 0 Blue.
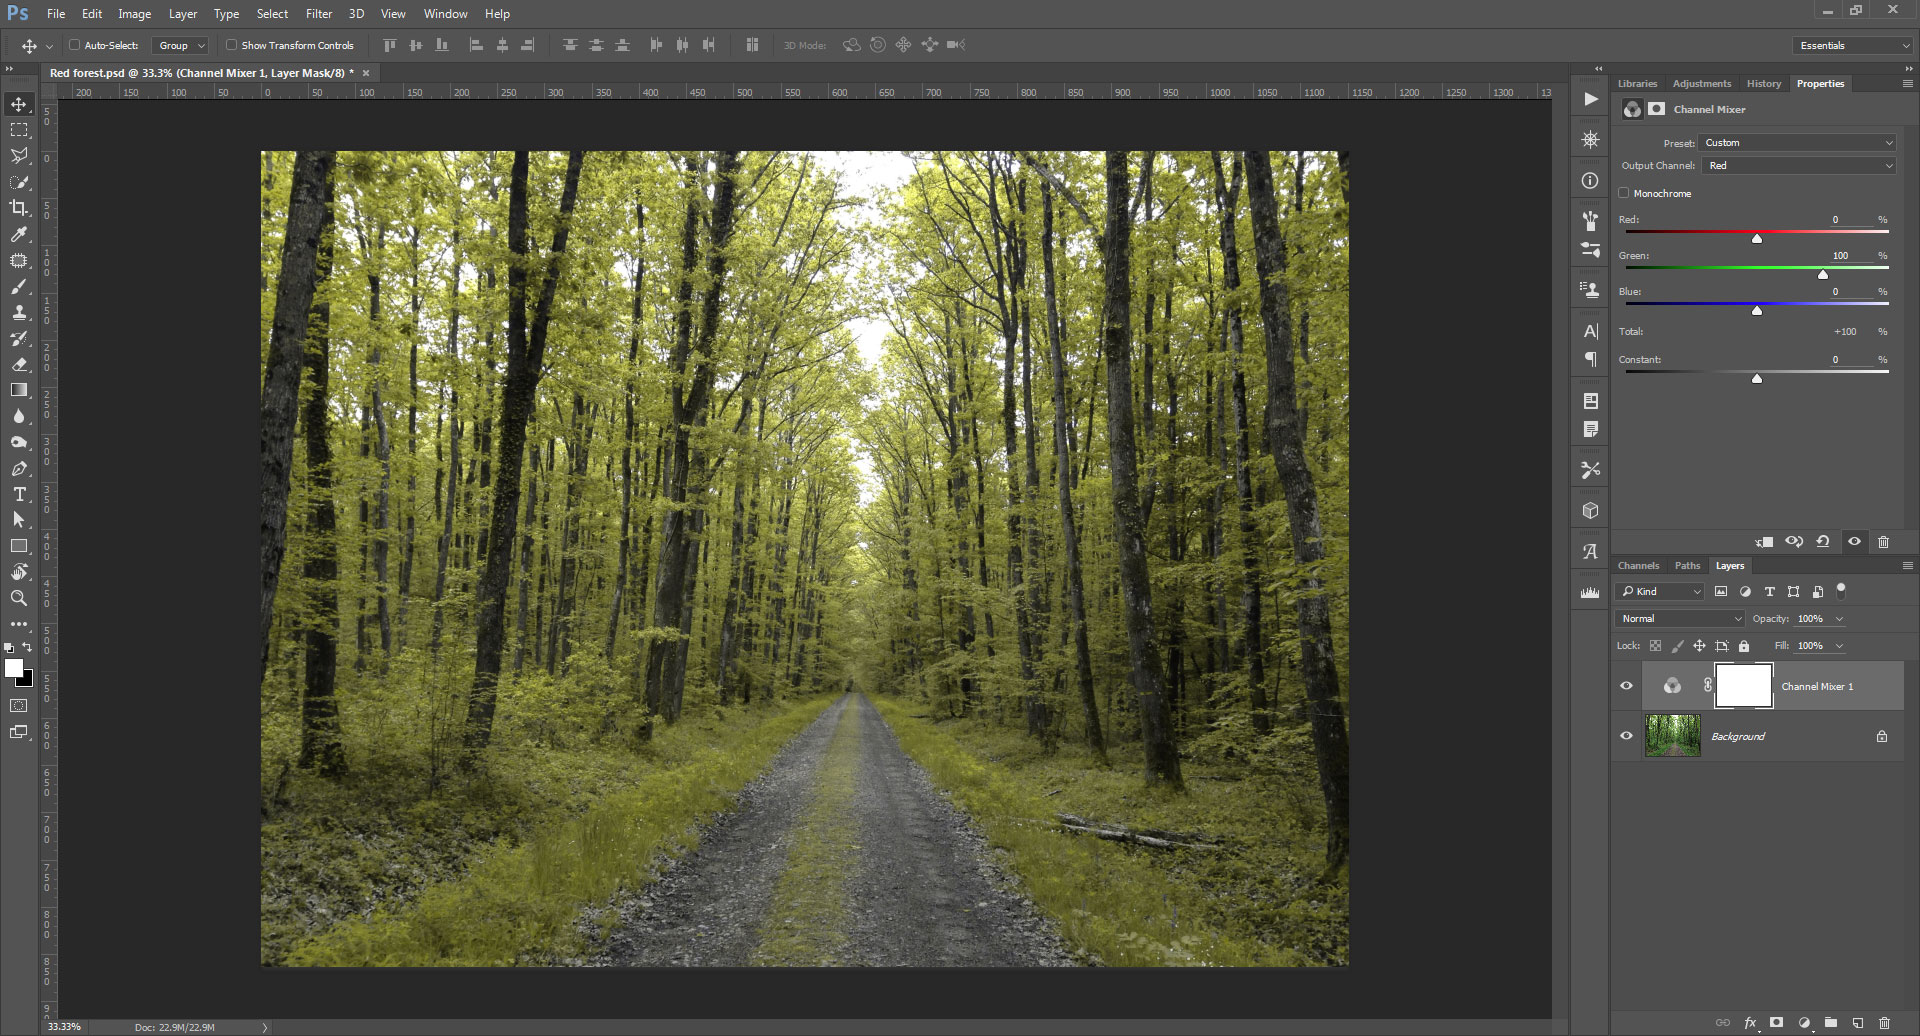
The idea is to get a red forest, so we're going to swap the red and green channels around. Anything that is green will become red, and anything red will become green. By setting the Red channel to +100 green and 0 red, we've told it to use the green channel for reds. But it doesn't look red yet as the green channel is also still being used for green, so anything originally green is now a mix of green and red.
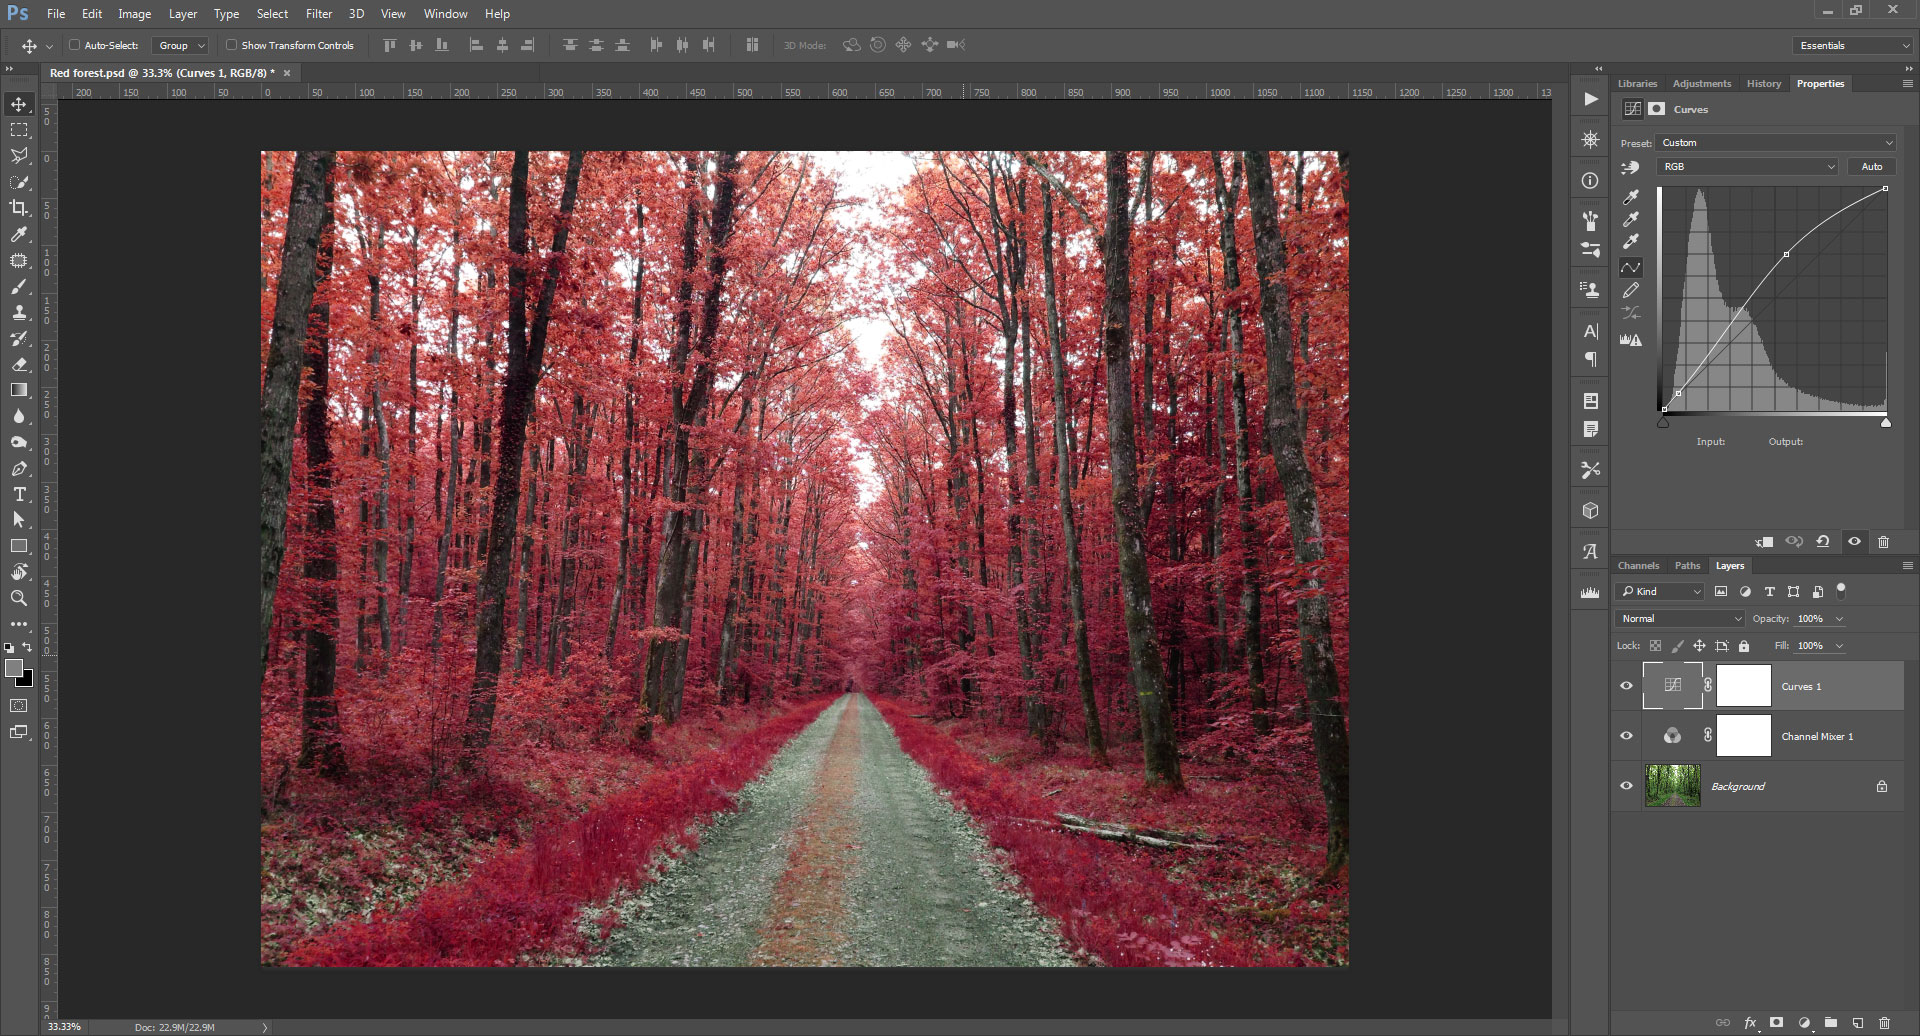
So, switch to the green channel and change it to +100 Red, -50 green, +50 Blue.

Switching the green channel to just +100 Red, 0 green, 0 blue gives a brown looking image. By decreasing the green further to -50 we allow more of the red channel to show through in the areas that were originally green. To avoid the image becoming overly dark we add in +50 blue, as there isn't much blue in the leaves and grass normally. The overall balance of the channel should be 100% to keep a similar brightness and avoid introducing color casts over the whole of the image.
The blue channel I left as-is: 0 red, 0 green, +100 Blue
Finally, add in a curves adjustment to brighten the image and increase the contrast. Pulling the curve up in the brighter midtones while keeping it locked down in the shadows ensures that the brighter tones are made brighter without affecting the dark tones.
Repetitive difference
This technique is similar to the first, except that rather than using a single copy of the layer that we rotate, we use multiple copies all offset from one another by the same distance.
Based on studio photos C sabinpaul by sabin paul croce on Flickr (licensed CC-BY)
The technique relies on recording an action to repeat the same steps multiple times in a row. GIMP and Photoshop Elements don't allow recording actions, however you can still get the same result by repeating the steps manually.
If you'd like to follow along, the image I'm using is studio photos C sabinpaul by sabin paul croce. Again, this image is licensed CC-BY, allowing modifications to be made.
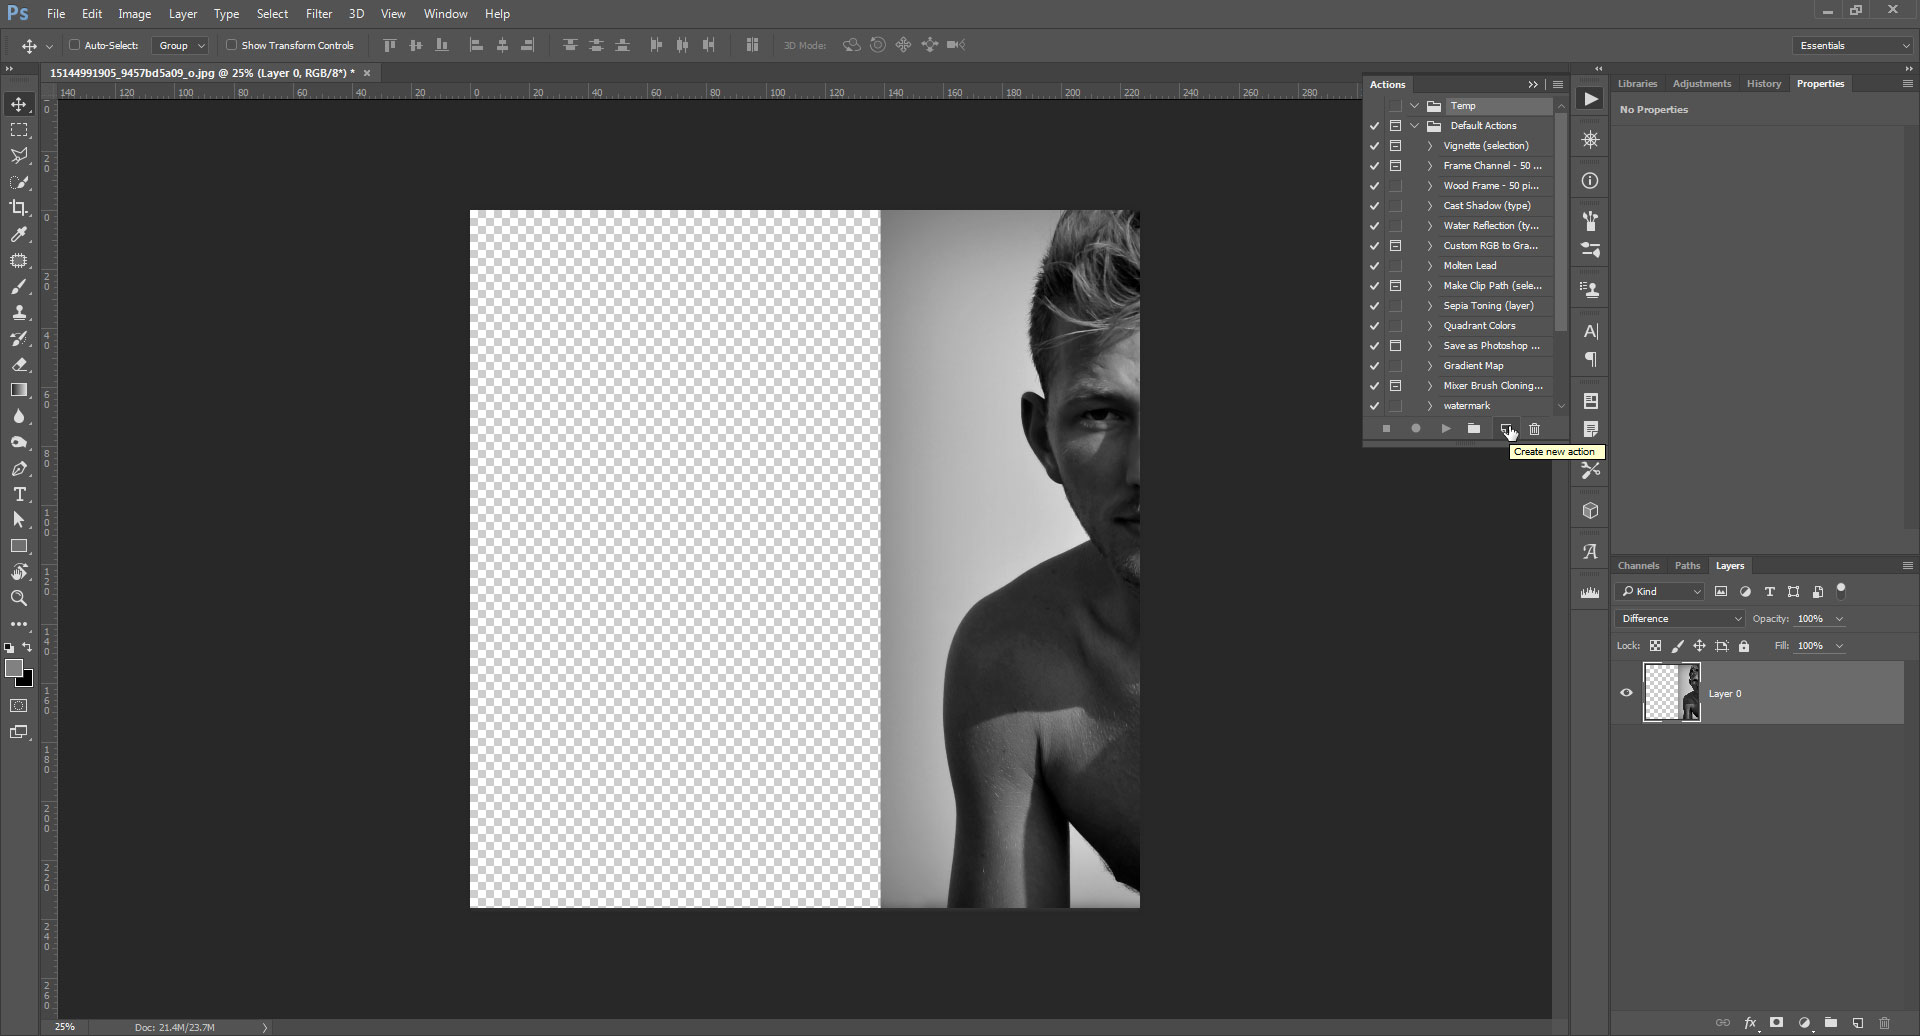
Open your image. We need to move the layer, but this can't be done with the special 'Background' layer, so we must convert it to a normal layer. To do this, double-click on the name of the Background layer, then click OK on the layer rename box that pops up.
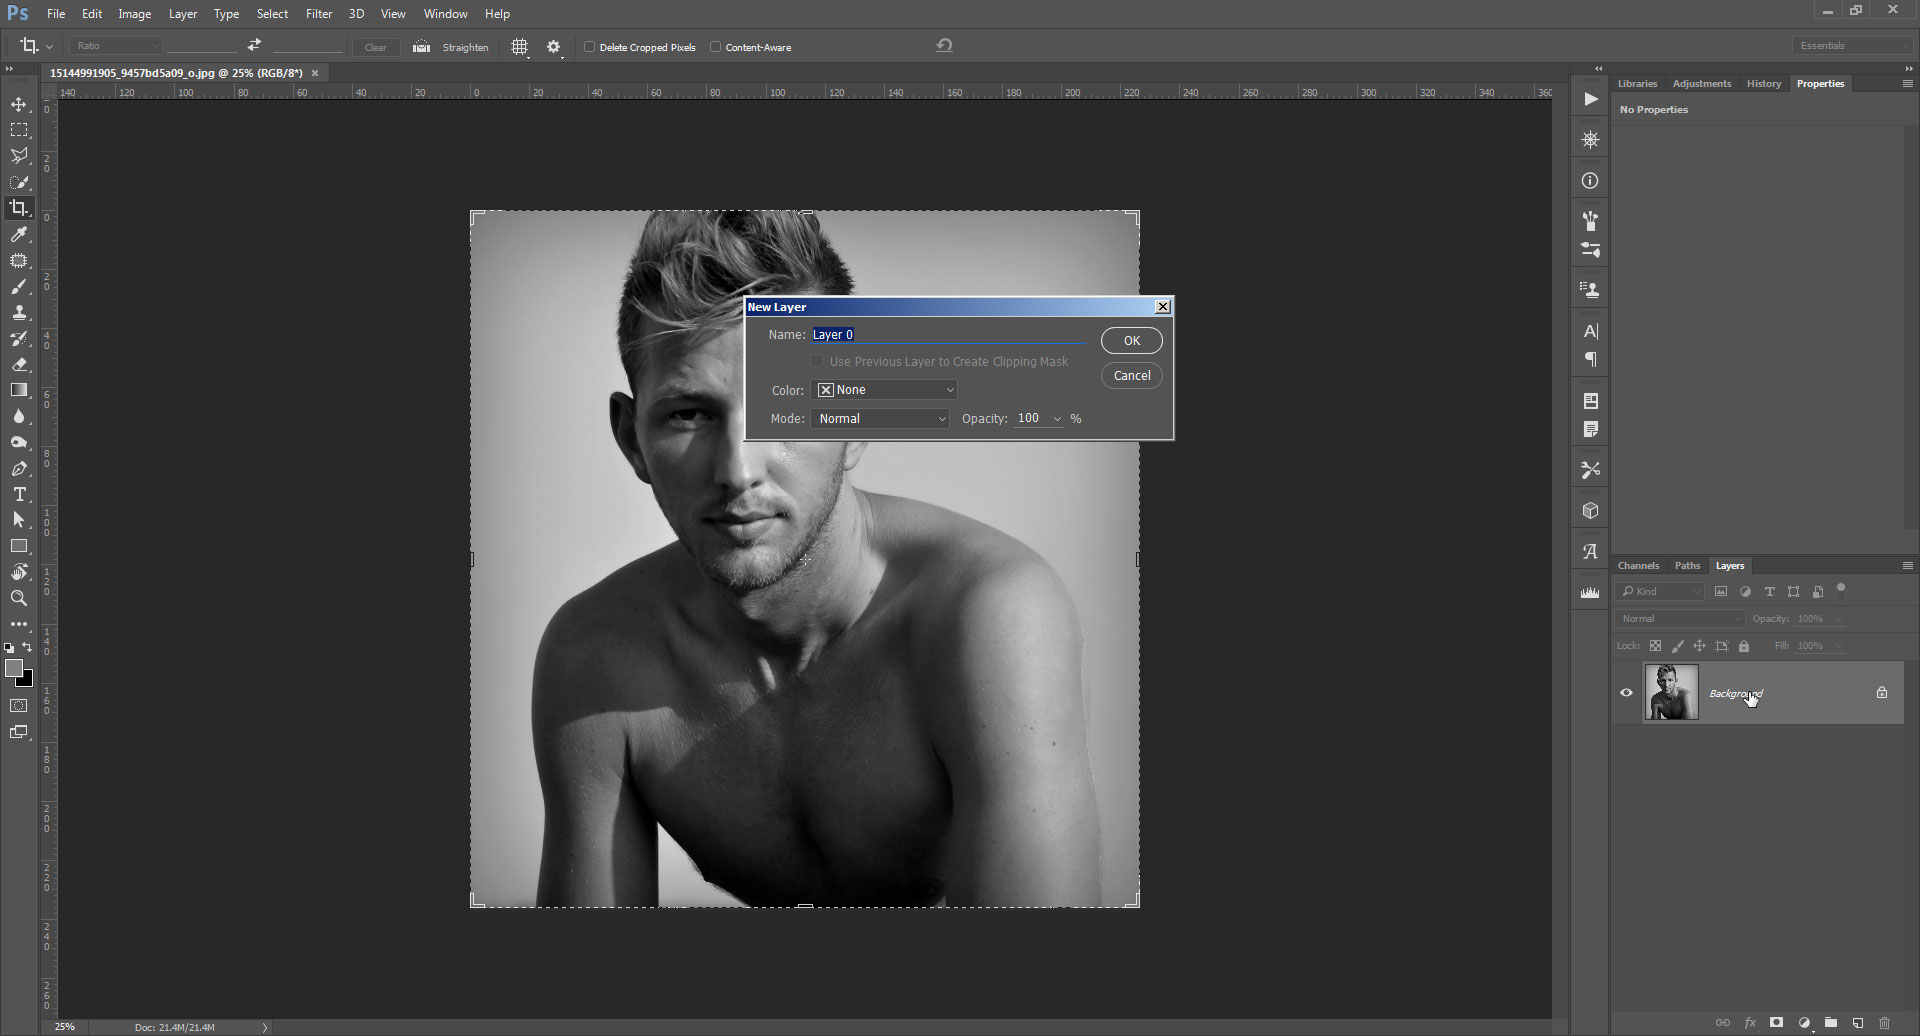
Use the move tool to move the layer to the right side of the canvas where you want the image to start. Then change the layer's blend mode to Difference. (The blend mode change will show no effect at the moment since there are no layers behind it).

Open the actions palette (Window > Actions). Click the new action button at the bottom of the palette.
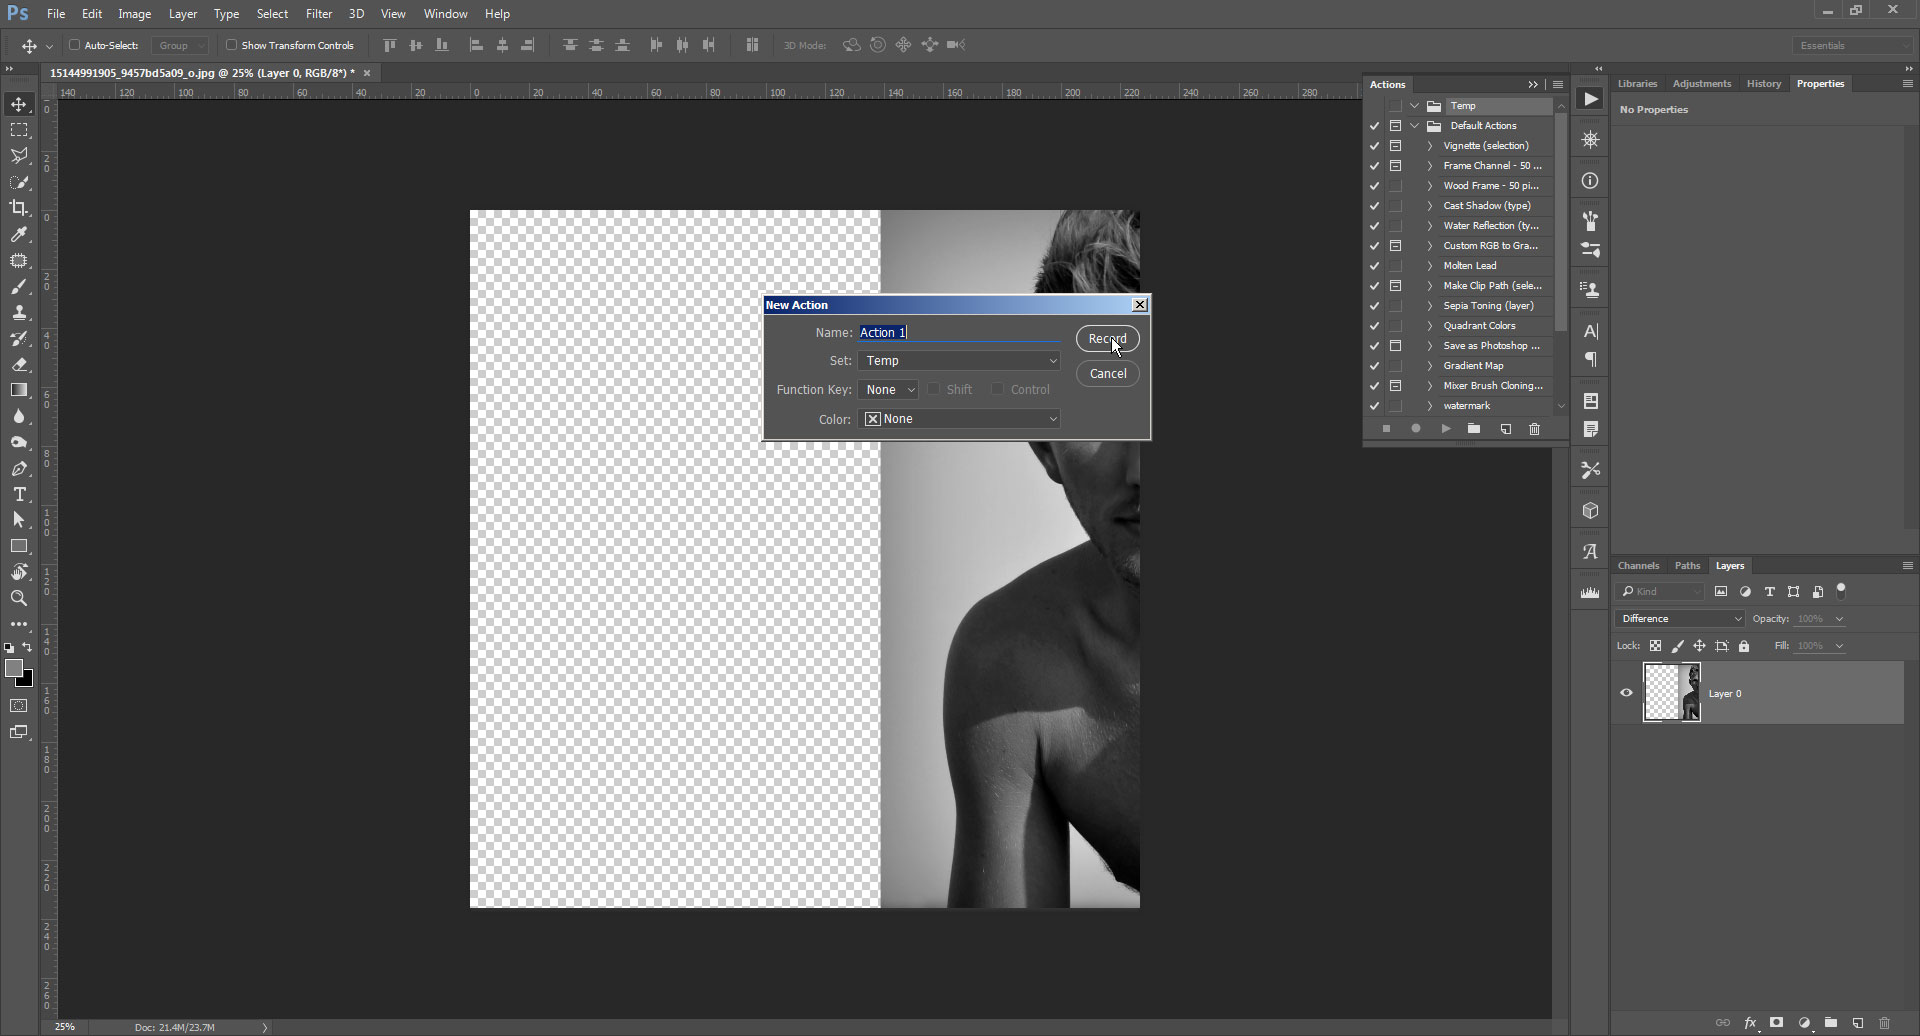
A box will come up asking for the action name. We will be recording an action just to ensure we move the image by the same distance each time we duplicate it. So the action name isn't important - you'll probably never need the action again since it will be specific to this image. Press the record button.
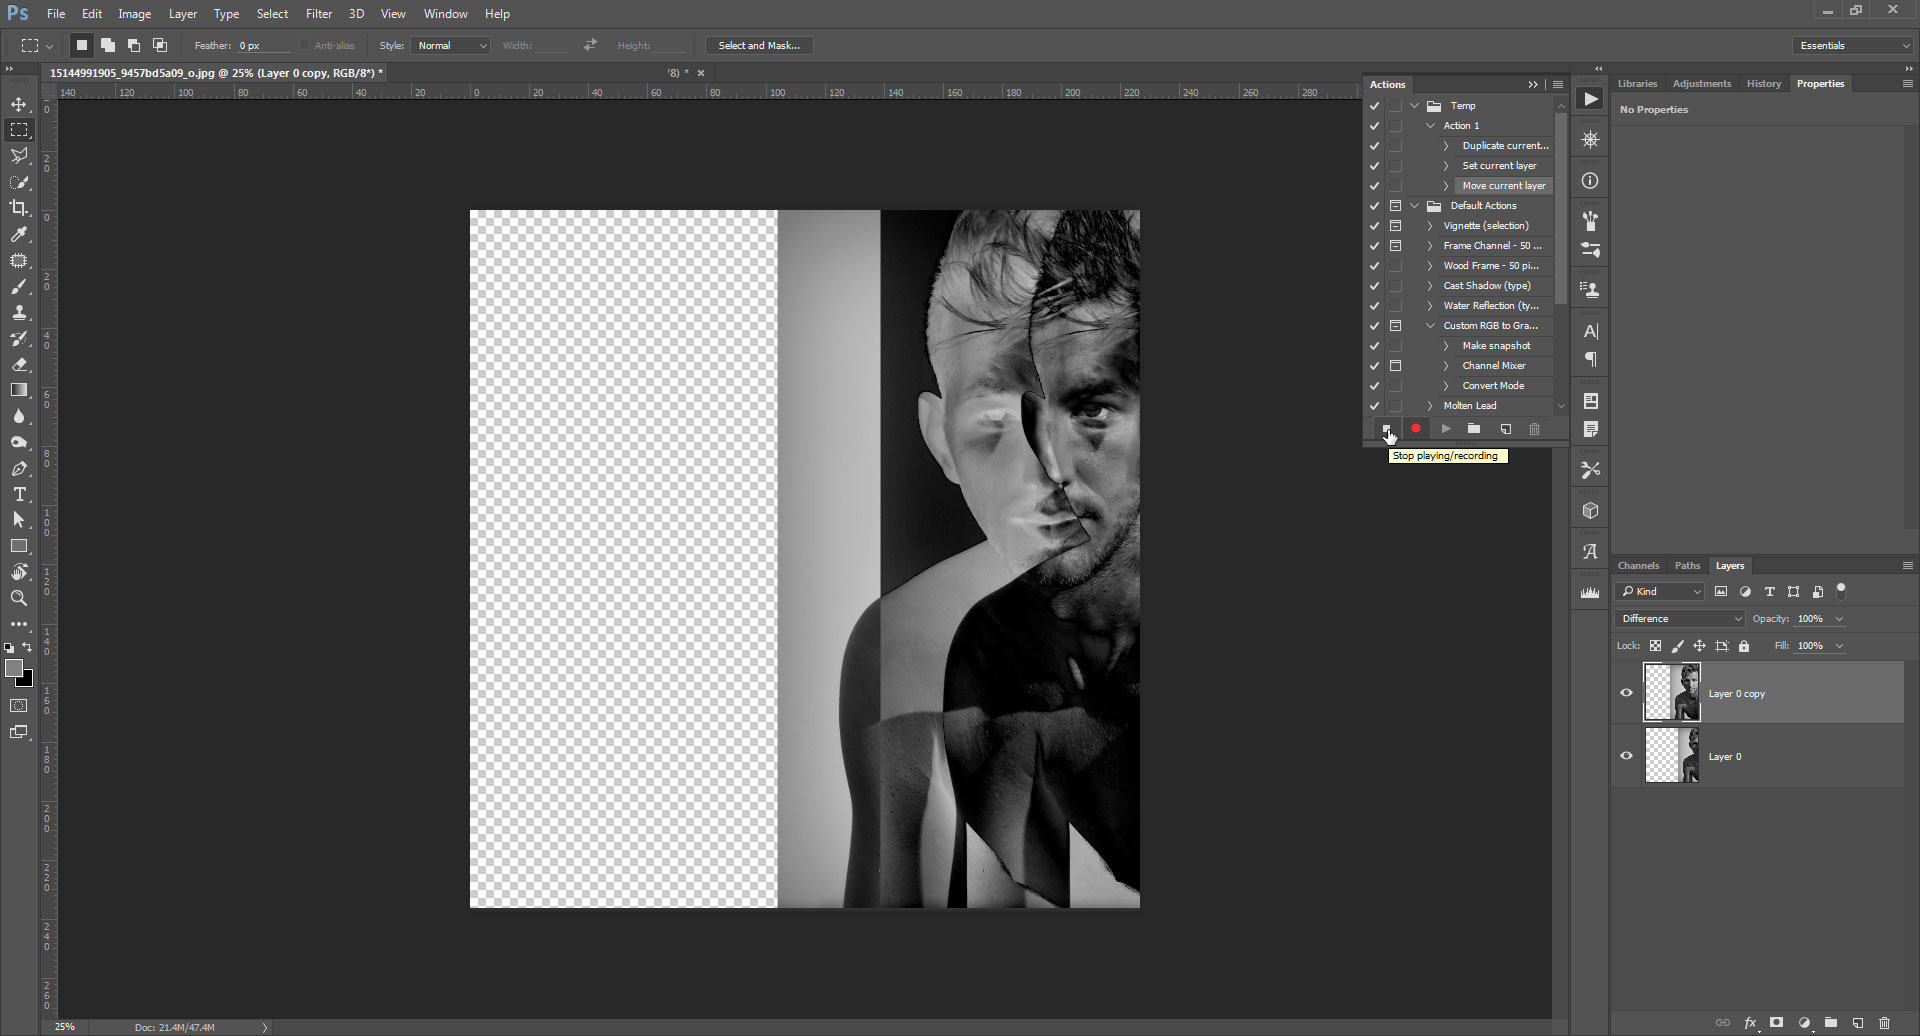
Duplicate the base layer Ctrl + J (PC) / Cmd + J (Mac). In the layer palette select the duplicated layer. Then use the move tool to offset this layer from the below layer. Arrange this layer so the eye on the right (roughly) overlaps the eye on the layer below. Then hit the stop button on the actions palette to stop recording the action.
In the actions palette, select the action you just recorded and press the play button. This will repeat the same process you just recorded.
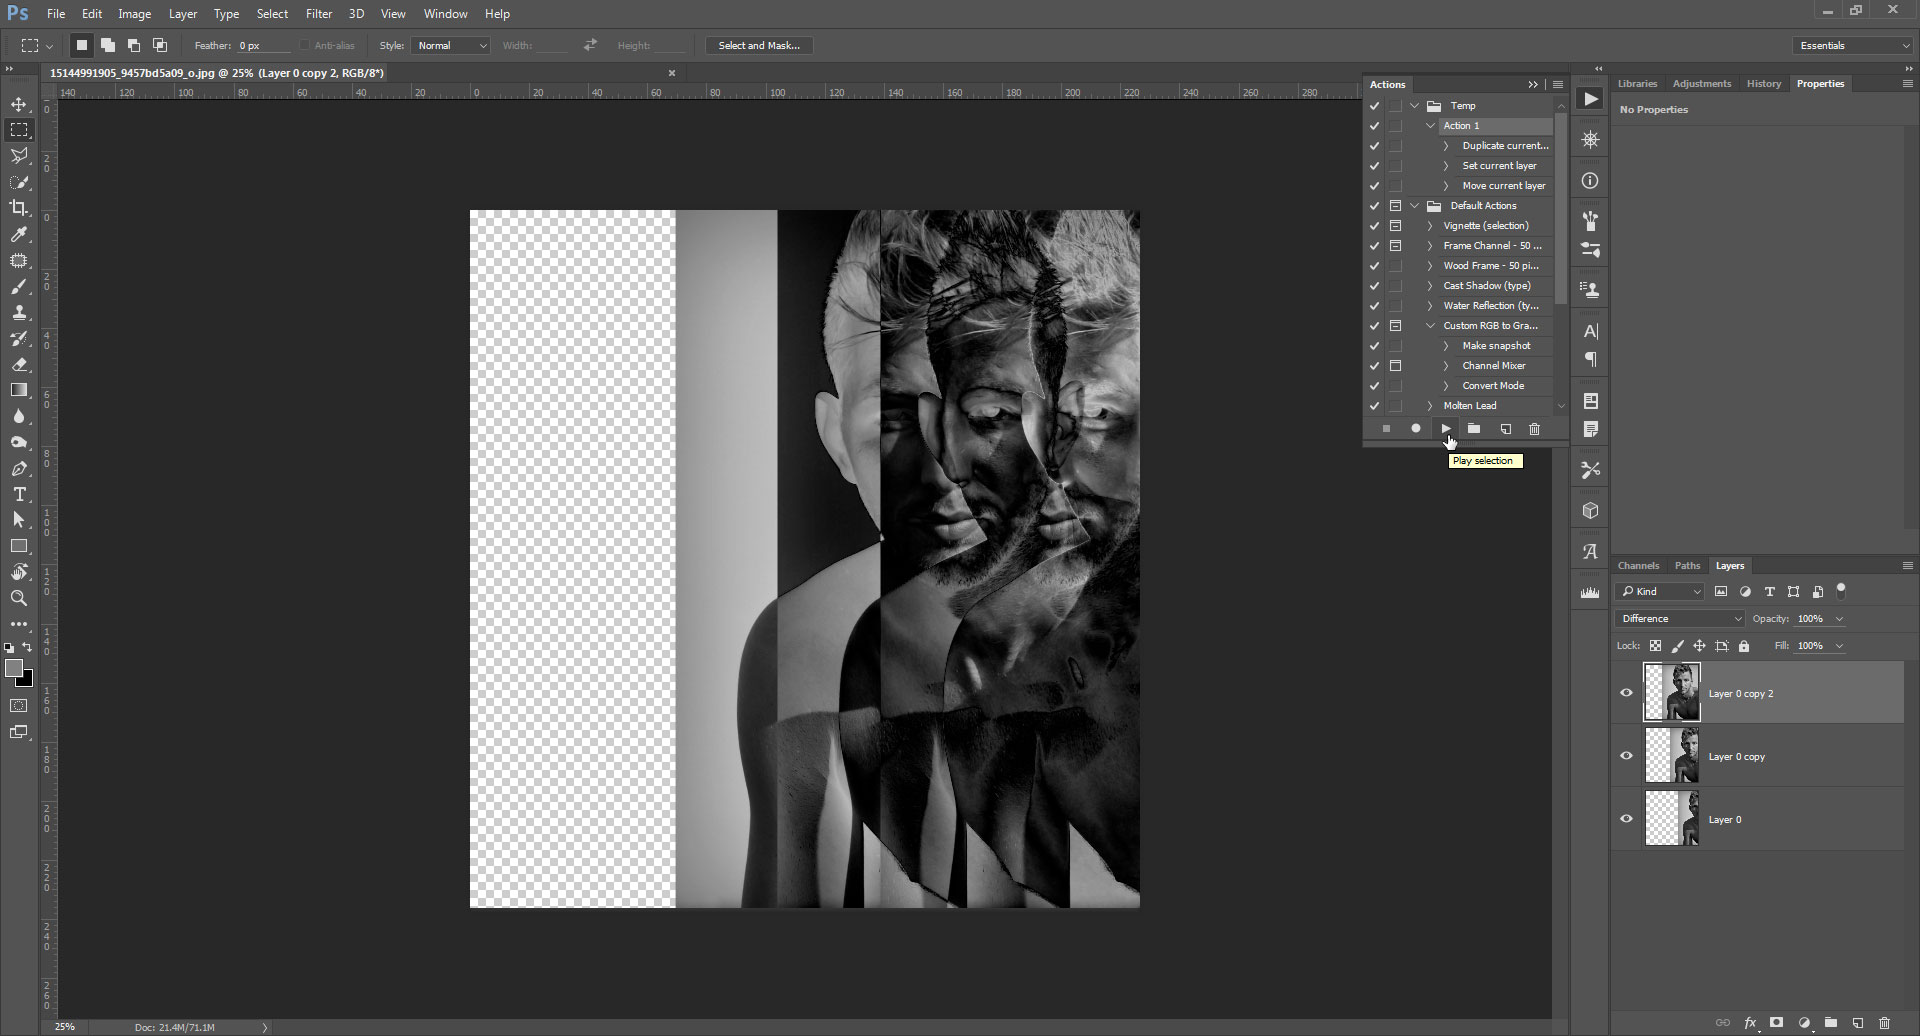
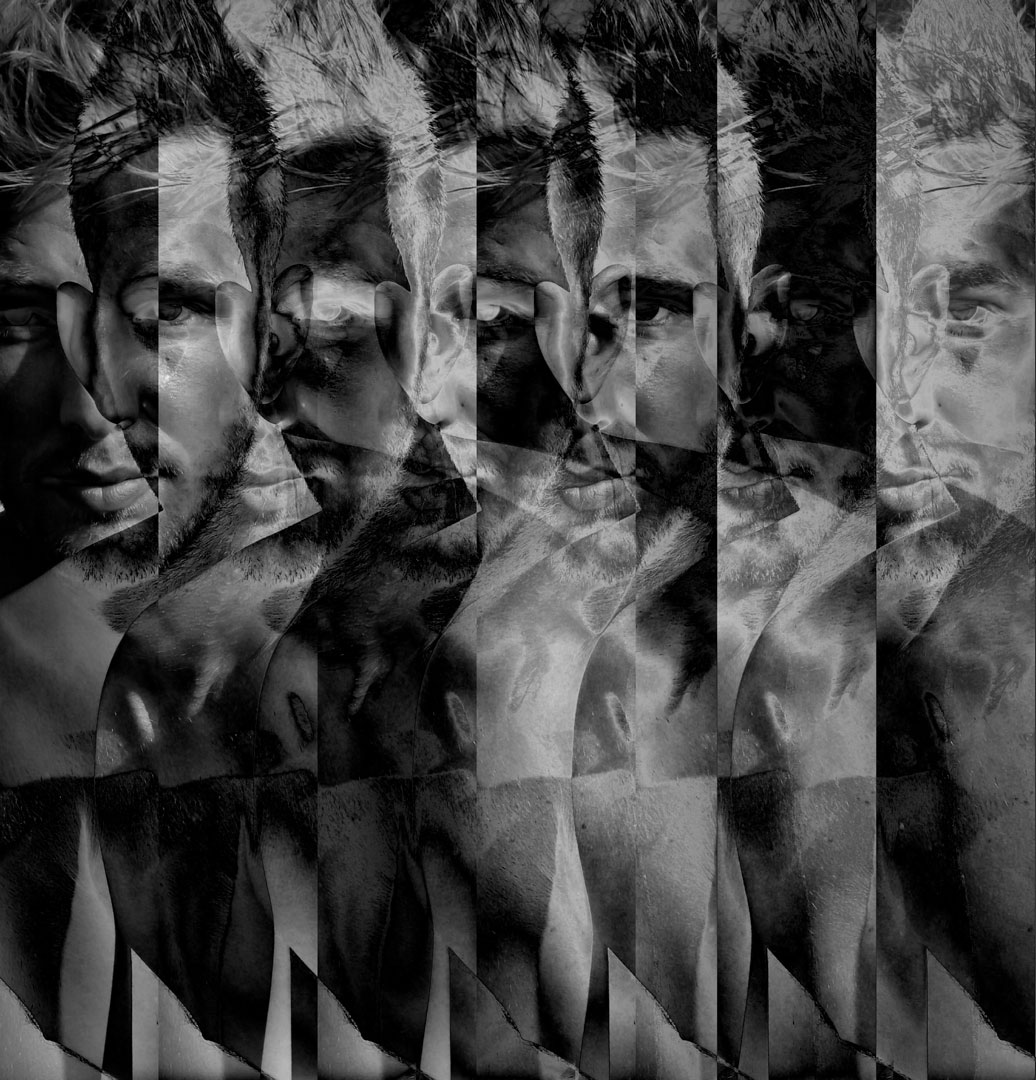
Play the action several times more until your canvas is filled with the repeated image.
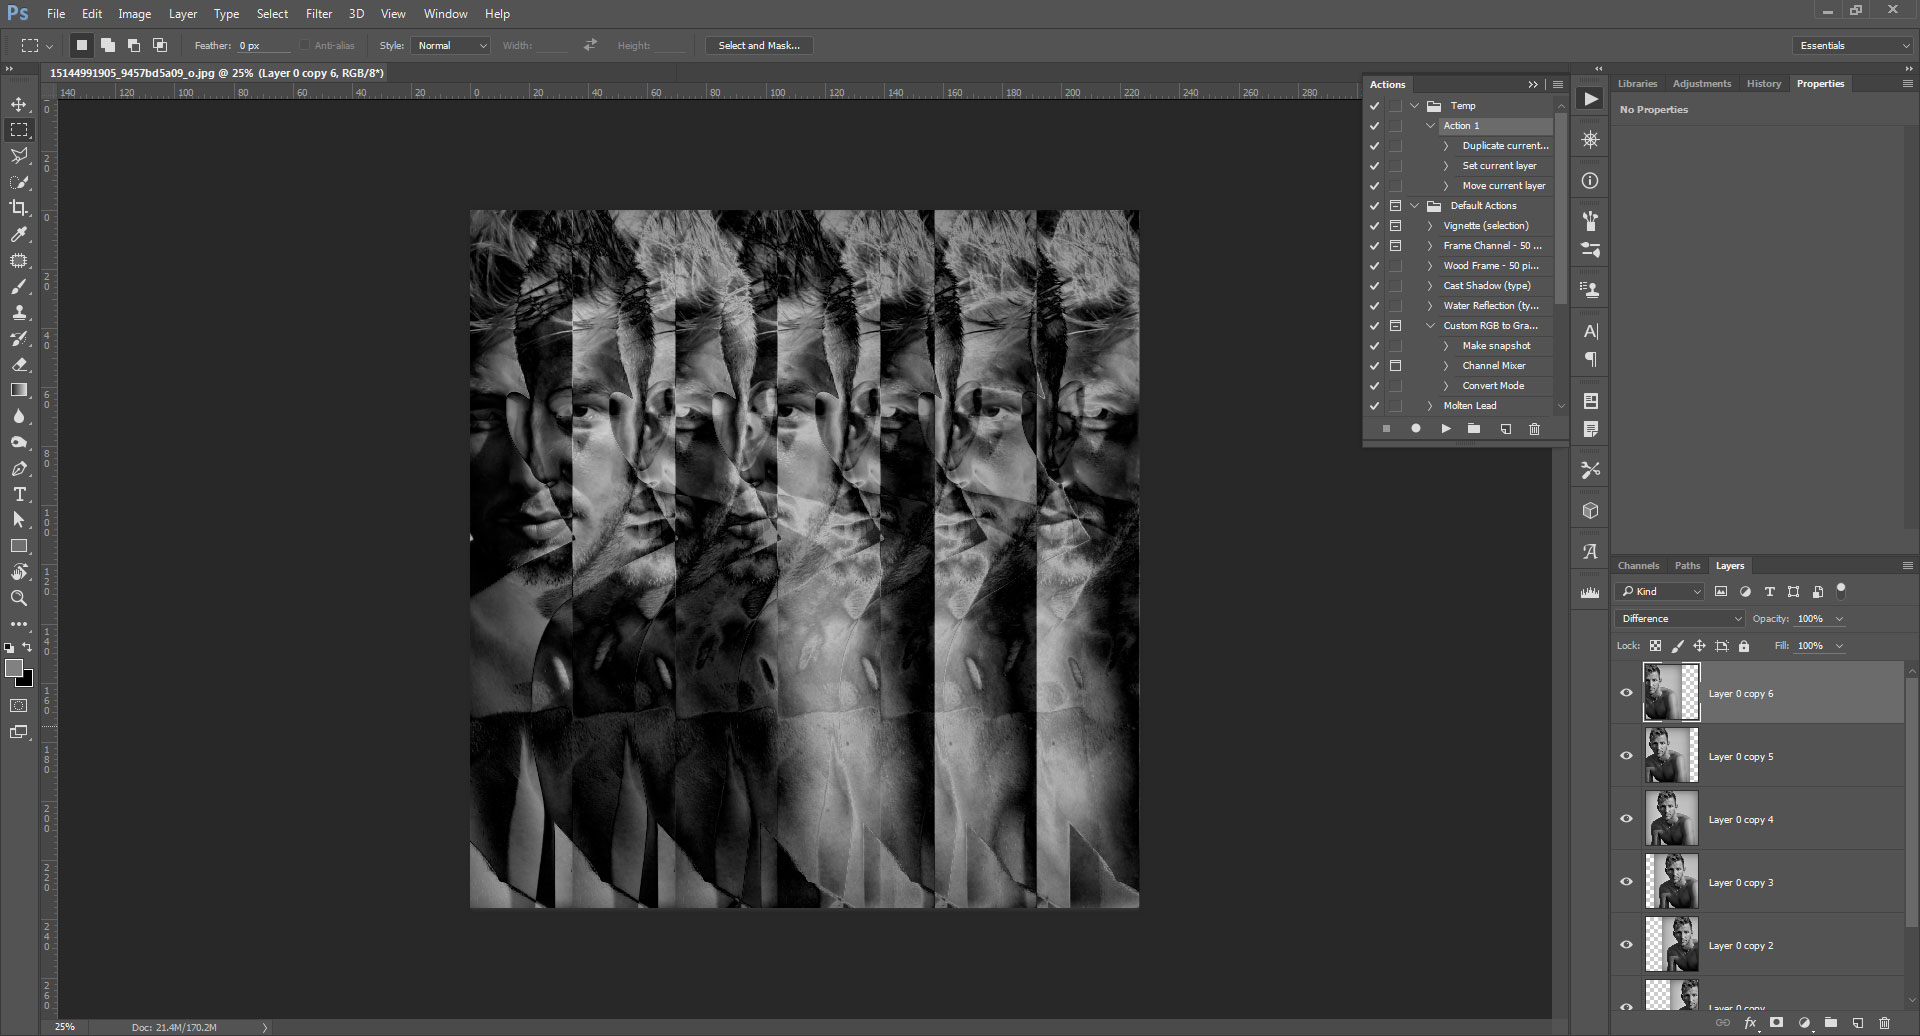
Finally I added an invert adjustment layer above the middle image layer. I then clipped this to the middle layer by Alt clicking (PC) / Opt clicking (Mac) in between the invert layer and the image layer below it.

Clipping the invert adjustment to the midde image layer means that it only affects that layer. But due to the use of our difference blend mode on the image layers, this change in our middle layer also affects how the underlying and overlaying images appear.
And that gives us the final image.
Texture
Using textures in photography is pretty common, and doesn't necessarily create a surreal feel to an image. Normally a texture will be applied as an overlay, the main image being much more noticeable than the texture.
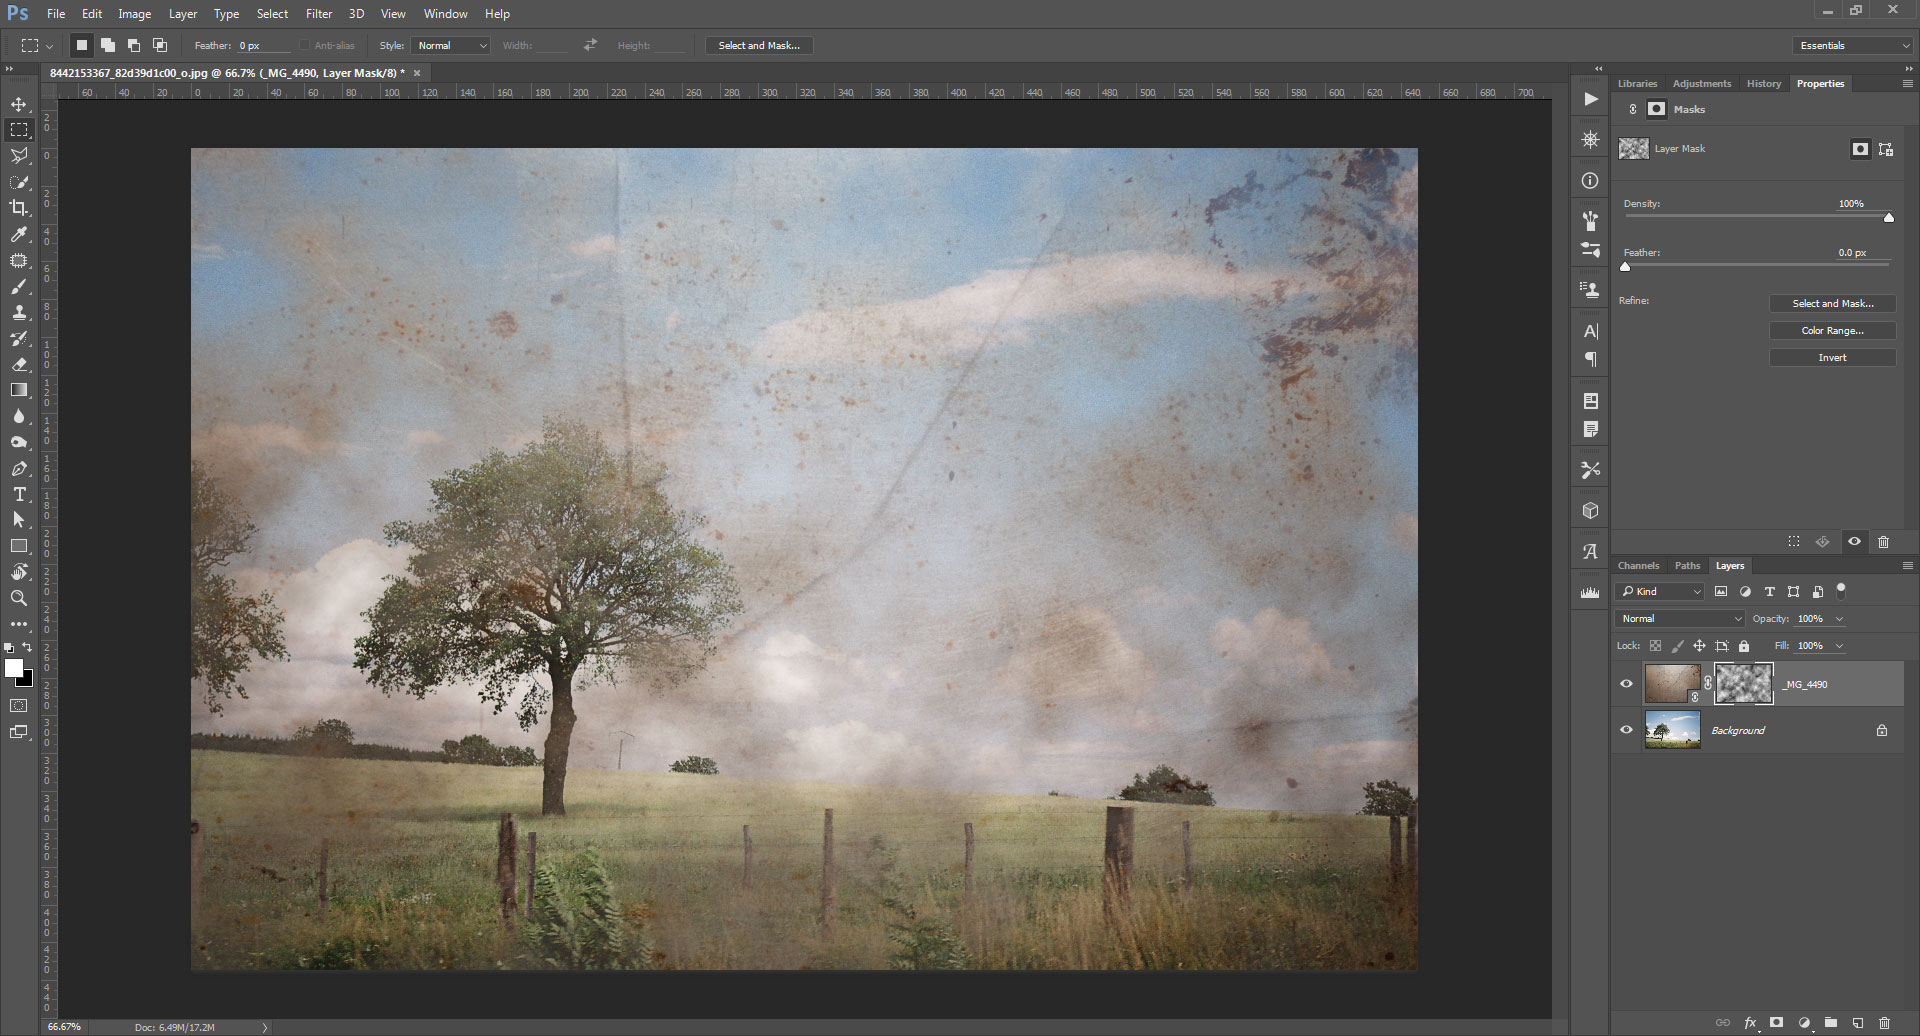
With this technique however, the texture takes on a much more prominent role, even obscuring some parts of the main image.
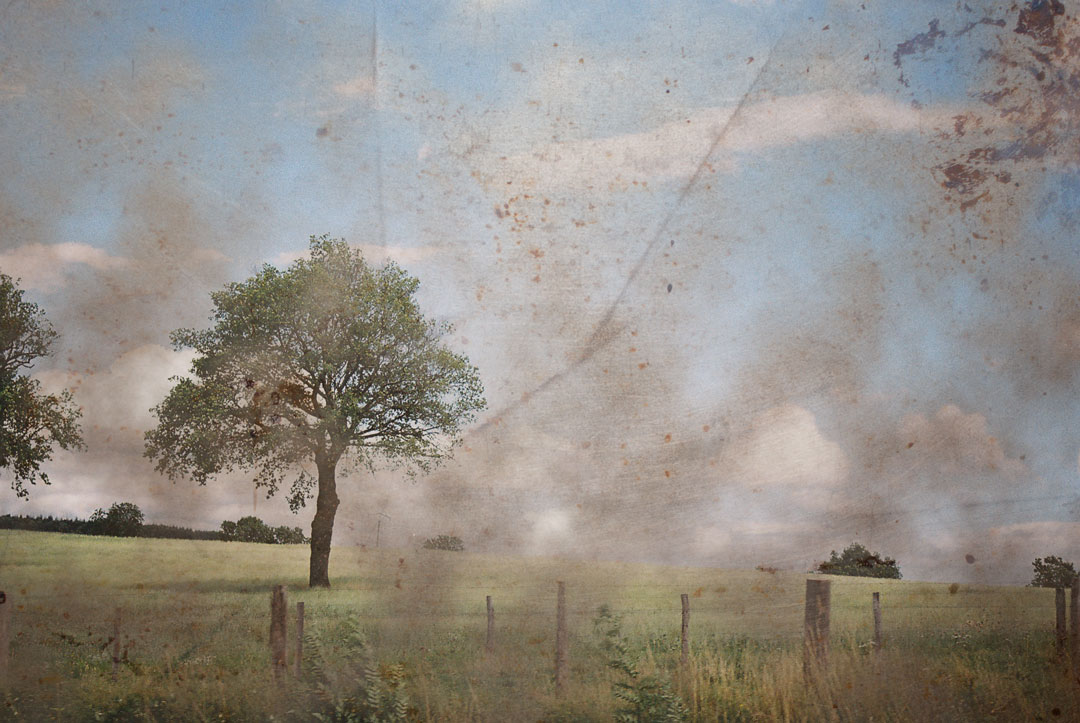
Based on Landscape by Loïc on Flickr (licensed CC-BY-SA)
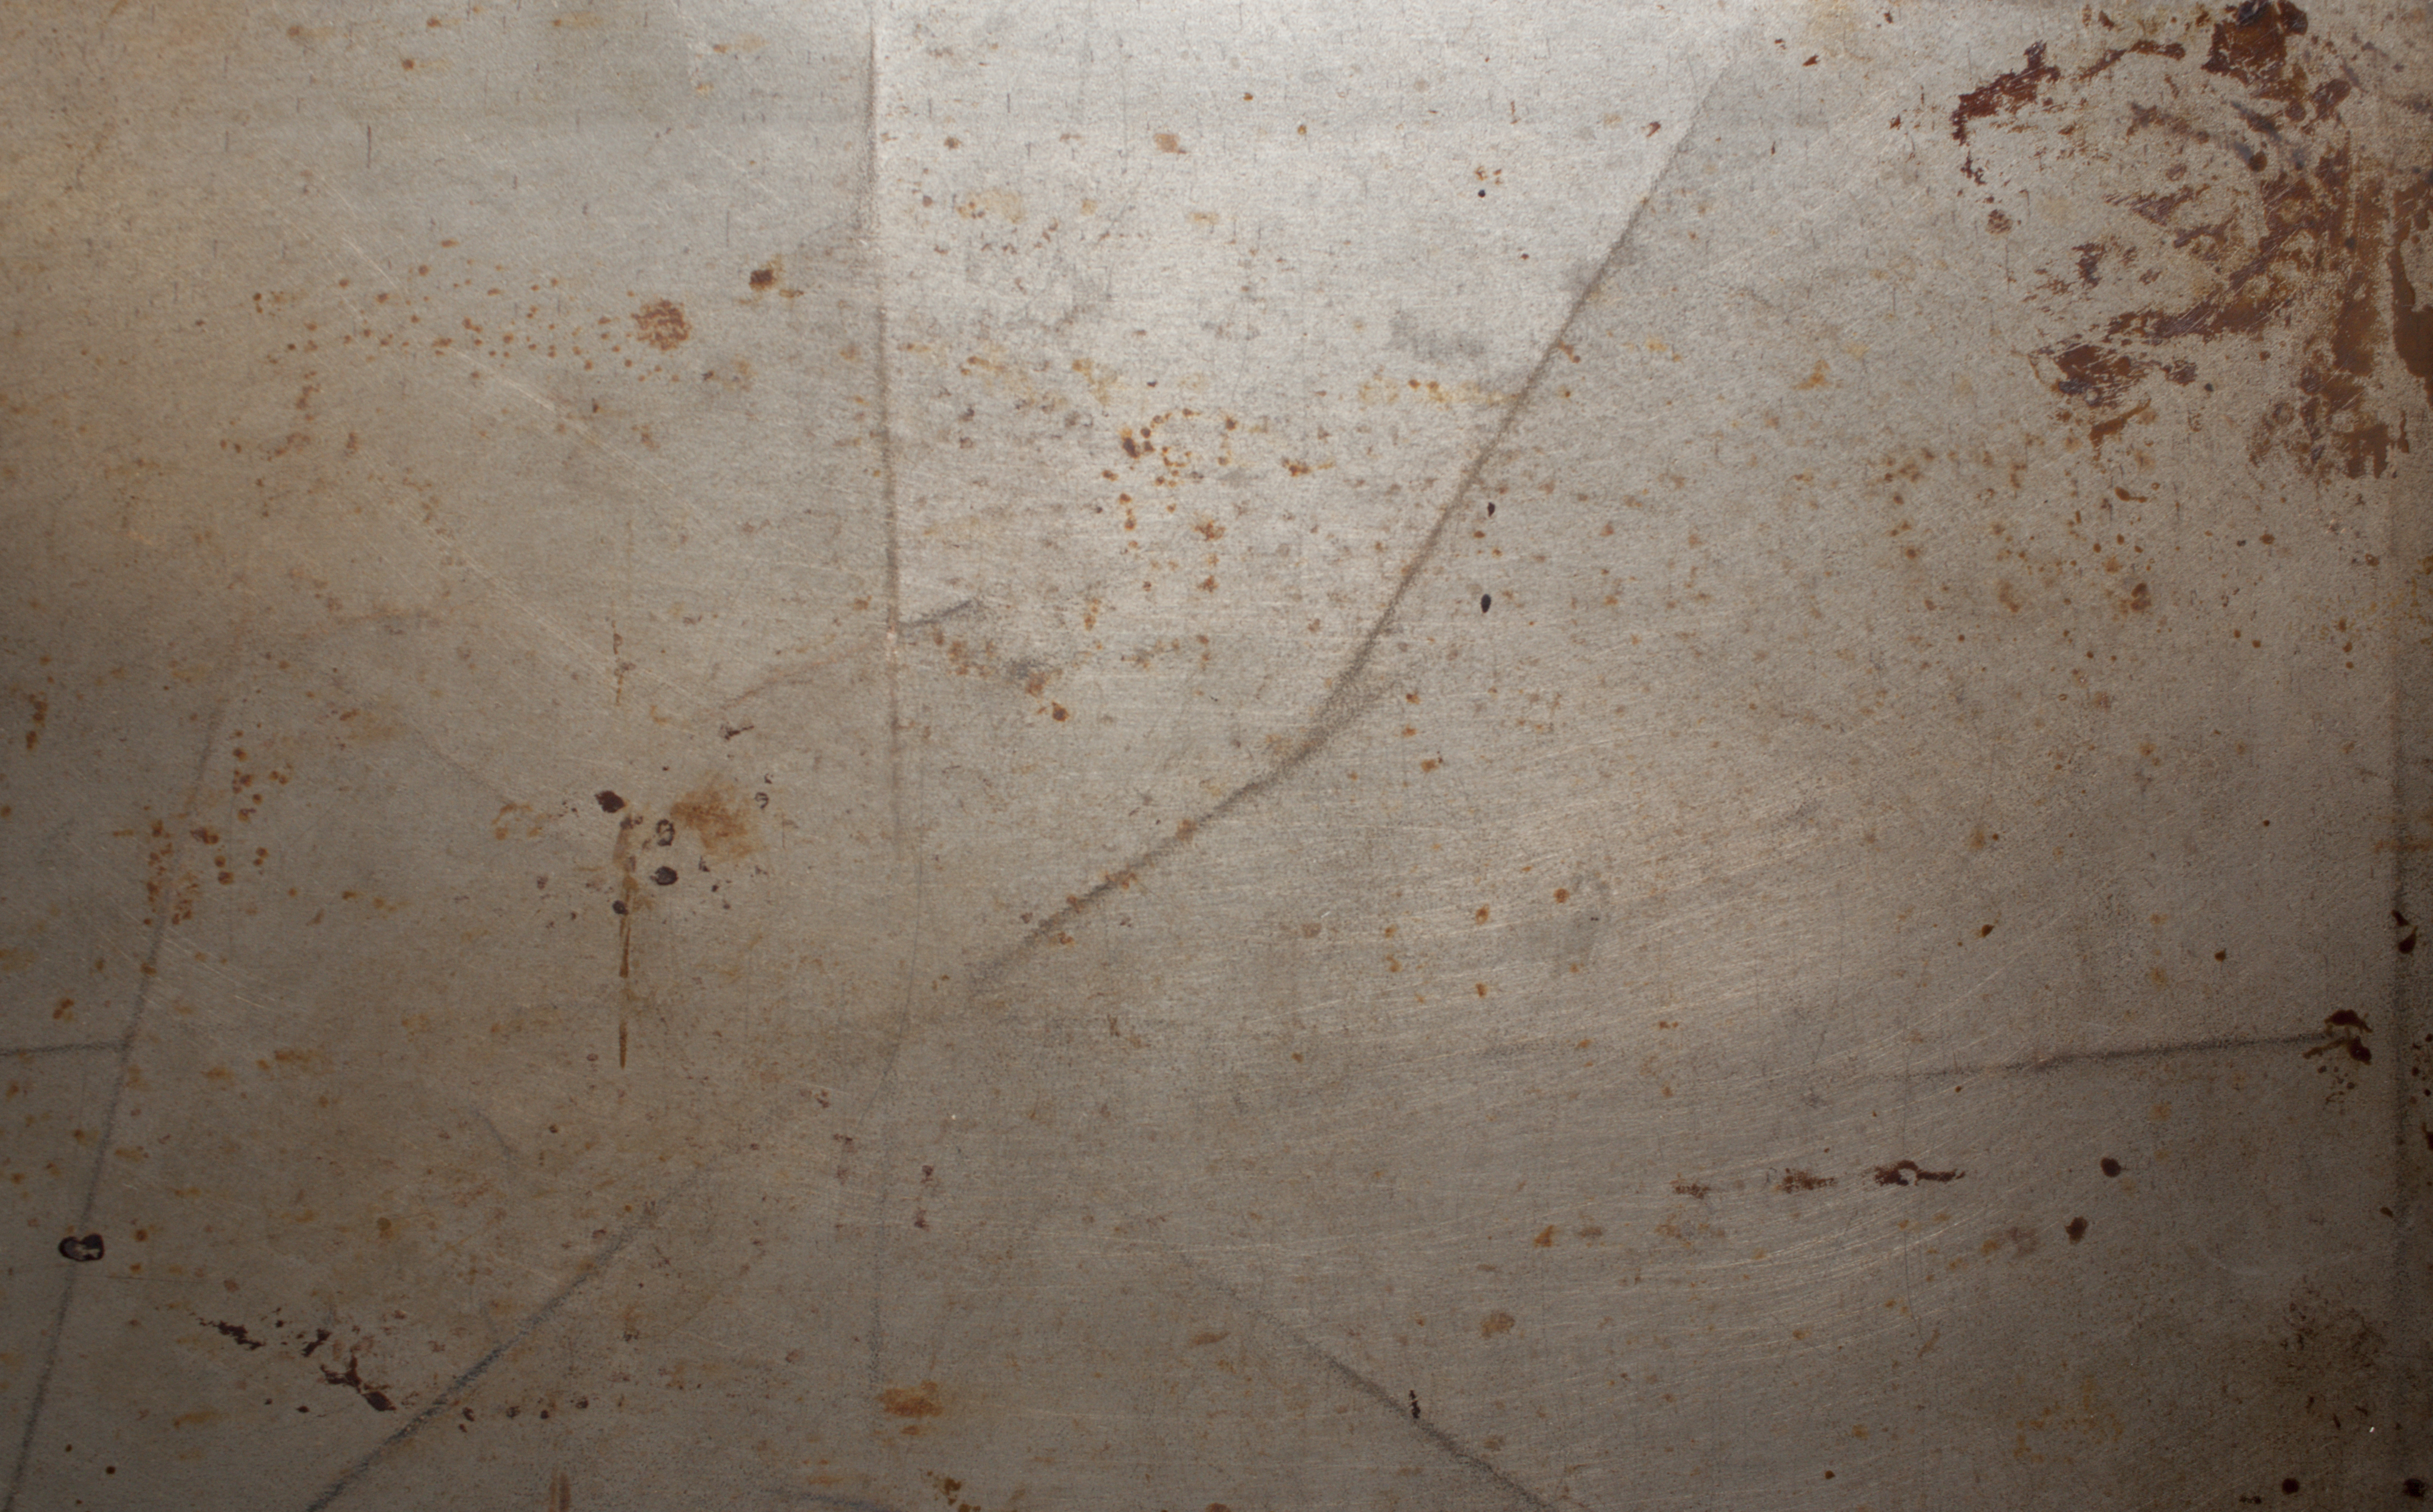
The base image I'll be using is Landscape by Loïc. This image is licensed CC-BY-SA, allowing for modifications. The texture image I'm using is an old baking tray, which you can download here.
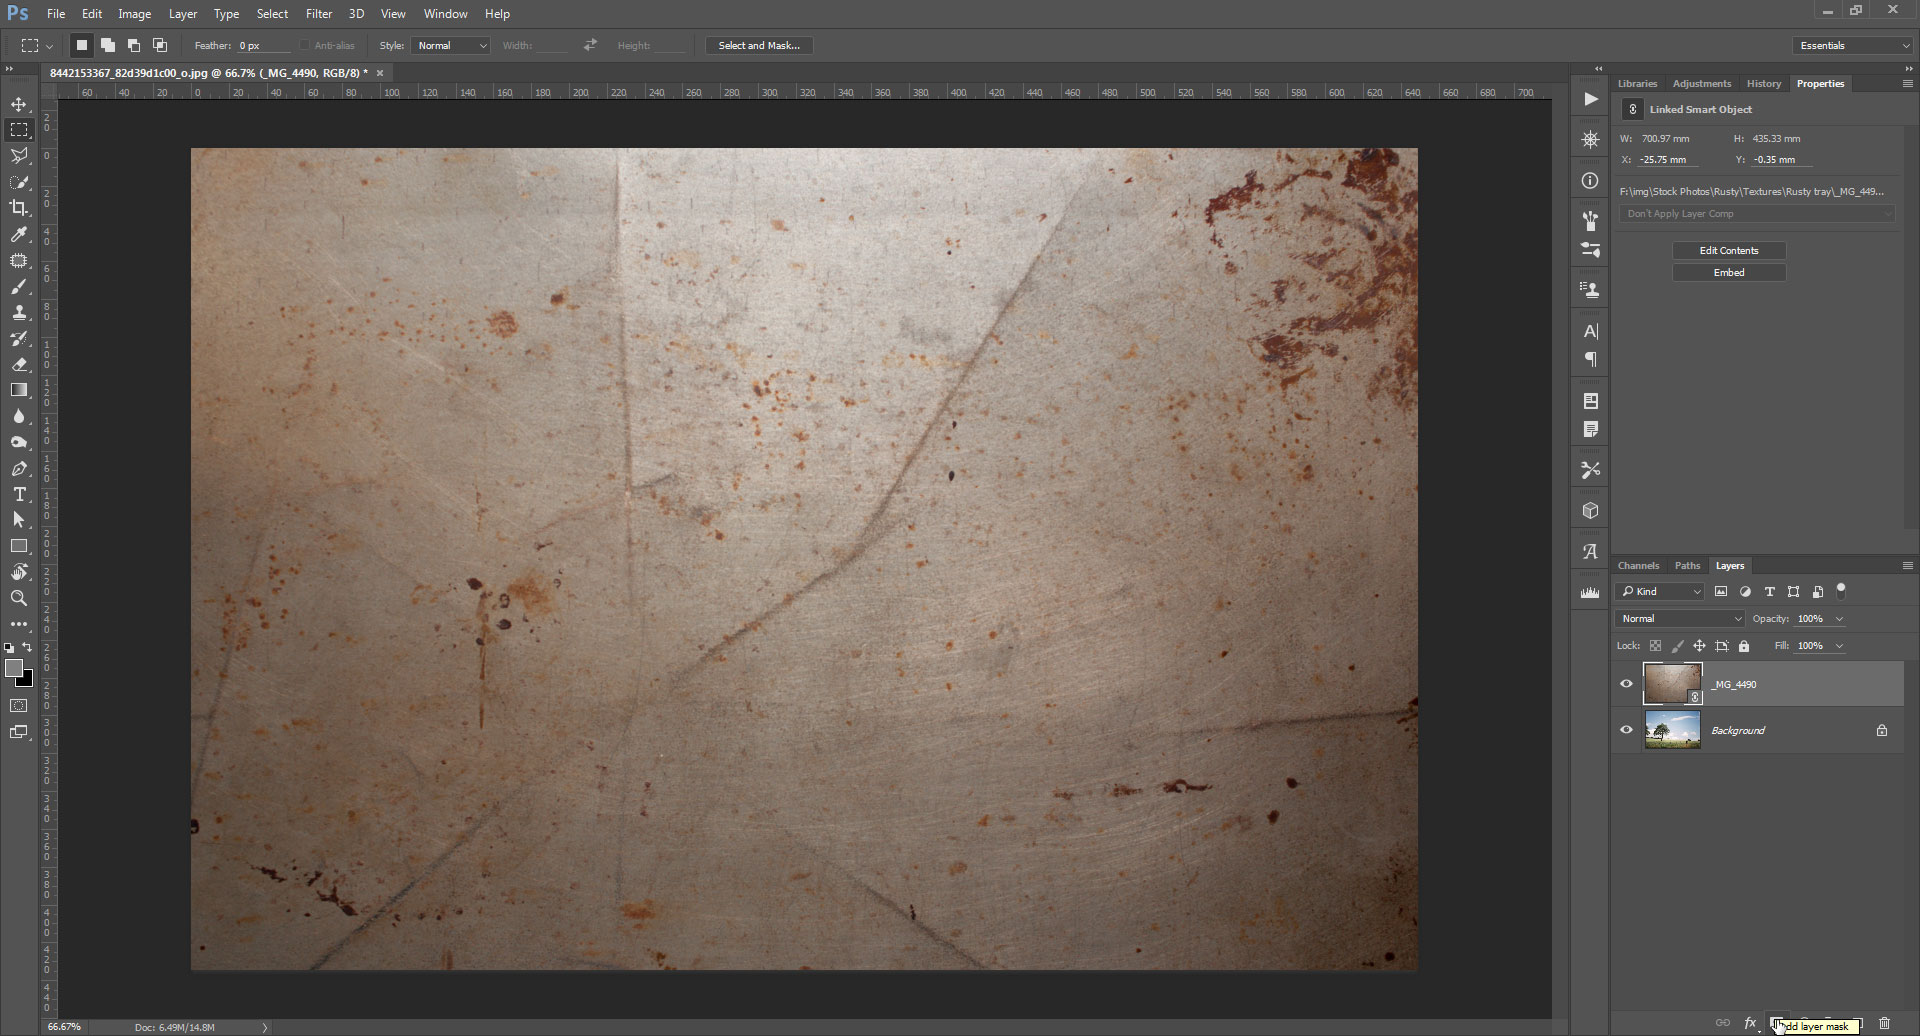
Open your base image in Photoshop. Then add the texture image as a new layer above it. The easiest way to do this is via File > Place (either Place Linked or Place Embedded). Browse to the texture file then press the Place button to add it as a layer to the current document.
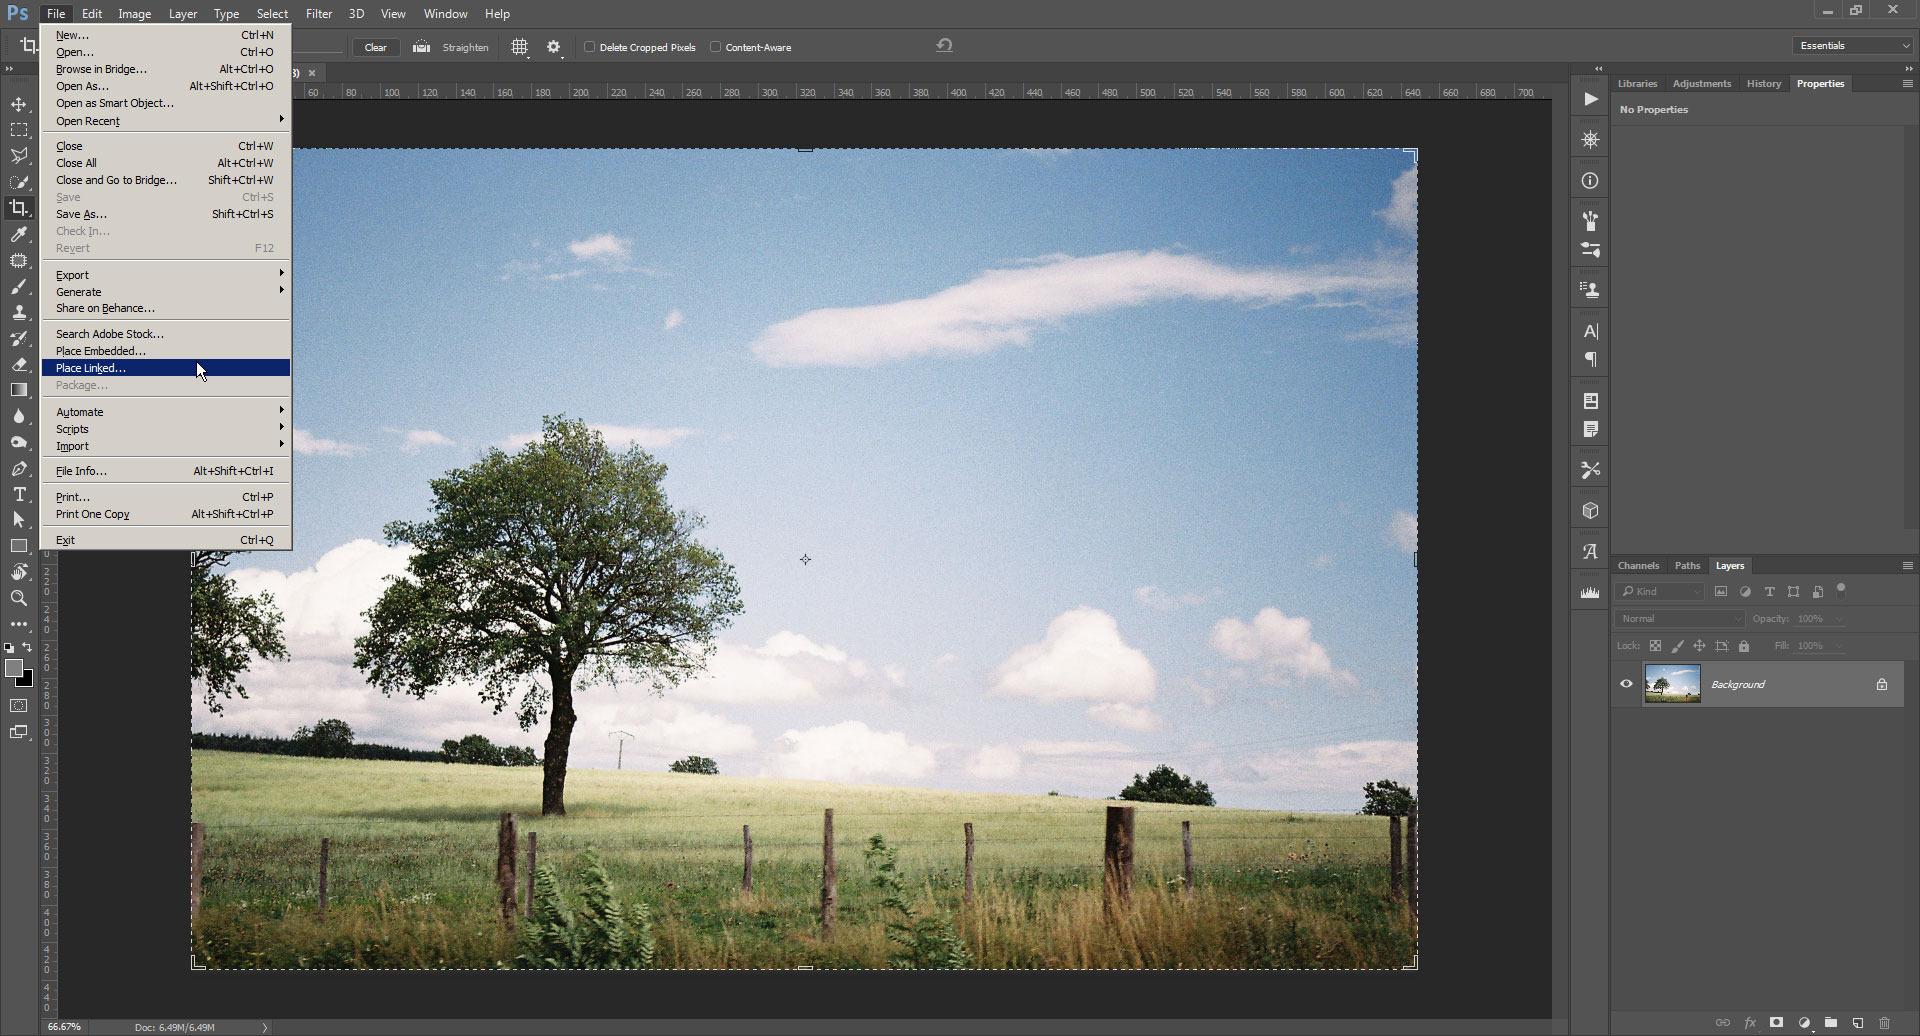
The alternative way is to open both images in Photoshop, then arrange the windows so you can see both documents at the same time. Click and drag the Background layer from the texture image to the other image to copy it across as a new layer.
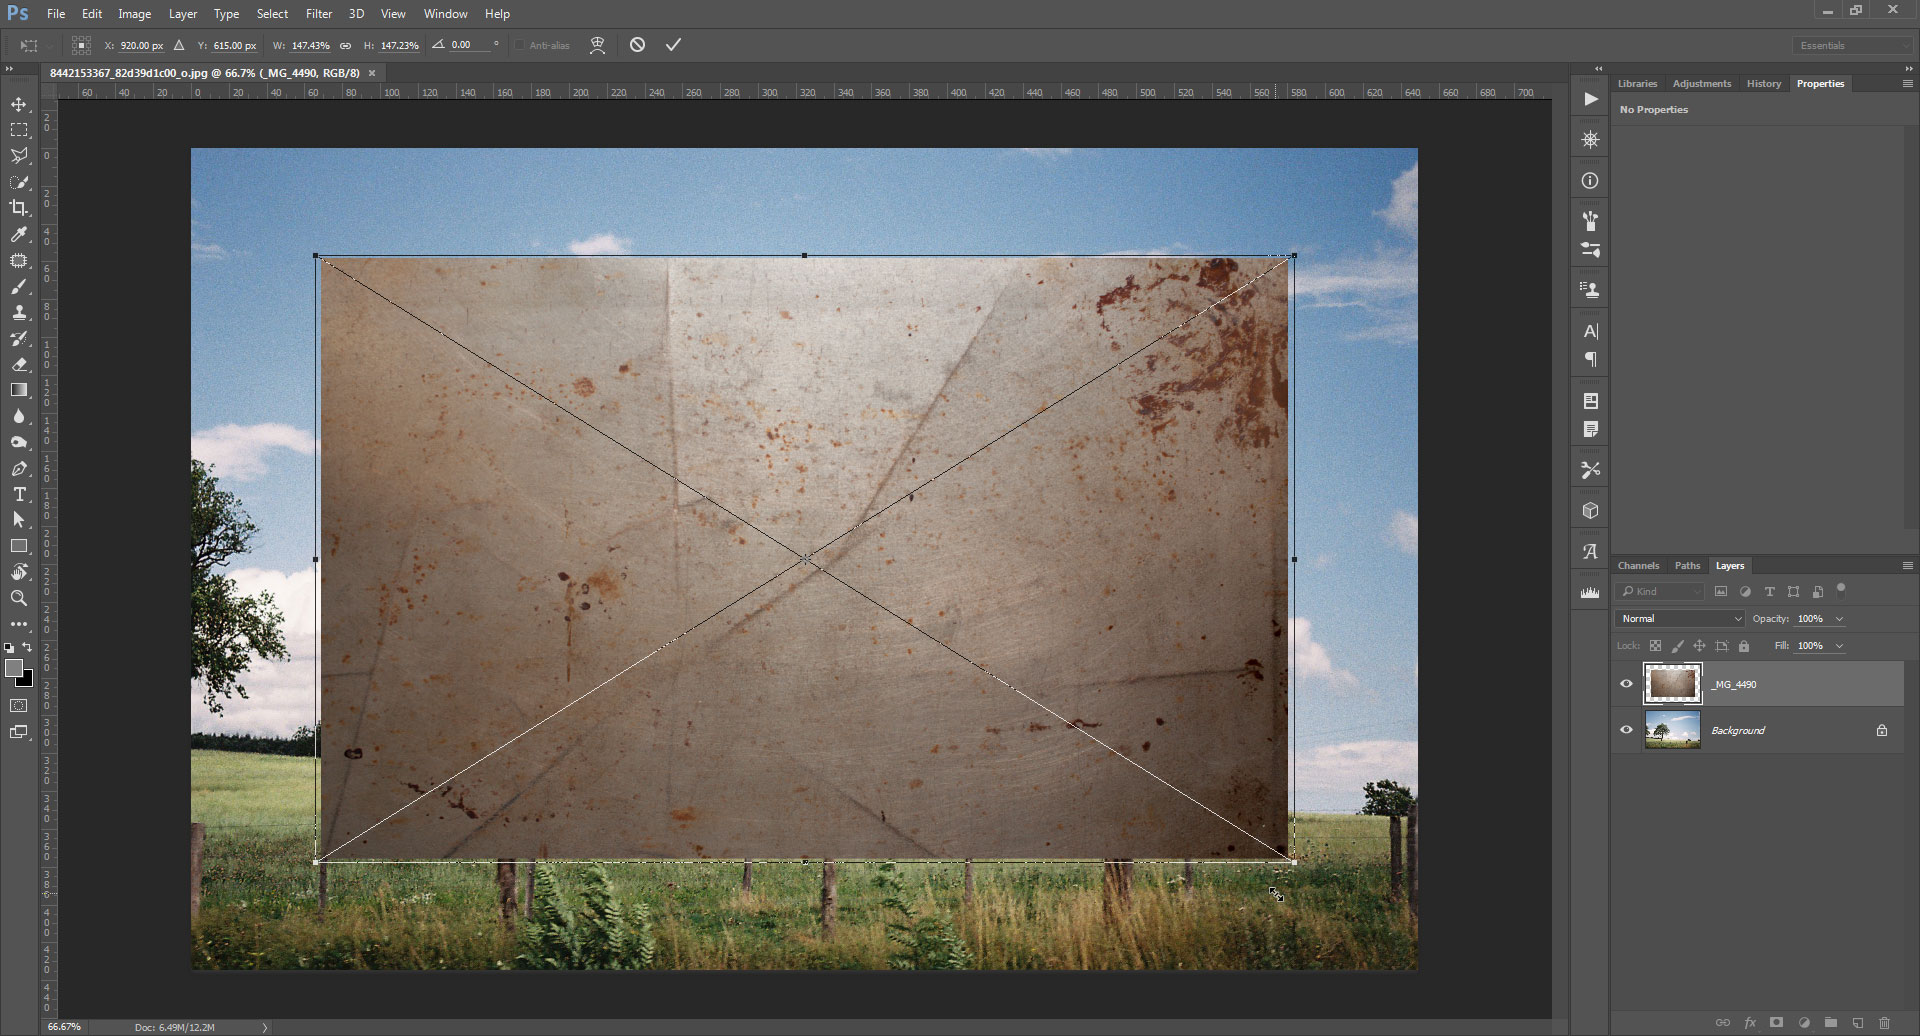
With the texture layer added, you may need to resize it to cover the background image. When placing a file, it will automatically be placed with free transform active. When placing by dragging the layer across from the other image, you can press Ctrl + T (PC) / Cmd + T (Mac) to activate free transform. Adjust the size of the texture layer as necessary then press Enter to apply the transformation.
With the texture layer selected in the layer palette, add a layer mask to it.
Select the layer's new mask in the layer palette. Ensure your foreground and background paint colors are black and white (Press D on the keyboard), then go to Filter > Render > Difference Clouds.
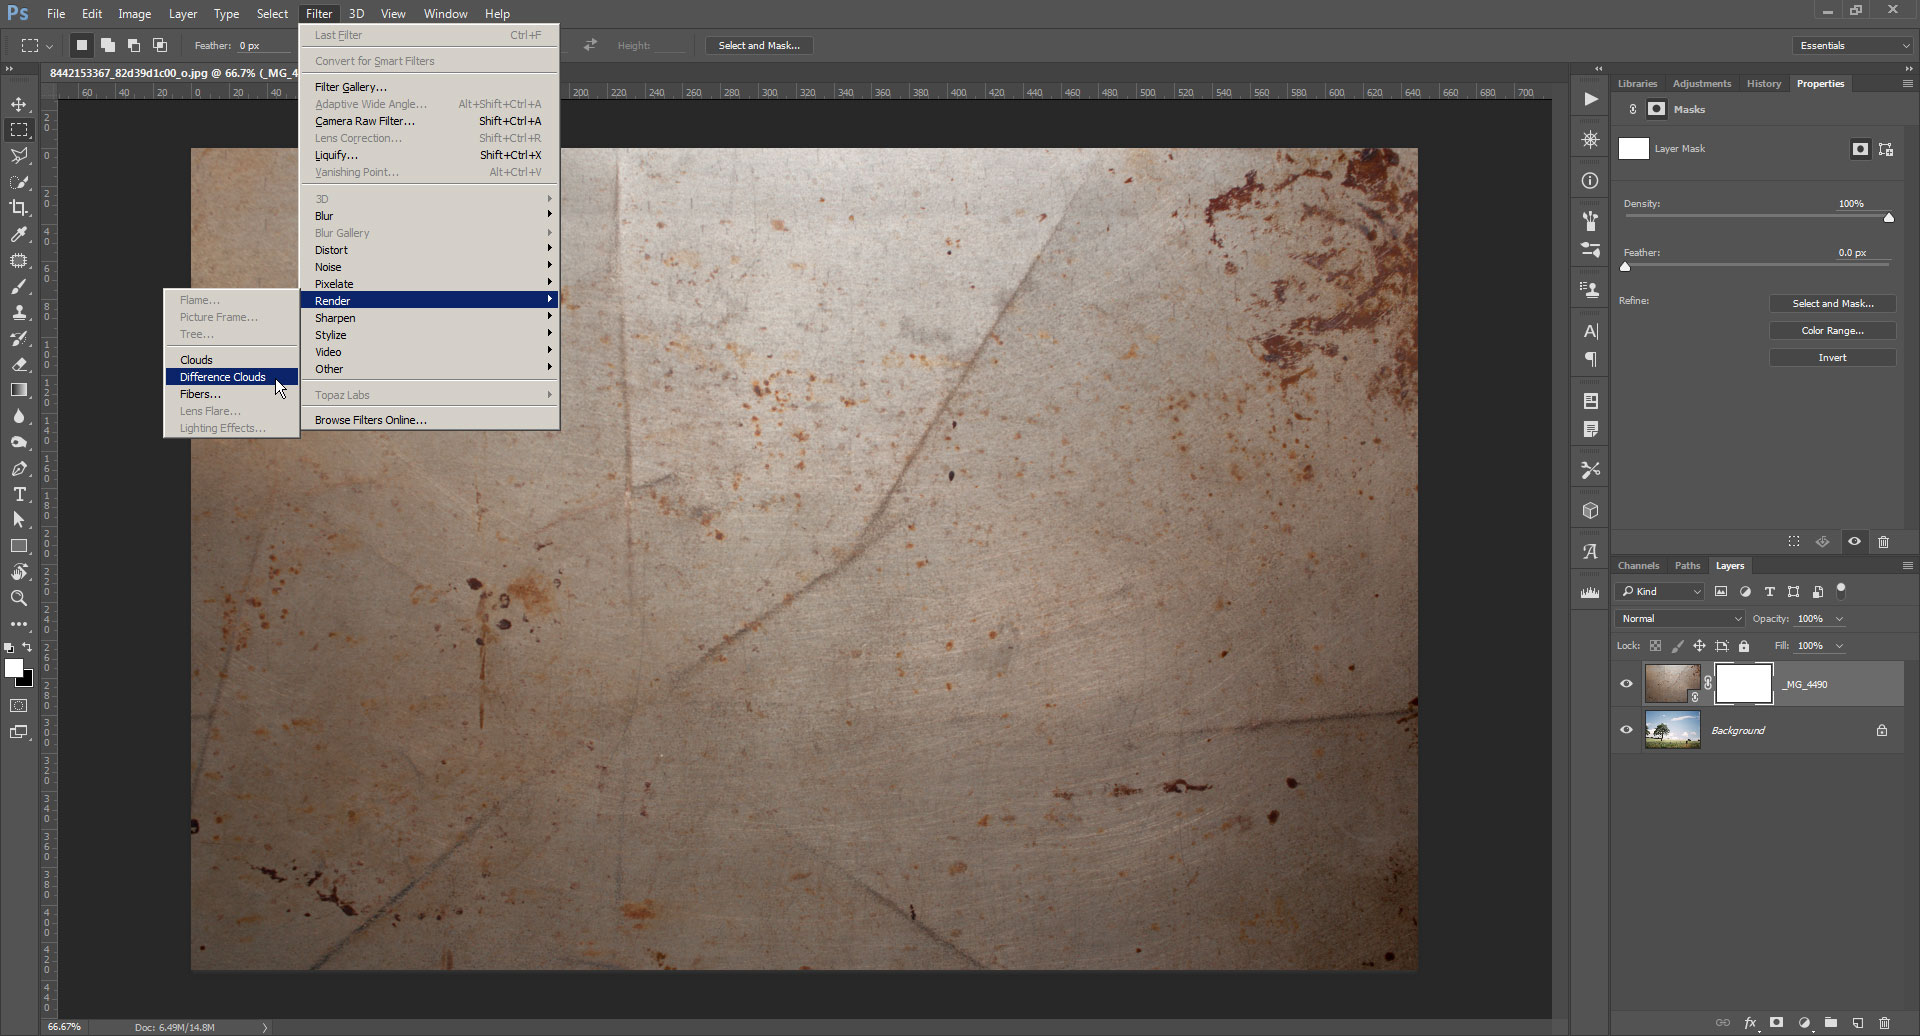
This will render 'clouds' in your texture layer's mask. In a layer mask white reveals and black conceals, shades of gray are in between. So bright areas of the 'clouds' show your texture layer, while dark areas show through to the image layer below.
If you don't like the effect you get, you can press Ctrl + Del (PC) / Cmd + Del (Mac) to fill the layer mask with your background color. Then press Ctrl + F (PC) / Cmd + F (Mac) to run the filter again. The clouds filter is randomized, so you'll get a difference result each time.
Offset colors
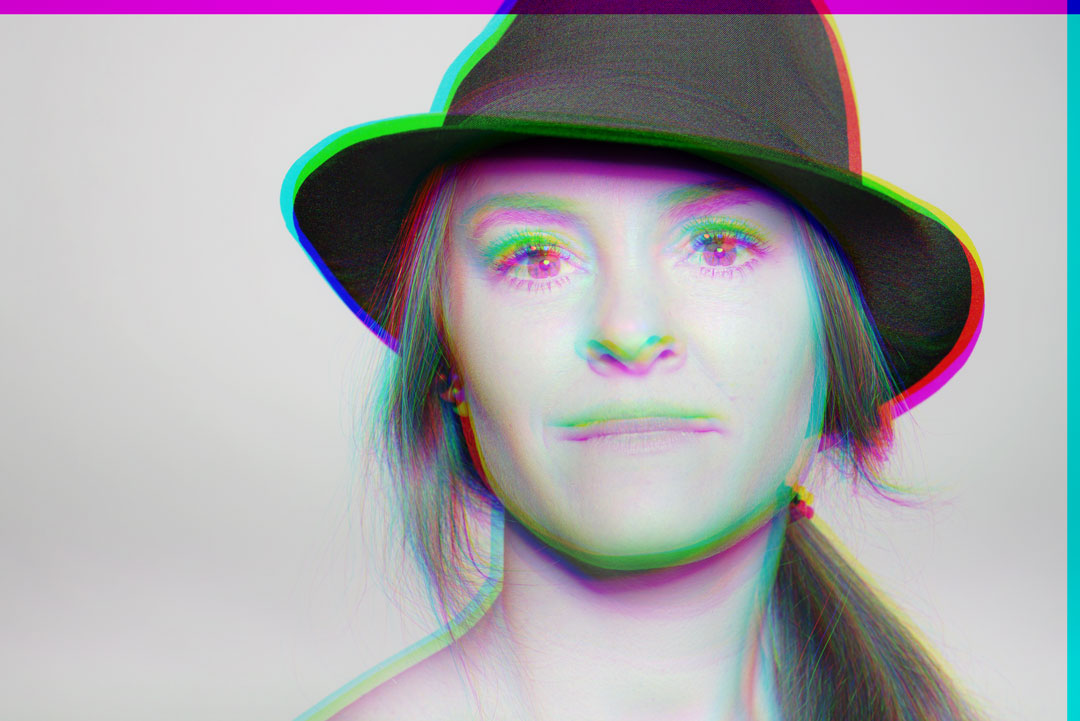
Portrait by Sadettin Canbay on Flickr (licensed CC-BY)
For this technique we take a black and white image, then offset the color channels by a small amount to create colored double or triple images. It's slightly more involved to perform this in GIMP as you can't move color channels. However you can still achieve the same result with a bit of work: Moving color channels separately in GIMP.
Similarly, Photoshop Elements does not allow adjusting the color channels separately, but you can work around this. Just duplicate your image to three grayscale layers, then follow this guide to making the layers act like RGB color channels.
I'll be using the image Portrait by Sadettin Canbay, which is licensed CC-BY.
Open your image in Photoshop. If it's a color image, desaturate it: Image > Adjustments > Desaturate.
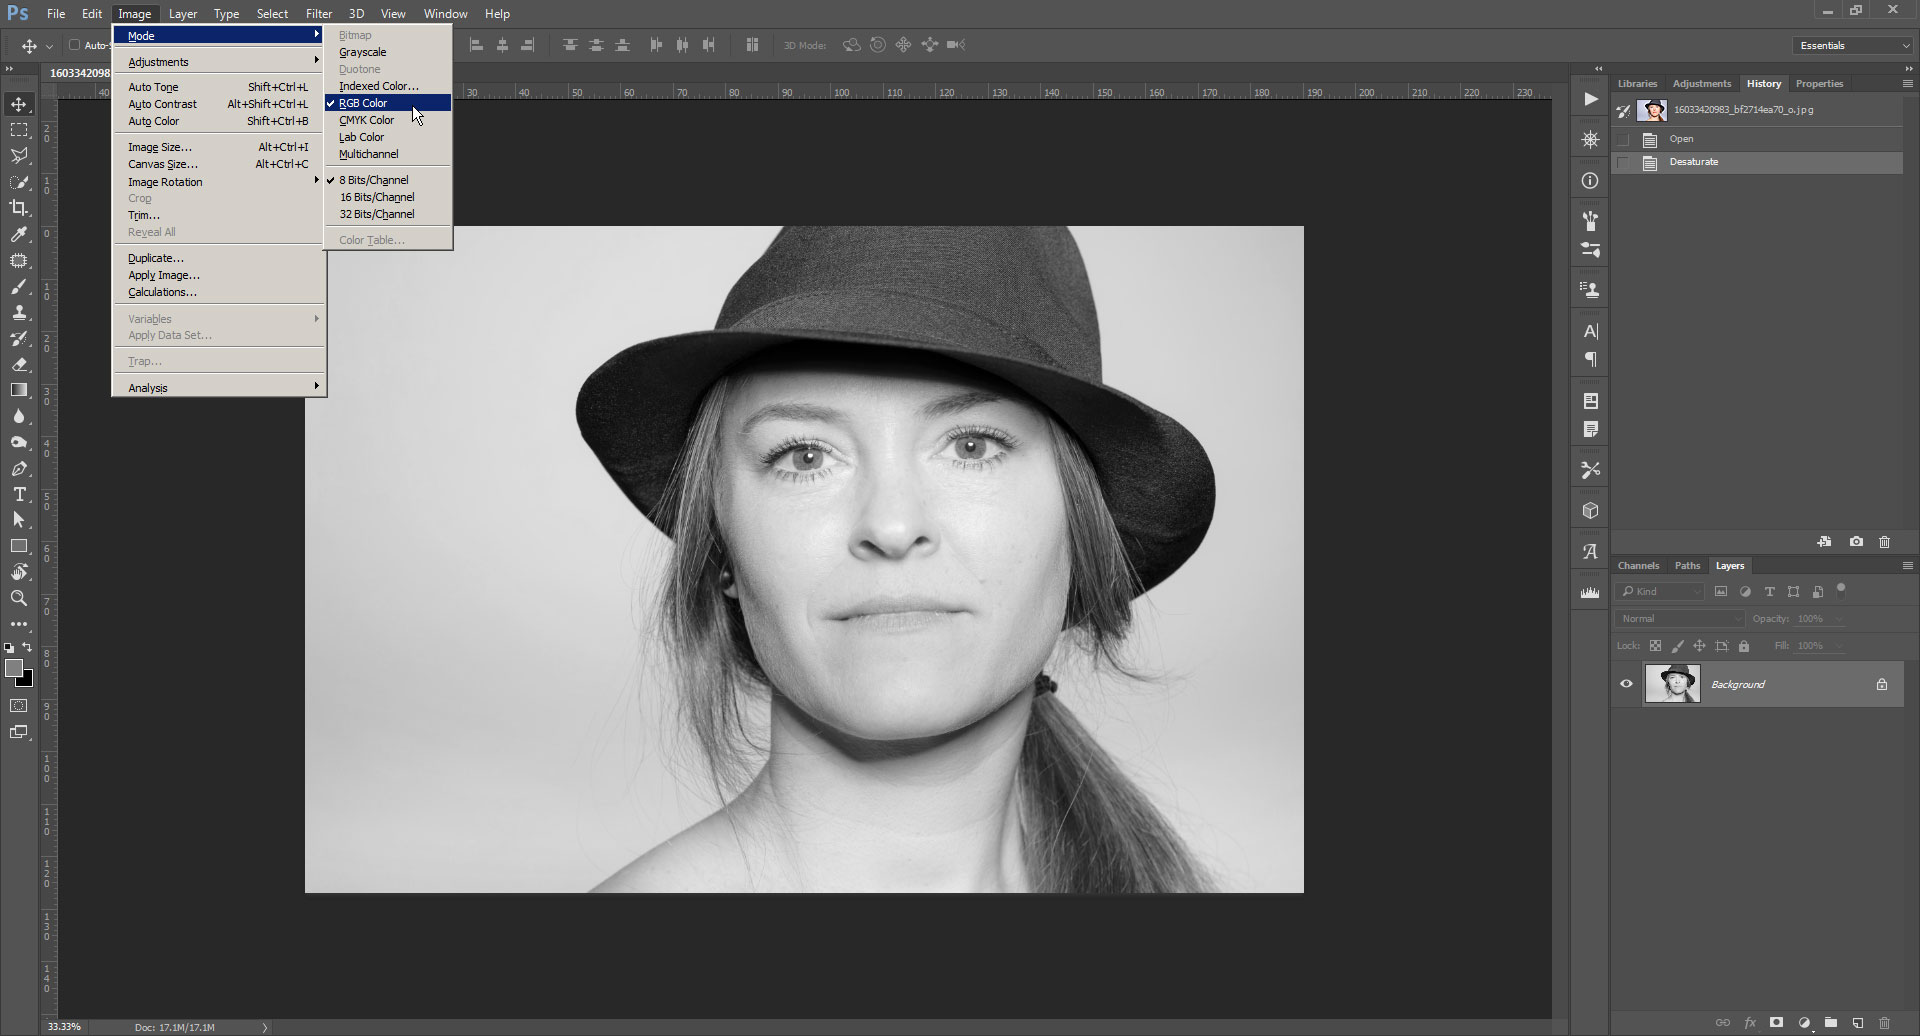
If you're starting off with a black and white image, ensure it is in RGB color mode: Image > Mode > RGB Color.
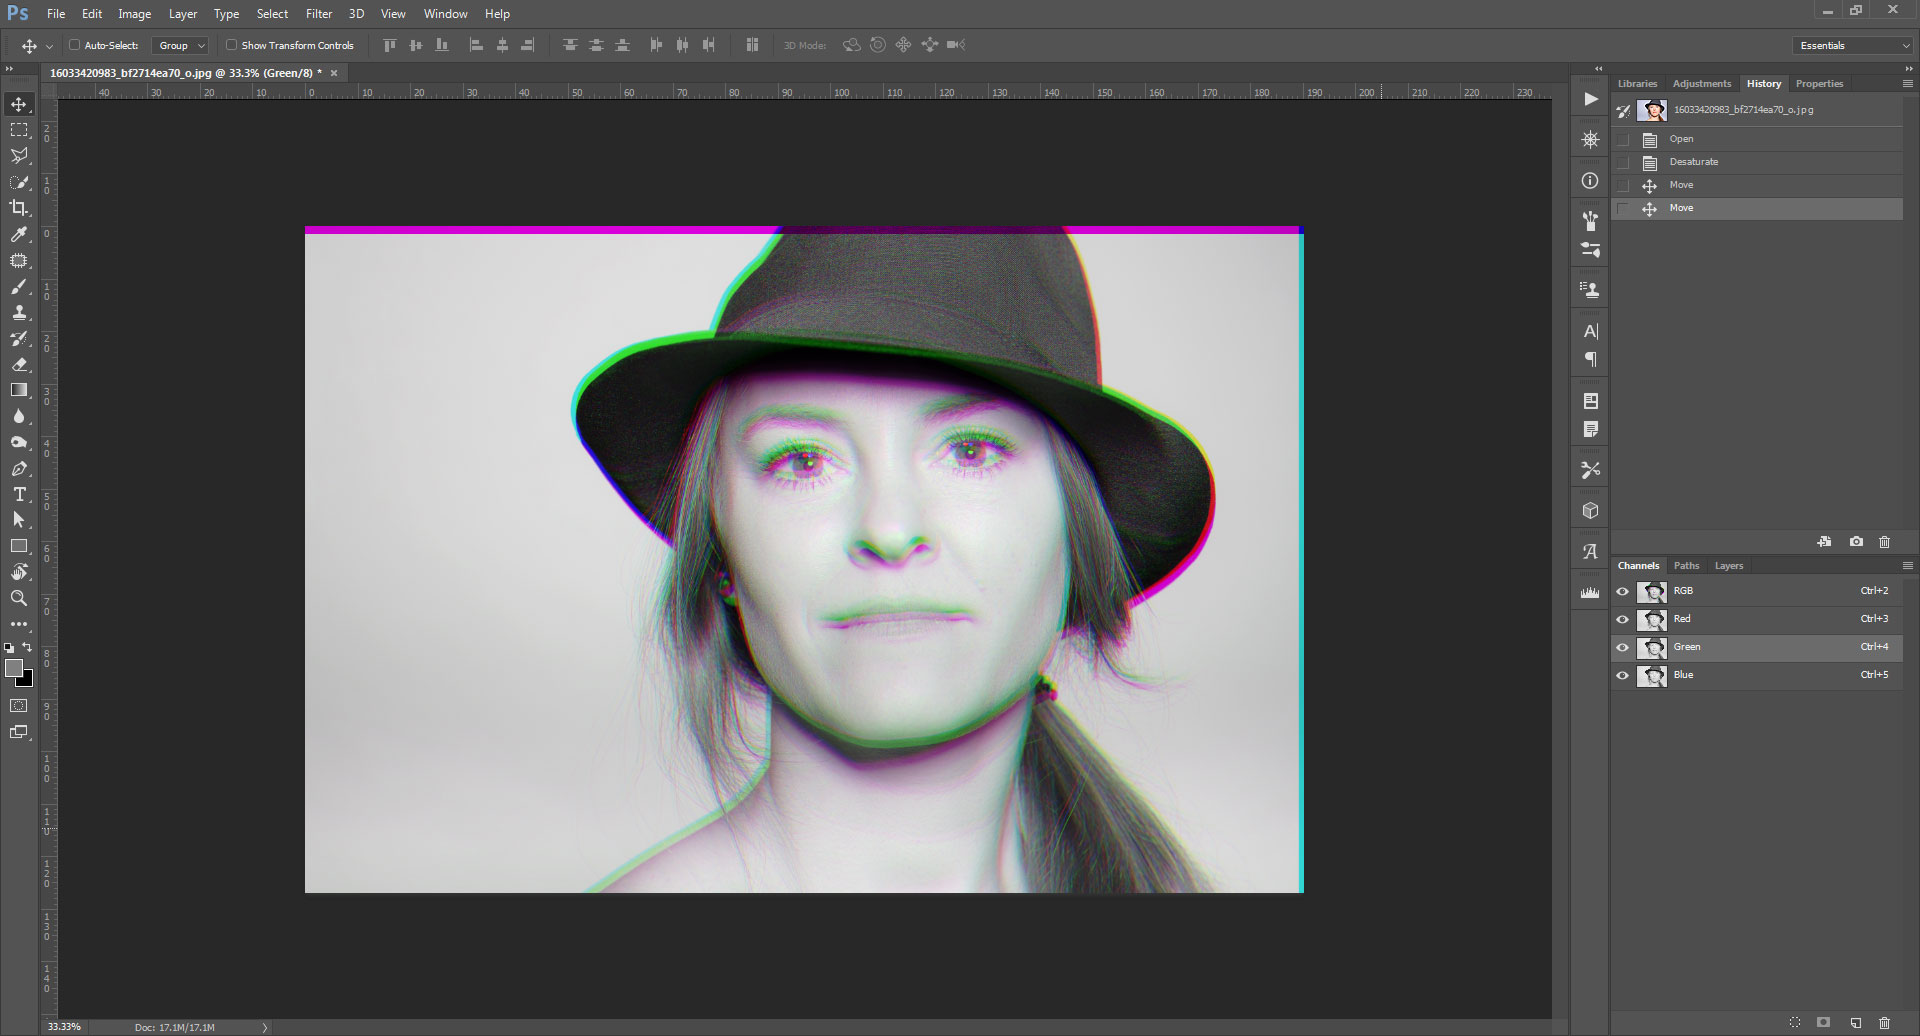
Open the channels palette (Window > Channels). Select the Red channel. In the tools palette, select the move tool (V on the keyboard), then click and drag on the image to shift it. Just move it a small amount.

Next select the Blue or Green channel, and move it in the other axis to which you moved the Red channel. E.g. if you moved the red channel horizontally, move the Green channel vertically.
For variations on this technique, try only moving one channel, varying which channel you choose. You can also try modifying the channels or even copy-pasting different images into the channels.

Green channel flipped horizontally
Have fun with these techniques and don't forget to play around with various settings, filters and blend modes. Experimenting yourself is the best way to learn and understand the creative options that are available.


Hi there! I just read your blog post on surreal Photoshop techniques, and I must say that it was a really interesting and inspiring read. As someone who is always looking for new ways to get creative with photo editing, your tips and techniques were very valuable.
I loved how you explained the different techniques that can be used to create surreal and dreamy effects in photos using Photoshop. Your step-by-step instructions and screenshots were very clear and easy to follow, which made it easy for me to try these techniques on my own photos.
I especially appreciated the tips on using blending modes, layer masks, and adjustment layers to create surreal effects, as these are features that I don’t always use to their full potential. Your tips on creating double exposure effects and levitation photos were also very inspiring and opened up a world of possibilities for my own photo editing.
Overall, I found your blog post to be a great resource for anyone who wants to get creative with photo editing using Adobe Photoshop. Your tips and techniques were very informative, and I can’t wait to try them out on my own photos. Thank you for sharing your knowledge and expertise with us!