Macro & Close-up Photography Tips – Lighting
Just as with standard photography, getting lighting right for macro photography isn't easy. The main issue is often the lack of light, especially when working at magnifications of 1:1 or above. The extension used by a lens to allow it focus closely, plus any additional extension you add means that not as much light reaches the camera's image sensor.
As well as this factor, you often need to get very close to the subject, which can result in yourself blocking some of the light. And many subjects grow or live in shaded areas, just compounding the lack of light even more.
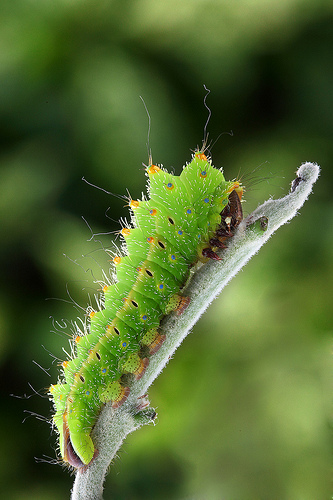
Bruco di Antheraea Mylitta by Herman Rhoids on flickr (licensed CC-BY-SA)
Using natural light
Just like most other forms of photography, natural light macro photos are best made around sunrise or sunset. The light has a warm tone, which is more pleasing to the eye, but just as importantly, it is not as harsh. So you are less likely to get strong black shadows and bright blown out highlights on your subject.
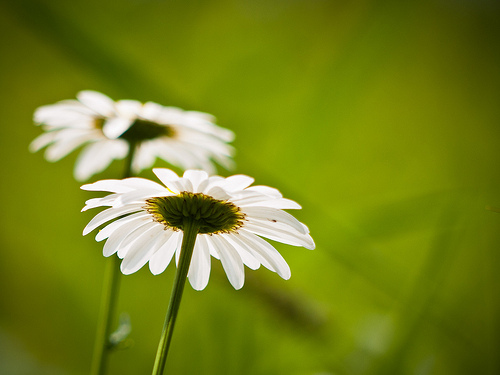
By Some Miracle by basheertome on flickr (licensed CC-BY)
Early in the morning the air is much stiller than it is later in the day. So you can often take natural light photos using a tripod and a longer shutter speed without any blur from subject movement. Similarly, insects are also lethargic at this time of day, and will normally be quite still allowing for longer exposure times without blurring.
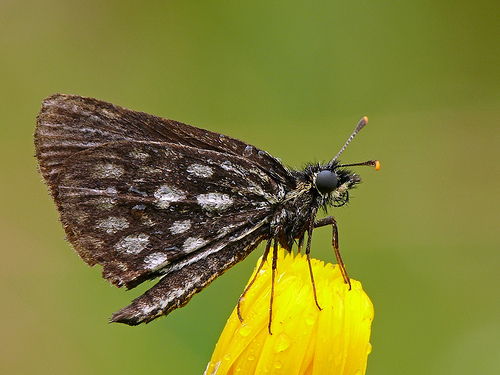
Large Chequered Skipper by Darius Baužys on flickr (licensed CC-BY-SA)
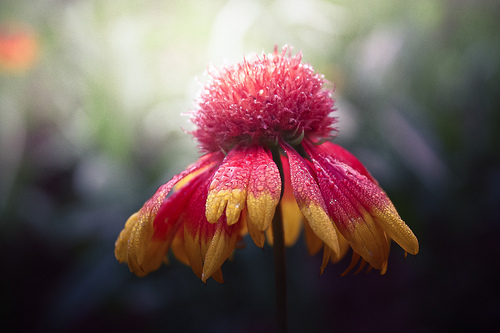
Light modifiers
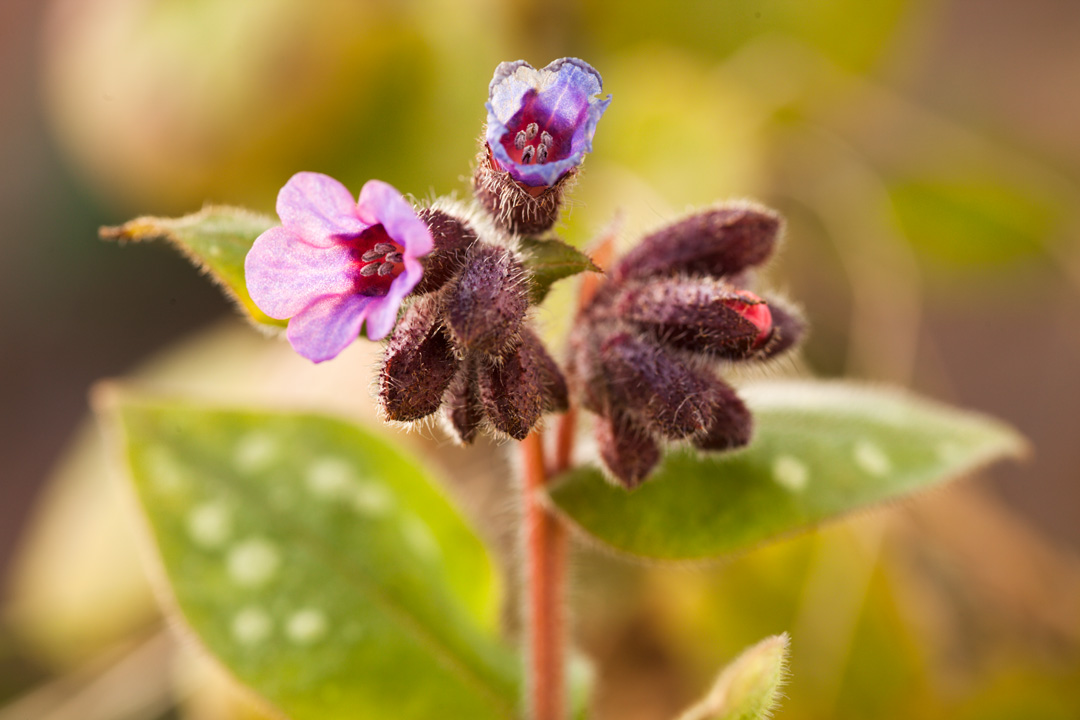
Natural light can be manipulated by blocking off light from part of the image, or using a reflector to bounce more light into part of the image. If a flower is half in light and half in shade, I will often try to position myself to put the whole flower in shade. Then the whole of the flower will be exposed properly, rather than having the half of it in bright light and the other half in dark shadow.
Photographing these flowers in the sun resulted in bright highlights where the sunlight hits, and dark shadows where the light doesn't reach.

Moving between the sun and the flower to block the sunlight and put the flower in shadow results in a much nicer, more even exposure.
Anything that reflects light can be used as a reflector, so it could be a piece of white card, a piece of white foam, or a commercially produced photography reflector. Positioning of the reflector needs to be decided on a case by case basis.
In some cases you will want to position it so as to add light to fill in shadows. In other cases the lighting may be very flat, and so you may want to position it so that it adds some shadows.
Another accessory that can sometimes come in handy is a diffusion panel. This is a thin white fabric stretched across a frame. The panel can be placed above the subject to diffuse the light. This is particularly useful if shooting in harsh light, such as during the middle of the day.
Cincinnati Nature Center's Rowe Woods by Referenceace on flickr (licensed CC-BY)
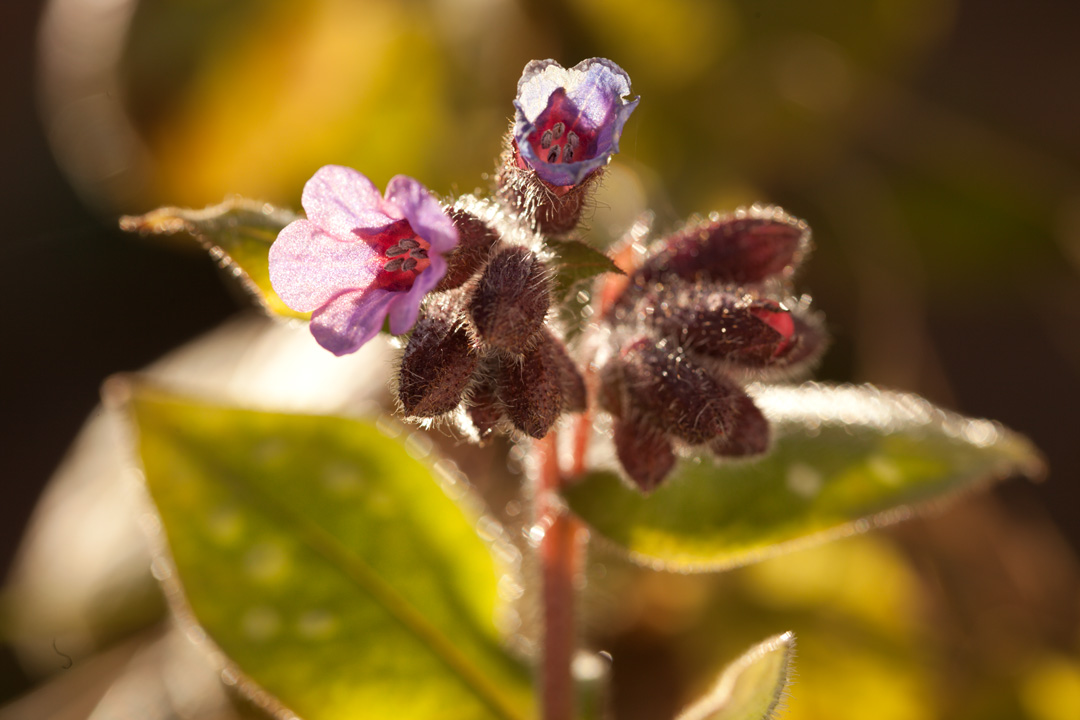
This photo, lit by natural light, has strong contrast, with deep shadows and bright highlights
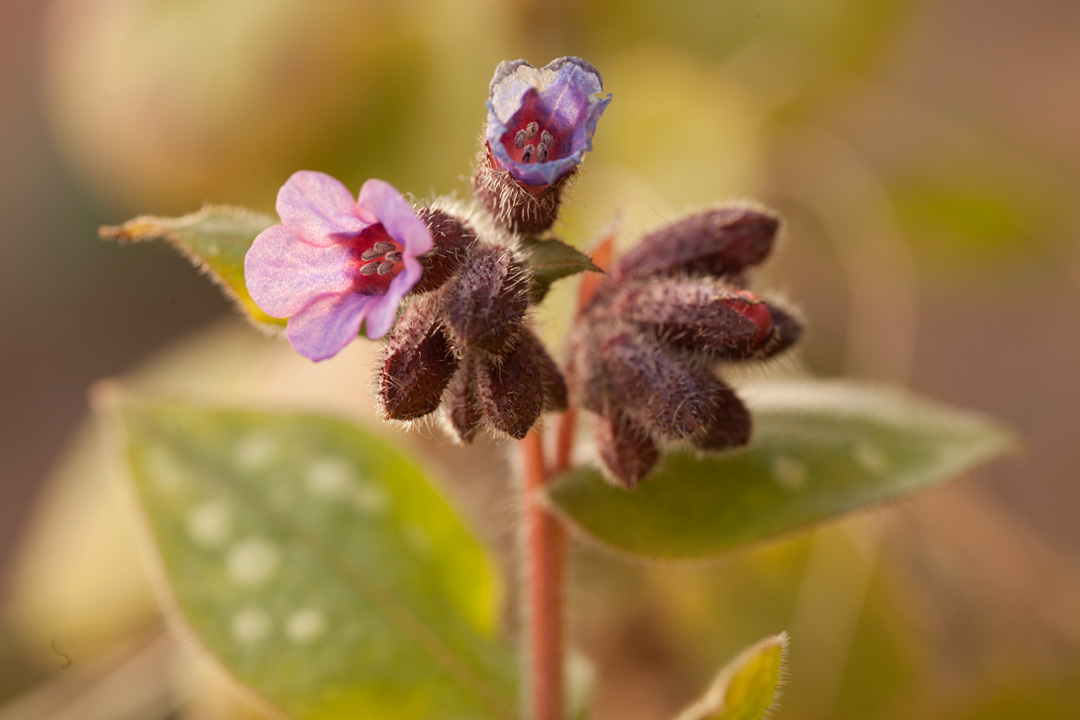
Placing a diffusion panel between the sun and the flower makes a big difference, providing a much softer light
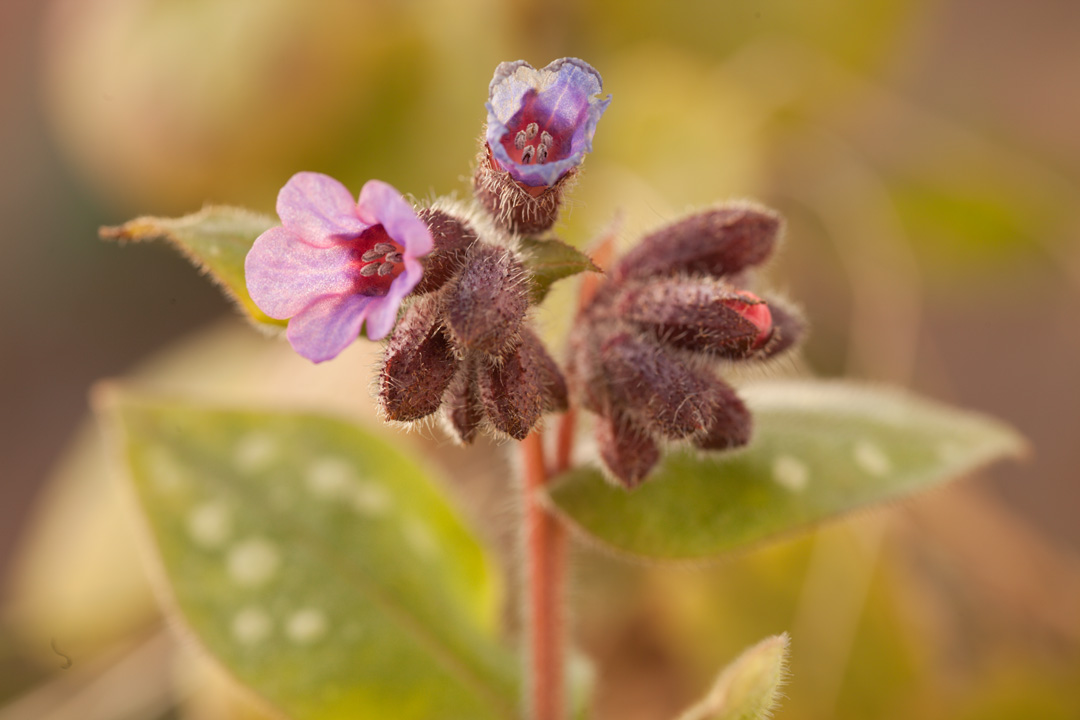
Adding a reflector on the right fills in shadows and helps bring out the color of the opening flower bud on the right.
If you prefer a more contrasty look, it is easy to boost the contrast in image editing software.
Using flash
Using flash for macro photography allows you to easily increase the light level and change the positioning of lighting in relation to the subject as needed.
The duration of a flash burst is very quick, and so when flash is acting as your main light source, you get a very fast effective shutter speed. Although you may have a 1/100s shutter speed set, if the flash burst is providing the light during the exposure, then the effective shutter speed is that of the flash burst (e.g. 1/1000s).

Hummingbird Hawk-moth (Macroglossum stellatarum), photographed in Hanko, Finland By Wikipedia editor J-E Nyström (User:Janke), Finland (licensed CC-BY-SA-2.5) - the flash burst was short enough to freeze the moth in flight
The direction of light in flash photography is quite important. Just as in portrait photography, lighting from the front with bare flash can give quite a flat look. Generally the best angle for flash is pointing down somewhat from near the front of the camera, or off to one side.
By pointing the flash down a bit, you emulate natural lighting, which comes from above. This can help create some shadow under the subject as well, keeping with a natural look. By pointing the flash from the front (rather than just having it straight overhead the subject), you also get some light and detail of the front of the subject.
I have also seen some excellent macros taken using just the camera's pop-up flash, for example those by Dutch photographer Mark Dijstelberge. By placing a piece of white paper (or similar semi-transparent material) in front of the flash it creates a much more diffuse light source that will wrap around the subject.
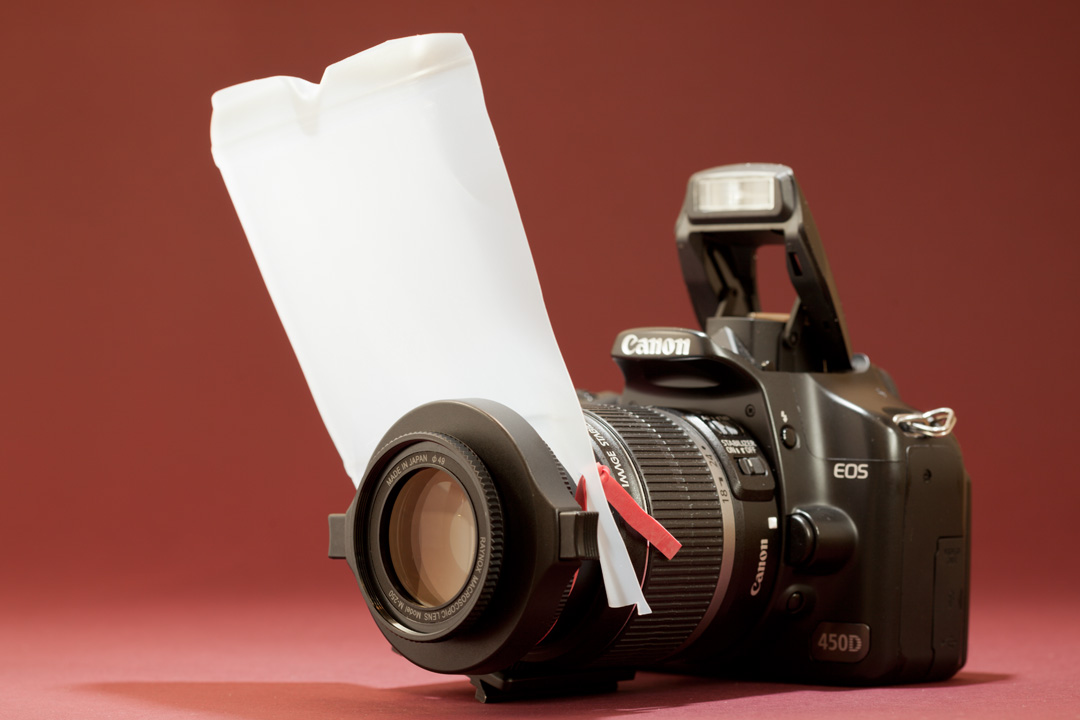
A pop-up flash diffuser for macro photography made from part of a plastic milk bottle and an elastic band
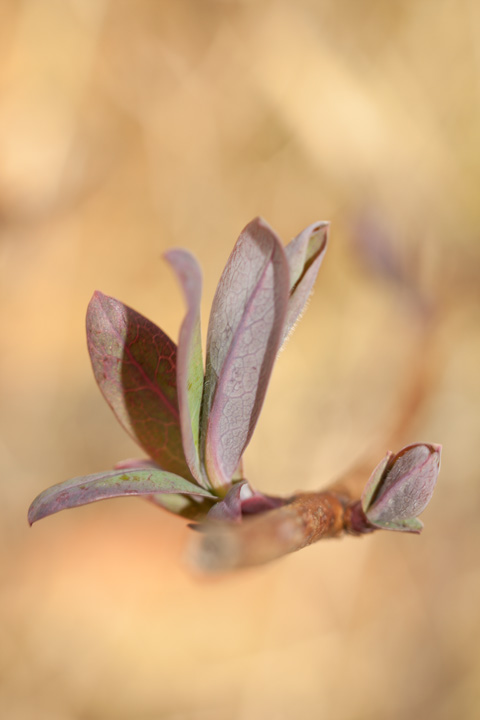
Photo taken with pop-up flash and no diffuser

Photo taken with pop-up flash and diffuser - note the edges of the shadows are much softer and less harsh
If using an external flash, don't be afraid to play around with the positioning. Subjects that are semi-transparent, such as leaves and flower petals can look excellent when lit with flash from behind.
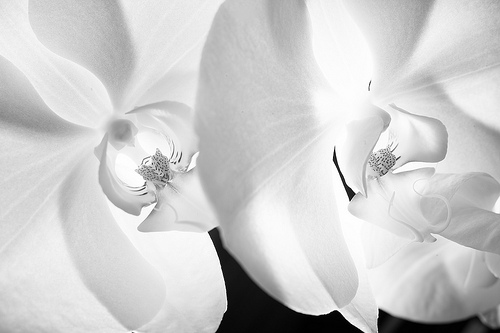
64/366 Shades of White by Andreas Øverland on flickr (licensed CC-BY-ND)
To sum up:
- Be aware of the light level and any blurring that long shutter speeds may introduce.
- Direct sunlight or direct flash can often be quite harsh - consider diffusing the light for more pleasing lighting.
- You can play around with the direction of lighting either by using an external flash or by using a reflector.


