Lightning Photography Tips
In the previous article I looked at the different ways you can set your camera up to capture a lightning strike. In this article I'll cover some more tips on how to get great lightning photos.
Ka-boom (lightning) by Leszek.Leszczynski on flickr (licensed CC-BY)
Safety First
There's not much point trying to get a great lightning photo if you get fried by a lightning strike in the process. Even if a lightning strike doesn't kill you, it can leave you seriously disabled. So it is very important to think about your safety.
Lightning can strike out up to 10 miles from a storm. As a general rule, if you can hear thunder, then you can be hit by lightning. The closer to the storm you are, the greater the chance of being hit. It is recommended to always keep at least 6 miles away from the storm.
OMGIALMOSTDIED by J.J. Verhoef on flickr (licensed CC-BY)
Because sound travels more slowly than light, you can count from the time of a lightning strike until you hear the thunder to calculate your distance. Each 5 seconds that passes between the lightning and the thunder is 1 mile. If you are 6 miles away, there should be 30 seconds between the lightning and the thunder.
Ideally you should photograph the lightning from a safe place. This can be a building that is grounded (has wiring or plumbing that goes down into the ground). Or it can be a metal topped (and bodied) car.
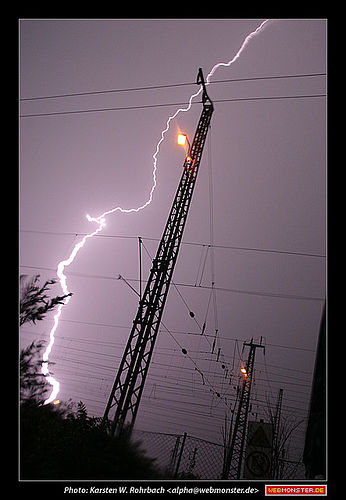
Wham! by Karsten W. Rohrbach on flickr (licensed CC-BY-ND)
Keep the camera steady
No matter what method you are using to capture a lightning photo, your images may suffer from blurring caused by camera shake if you are hand-holding the camera.
If you're shooting from a car, then you can buy a window clamp. This clamps onto your open window, and has a mount on top that you can attach your camera to. This provides a stable platform for the camera that will prevent the image blurring from camera movement (unless you bounce up down in the car while the photo is being taken).
If you're shooting from a building, or somewhere safe in the open, then use a tripod, wall, or ledge to keep your camera steady. Note that if you're out in the open, a tripod can act as a lightning conductor.
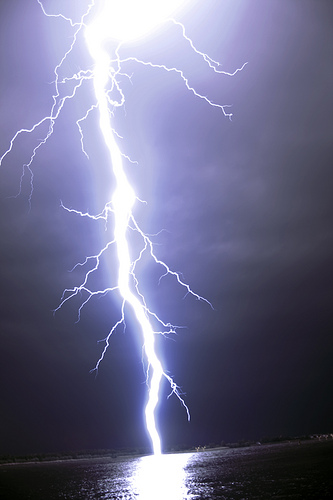
Lightning by veggiefrog on flickr (licensed CC-BY)
Camera settings
Exposure settings are mostly determined by the light levels and whether you are using a long exposure to capture the lightning strikes. So there can't really be any recommended settings, though I will give some suggestions you can use as a starting point.
For a lightning shot you typically want most of the image (particularly the sky) to be quite dark. This ensures that the lightning will stand out and contrast strongly against the rest of the image.
To take control of how the image will look, I would recommend using Manual Exposure mode. Generally you will want to use your camera's base ISO setting (normally ISO 100 or 200). This will reduce image noise and allow for a longer exposure time.
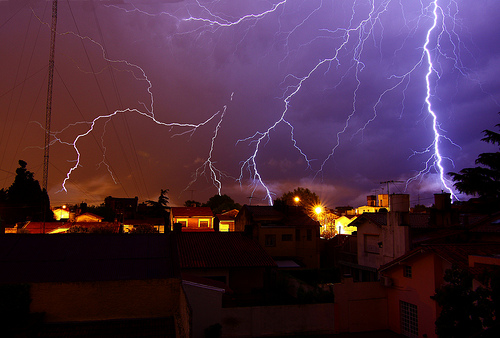
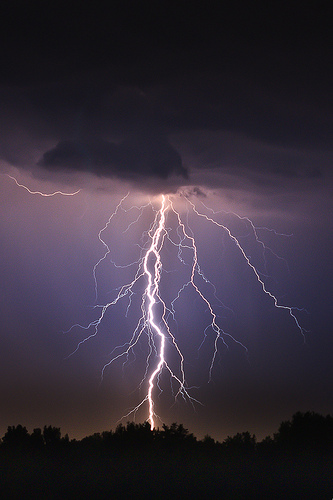
Spring Storm at Buenos Aires by lrargerich on flickr (licensed CC-BY)
An aperture setting of around f/8 - f/11 should give a sharp image. It also reduces the amount of light reaching the camera's sensor, allowing for a longer exposure.
Shutter speed should normally be as long as possible to increase the chance of capturing a strike or multiple strikes in an image. As with the other exposure settings, it depends on the light levels and the look you are going for, but 30s is a good starting point.
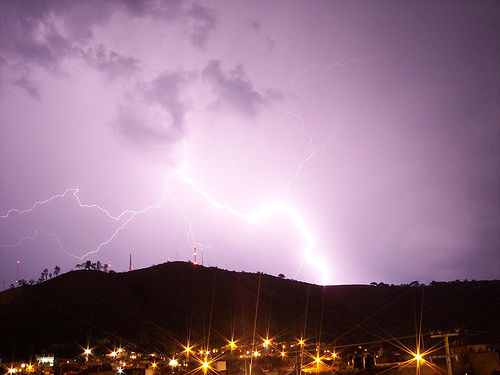
Rayo de Zeus / Zeus's Lightning - Tepic, Nayarit, MEXICO by Christian Frausto Bernal on flickr (licensed CC-BY-SA)
For focusing, it is best to switch the camera to manual focus, so that it does not try and refocus each time you take a shot. You can focus the lens first using autofocus, then switch to manual focus to lock the focus in place.
Or you can focus the lens manually. In this case, since the lightning will be several miles away (or even if it's only half a mile away), setting the focus to near infinity will give best results.
Camera power
Most of the methods used for photographing lightning (other than the Lightning Trigger) use a lot of energy. So it is a good idea to make sure you have enough power for your camera.
If you're working indoors, you might consider connecting your camera to the mains power (using the appropriate adapter). But this could be rather risky as a power surge caused by a lightning strike could then fry your camera. Even if you have good surge protection in place, it likely still won't protect against a direct lightning strike on or near your house.
If you're working outdoors, make sure you bring a spare battery. If you're planning on setting a camera up outdoors and then leaving it to photograph the storm while you retreat to safety, then a battery grip would be a good idea.
Battery grips are available for most DSLRs and some other interchangeable lens cameras. They allow the camera to run on two batteries instead of one, so the camera will last twice as long until the battery runs out.
Lens / Focal length choice
Composing your photo can be rather difficult, since you can't know where lightning is next going to strike. A telephoto lens has a small field of view, which will give a nice large image of any lightning strike. But because the field of view is small, there is only a small chance that lightning will strike where you have the camera pointed.
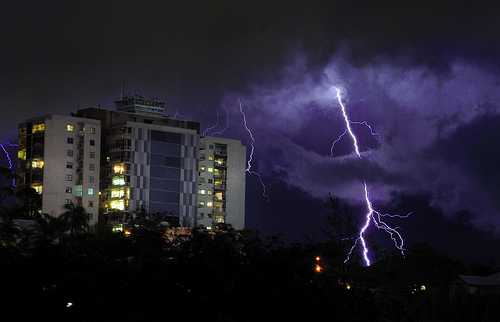
Electrical storm over Brisbane by Richard.Fisher on flickr (licensed CC-BY)
A wide angle lens, on the other hand, has a much larger field of view. This means that any lightning strikes captured will appear smaller in the image. But you also have a much greater chance of capturing any strikes in your image.
Composition
For a good lightning photo, you want to fill the majority of the frame with the sky. This is, after all, where the lightning will happen. However, it is also a good idea to include some foreground interest as well.
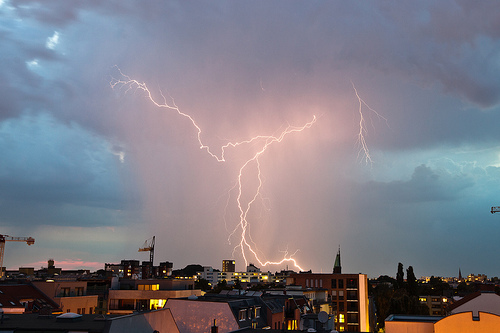
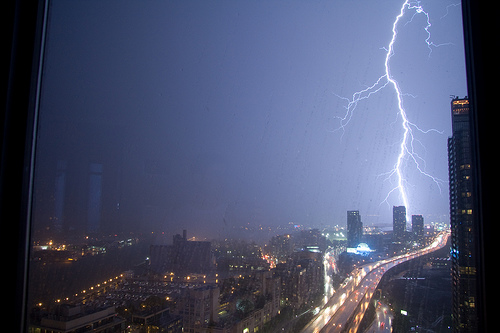
Lightning storm over Berlin by Matt Biddulph on flickr (licensed CC-BY-SA)
If you can frame the photo so as to include the point where (or near where) the lightning strikes, this can really show the scale of the lightning.
Capturing multiple strikes
A single long exposure photo may be able to capture multiple lightning strikes in a single image.
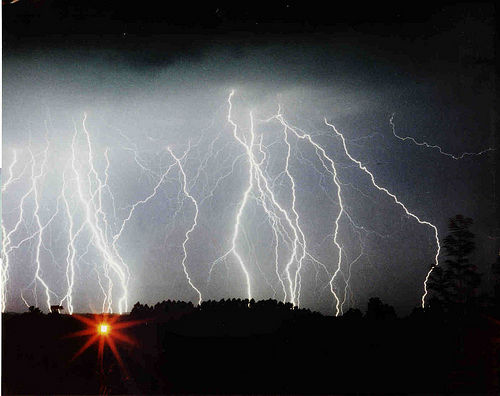
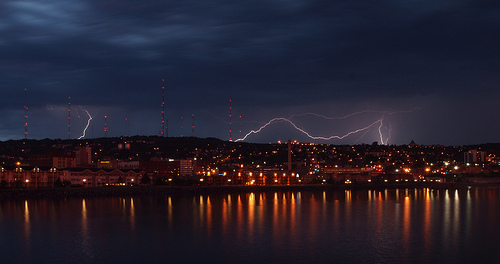
Marden lightning by Elsie esq. on flickr (licensed CC-BY)
But if you are taking multiple shorter exposures rather one single long exposure, you can still merge the images to create the same effect.
You will need to have used a tripod or other form of support so that the camera position is exactly the same for all the photos. Load the photos into your image editing software, such as Photoshop or GIMP, and add them all as layers to a single document.
Set the blend mode of each layer (image) except the bottom layer to 'Lighten'. Only the parts of each layer that are brighter than the layers below will show through. Since the only part of each image that should brighter than in the other images will be where a lightning strike was recorded, you end up with a single image combining the lightning strikes from all the images.


