Easy Photoshop Portrait Effects
Post processing can be used to improve your portrait photos, and really give them that professional look. The following three techniques are relatively simple and easy to implement, but can make a big difference.
Add a vignette
A vignette is simply a darkening on the image around the edge of the frame. Adding a vignette helps to draw the viewer's eye towards the middle of the frame, where your subject is.
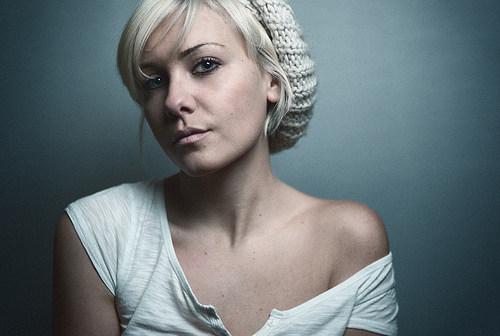
Chiara by Astragony on flickr (licensed CC-BY)
Many lenses vignette, especially if they are used at their largest aperture e.g. f/1.8. However, if you have a photo without a vignette, or the vignette is not very strong, you can add one easily.
The way to add a vignette varies between different photo software. At it's simplest you can make an oval selection, feather the selection, invert the selection, and then fill with black.
Most software though, will have a vignette slider. Just move the slider to create the vignette with the strength you want. For Adobe Camera RAW, you can use the Lens vignetting slider (on the Lens correction tab). For Paintshop Pro go to Effects > Photo Effects > Vignette. In Photoshop Elements go to Filter > Correct Camera Distortion.
Dodge & Burn
Dodging and burning refers to the darkroom process used with film photography. It involves reducing or increasing the exposure of parts of the print, to make those parts appear lighter or darker in the final print.
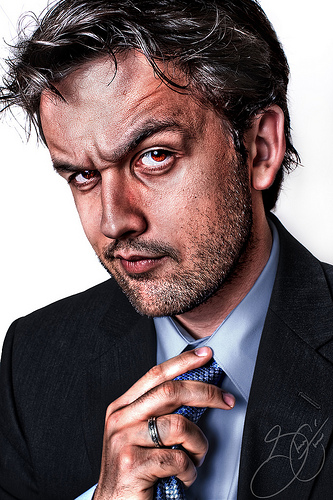
Citizen by country_boy_shane on flickr (licensed CC-BY-ND)
With digital dodging and burning we can do a similar thing, selectively brightening and darkening areas of our image. Thankfully, we can be much more precise, as well as easily fixing any mistakes we make when working in the digital darkroom.
Most image editing software includes dodge and burn tools you can use on your image. Alternatively, create a new, empty layer above your image. Change the blend mode of the layer to overlay. Now use a low opacity white brush to dodge (brighten) and a black brush to burn (darken).
A pressure sensitive graphics tablet can be particularly useful for dodging and burning. It will let you vary the opacity of the brush by how much pressure you put on the pen.
Local Contrast Enhancement (LCE)
Local Contrast Enhancement refers to a technique that, rather than modifying the contrast globally over the whole image, modifies the contrast of each area locally.
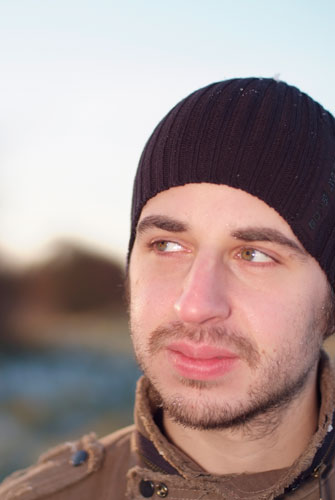
Before applying LCE

After applying LCE
To apply local contrast enhancement, you can use an unsharp mask with a large radius, but my preferred method is to use a highpass filter.
First, duplicate your image into a new layer. Now apply a Highpass filter with a radius of around 100px. The exact radius to use depends on the size of the image you are working on. In Photoshop Elements and Photoshop CS, you can do this via Filter > Other > Highpass. Then change the blend mode of the layer to 'Overlay' and adjust the opacity of the layer to taste.
If you are using Paintshop Pro, you can do the same thing through Adjust > Sharpness > High Pass Sharpen. You will need to choose Overlay in the blend mode option of the High pass dialog though, rather than changing the blend mode of the layer.
All of these effects can make a quick and easy improvement, though dodging and burning can take a bit of time depending on how much you want do. So don't be afraid to spend a little longer post processing your portrait photos, and try applying some of these effects.


