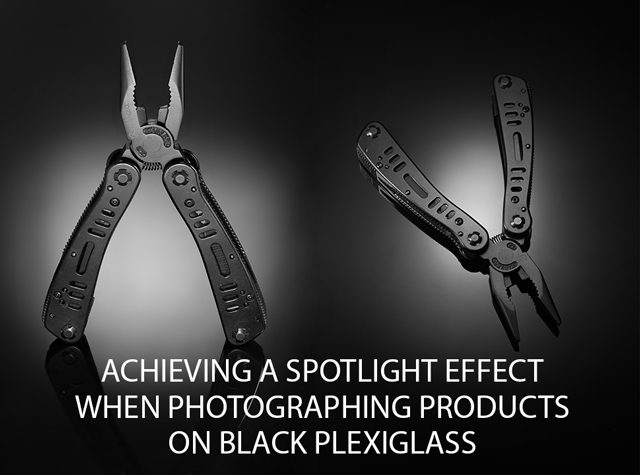
Achieving a spotlight effect when photographing products on black plexiglass
While product photos on a plain white background can work very well for many uses, a black background with the product reflected below can give a more high-end, expensive, look to a product. Photographing the product on sheet of glossy black plexiglass / perspex / acrylic is a relatively cheap way to achieve this look.
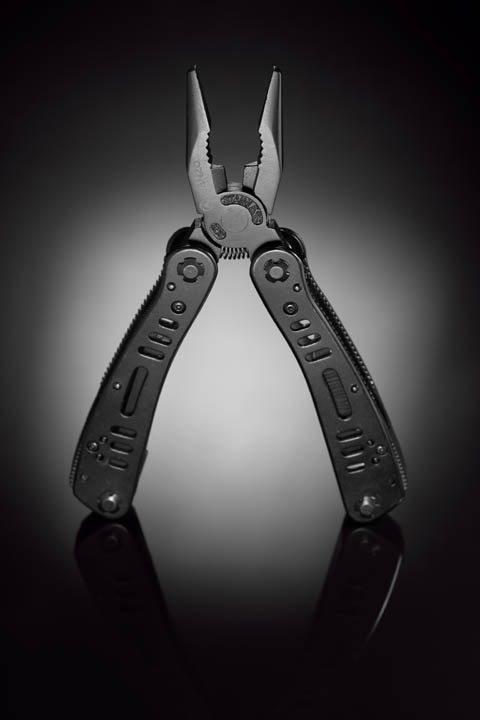
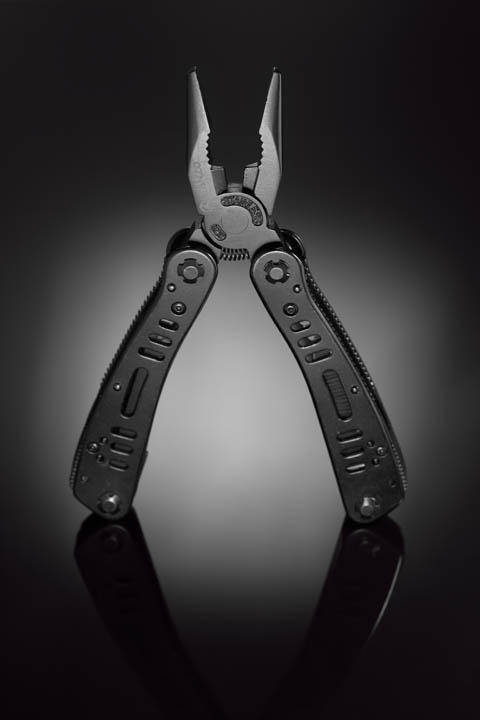
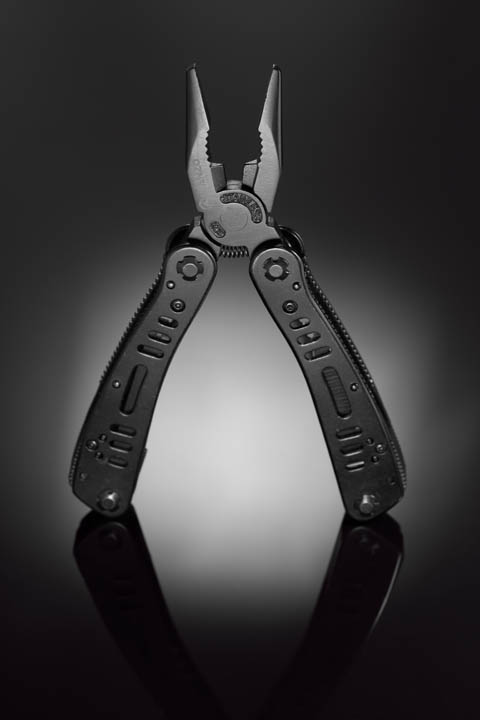
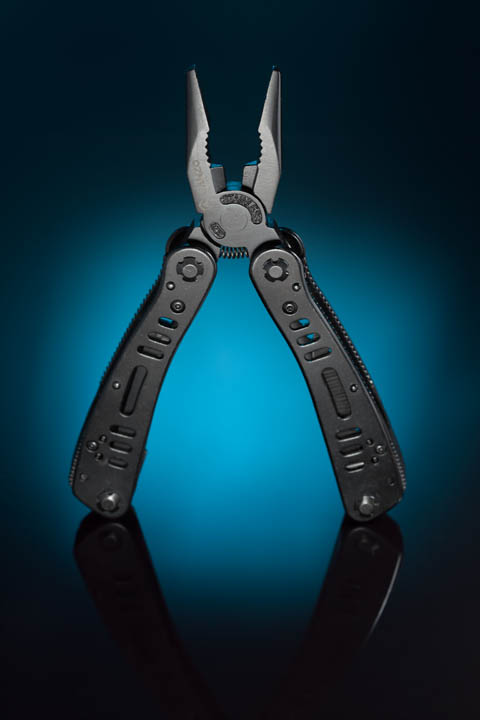
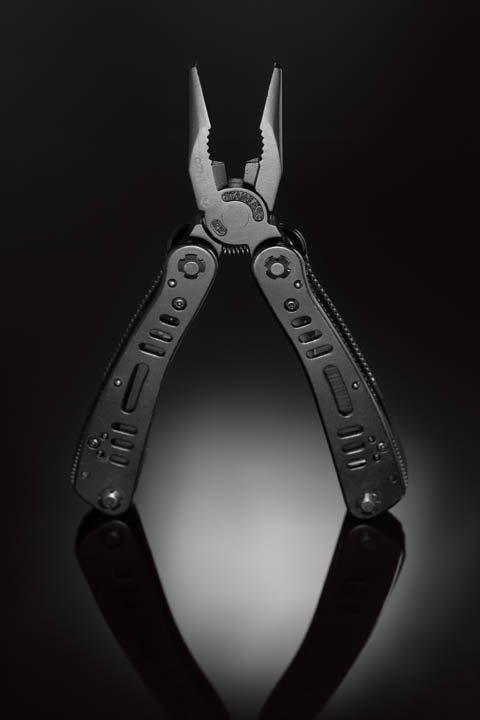
A common effect used when photographing a product on black is a spotlight highlighting the product. The brightness of the area around the product compared to the darker edges of the image helps draw the viewer's eye towards the product.
While you might think this effect would be achieved by using a spotlight above or below the product, the technique actually relies on a reflection. In this article we'll look more at how to achieve this effect.
Glossy black plexiglass / acrylic acts like a mirror. This allows you to get a nice reflection of the product on the plastic's surface. But it also reflects the area around it. Exactly what is reflected depends on the angle you are shooting the product from.
If you're shooting from a low to medium angle, it will be the area behind the plexiglass sheet, which unless you've set up a background, will probably be the wall of the room you're shooting in. If you're shooting from a high angle, you're more likely to have the ceiling reflected as the background.

Diagram showing the line of sight from the camera to the product and the area of background that would be reflected behind the product. Camera angled at 45°.

Camera angled at 65°.
However, whether the background shows up at all as a reflection depends on how well it is lit in comparison to your subject. If you're using flash to light your subject, and shooting in a dimly lit room, then virtually no light from the background will hit the plexiglass. This means the reflection of the background will just appear black (i.e. effectively there is no reflection of the background).
If you're shooting using window light, with the windows in the background, then lots of light from the background will hit the plexiglass. You'll get a strong reflection of the background.
Background
So, for a reflection of a spotlight on the glossy black plastic, we need to control the background and the lighting on that background. For the background we want something that is plain, to give us a smooth, distraction free background reflection. You can either use a solid background, such as a sheet of card, or a semi-translucent one, such as a sheet of thin paper.
With a solid background, we create the spotlight effect by hitting the side of the background towards the camera with a spotlight. Whereas with a semi-translucent one, we light from the side away from the camera, shining the light through the background instead of bouncing it off.
The tone of the background does have some effect on the image, though it is not a particularly big effect. The brighter the background material, the more likely it is to reflect back any other light (including ambient light). So a white background may appear more gray (when lighting is reasonably well controlled - see next section), while a black background may appear pure black (other than the area being highlighted).
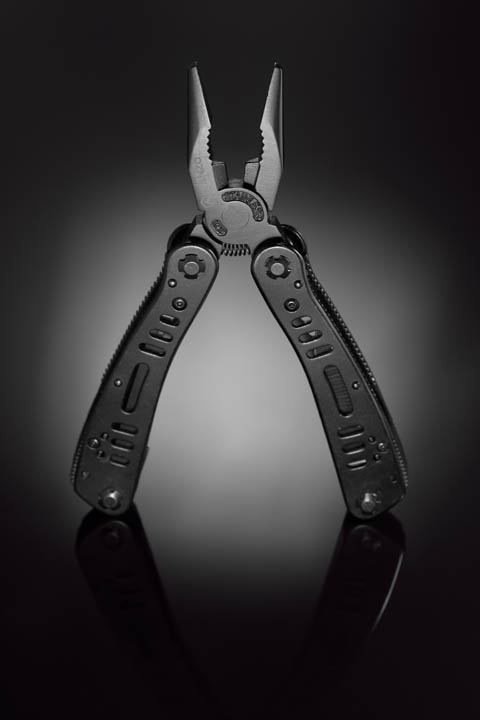
Black background.
Gray background.
White background.
On the other hand, a black background requires much more light to create a highlight on than a white background does. Of course, if you are using a semi-transparent background, then you have little choice apart from white. Generally I prefer working with a gray or black card background when I want a black background.
You can also use a colored background, or even use a neutral background then gel your light to create a colored highlight.
Using blue card for the background.
Lighting
In terms of lighting, it is easiest to work with flash, rather than continuous lights. Flash outputs a very short but bright flash of light, allowing you to use a fast shutter speed and small aperture. In turn, the fast shutter speed and small aperture ensure that very little ambient light will affect the image (unless you are photographing your subject outdoors in daylight or in a very well lit room).
With continuous lighting, unless your lights are very powerful, you will need to use a slower shutter speed and / or larger aperture. In turn, this allows ambient light to affect the image more, so you have less control over the lighting of the image. You're likely to find it quite difficult to get a black background around the edge of the frame, getting a gray background instead.
It's not impossible to use continuous lighting though, just a bit trickier than flash. You'll need to try and minimize the ambient light as much as possible, so it has no effect on the image. Shooting indoors, that means working in a dark room, so you may need to set up your shot, then close the curtains, and turn all room lights off before taking the photo.
To create a spotlight effect with your background light, you have a number of choices:
- Place the light very close to the background. This produces a small, bright spot, and is only really practical if using a semi-transparent background with the light positioned close behind it.
- Use the zoom feature of your light (if it has one). This creates a narrower, more condensed beam of light.
- Use a snoot or grid on your light. These accessories both help create a narrower beam of light.
If you've followed along so far, then you should have your product set up on the black plexiglass. You have a plain background behind, which is reflected in the plexiglass. And you have a spotlight to create a highlight on the background. Now comes the tricky part - positioning the light on the background so that the highlight appears behind your subject.
The angle that you are photographing the subject from, along with the distance between the subject and the background determines what area of the background needs the spotlight on it. If you are photographing the subject from a relatively low angle, then the spotlight will need to be quite low on the background. If you're photographing from a higher angle, then the spotlight will need to be higher on the background.

Diagram showing the line of sight from camera to product and the area of background that would be reflected. With the camera at a low angle, the area of background reflected is also low.
With the camera at a higher angle, an area higher up the background will be reflected on the plexiglass.
Setup shot showing position of reflected highlight on plexiglass when camera is positioned at a low angle.

Moving the camera higher to shoot down at a higher angle, without changing anything else, changes where the reflection on the plexiglass appears.
Shooting straight down
You can't photograph a subject and include a reflected highlight behind it when shooting straight down - you'd get a reflection of the camera as the background. However, you can shoot down at an angle. Because the reflected angle will also be high, you'll likely need to tilt your background towards the camera, so as to ensure the background is reflected behind the subject.
Diagram showing line of sight from camera to product and reflected area when camera is positioned at a high angle. The reflected area would likely be the ceiling.

By tilting the background over, we can ensure the background is reflected in the plexiglass.
With the background tilted like this, using a solid background with a reflected light could be quite tricky. Placing the spotlight so that it creates a highlight on the background, but without spilling light onto other areas of the image, and without the light source appearing in the image would be difficult to do. Instead, it is much easier to use a semi-transparent background and light it from behind.
You'll likely find that you need to take a few test shots, adjusting the positioning of your light each time, until you get the reflection of the spotlight just where you want it. If the highlight in the image is lower than you want (nearer the camera), then you need to move the light so it is highlighting a lower point on the background. This moves the reflection of the light up (further from the camera).
If the highlight is higher than you want, then you need to move the light so it hits the background higher up. This will move the reflected highlight further down (closer to the camera). It can be a bit confusing to think that you need to move the light higher when you want the highlight to appear lower in the image!

Diagram showing camera angled at 45° and area of background that would be reflected behind the product. The angle of view of the camera shows that the area in front of the product (nearer the camera) reflects an area of the background that is higher up than the area behind the product (further from the camera).
Light positioned to hit background so as to give a reflected highlight centered behind the subject.
Light positioned to hit background higher up - reflection appears lower.
Light positioned to hit background lower down- reflection appears higher.
The angle of your light in relation to the background will have an effect on how the highlight appears. If the light is angled down, then this will create a highlight on the background with quite a sharp bright area higher up, that fades softly lower down the background. In terms of the reflection behind your subject, this means the brightest area will be towards the front of your subject, with the soft fade to black behind the subject.
Light positioned to hit background roughly straight on.
Tilting the flash so it hits the background at an angle creates an uneven highlight with one end brighter and harsher than the other.
You could achieve the opposite effect by angling your light up at the background. Or for a more even effect, ensure that light hits the background as straight on as possible.
The technique you use to create the spotlight effect from your light will also determine how the spotlight appears, and how quickly it fades from bright highlight to dark background. If you don't like the spotlight effect you're getting, or want to change the shape of the highlight, then play around with your light settings and light modifiers until you get something you do like.
You might find your spotlight is quite strong, with a bright center fading very quickly to black, but you would prefer a smoother transisition between the bright and dark areas. In this case you can try adding a diffuser between the light and background. The diffuser spreads the light out, so the transition between bright and dark is not quite so harsh. You'll need to increase the power of your light though to compensate for the additional light loss caused by the diffuser.
Without diffuser.
With diffuser.
The larger the distance between your light and the diffuser, the more of an effect the diffuser will have. So a diffuser placed right in front of your light won't have a large effect. But a diffuser placed too far from the light might spread the light too much, so you loose the spotlight effect.
The distance between your light and the background also has a big effect on how the light falls off, as well as the size of the highlight. Positioned close to the background, a light will give a small highlight with a bright center and quick fall off to black around the edges. Positioning the light further from the background gives a larger highlight, but also a much softer roll off to black around the edge.
Light positioned close to the background creates a highlight with a bright center that quickly falls off in brightness around the edge.
Light positioned further from the background creates a softer highlight that falls off more gradually in brightness around the edge.
Other things to bear in mind
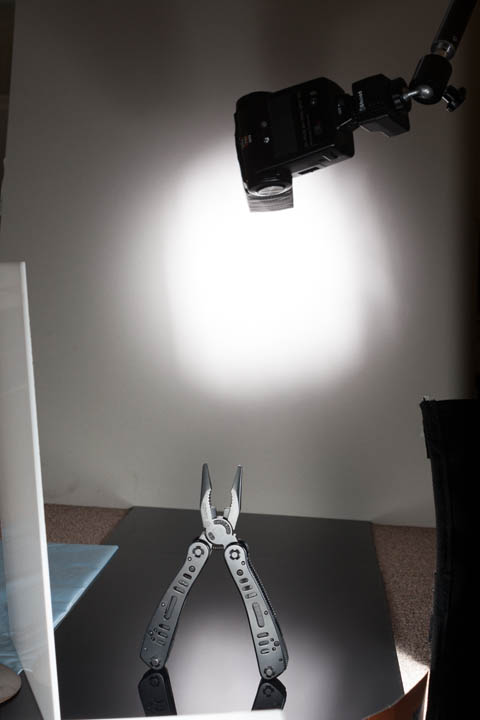
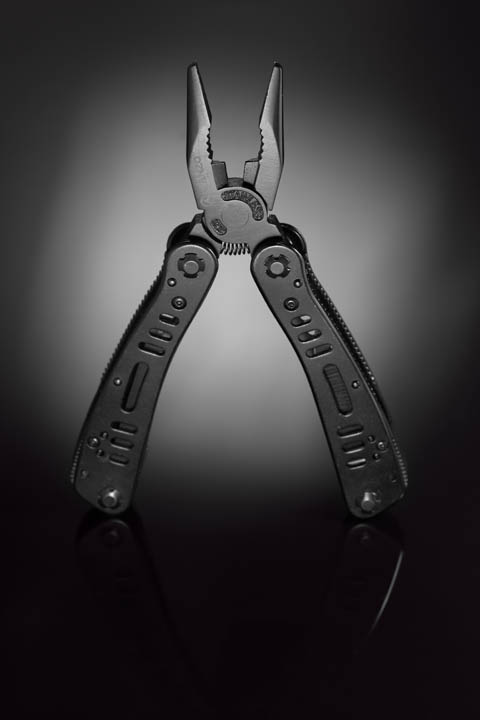
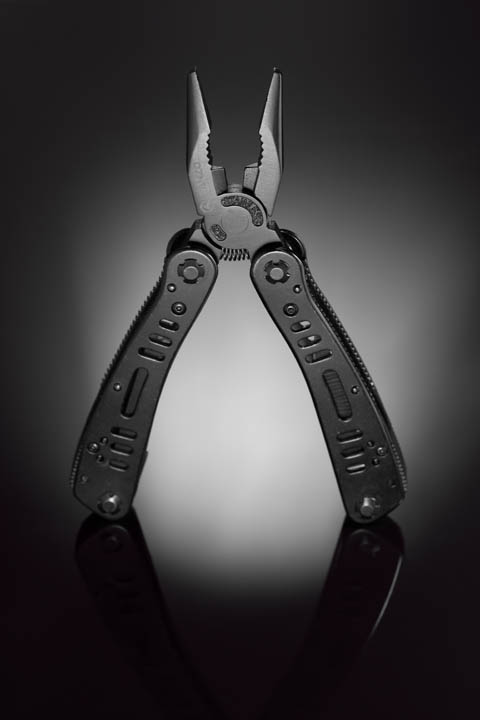
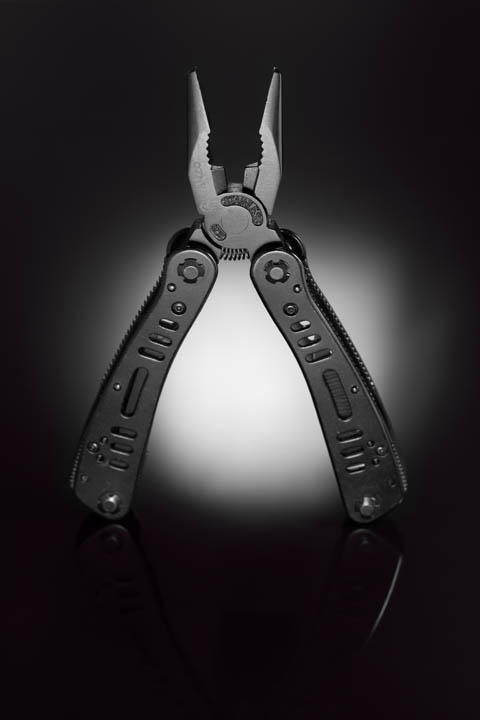
As well as creating a spotlight on the background, you may well want to add additional lighting to light your product. For the photos of the tool standing up in this article I used a light off to the right to help highlight edge of the product, a reflector on the left, and another light to light the front of the product.
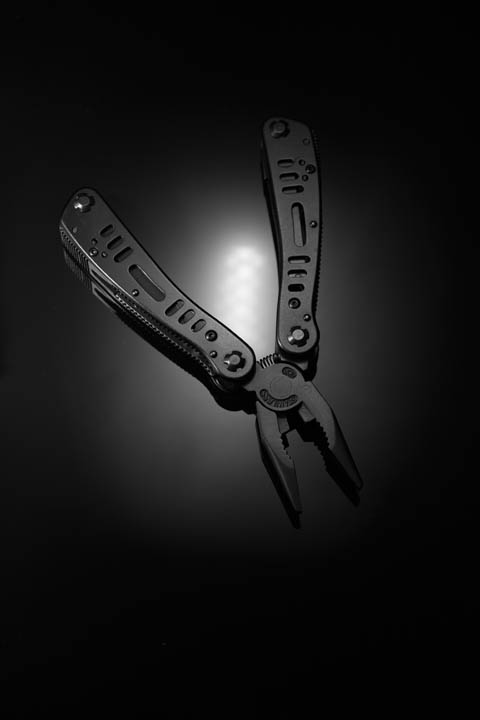
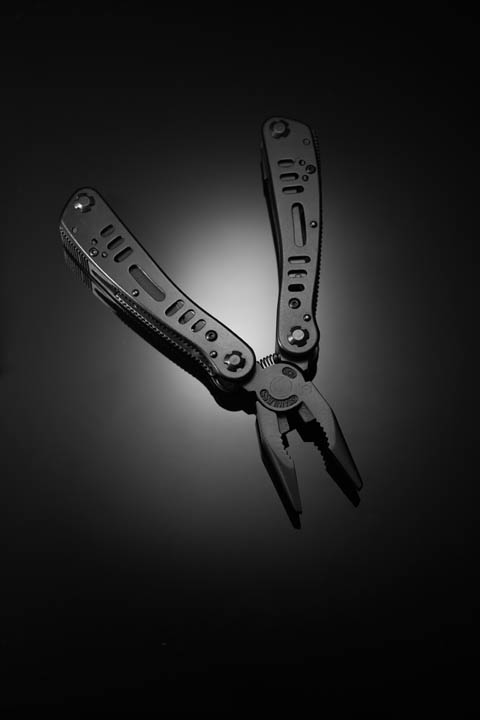
For the product lying flat on the plexiglass, I used a light off to the left to help highlight the edge of the product.
Only have one light? You can cheat by taking differently lit photos then combing them together.
One of the difficulties in working with black plexiglass is that dust shows up very easily. When you have everything set up, clean the surface using a soft anti static cloth (and anti-static plastic cleaner if you have it available) before you start taking your 'real' shots.
You'll likely still get some dust on the surface that needs cleaning up in post. Selectively applying very strong noise reduction to the background areas in the image can be a quick and easy way to remove small specks of dust.
You might not be able to get all the product in focus in a single shot. If you want the whole product in focus, then try focus stacking.


