Don’t make these 7 mistakes with flash
Almost all cameras sold today, whether a phone, compact, or ILC, feature a built-in flash. The few that don't (as well as many that do) often have a hot-shoe for adding a speedlight flash. And many photographers have one or more speedlight flashes they can use when the need arises.
But good use of flash isn't simply letting the camera pop up the flash whenever you're shooting in low light levels. In this article we'll look at seven mistakes people sometimes make regarding flash, and how avoiding these mistakes can help you get better photos.
Thinking it's not worth using during the day
A common mistake many people make is thinking there's no point in using flash when shooting portraits during the day. It's not surprising that many people think this, after all, there's plenty of natural light around during the day, so why would you need to add light using flash?
The answer is mainly to do with controlling the direction of the lighting on your subject. During the day, the sun is quite high in the sky and will cast strong shadows in your subject's eye sockets, under the nose, and under the chin. These shadows don't work well to create a flattering portrait.
By having the subject turn so that their back is to the sun, (or moving them into an area in shadow), this puts their whole face in shadow. You can then brighten their face using a small amount of flash. Because the flash is not high up above the subject, this avoids the ugly shadows that the bright sun creates during the day. This technique is often referred to as 'fill flash', because you're using the flash to fill (brighten) the shadow areas.
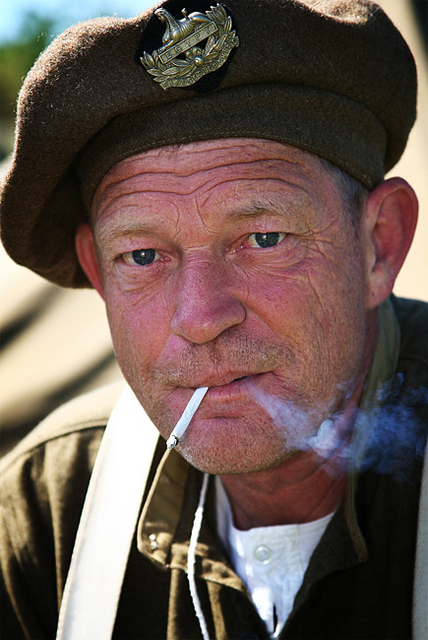
Maiden Newton at war Sun 220 blog by uncle keith on Flickr (licensed CC-BY-ND)
Having the sun behind the subject also also opens up more creative lighting possibilities through the use of two light sources (flash and the sun). Bounced sunlight acts as your main light, the flash acts as your fill light (or vice versa), and direct sunlight can act as a hair light or rim light.
The light from the sun hits the edges of the subject, which helps separate them from the background. This can be particularly effective if photographing the subject against a darker background (such as an area in shadow).
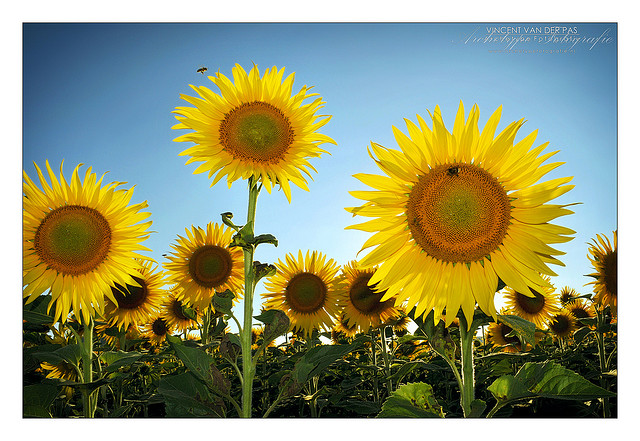
Buzzing Sunflowers by Vincent_AF on Flickr (licensed CC-BY-SA)
Not diffusing it
While bare flash can work well, in most situations diffused flash will work better. The problem with bare flash is that it is a small point light source, and so the light it gives out is quite harsh. This means it creates strong hard-edged shadows and bright highlights.
The larger the light source, the softer the light. Soft light gives shadows with soft feathered edges, and highlights that smoothly roll off. Unless you are trying to bring out the texture in something, soft light generally gives much nicer results, especially for portraits.
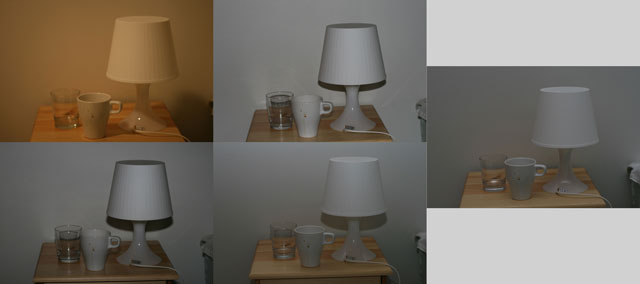
Flash testing by Jan-Erik Finnberg on Flickr (licensed CC-BY). Clockwise from top left: No flash, Pop-up flash, Bounced speedlight flash, Speedlight flash at 45° (mix of bounced and direct), Direct speedlight flash.
A small light source such as a flash can be made into a larger, softer, light source in two different ways. One way is to bounce the flash off a large surface, such as a ceiling or wall. Most speedlight flashes, and some cameras' pop-up flashes have rotating or tiltable heads that allow you to do this when indoors.
For cameras with pop-up flashes that don't tilt upwards, you can purchase bounce accessories such as the Lightscoop. Or just attach a foil covered piece of card in front of the pop-up flash, angled to reflect the light up at the ceiling for a DIY bounce card.
Aah! by Tricia on Flickr (licensed CC-BY)
As a bonus, aiming the flash at a wall or the ceiling also bounces a lot of the flash around the room. This gives a photo where the lighting looks much more natural, rather than the brightly lit person standing in a dark room look of straight on-camera flash.
On the negative side, it does use up more power though. Increasing your ISO somewhat can help reduce the flash power needed, as well as giving more of a balance between the flash and the ambient lighting.
The other method of softening the lighting from flash is to shoot the flash through a sheet of semi-translucent material. The larger the piece of material, and closer it is to your subject, the softer the lighting will be.
Rachel by Sean McGrath on Flickr (licensed CC-BY)
Note that the flash also needs to be far enough from the material for the light to spread out when it hits it. If you place a large sheet of diffusion material next to your subject, then hold then flash right next to the material, it won't have much effect on the light quality at all.
Generally most diffusers are just made from a thin sheet of white fabric. But it can be anything semi-transparent, you could use a sheet of tissue paper. A softbox is also a form of diffuser, just with a reflective enclosure between the front diffusion material and the flash to minimize light spill to the sides and increase efficiency.
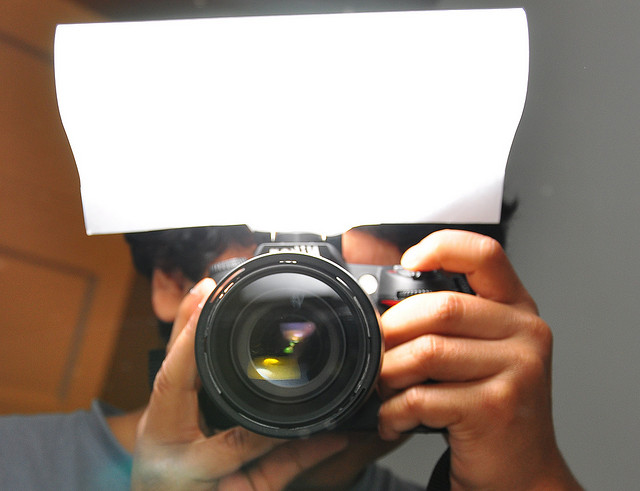
The home-made diffuser+softbox at work! by TMAB2003 on Flickr (licensed CC-BY-ND)
When the light from the flash hits the diffusion material, it spreads out, creating a much larger light source, and so softening the light. You can get (or make) diffusers in a large number of different sizes, from small ones designed to add to a pop-up flash, to massive 7 foot octabanks designed for studio flashes.
Forgetting about shutter speed
One of the main reasons for using flash is when shooting in dim lighting conditions. Adding more light to the scene (by use of flash) allows you to keep a hand-holdable shutter speed without underexposing the image.
However, combining flash with a slow shutter speed can actually work very well to capture an image that combines both sharpness and blur. The slow shutter speed results in blurring (when the subject is moving or you are hand-holding the camera). But the quick burst of light from the flash freezes the movement at the point it fires.
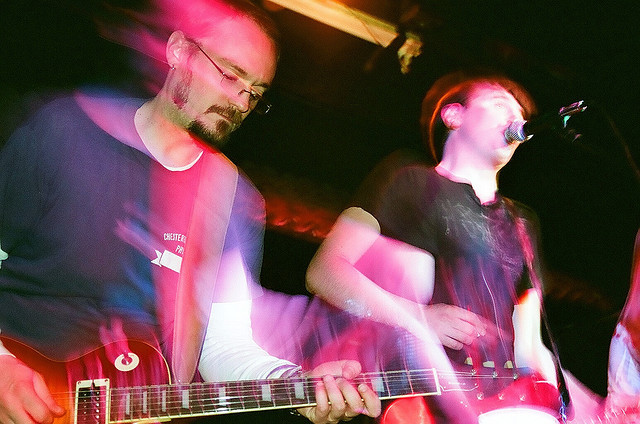
Untitled by Timothy Tolle on Flickr (licensed CC-BY)
Conversely, flash is not so effective at fast shutter speeds. Indeed, getting flash to work at fast shutter speeds can be quite tricky. Due to the way the shutter works in most cameras, above a certain shutter speed only a section of the image is exposed at any one time during the exposure.
The duration of the light emitted by a flash is very fast, typically around 1/1000s - 1/10000s. Firing the flash during a fast exposure then, results in only part of the image being recorded as being lit by the flash.
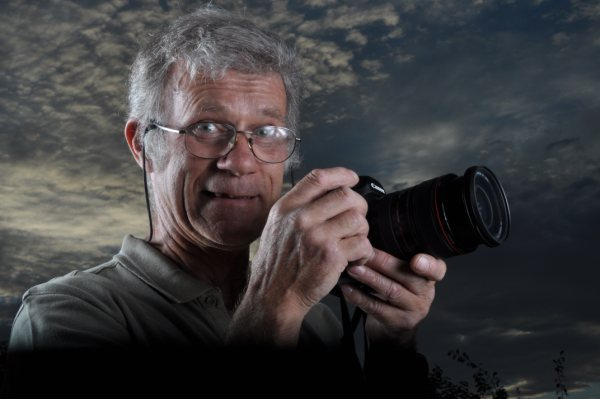
Keith at Mark's evening 2 by uncle keith on Flickr (licensed CC-BY-ND)
The maximum shutter speed the camera can manage where the whole image sensor is exposed at once (and so flash will light the whole image) is known as the flash sync speed or X-sync speed. So the camera normally needs to be kept at or below this shutter speed for flash to work effectively. Note this speed varies between camera models - typically it is around 1/180 - 1/250s.
When photographing subjects that are not brightly lit by ambient light, it is still possible to get a very fast exposure time when using flash though. The duration of the flash becomes the effective shutter speed.
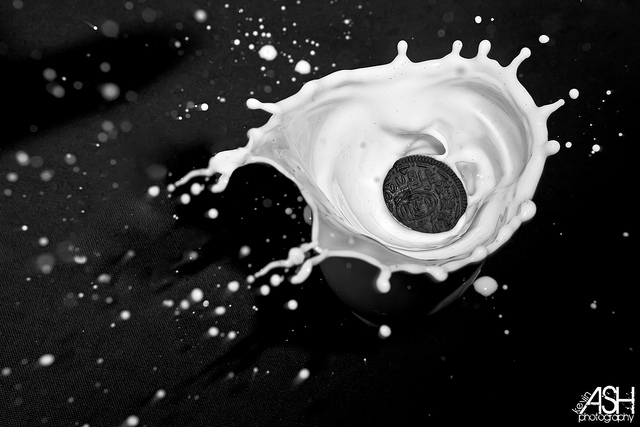
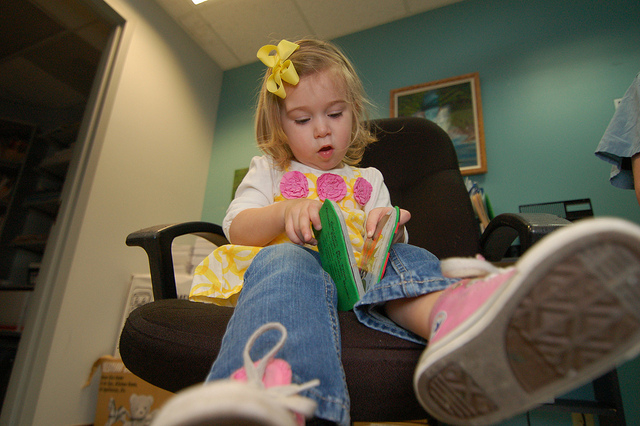
C is for Cookie! by http://kevinashphotography.com on Flickr (licensed CC-BY-ND)
So, you might set your camera to 1/200s, and the duration of your flash might be 1/5000s. If the majority of light hitting your subject during that 1/200s comes from the flash (which will generally be the case unless shooting outdoors on a sunny day or using a large aperture setting), then your effective shutter speed is 1/5000s.
Working with higher shutter speeds becomes much more difficult if shooting a well lit subject though. Some flashes / cameras feature a High Speed Sync mode, which lets you use them at faster shutter speeds. This does come at a cost though, the faster the shutter speed you use, the lower the maximum power the flash can give.
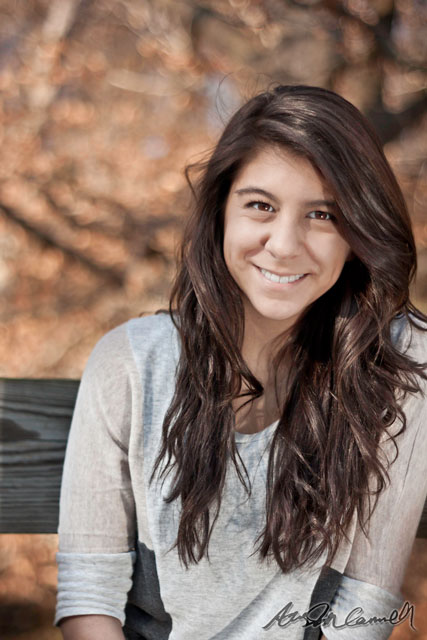
DSC08321 by Austin Connell on Flickr (licensed CC-BY-ND)
The other alternative is reducing the amount of ambient light, so that the flash becomes the main light source. Unfortunately, if your shutter is already at your camera's max flash sync speed, then you're stuck with the aperture, and ISO controls, and the possibility of adding ND filters to the lens. All these will reduce the strength of the ambient lighting in the image, but also reduce the strength of the flash by the same amount.
So this technique requires a powerful flash. It can be done with a single speedlight flash, but typically overpowering the sun is done with several speedlight flashes fired together, or a more powerful studio strobe with battery pack. Bear in mind that the closer the light is to the subject, the stronger its effect.
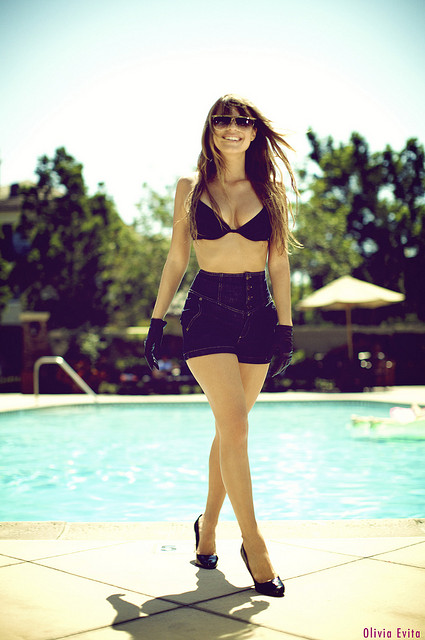
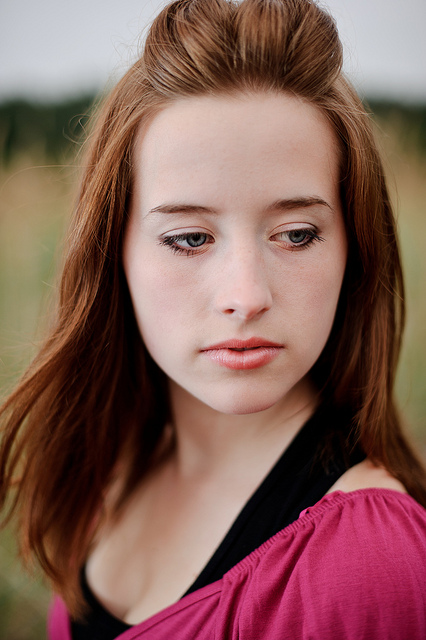
Olivia (#60321) by mark sebastian on Flickr (licensed CC-BY-SA)
Using when shooting through glass
When at an aquarium, for example, you'll sometimes see people taking photos with flash, while standing back from the glass. This generally doesn't work too well, and you get a photo with a strong reflection of the flash on the glass.
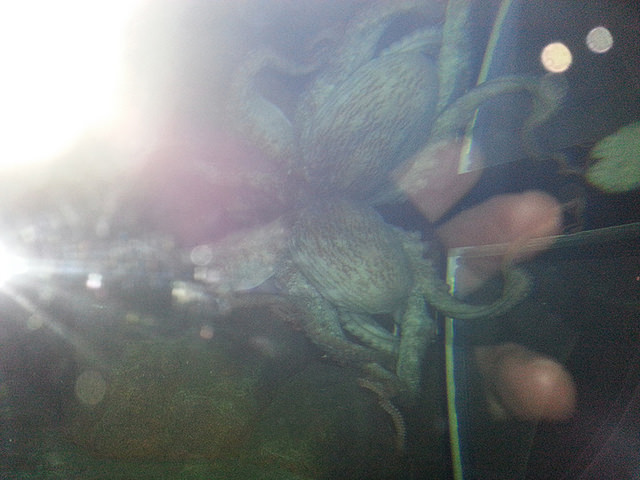
20150426_134631 by Feline Groovy on Flickr (licensed CC-BY-ND)
If you can get your camera right up against the glass, then the flash is less likely to affect the image. However, in the case where there are more than one layer of glass (or plastic) between you and the subject, you may still get reflections from the flash.
If you can use an off-camera flash, you may be able to position it so that it lights the subject on the other side of the glass without highlighting the glass itself too much.
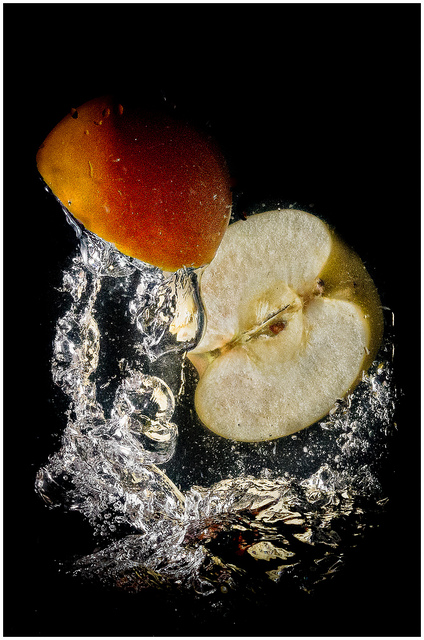
Splash... by stephane on Flickr (licensed CC-BY)
The other option is to avoid using flash and just use a high ISO setting instead. A grainy image is likely to better than one where the subject is half covered up by the reflection from the glass of your flash.
Leaving it on auto
When I say that you shouldn't leave your flash on auto, I don't mean you shouldn't use automatic flash exposure. The auto TTL flash exposure of most cameras tends to be pretty good. But rather I mean that you shouldn't let your camera decide when flash is needed and when it is not.
If you're taking a few snaps of a play you're attending (assuming photography is allowed at all), the performers (and the rest of the audience) aren't likely to appreciate the bright burst of light from your camera's flash whenever you take a photo.
If you're trying to take a candid photo of someone, but your camera pops up the flash to add some light, the photo is not likely to be as candid as you wished. (Most cameras use a low power pre-flash to determine the flash exposure needed before they take the actual photo. In auto mode a pre-flash may also be used to reduce red-eye. So using flash can alert someone you're taking a photo of them before the actual photo is taken).
If you're photographing a large building or a football game at night, your camera's flash isn't going to make any difference, even when firing at full power. All it does is waste the batteries.
So, don't worry about using your flash in an auto exposure mode, but do try to avoid using a shooting mode that fires the flash whenever the camera thinks it needs it. You should be able to tell whether an image would benefit from flash or not better than your camera can.
Buying a speedlight flash and only using it on-camera
Just to be clear, there's nothing wrong with using a speedlight flash mounted on the hot shoe of your camera. It provides much more power than your camera's built-in flash, and can provide very nice lighting when bounced off a wall or ceiling. But you can get much more interesting lighting in many cases by using your flash off-camera.
Off-camera lighting allows you to change the direction from which the light is hitting your subject. Changing the direction of light changes the areas that are highlighted and those that are in shadow, meaning you can get very different images just by changing the position of your light.
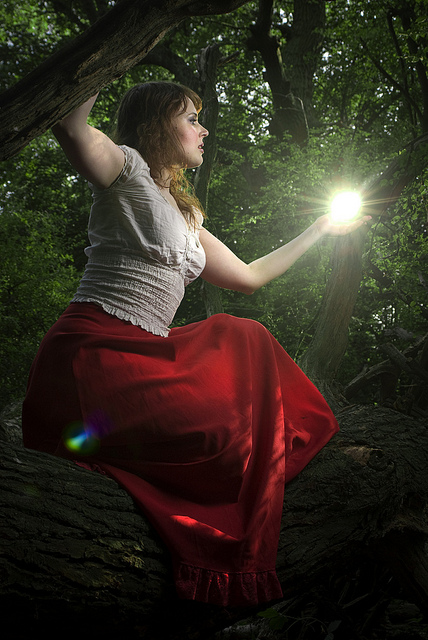
Strobist Forest Shoot 26th July 2010 by Algy O'Connell on Flickr (licensed CC-BY-ND)
Add in multiple off-camera flashes, and you can really get creative with your lighting, especially when adding various light modifiers and colored gels to the mix.
Ignoring third party branded flashes
Some people seem to think that it's only worth buying the camera manufacturer branded flash models, and ignore all the much cheaper third party speedlights. But this is a mistake.
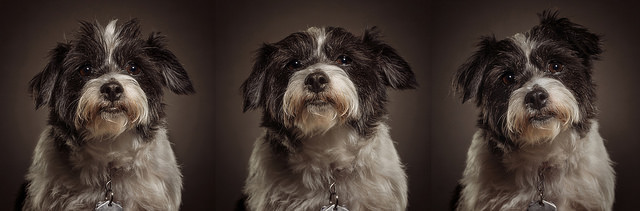
The many faces of Maggie Mae by MattysFlicks on Flickr (licensed CC-BY) - lit with one camera manufacturer branded flash (Minolta) and two cheaper third party (YongNuo) branded flashes.
Third party speedlight flashes offer a large range of options. From basic manual power models, to those that offer full TTL auto flash support and matching features to the top branded flashes, yet at a fraction of the cost. Why pay more for a branded flash when you can expand your lighting possibilities with two or three (or more) equivalent third party flashes for the same price?
Of course, reliability could be an issue with some third party flash guns. But so long as you're not purchasing a newly released third party flash, you should be able to find plenty of reviews to check how reliable it is. A lot of third party flashes have very good reliability records. Warranty can be trickier, but given the cost difference, is it really worth paying much more for a camera manufacturer branded flash just for the warranty?


Dear Sir,
An excellent and thorough article. I shall try out the suggestions in due course.
Your last paragraph about considering third party flashes is good.
Could you do a piece on flash guns per se? Like what to look for when buying one? Why price differences (apart from the ‘brand’)? What factors affect their quality? What type of flash suit what type of photography? And so on.
I think that will be a good guide for those who desire to buy one (like me).
Thanks and regards.
Sincerely yours,
Hi Ravindra
Thanks very much, I’m glad the article was helpful, and I like your suggestion for another article. I’ll write something up on that and hopefully publish it within the next few weeks.
Kind regards
Dave