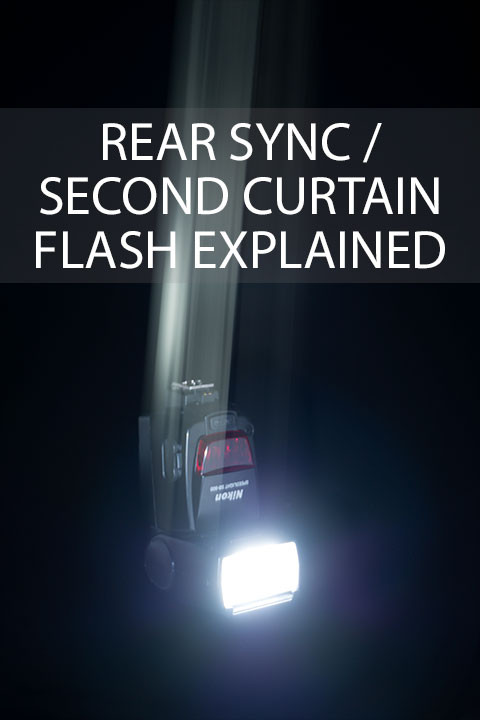
Rear Sync or Second Curtain Flash Explained
Rear or second curtain sync flash is a flash mode available on many (though not all) cameras. It is designed for use when you want to combine a slow shutter speed with flash. Unlike the standard flash mode, rear curtain sync flash will fire the flash at the end of the exposure, rather than the start.
In this article we'll take a in-detail look at rear curtain sync flash, looking at how the resulting image differs to standard flash, and why and when you might want to use this flash mode.
How does Rear / Second curtain flash differ from standard flash?
As I stated in the introduction to this article, the difference between rear curtain and standard (first or front curtain) flash is when the camera's flash fires during an exposure. First curtain flash, which is the normal flash mode, will fire the flash right at the start of the exposure. Second curtain flash will fire the flash right at the end of the exposure.
You will only be able to see any difference between the two modes when using a relatively slow shutter speed. With fast shutter speeds, the time difference between the start and end of the exposure is so small that whether the flash is at the start or end of the exposure makes no difference. Some camera models will always use first curtain sync flash above a certain shutter speed, even if you have second curtain sync set as the flash mode. This technique of using a relatively long exposure (typically anything longer than 1/25s ) combined with flash is often called 'dragging the shutter'.
The benefit of rear curtain flash comes when you are using a slow shutter speed and have your subject traveling across the frame in your image. Without flash this would just appear as a blur. But by adding flash at the end of the exposure, the flash 'freezes' the subject, with the trail of blur behind them.
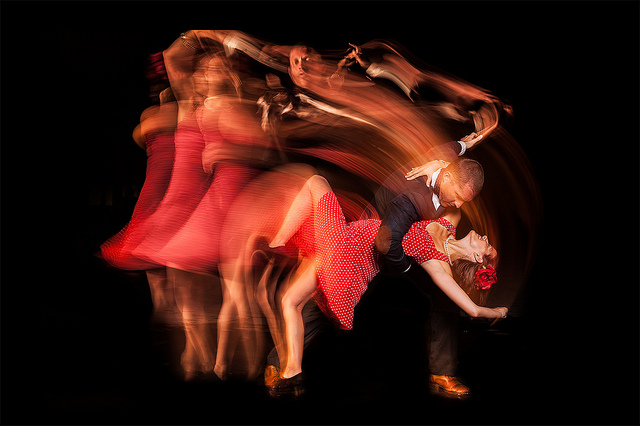
Easy Swing by Jonathan Vahsen on Flickr (licensed CC-BY-ND)
Whereas with first curtain flash (the standard flash mode), the flash will fire and freeze the subject right at the start of the exposure. Then as they carry on moving during the exposure, they will create a blur trail in front of them. This can look quite unnatural and strange, as if the subject is moving backwards.
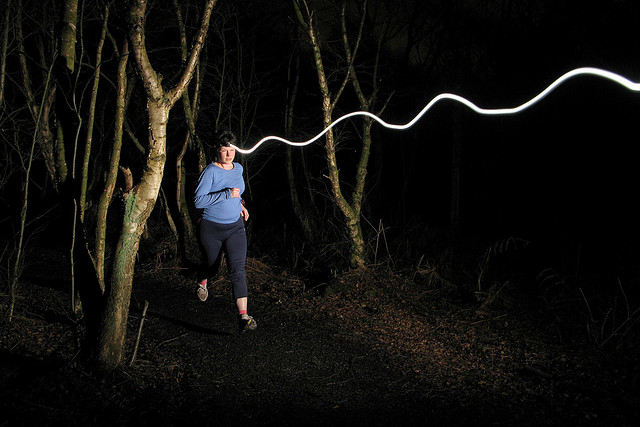
Day 130 - Midweek Run by Phil and Pam Gradwell (to be) on Flickr (licensed CC-BY)
If you are photographing a static subject, nothing in the scene is moving, and the camera is not moving either, then you won't see any difference between a photo shot with first curtain or rear curtain flash. The difference only comes when you are using a slow shutter speed and the image includes movement of some sort.
Enabling Rear / Second curtain flash
As I said earlier, not all cameras support rear curtain flash sync. However, most DSLRs, Compact System Cameras, and advanced fixed lens cameras do have it available as an option. You will normally find it somewhere in the camera settings menu, often grouped with other flash related settings. Bear in mind that some cameras only display certain options depending on other options you have set, so if you can't find the setting easily, then it is probably worthwhile to check your camera manual. This should tell you exactly where in the menus the rear sync / 2nd curtain flash setting is and what other settings (if any) could make it unavailable.
Unfortunately, even if a camera does support rear curtain flash, this mode is not always compatible with speedlight flashes. Some camera manufacturers purposefully limit this feature to only be available when the camera detects that a flash from the same manufacturer is attached. However, some third party flash manufacturers have managed to work round this, so the camera thinks that the flash is an official model, and will let you use special flash modes such as rear sync flash.
But with many older external flashes, or more basic third party speedlights, you may find that your camera does not allow you to use rear curtain flash. In this case there are a couple of possible workarounds. The first is to use your camera's pop-up flash (if it has one, and if the pop-up supports rear-sync flash) to trigger your speedlight flash off-camera. For this you need an optical trigger for your external flash. Many speedlights come with an optical trigger built-in, or you can buy one separately that attaches to your speedlight's foot.

Example of an optical slave trigger for use with speedlight flashes that do not have an optical trigger built-in
Then, when your camera fires the pop-up flash at the end of the exposure, this in turn will trigger your external speedlight flash. There are a lot of 'ifs' with this procedure though. There has to be enough time between the camera firing its flash and the end of the exposure for the optical trigger to receive the flash from the pop-up, trigger the speedlight flash, and then the speedlight flash to fire.
Given that the flash is meant to fire right at the end of the exposure, this is a very tight timing, and you could find that the speedlight flash fires after the exposure has already finished. You could also find that you end up with double 'frozen' parts in your image. The subject could be frozen first by the pop-up flash, then again a few milliseconds later by the speedlight flash. This will depend on how quickly your subject is moving and the amount of delay between the pop-up flash firing and the speedlight flash firing.
The other option, again with using the speedlight flash off-camera, is to use a radio trigger that allows setting a delay for the flash. In this instance you would put a radio trigger in your camera's hotshoe, and another (receiver) attached to the speedlight flash. You then use the trigger to use delayed flash to make it so that the flash will fire near the end of the exposure. For example, for a 3s exposure you might set the trigger for a 2.9s delay.
The main disadvantage of this is that if you change your shutter speed, you then also need to change the flash delay. You also want to make sure you get the delay as close to perfect as possible, otherwise you could end up with a little bit of blur after the flash fires. Finally, not many radio triggers offer a delay option, and models with a delay setting tend to cost quite a bit more than the most basic radio triggers.
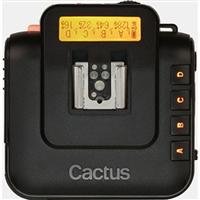
The Cactus V6 - example of a radio flash trigger with delay setting
So, if you are considering buying a speedlight flash, then it is worthwhile checking whether it will be compatible with the rear curtain sync mode of your camera.
Tips for using rear curtain flash
For the freezing effect of rear sync flash to work well, your subject needs to be against a dark background. If there is too much ambient light in the scene, then the camera will record this light on the background, and your frozen subject will appear partially transparent.
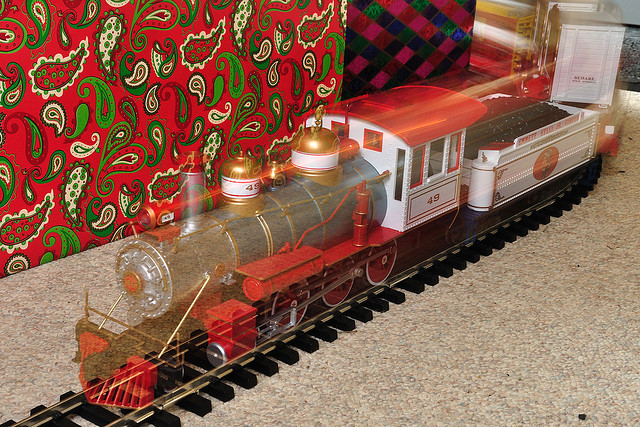
Circus Train Under the Christmas Tree by Don DeBold on Flickr (licensed CC-BY)
Knowing that parts of the scene lit by continuous light will blur (if the subject or camera is moving) while parts lit mainly by flash will freeze can be used to creative effect. You can choose which parts of an image to blur during the exposure by using a continuous light aimed carefully where you want it. Note that you may have to use some kind of light modifier, (such as a grid, snoot, barn doors, or just pieces of card) to help direct where the light shines.
A more general tip for using long exposures with flash (it could be rear or first curtain sync flash) is that you don't need to have a moving subject to get an interesting photo. If you have a mostly dark scene with some lights in it, you can move the camera during the exposure, which will blur the lights. But the flash will freeze your subject. You end up with an image of a sharp subject with light trails moving across the image.
Goldies Jan.07.2011 by Sharif / Sean Sharifi on Flickr (licensed CC-BY-ND)
The main use of rear sync flash is for capturing both a sharp image of a subject, but also capturing their movement. Panning is often a method used to achieve this same aim without flash. But what about if you combine panning with a moving subject and rear sync flash? If you're panning slightly slower than the subject is moving across the frame, then you'll end up with a blurred background, a short blur trail behind the subject, and a sharp subject.
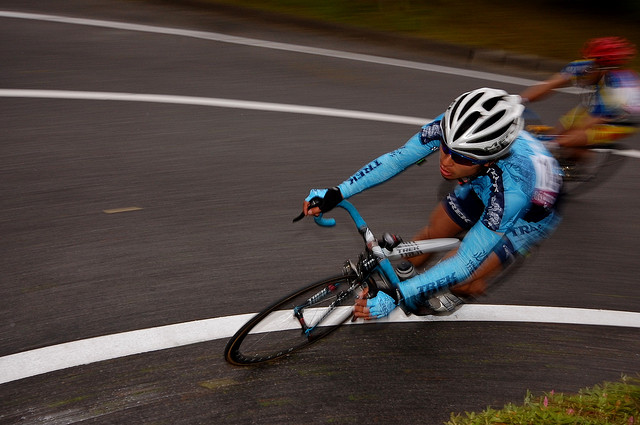
Rear Sync Bike by musume miyuki on Flickr (licensed CC-BY)
Even if you panned at the same speed as the subject, you'd likely end up with a sharper subject than you would by just panning with no flash. The technique of combining panning and flash is particularly useful when the subject is not moving parallel to you, which is a situation where just panning without flash doesn't work so well.
Finally, here's a video that not only explains the theory behind 2nd curtain flash, but also gives a nice example of its use for a creative image:
Hopefully you'll agree that combining second curtain flash with a slow shutter speed can be used to capture some great photos that you couldn't get any other way. It can be a hassle if you want to get it working with an off-brand speedlight, but once you've used second curtain sync it's unlikely you'll find much reason for ever using the standard flash mode of first curtain sync again.


