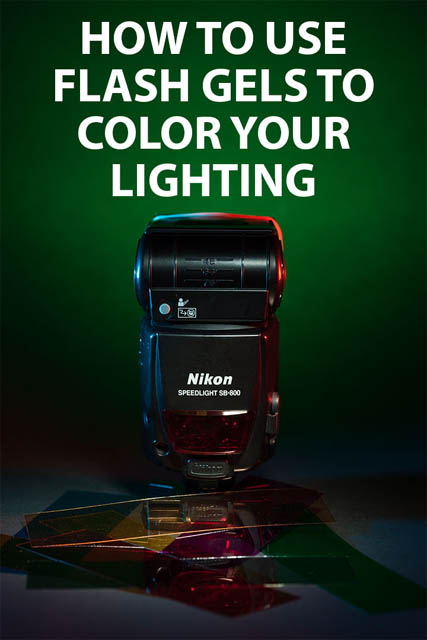
How to use flash gels to color your lighting
Flash gels are thin pieces of colored plastic that you can place over your flashgun, studio strobe, or any other artificial light source to modify the color of the light. (Actually they don't always have to be colored - we'll look at some neutral flash gels at the end of the article).
The reason they are known as gels is because they were originally made from gelatin. Plastic is a lot more long lasting, cheaper, and easier to use, so you're unlikely to find any flash gels still made from actual gelatin today. In this article we'll look at how you can use flash gels for balancing flash with ambient light, creative use of gels for colored lighting effects, how they can be used for reducing the light power, and creating softer lighting.
Lighting gels come in a wide range of sizes. You can buy small pieces designed to cover the end of a speedlight flash. Or you can buy large sheets designed for use with theater lights.
y2.d2 | tech week by Bryan Rosengrant on Flickr (licensed CC-BY-ND)
There are many sellers that sell a kit of various colors in sizes suitable for use with speedlight flashguns, and I would recommend purchasing one of these for most photographers. These kits are quite cheap and give you the most common colors you're likely to want. And all in the correct size for a flash, so you don't have to spend time cutting down larger filters.
There are a wide range of manufacturers making lighting gels. The largest two are probably Lee (who also make photographic filters) and Rosco. There are plenty of unbranded gels available too, but the kits made from Rosco or Lee filters tend to be very reasonably priced as well as being good quality.
Attaching lighting gels to your flash
Many kits include some method of attaching the gels to your flash. The simplest is velcro. You add pieces of velcro either side of the flash head, and pieces of velcro at either end of the flash gel. The flash gel then bends over the head of the flash, attaching at either side with the velcro.
If you don't want to add velcro to your flash, you can find plastic gel holders that attach to the front of the flash. Or you can just use an elastic band.
Use of gels with hot lights
If you are planning on using gels with a light that gets quite hot, such as a studio strobe or non-LED continuous lighting, then you should check the gel can handle the temperature. You don't really want to melt a colored gel to your light.
Speedlight flashes can get hot, but generally not really hot. I don't think I have ever heard of anyone melting a gel to their speedlight. And regardless, if you buy one of the gel kits designed for speedlights, then you can be sure they are suitable for that purpose.
Lighting gels and light loss
All lighting gels will cause a certain level of light loss. The deeper / stronger the color, the more light power will be lost. Often the gel manufacturers will publish information on how much light loss the gel causes. In most cases it will be less than one stop of light.
Since flashes allow you to control their power in stops, it is easy to compensate for any loss of light caused by a filter gel. If the gel causes half a stop of light loss, just increase the flash power by half a stop to compensate. With some gels you may find the loss of light is so minimal it's not even worth compensating for.
Durability
Being made of plastic, flash gels are pretty durable. They don't tear easily, and while they can get scratched or fold marks, these don't affect the lighting.
Over time the colors in gels can fade, but the dyes used in modern gels are very good. If you leave your gels out in the sun for a very long time you'd probably notice some ill effects, as with anything made of plastic. But used in a normal way, they should last you several years.
Using gels to match flash to ambient light
One of the main uses of flash gels is when you are photographing under colored lighting (e.g. tungsten, fluorescent), but need to add in a bit of extra lighting with a flash. Flashes are color balanced to daylight, whereas fluorescent lighting has a green tint, and tungsten appears quite orange.
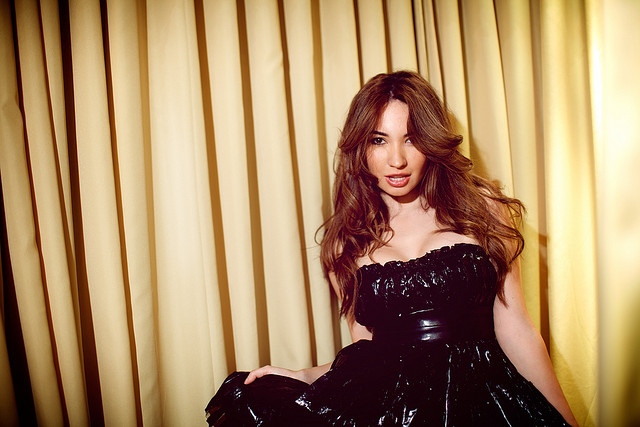
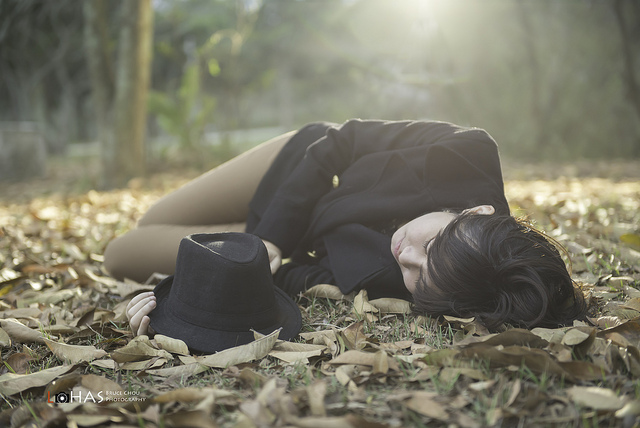
Jackie Martinez (#90896) by Mark Sebastian on Flickr (licensed CC-BY-SA) - CTO gel used on flash to match tungsten lighting from above
If you're shooting under fluorescent lighting, for example, you'd set your camera to use a fluorescent white balance. This adds magenta to the image, which neutralizes the green tint from the fluorescent lighting. But when you add in your daylight balanced flash, the light from this will now look magenta due to the white balance setting.
The solution is to gel your flash so that its color matches that of the ambient lighting. By adding a green gel to your flash, the flash will no longer look magenta, but neutral, as the fluorescent white balance setting neutralizes the green color.
There are three commonly used color correction gels:
- CTB
- Color Temperature Blue isn't that useful for color correction with flash, but can be used over a tungsten light to bring it to a similar color temperature to daylight.
- CTO
- Color Temperature Orange can be used to make a daylight balanced light (like flash) match tungsten lighting. A light orange can also be useful for matching sunset / sunrise light.
- Green
- Often called 'plus green' or 'window green', used to make a daylight balanced flash match fluorescent lighting.
These gels are all available in a number of strengths, typically quarter, half, and full. This allows you to adjust the amount of color you add to your flash, so you can match it carefully to the ambient lighting. Not all lights will have the exact same intensity of color, some will be stronger than others. So you can adjust the intensity of the colored gel you use to match.
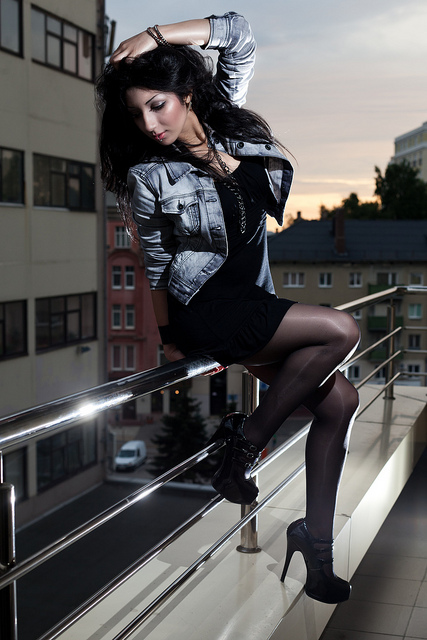
Recent Party Shots 😉 by heipei on Flickr (licensed CC-BY-SA) - CTO gel used to match flash to ambient lighting
If you're wondering how you tell what strength of gel you'll need, well that's a bit trickier. It's just a case of testing. Set your camera to the correct white balance for the ambient light. Add a gel to your flash and take a test shot. You should be able to see whether the output of your flash matches the ambient lighting or not.
If the flash is over-corrected, use a weaker gel. If it's not corrected enough, use a stronger gel. You can double up on gels to create a stronger effect too. Two half CTO gels will have the same effect as a single CTO gel.
DSC_5352 by BoChengChou on Flickr (licensed CC-BY) - ½ CTO gel used to match the flash to the warm color temperature of the late afternoon sun.
When not to color match
In some cases matching your artificial lighting to the ambient lighting can make an image weaker rather than stronger. If you're photographing a portrait under cloud or in the shade, technically you would add a light blue to your flash to match the color temperature of the ambient lighting.
Wilhelmina Volter by Dima Bushkov on Flickr (licensed CC-BY) - white balance set for flash, resulting in background having a slight blue tint and helping the subject stand out.
However, if you you don't gel the flash, then the subject will be lit with slightly warmer light than the rest of the image. This helps bring them out from the background. The difference in color temperature doesn't tend to be massive, it's not a big jarring difference. Just enough to draw attention to the subject.
Same subject, different light by Miika Silfverberg on Flickr (licensed CC-BY-SA) - left natural light (shade), right with flash with warming gel
In a similar way, you can add a slight orange gel to your flash when photographing in sunlight to warm up your subject's skin tones a bit.
Creative color with flash gels
As well as correcting flash to match ambient light, color gels can be used to purposefully color the light a completely different color. This can be done in combination with ambient light, or using flash alone.
This is where more color gels, such as red and purple can come in handy. Gelled lights can be used for changing the color of a background behind your subject.
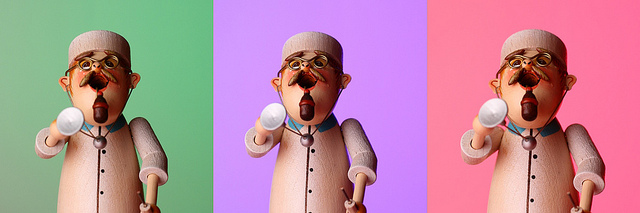
Räuchermännchen by heipei on Flickr (licensed CC-BY-SA)
Or they can be used to light your subject. Using multiple lights with different colored gels can create great images. I think part of the strength of this technique is that it is not an overly used effect - you don't see images purposefully lit with two different colors that often.
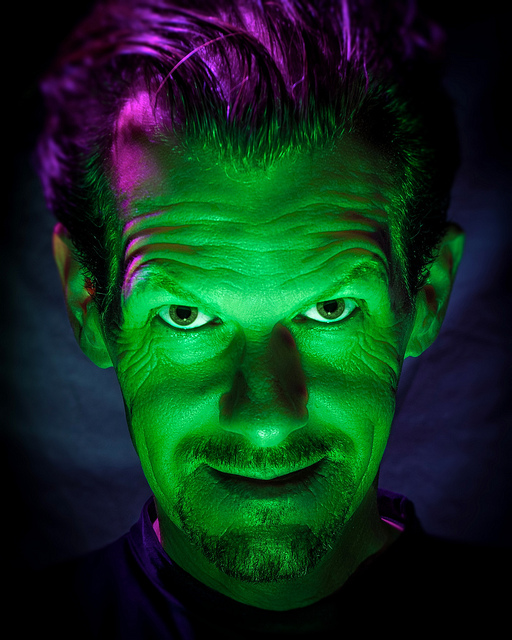
Boris Frankenstein by R.E. Barber Photography on Flickr (licensed CC-BY-ND)
To have the separate colors show up well, it is best to angle the lights from different (typically opposite) directions. That way you have items lit with one color from one side and a different color from the other side. If both lights were positioned close together, the colors would just mix into a single color.
Don't forget that you can also modify the colors by playing with the white balance too. For example, if you photograph a subject with a tungsten white balance and use one flash with an orange gel, and another without a gel. The white balance will make the orange gelled flash will appear neutral and the ungelled flash will appear blue.
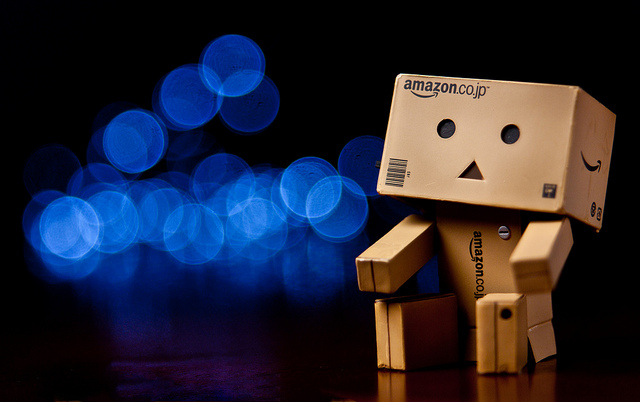
94/365: Jugando con bokeh's by Andrés Nieto Porras on Flickr (licensed CC-BY-SA) - shot with tungsten wb and full CTO on flash, to turn background lights blue
ND and Diffusion Gels
The last type of flash gels I want to talk about are uncolored. Neutral Density gels work the same way as neutral density filters work on a camera. They simply cut down on the amount of light, without altering the color temperature.
You may be wondering why you would want to use an ND gel with your flash. Why not just turn the power on the flash down instead if it's too bright? Well, there can be instances where the flash is too bright even at minimum power. This is where an ND gel can come in handy.
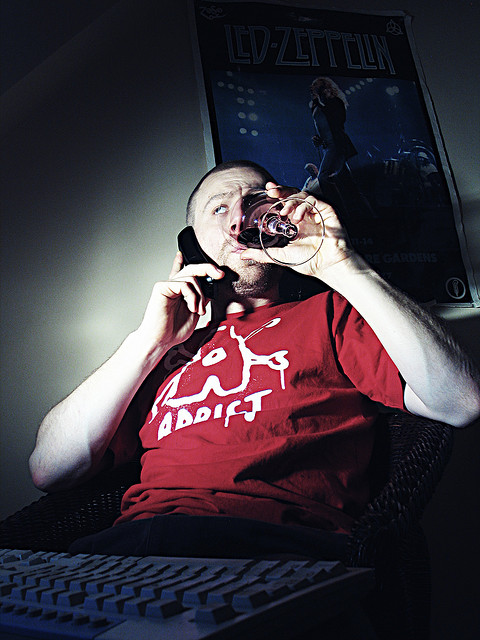
Day 117 - Addict by Phil and Pam Gradwell (to be) on Flickr (licensed CC-BY) - The portrait was lit with a flash that only goes down to 1/16th power so an ND flash gel was used to further reduce the power of the flash to the desired level.
There aren't many occasions when a flash will be too bright even at minimum power though, but a few examples could be:
- Photographing a subject in a dimly lit area where you want to use a very shallow depth of field (large aperture).
- If you need to use a high ISO to capture detail in a background lit by low levels of ambient light (e.g. photographing at night).
- If you're photographing with an older flash, it may only go down to 1/16th power, which can be too much. (Most modern flashes go down to 1/128 power).
These are all quite extreme examples though, you would probably need to be using the flash undiffused and quite close to the subject for the minimum power to be too strong. The further away the flash is, the less of the light hits the subject. And diffusion (such as a softbox) cuts down on the light level too.
Diffusion gels are used to soften the light coming from a flash. They are usually sold as 'diffusion' or 'frost' gels. They spread the light out as it hits the gel, and should be positioned some distance in front of the flash, rather than right against the flash head. See below examples - the diffusion gel used (Lee 216) causes about 1½ stops of light loss, the flash power was not adjusted to compensate for these examples.
Bare flash
Diffusion gel placed up against flash head

Diffusion gel placed between the flash and the subject
Soft light tends to be more pleasing than undiffused light. Harsh highlights and shadows disappear, and the transition between light and shadow areas becomes more gradual. Probably the main use for soft light is in portrait photography, but it can also be very useful for macro and product photography too.
Diffusion gels cause a loss of light, and this is usually given in the name / specification of the gel. As a general rule, the better the gel diffuses the light, the more light will lost. So a one stop diffusion gel will very likely give a softer light than a quarter stop diffusion gel.
Gels are very useful for flash photography, whether it's for balancing flash with ambient light to create a natural looking image, or purposefully using colored lighting for creative effect. Packs of gels for speedlight flashes can be purchased very cheaply, so if you have a flash, why not pick up some gels and see what you can create.


Great post! Really helpful
Thanks a lot
Great article. Thank you for taking tge time to explain it.
Great article! The way you presented Flash Gels and even more importantly demonstrated by example, with explanation was really appreciated!
Cheers,
John