Macro & Close-up Photography Tips – Aperture, DoF, Diffraction
When you take a photo of a landscape, it's not too difficult to get everything from a few feet in front of you all the way to the horizon in focus. But as you get closer to your subject and the magnification level increases, the depth of field (amount of the image in focus) rapidly drops off.
In macro and close-up photography, depth of field is so narrow it is usually measured in millimeters. So taking photos where more than just a thin sliver of the image is in focus can be tricky.

The depth of field in this image covers just a small part of the butterfly's mustache
For this reason, much macro photography work is done with relatively small apertures, such as f/8 - f/16. This produces a slightly larger depth of field, so you can at least get a reasonable part of your subject in focus.
The distance between the camera and subject is normally much shorter than the distance between the subject and background. So despite the small aperture, you'll normally still end up with nicely defocused backgrounds.

Aperture set to f/2.8

Aperture set to f/8

Aperture set to f/16
Placement of the plane of focus
Because depth of field is so small, it is important how you place the plane of focus in your image. Remember that this plane is parallel to the image sensor of your camera. So, as well as considering composition when positioning your camera relative to the subject, you also need to consider the positioning to make sure that the plane of focus will go through the most important parts of the subject.
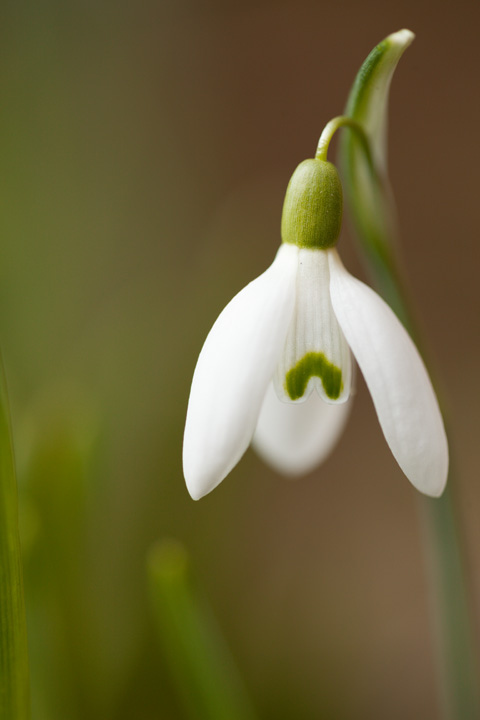
Placing the camera parallel to the flower ensures that most of it is in focus
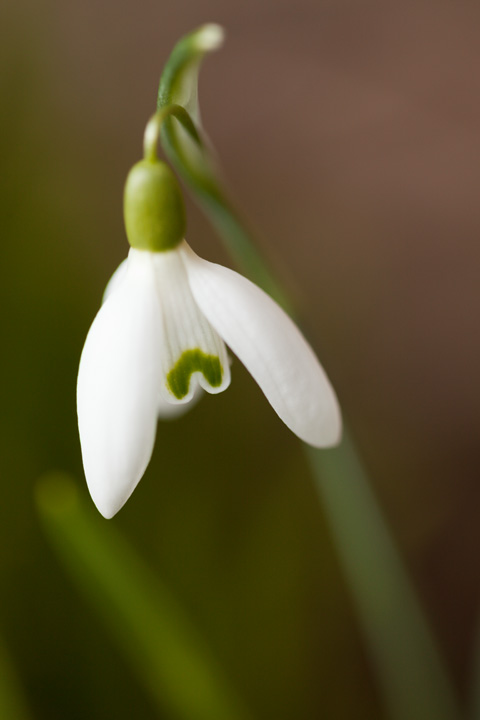
If photographed at an angle, the plane of focus slices through the flower at an angle
Focus stacking
In some situations there may just not be enough depth of field to get the main features of the subject all in focus. Or adjusting the camera position to put the plane of focus in an optimal position may compromise the composition of the photo too much. In this case you can consider focus stacking.
Focus stacking is the process of taking a number of photos at slightly different focus points. These can then be merged into a single image that combines the in focus part of each of the images. Resulting in an image with a much larger depth of field than any of the individual images by themselves.
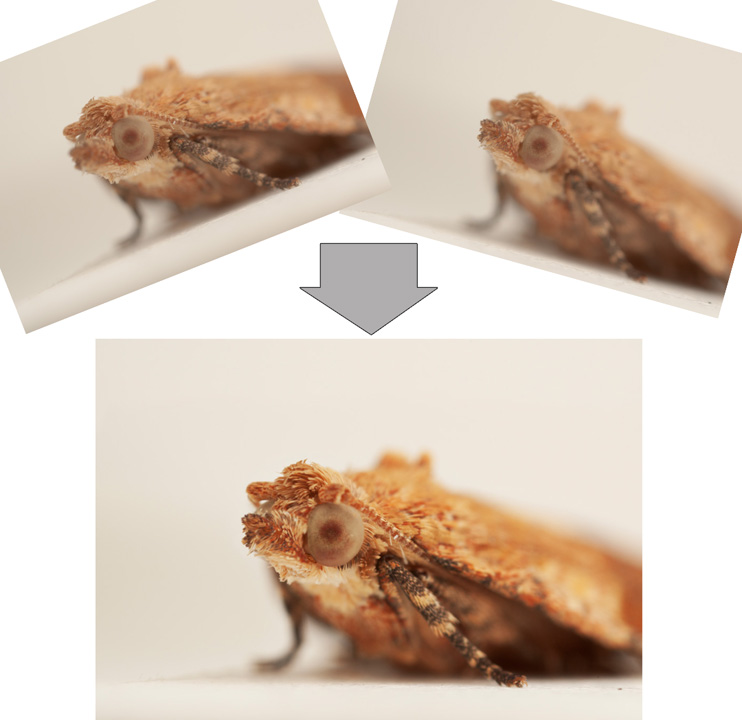
Two photos of this moth were stacked together to get the nose and most of the face in focus
Focus stacking works best in a studio situation where you can precisely control the camera movement and the subject will not move. For outdoors subjects, it will work best during the early morning when there is little wind to blow flower subjects and insect subjects are not moving.
Focus stacking can be used in other situations, but if there is subject movement or camera movement (other than moving the camera backwards or forwards for focusing), then you might have problems combining the stack.
Focus stacking can be done manually by using layer masks in image editing software. Starting with the top layer, just paint out everything that is not in focus (or paint in everything that is in focus), then work your way down through the layers. This is my preferred method when working with a stack of only 2-3 images.
For larger stacks you'll probably want to use some dedicated stacking software. Combine ZP is a popular free focus stacking software. Helicon Focus is a popular paid stacking software, as is Zerene stacker. These programs can take the individual shots, and then automatically combine them into a focus stacked image.
Dust spots
One of the issues of using a small aperture is that any dirt on your camera's image sensor will become visible. This is especially true over areas of an image that are out of focus, which is normally most of the image in a macro photo.
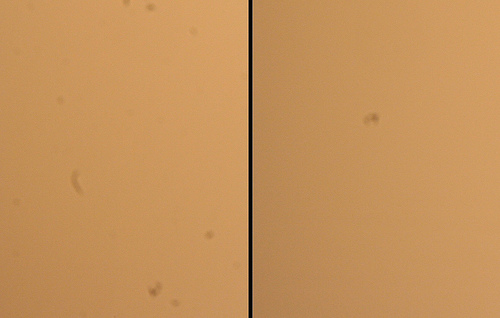
First Sensor Cleaning - Day 172 by Velo Steve on flickr (licensed CC-BY-SA)
If you have a camera with a built-in lens, then hopefully you won't have this problem - if you do, you'd have to have the camera serviced to clean it. Cameras with interchangeable lenses are likely to suffer from the problem though, as dirt gets into the camera when you change lenses. I covered tips on cleaning your camera's image sensor, reducing the likelihood of dust spots, and removing dust spots from existing photos in a previous article: How to clean your DSLR or MILC’s image sensor to remove dust spots.
Diffraction
When you use a very small aperture, your images can suffer from diffraction softening. This is dependent on the aperture used, the pixel density of your camera's image sensor, and how closely you look at the resulting image. It results in fine detail in the image being softened.
- The smaller the aperture, the more likely you are to see diffraction softening.
- The smaller the size of pixels on your camera's image sensor, the more likely you are to see diffraction softening. For example, a compact camera with a small 10MP sensor is more likely to show diffraction softening at a given aperture than a 10MP 35mm full frame camera.
- The larger you display the photo, the more likely you are to see diffraction softening. If you view a photo at 100% zoom you are more likely to see diffraction softening than zoomed out to fit on your screen. In conjunction with the previous point, a 40MP 35mm full frame camera is more likely to show diffraction softening than a 10MP full frame camera when both images are viewed at 100% zoom - you would be effectively enlarging the image from the 40MP camera more than you would be from the 10MP camera.
So although we want to use a small aperture to maximize our depth of field, we also want to avoid using too small an aperture so our images don't suffer from diffraction softening. Ultimately it is a fine line to walk, and the decision whether to give up fine detail or depth of field will depend on the image.
Here are two example photos, one taken at an aperture of f/8, and one at an aperture of f/22. When viewed at normal sizes no diffraction softening can be seen at all.
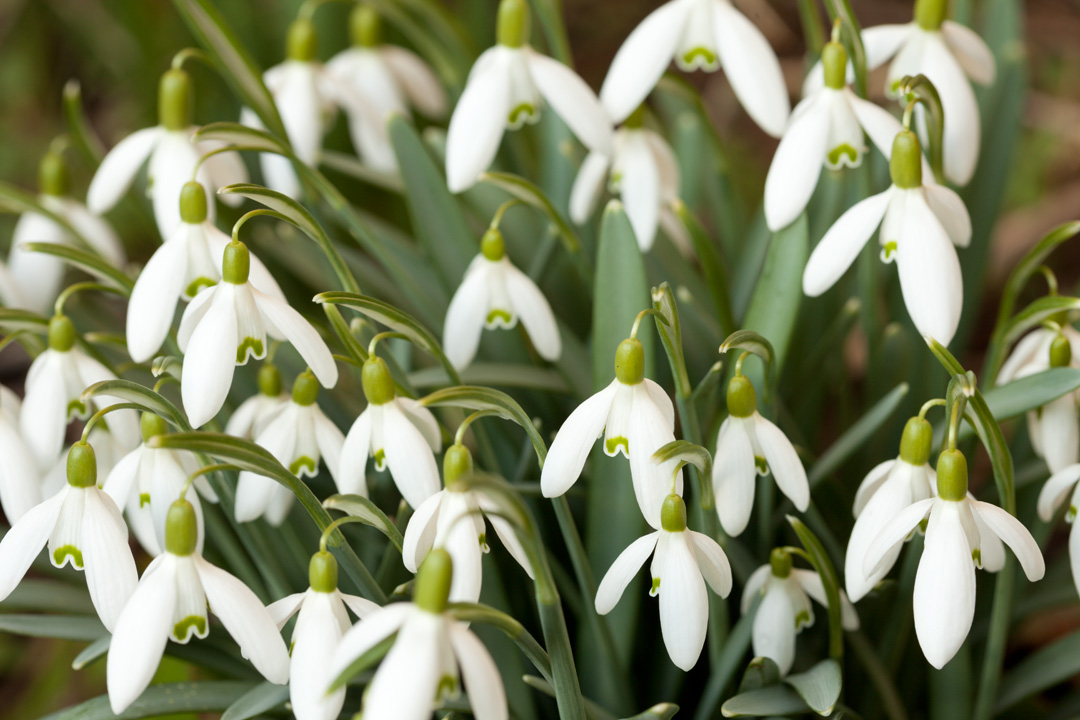
Photo taken at f/8
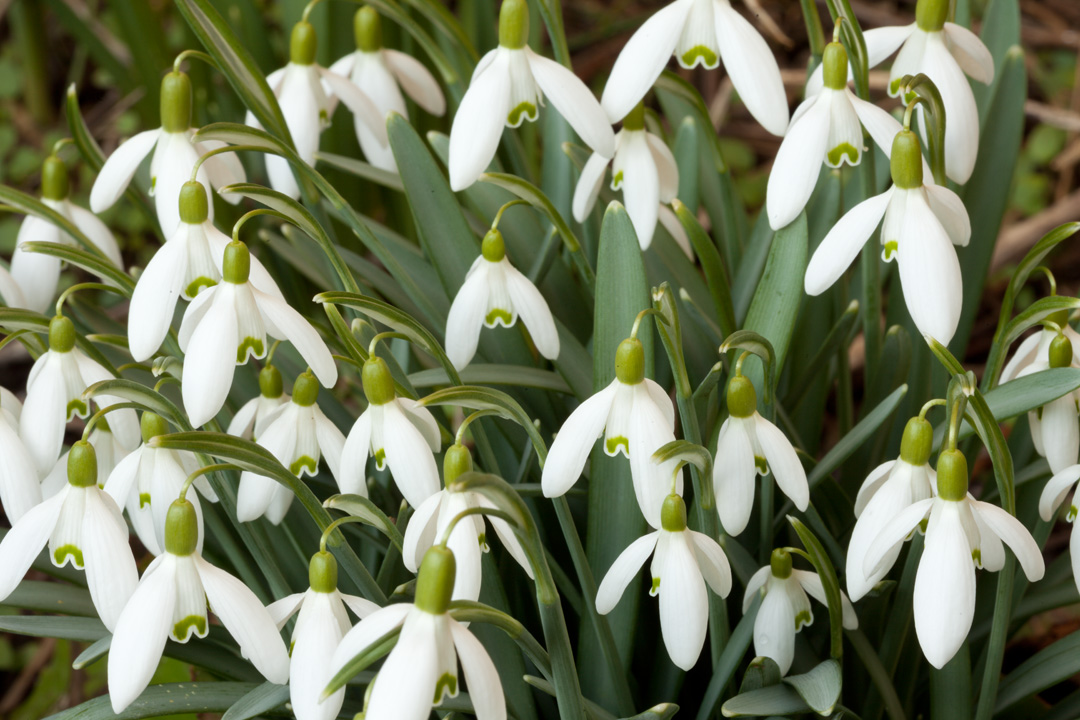
Photo taken at a diffraction limited aperture of f/22
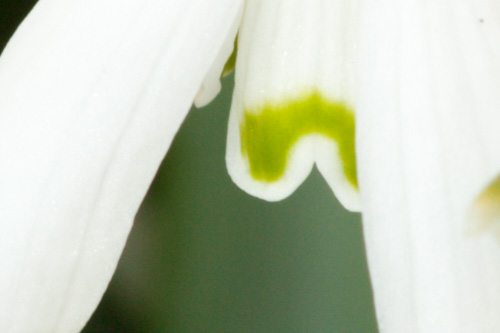
100% crop from the photo taken at an aperture of f/8
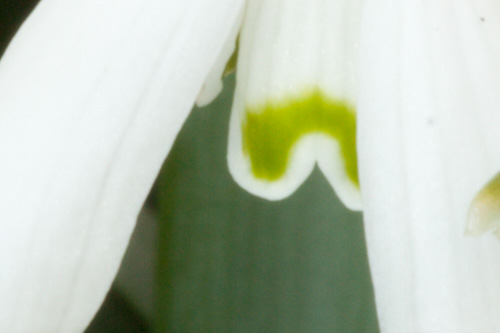
100% crop from the photo taken at an aperture of f/22
Even when viewed at 100% on screen, it is difficult to see much of a loss of detail from diffraction. If you look at the edges of the flower petals, you can see they are slightly blurred from diffraction softening in the f/22 photo, while they are sharp in the f/8 photo.
For some (most?) images depth of field will be more important than absolute pixel sharpness. For others you may prefer to use a slightly shallower depth of field and retain pixel level sharpness. If you are focus stacking an image, then you may decide to use an aperture that avoids diffraction, and just use smaller steps as part of the stack to negate the reduced depth of field in each image.
The point at which diffraction softening starts to become visible in an image is known as the diffraction limit. A camera that is diffraction limited at f/5.6 means that stopping the aperture down beyond f/5.6 the image will start to get slightly softer.
To calculate the diffraction limit for your camera, there is a diffraction calculator on the Cambridge in Colour website. It's well worth reading the article on diffraction on that page for more of a technical explanation as well.
While often the small depth of field can be a problem in macro photography, sometimes it can be good to embrace it. Shallow depth of field macros where only a small part of the image is in focus can work very well, particularly for flower photos.
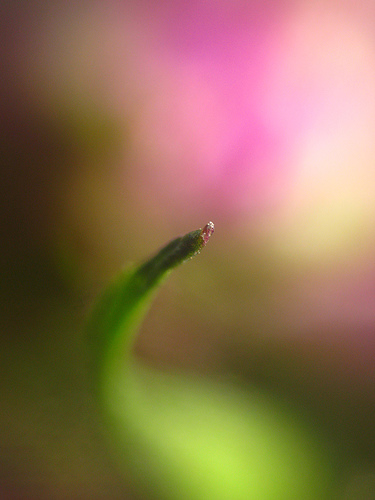
When life throws you curves, do some photography by kevin dooley on flickr (licensed CC-BY)


