Blue hour and Golden hour photography tips
One of the phrases you hear quite often in photography, particularly from a landscape photography perspective, is the Golden hour. This refers to the period around sunrise or sunset. Slightly less common is the phrase Blue hour, which means the period shortly before sunrise or after sunset.
Neither of these periods are precisely an hour, and their length varies with the seasons. But both periods are important to many photographers in the terms of the natural lighting found at these times of day.
To find the approximate times of the Golden hour and the Blue hour, you can use the online Twilight Calculator. This tool will show the start and end times, duration, and direction of the sun for a given location and time of year.
When planning to shoot during Blue or Golden hour it is a good idea to give yourself plenty of time, so you can get everything set up and ready to shoot. Sometimes the 'hour' may only last 30 minutes, and the light can change quite dramatically during this period. So it pays to make sure you are ready in advance.
Golden hour
During golden hour the sun is low in the sky, near the horizon. This produces a nice soft light. The light coming from the sun is diffused by particles in the air, making the light a lot less harsh than during the day. This softer light is especially suited for natural light portraits, as well as landscape photography.
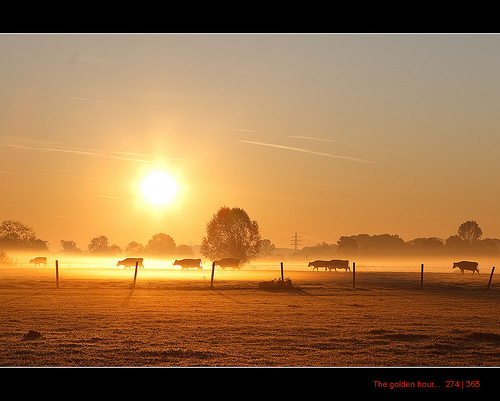
274/365 the golden hour by Maarten Takens on flickr (licensed CC-BY-SA)
The intensity of light from the sun is also reduced during golden hour. This makes it easier to achieve a photograph that is evenly exposed, without overly bright highlights or really dark shadows (so long as you are not shooting straight into the sun).
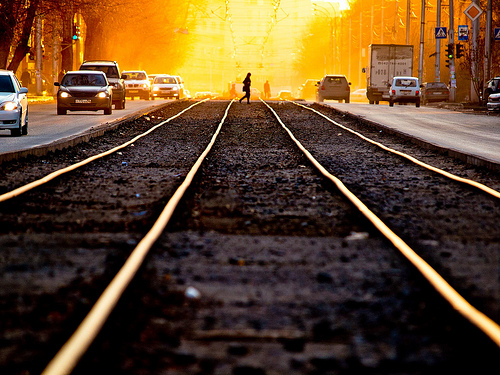
Sunset / Novosibirsk / Siberia / 07.11.2011 by Mikhail Koninin on flickr (licensed CC-BY)
If you do want to shoot into the sun, then you will find that it is nearly impossible to get an image where both the sky around the sun and the landscape are both exposed evenly. You'll probably end up with a photo where the sky is blown out white. To combat this, you can use a graduated neutral density filter, or bracket your exposures and then combine them into an HDR image that captures the full tonal range of the scene.
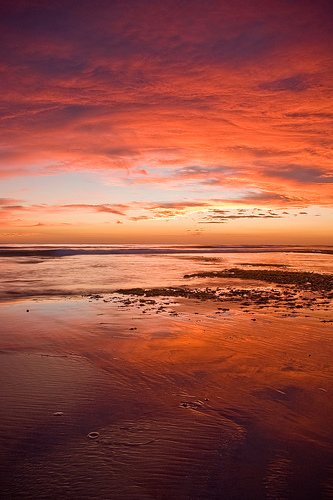
Encinitas Sunset by Phil Price on flickr (licensed CC-BY-SA)
The low angle of the light at this time of day causes long shadows, and help brings out the texture in many subjects.
Golden hour gets its name from the warm, golden light that you find at this time of day. This warm color is generally more appealing than cooler color temperatures, another reason why many photographers prefer this time of day.

Something wicked this way comes ... by blinking idiot on flickr (licensed CC-BY-ND)
Due to the reduced light intensity during the Golden hour, it is important to pay attention to your camera's shutter speed. A higher ISO or tripod may be needed to ensure you can capture a sharp photo that does not suffer from blur caused by camera shake.
Rim lighting can be easily achieved during golden hour thanks to the low angle of the light. This is particularly suited for portraits. Just shoot towards the sun, with your subject facing you with their back to the sun. The sun creates a beautiful warm glow around the edge of your subject.
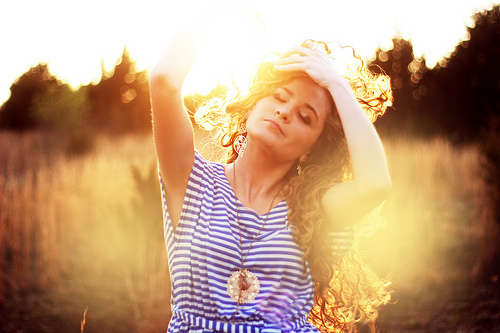
golden hour by Haylee Barsky on flickr (licensed CC-BY)
Blue hour
During blue hour the sun is below the horizon, and its light becomes scattered in the upper atmosphere. This causes a very even illumination, with no single direct light source. The light at this time of day is even more soft and diffused than it is during golden hour. The lighting is so soft that it is almost shadowless.
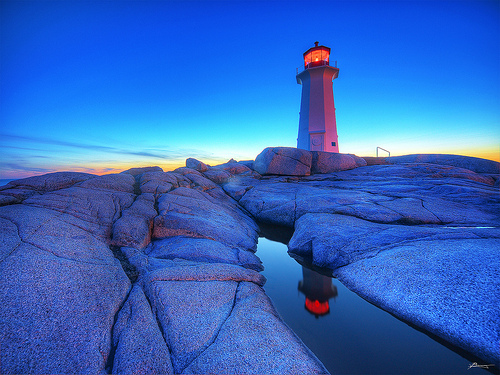
sunset at peggy's cove by paul bica on flickr (licensed CC-BY)
Blue hour is named after the deep blue color of the sky at this time of day. Because the sky is being illuminated from the sun hidden below the horizon, this makes the sky quite a bit brighter than the landscape. This can be a good time for achieving some silhouette photos.
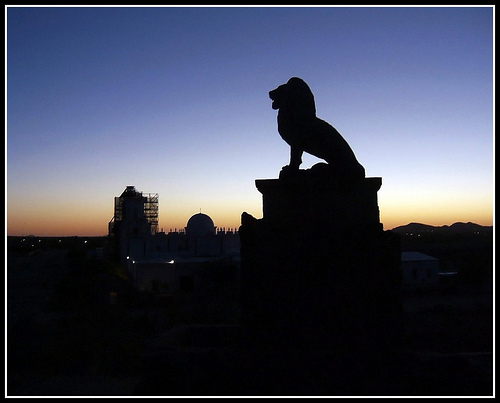
The Guardian Lion by Tony Fischer on flickr (licensed CC-BY)
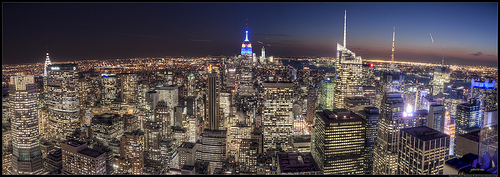
Artificially lit scenes (such as those in a town or city) look much nicer during blue hour than they do later in the night. The remaining light in the sky gives it some color, and also helps add a bit of fill light to areas that would otherwise be unlit.
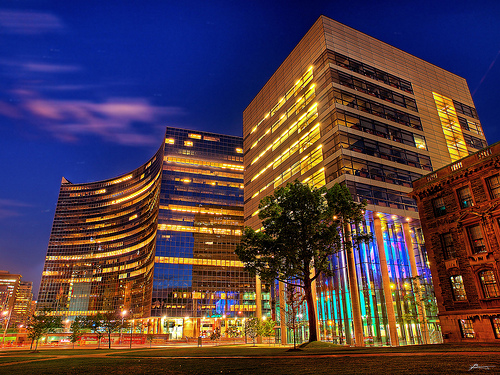
twilight by paul bica on flickr (licensed CC-BY)
When composing your frame, be aware of any very bright lights there are in the scene or just outside of your frame. Bright lights will quickly blow out pure white, and can also cause lens flare. If a light outside of the frame is causing flare, this can be remedied by using a lens hood to block the light from hitting the lens.
It can sometimes be quite difficult to achieve a good exposure where one building is brightly lit, and another dimly lit. In this case you will probably need to result to taking separate exposures so that you have one image with the brightly lit building(s) exposed properly, and another with the dimly lit ones exposed properly. These images can then be merged together using a technique such as HDR or exposure blending.
Twilight's Pinnacle (This is Huge... best viewed large!) by Nathan Van Arsdale on flickr (licensed CC-BY-ND)
The intensity of natural light during the blue hour is very low, and you will very likely want to use a tripod (or some other form of support) to keep your camera steady. Bear in mind that it can start to get cold quite quickly after the sun sets, a sweater or coat for yourself is a good idea as well.
Blue hour is a great time to try long exposure photography. Because the light levels are naturally very low at this time of day, you do not require any strong neutral density filters to achieve a slow shutter speed. However, a graduated neutral density filter may be required to even out the exposure between the brighter sky and the landscape.
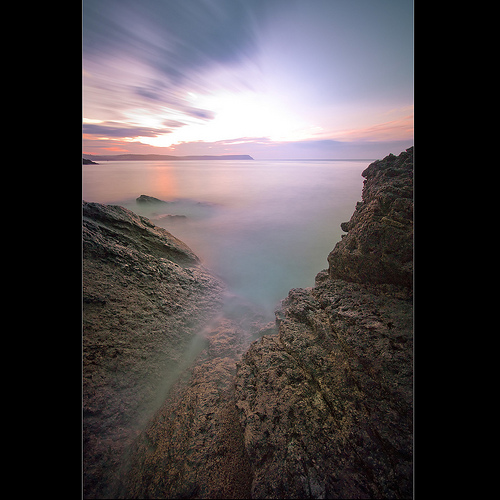
Portloe Long Exposure by Johan J.Ingles-Le Nobel on flickr (licensed CC-BY-ND)
When photographing during the blue hour, it is important to use the Histogram when evaluating your exposures. Because of the dim light at this time of day, your camera's LCD can appear quite bright, making images look brighter than they really are.
You don't want to find out your images are actually very dark and underexposed when you later review the images on your computer. By checking the histogram you can see how bright the image actually is, and adjust the exposure settings for a correct exposure as necessary.
Although light levels are low during the blue hour, portrait photography is still possible. You can use a wide open aperture e.g. f/1.8 combined with a high ISO e.g. ISO 800 to capture enough light for a good exposure.
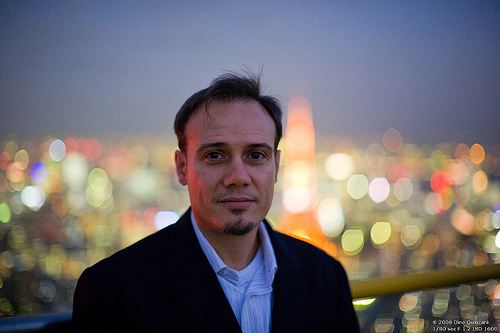
Night portrait by Dino Quinzani on flickr (licensed CC-BY-SA)
Alternatively, try a technique known as dragging the shutter – use a slow shutter speed (preferably with the camera steadied on a tripod. But also use flash to light your subject. This gives a well exposed background, while the subject is lit (and frozen) by the flash.
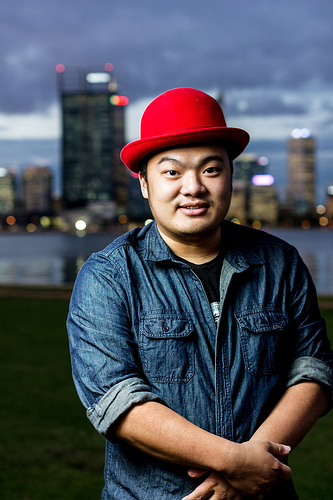
Get Funk'd 2 by Daniel Lee on flickr (licensed CC-BY-ND)


totally awesome!!! thank you for the info too.
Some good tips and example images here. Thank you.
Truly, one one of the most helpful articles I’ve seen. Now I understand it! Thanks. I’m off to read mor of your stuff.
Great article! Another important tip is to have well rounded portfolio for showcasing your photographs as most of the client will judge your skills and talent on the bases of portfolio. I’ve used Pixpa, works for me.