Tips for taking levitating or floating photos
Levitating a person or object is an old magic trick that still wows audiences to this day. But you don't have to be a magician to create magical photos where your subject appears to be floating.
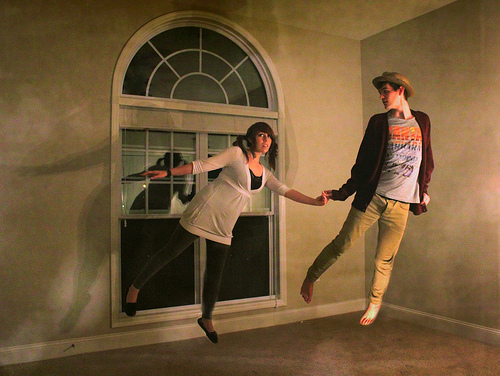
Never is an awfully long time. by Casey David on flickr (licensed CC-BY-ND)
There are two ways of taking floating photos. You can have your subject rest on an object, and then remove the object in Photoshop. Or you can just take a photo of the subject jumping.
Making floating photos in Photoshop
For the Photoshop method, you should mount your camera on a tripod (or something secure where the camera cannot be moved), and then take the first photo with your subject resting on an object. Then, remove the object (and the subject) from the scene, and take another photo.
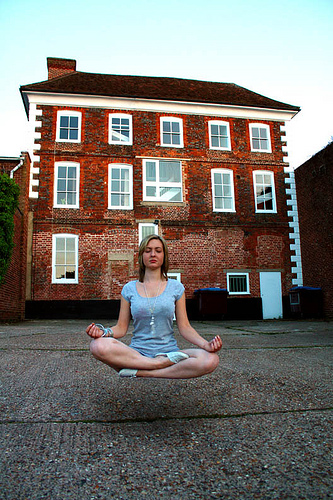
Levitate by Brian Tomlinson on flickr (licensed CC-BY)
Now using Photoshop (or any other image editing software), load both the images into layers, and use layer masks to hide the object that the person was resting on.
You will also need to add a shadow of the floating person in the appropriate place. Look at the photo to see what direction the light is coming from, and this should give you a good idea of where the shadow should be placed. Create a new layer, and use a soft, low-opacity brush, and carefully paint in the shadow in the correct area.
The Photoshop method of levitation photos is best if you want you subject in a position that is not standing. For example, someone sitting or lying down while floating above the ground is best done in Photoshop.
Making floating photos in-camera
Taking photos of people floating in-camera can certainly be done, and is likely to impress people when they learn it was done without any photo manipulation. You need to get your subject to jump, but they should jump without making it clear they jumping.
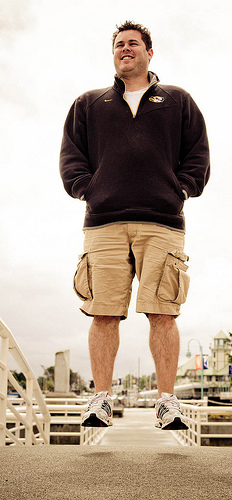
Levitating man! by mrgreen09 on flickr (licensed CC-BY)
They should have a nonchalant look on their face. Or possibly a look of surprise, looking down at the floor, noticing they are floating. Their knees should not be visibly bent. They should not look like they are physically exerting themselves.
On the camera, you need to use a fast shutter speed so as to freeze the action. Make sure you compose the photo to include the ground underneath the subject, and also their shadow. The shadow is an important part of the photo, which shows that the person is floating.
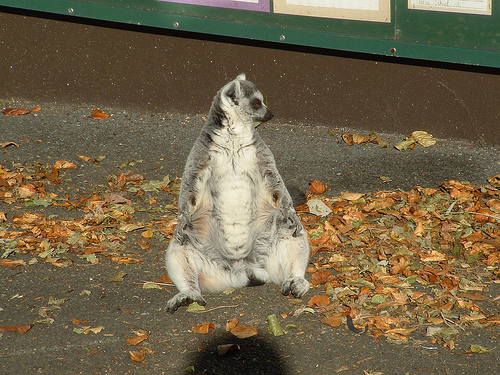
Levitating Lemur by Theyoungones1994 on flickr (licensed CC-BY)
You will likely to need to take quite a few shots before you get one that looks good. If you have trouble with not enough light for a fast shutter speed, an external flash (speed light) can help with this.
The whirlwind or poltergeist effect
If you want to include other objects floating with the person, or looking like they are being blown away, this is possible too. Have an assistant, or you may be able to do it yourself, throw the objects into the frame just as you are taking the photo.

take off with a good book. by Casey David on flickr (licensed CC-BY-ND)
Doing this in camera, it can be very tricky to get both the objects and the person frozen in mid-air at the correct time. But keep trying and you should get there eventually.
Alternatively, adding the objects in using Photoshop can be done relatively easily. Take your main photo as above. Just take a few shots of the objects being thrown into the air, and add them as layers to your levitation photo. Then use layer masks to keep the floating objects you want in the image.
P.S. If you are interested in trick photography, check out the Trick Photography & Special Effects e-book for loads of other photographic special effects tips.


Thanks for crediting and using my photos! 🙂
No probs, thanks for sharing your great photos!