Light Painting How To
Light painting is the process of manually lighting a photo during a long exposure, often using a torch or small LED lights. There are two types of light painting photography. One is where you shine the light onto your subject, I have covered this previously in How to use light painting for flower photography. In this article, we'll look at how to do light painting where you use the light source as the actual subject of the photo, painting the light into the air.
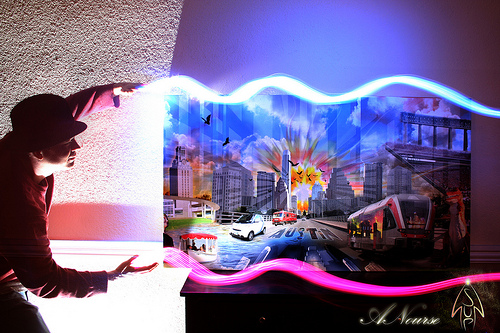
Painting the City by StandUPP on flickr (licensed CC-BY)
Light painting requires a long exposure time, so you either need to do it at night or in a darkened room. Your camera should be mounted on a tripod or attached securely to something so that it will not move during the exposure.
You need a light that you can paint with. Small point source lights work best for light painting. Wider beam lights, such as many torches, don't work very well as the light spreads too widely, making it difficult to create a clear path with the light. They are also more likely to cause problems with lens flare.
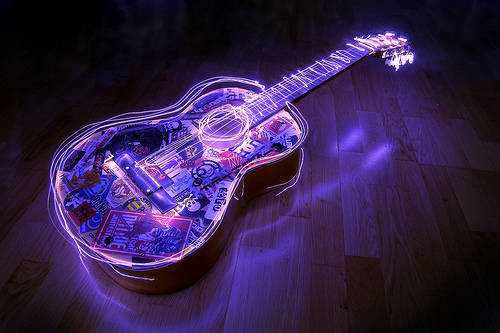
Electric Guitar by Sean Rogers1 on flickr (licensed CC-BY)
Small LED lights work well for light painting, and you can pick up LED keyrings and small LED flashlights quite cheaply.
The exact camera settings you need to use will have to be determined by experimentation. It depends on how bright your lights are, and how quickly you move them. If you have a dim light, you will either need to use a wide aperture, high ISO, or move the light slowly to ensure the light trail appears bright enough in the photo.
For the shutter speed, it depends on how intricate your light painting is going to be. A small and quick light painting could be done in a few seconds. A longer light painting might take many minutes.
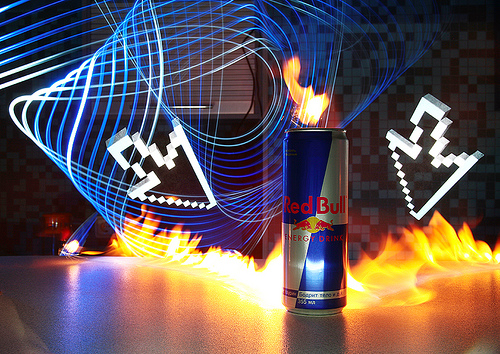
Red Bull by Mishel Churkin on flickr (licensed CC-BY)
If your light painting is likely to take a long time, make sure that your camera has a fully charged battery. Using a battery grip can help your camera last for longer before it runs out of juice.
As a starting point, I would use an aperture of f/5.6, ISO100, and shutter speed of 30 seconds. You should also set the camera / lens to manual focus, as it won't be able to autofocus in the dark. Set the focus distance to approximately where you will be doing the light painting (a lens with a focus distance scale helps).
Press the camera's shutter, and then walk in front of the camera. You can use a timed shutter delay or a wireless shutter release trigger if you don't want the exposure to start until you are in front of the camera. But normally there will be so little ambient light that the time it takes you to get in front of the camera from the time you press the shutter will not have any effect on the image.
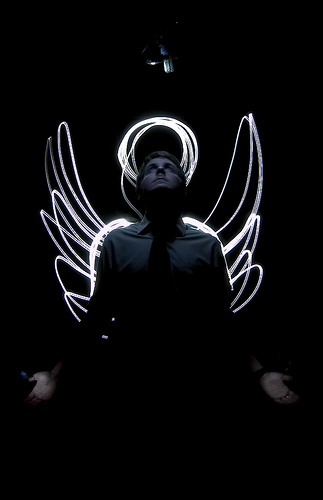
Once you are in front of the camera, switch on your flashlight / LED, and shine it towards the camera. Now proceed to draw shapes in the air with the flashlight. When you want to start a new line (similar to taking the pen off the paper), switch the flashlight off, then switch it on again where the new line should start.
Since you can't see where you've already drawn with the light, joining lines together is just a case of best guess. With practice you'll get better, and if a shot doesn't come out how you wanted, just try again.
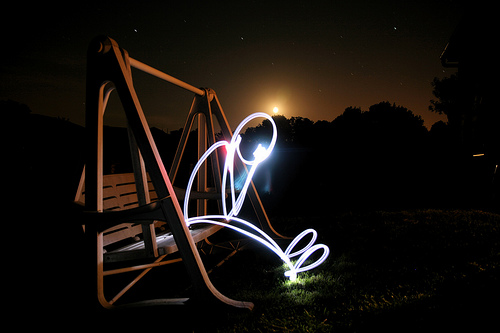
Light painting by rafoto on flickr (licensed CC-BY-NC)
So long as you don't have any significant light hitting yourself, you will not be recorded in the image at all. Instead, just the light trails left by the flashlight will be recorded. Wearing dark clothing is a good idea to minimize any chance of you being recorded in the image.
If you want to write with light painting, remember that you are facing the camera. So you need to write backwards, as if you were facing a mirror. A bit tricky, but again, you can just keep trying until you get it right (or the camera battery runs out).
Often it is a good idea to include an object or some background in the image, so that the light painting isn't just floating in space by itself. This can be done by shining a flashlight on the object to give it some exposure. If there is enough ambient light, using a long enough shutter speed will light the background.
Like a fly to ... (EXPLORED) by Sean Rogers1 on flickr (licensed CC-BY)
For lighting a person, you can shine a flashlight on them. Or using a flash (speedlight) works well, and will freeze them where they are standing. You are best off using an external flash in manual mode, off camera (hold it in your hand). Trigger the flash manually (most flashes have a test button you can press to fire the flash).
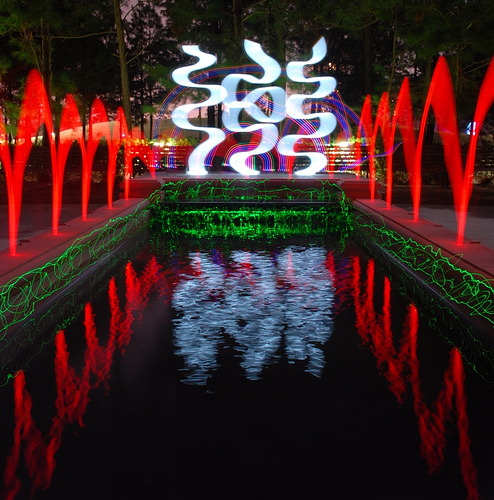
Something that you'll find can make a big difference to light paintings, is to use a variety of lights with different colors. Different color LED lights can be bought cheaply, or you can always trying wrapping colored cellophane over a white flashlight.
Light Paint Design by Www.ArtandSteel.coM on flickr (licensed CC-BY-ND)
For particularly intricate / long light paintings, you have a couple of options. You could get some friends to help you, which would greatly reduce the time needed to paint the light. If it would take one person 5 minutes to do a certain light painting, it should take 5 people, with each person working on a different part of the painting, more like 1 minute.
Another option is to take multiple photos, and then combine them in image editing software such as Photoshop. For the same example, you could take five 1 minute shots, and draw part of the painting in each shot. Then in Photoshop blend the 5 images together into 1 image with the parts from each image.
The advantage of doing it this way is that if you make a mistake in one part of the light painting, it means you only need to re-shoot that part, rather than having to reshoot the whole 5 minute image again (and possibly making a mistake in a different part).
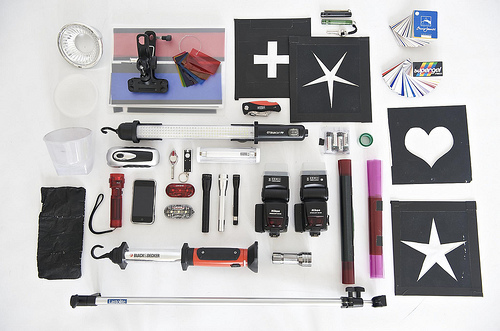
Lightpainting Tools by geishaboy500 on flickr (licensed CC-BY)
For light painting, you aren't restricted only to using small flashlights. People also use LED wands, sparklers, iron wool (burning), and even iPads. Anything that emits light can be used, and the different shapes and colors can be used for different effects.
Although you only need a small flashlight or LED light for light painting, if you get into it, you may find you want to purchase more lights. Or maybe you already have a range of different lights you can play with. Give it a go, and have fun painting with light!
P.S. If you are interested in trick photography, check out the Trick Photography & Special Effects e-book for loads of other photographic special effects tips.


Good Stuff