How to create a Panograph Photo Montage
Strictly speaking, a Photo montage just means a composite photo created from two or more separate photos. In this article I want to look at a specific type of photo montage, known as panography, where multiple photos of a subject are combined into a single image.
The technique is similar to that used when capturing photos for a panoramic image. But rather than stitching the photographs together seamlessly as you would for a panorama, the images are often purposefully offset from one another, and no blending between the images is used.
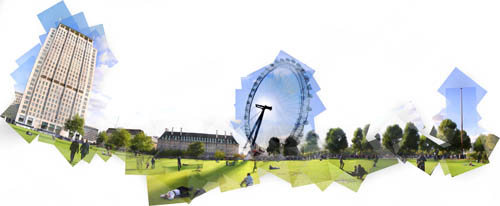
London Eye Panography by Gary Nisbet on flickr (licensed CC-BY-SA)
To create a Panograph, you can actually use just a single photo (I'll cover that later), but generally most panographs are composed of several photos. There are no 'rules' as such to follow when capturing the photos for the panograph, but the settings you use and the way you take the photos will determine how the final image looks.
If you use a fixed exposure, for example, using manual exposure or exposure lock, then all the images will have the same level of brightness. This means that the different images will blend together quite well. A fixed exposure is what is always used for standard blended panorama images.
On the other hand, you can use automatic exposure. This will likely result in brightness differences between the images. For example, if you have one photo of a backlit building, and then another of the edge of the building and the sky. In the photo with the sky in it, the building will likely appear much darker than in the photo of just the building. This makes each photo stand out more in the montage as an individual photo.
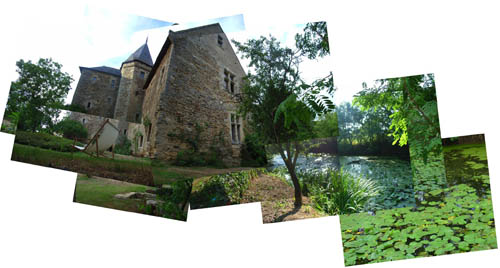
French Chateau panography by Lightsurgery on flickr (licensed CC-BY-SA)
Whether to use a fixed exposure or automatic exposure is completely up to you and the look you are going for. If using an automatic exposure, make sure that the camera does not drop the shutter speed down too low though. You don't normally want part of your panograph to be blurry from camera shake.
Another decision you have to make when capturing the photos, is how well you want them to align. When taking photographs for a traditional panorama, you want the images to align as closely as possible. You can do this for a panograph as well, but you can also purposefully move the camera to create misalignments.
By moving the camera to one side, or forwards or backwards, or tilting the camera from one shot to the next, each photo will have a slightly different perspective. Again, this makes each photo that is part of the montage stand out as an individual photo.
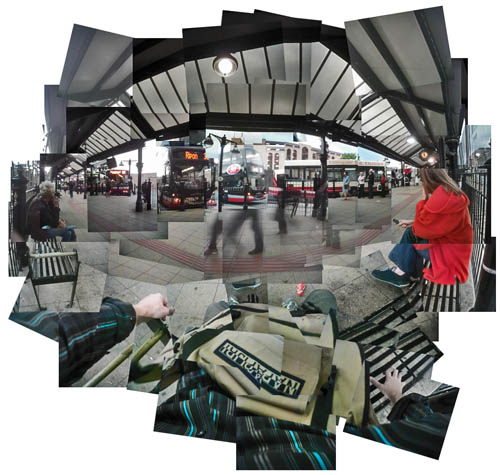
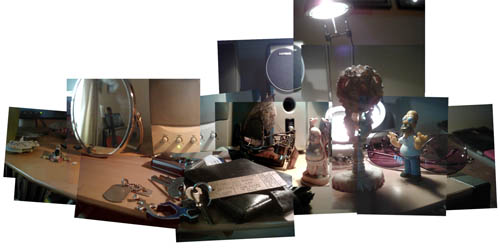
bust.ation by daren on flickr (licensed CC-BY)
One 'rule' that generally holds true for panographs, is to make sure you get enough shots to cover the whole scene. If you later put the photos together and there is a hole in the middle where you didn't take a photo, it will probably detract from the image. (Of course there are always exceptions to the rule).
When taking photos for your panograph, it makes the arranging process easier if you take the photos in a set order, for example starting by taking what will be the bottom left corner of the final image, then taking photos across for the bottom row of the image, then taking photos for the next row of images, etc.
If you just take photos randomly, it can be harder to work out the correct positions of the photos later. It becomes a bit more like a jigsaw puzzle (though you might enjoy that challenge!)
Creating a Panograph from a single image
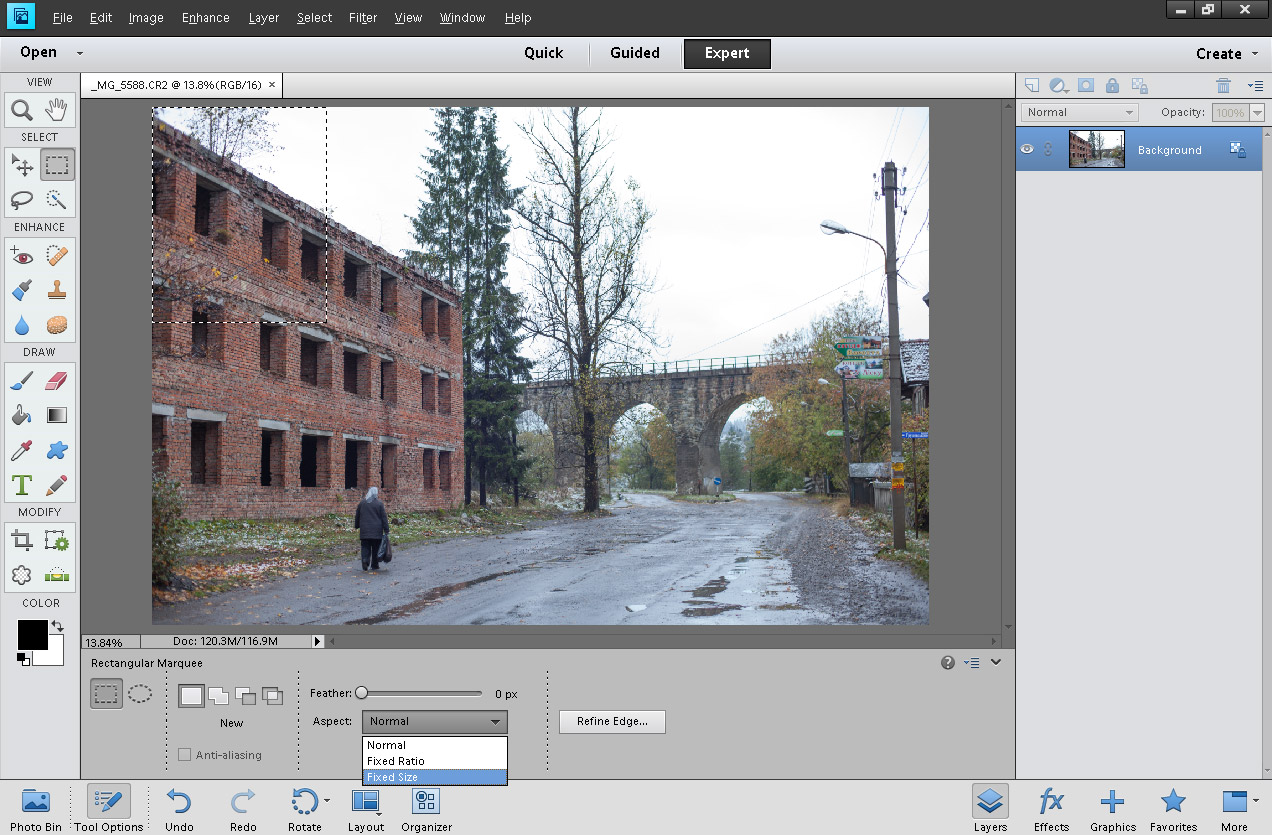
I mentioned earlier that you can also create a panograph from a single image. To do this, you need to open your image in photo editing software. Use the marquee tool to select an area of the image. Then copy and paste that area into a new layer.
If you would like all the 'photos' you are creating from your master photo to have the same dimensions, change the Aspect from 'Normal' to 'Fixed Ratio'. You will find this in the Marquee tool options. If you want each 'photo' to have the same dimensions and size, then choose 'Fixed size' from the Aspect options.
Repeat for all the other areas of the image, making sure that you have plenty of overlap between your sections. (Copy works from the layer currently selected, so make sure you click on the background layer in the layers palette each time you need to copy). When finished you should have a lot of different 'photos' from just the one original photo. The original photo can now be discarded.
If you want, you can apply exposure and color adjustments to the different layers to make it look like they were taken in automatic exposure mode.
Now you have your multiple photos, the next steps in creating the panograph are the same as if you had taken individual images.
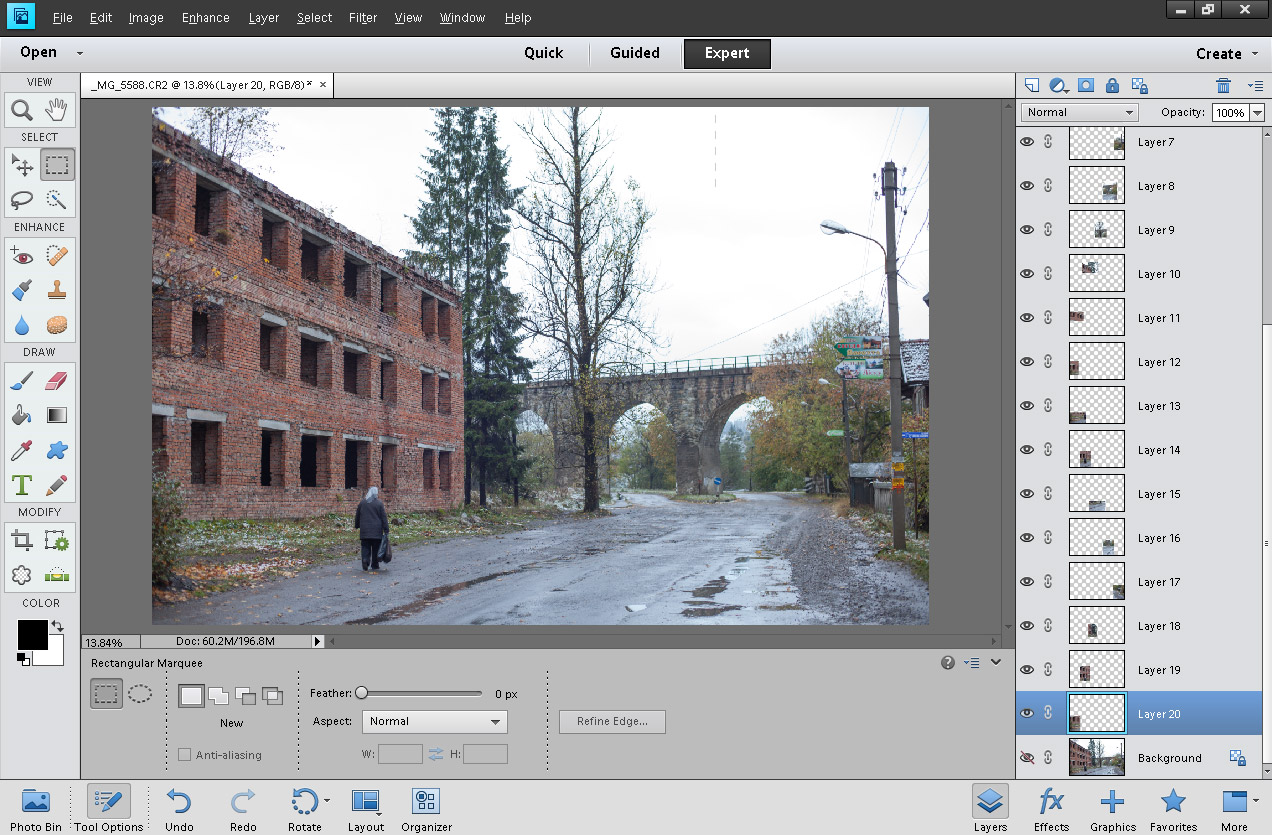
Putting together the Panograph Photo Montage
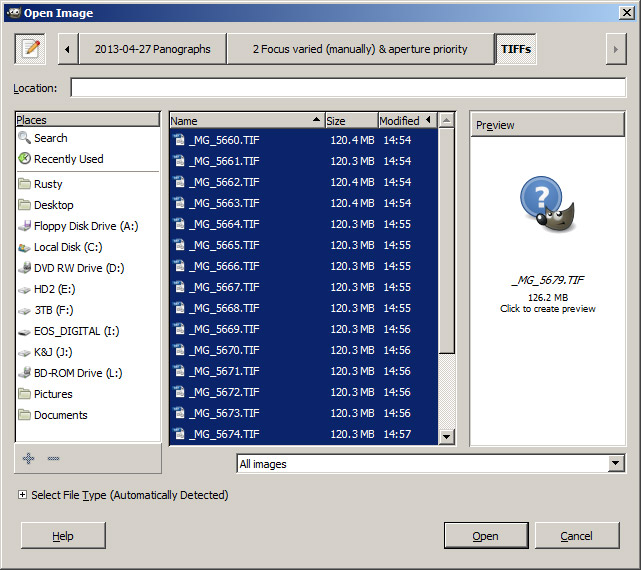
In your photo editing software, load all your images into layers in a single image. Software such as Paintshop Pro, Photoshop Elements, Photoshop CC, and GIMP are all suitable for making Panographs.
Because you will be creating quite a large image comprised of lots of single images, your computer might become quite slow if you try it with full size images. Unless you plan on printing the image really large, it can be a good idea to resize your photos to make them smaller before proceeding.
For the purpose of this example, I'll use GIMP. In GIMP you can load the images into layers by going to File > Open as Layers. Then select the images that make up your panograph and click open.
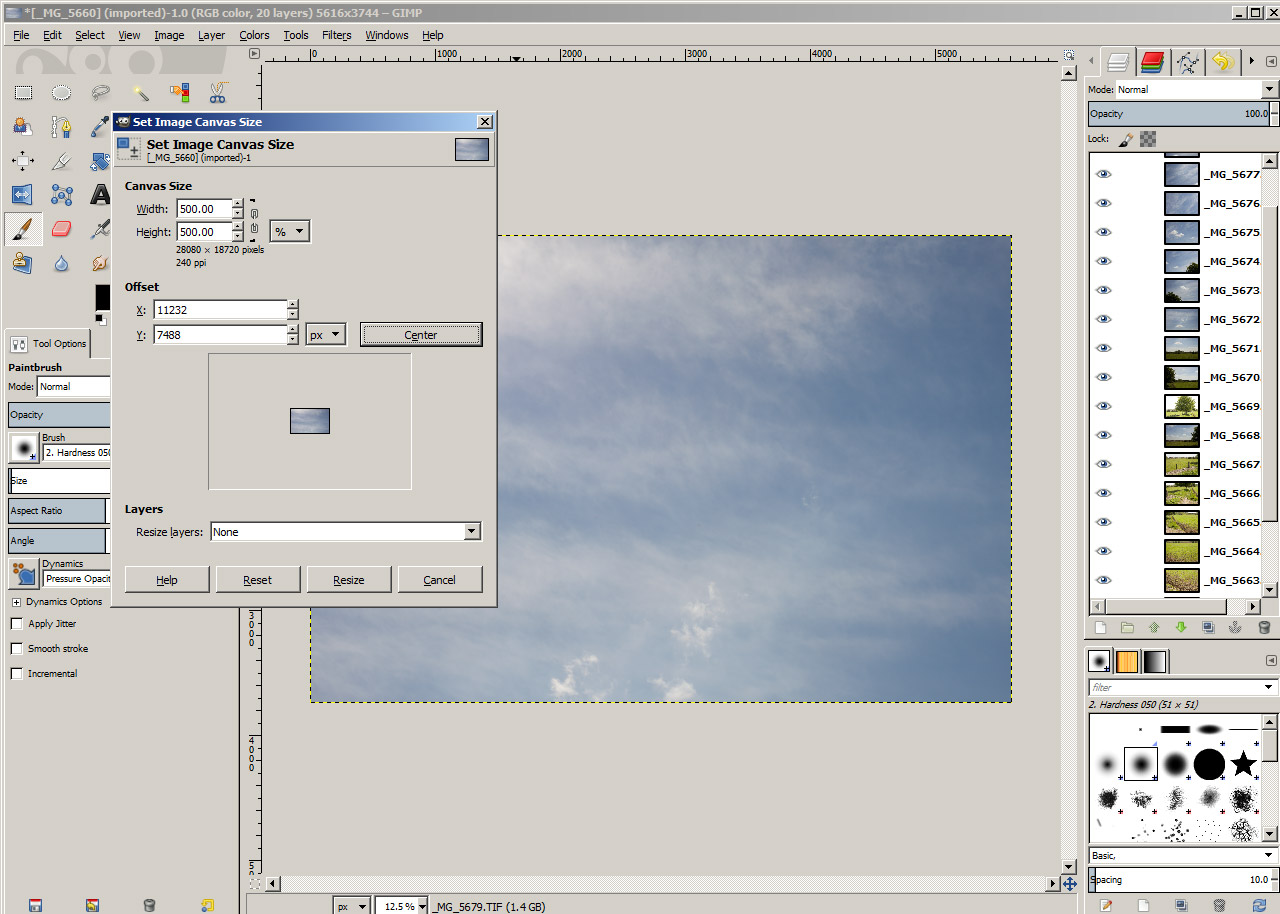
When the images are loaded, make sure that your canvas size is large enough to contain all the images when they are assembled into a final image. In Photoshop Elements you can adjust the canvas size Image > Resize > Canvas Size. In GIMP you need to go to Image > Canvas Size.
The size needed for your canvas will depend on how many photos you took and the amount of overlap. I'm choosing 500% for the size of my canvas. You can always adjust the canvas size later if you find out that it's too large or too small.
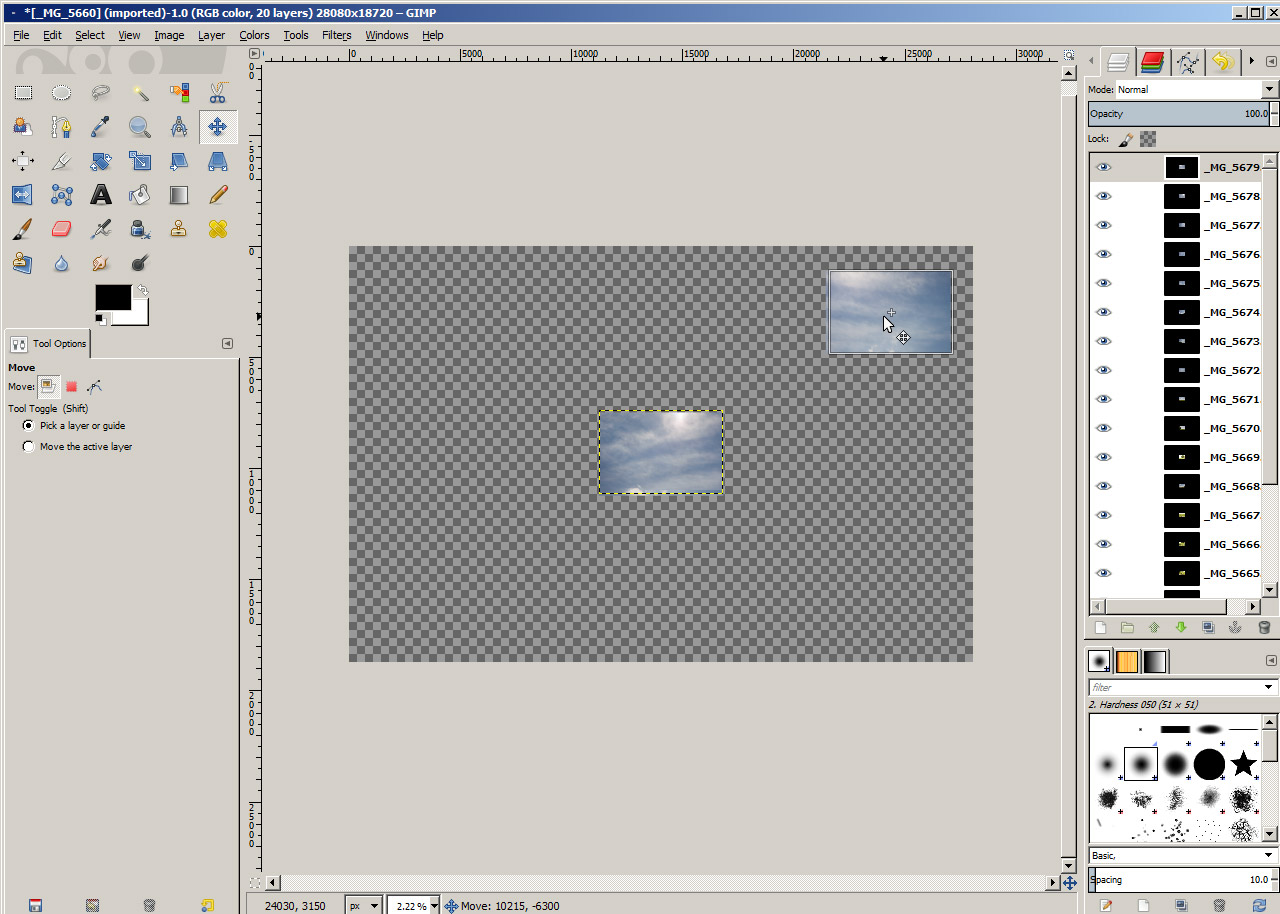
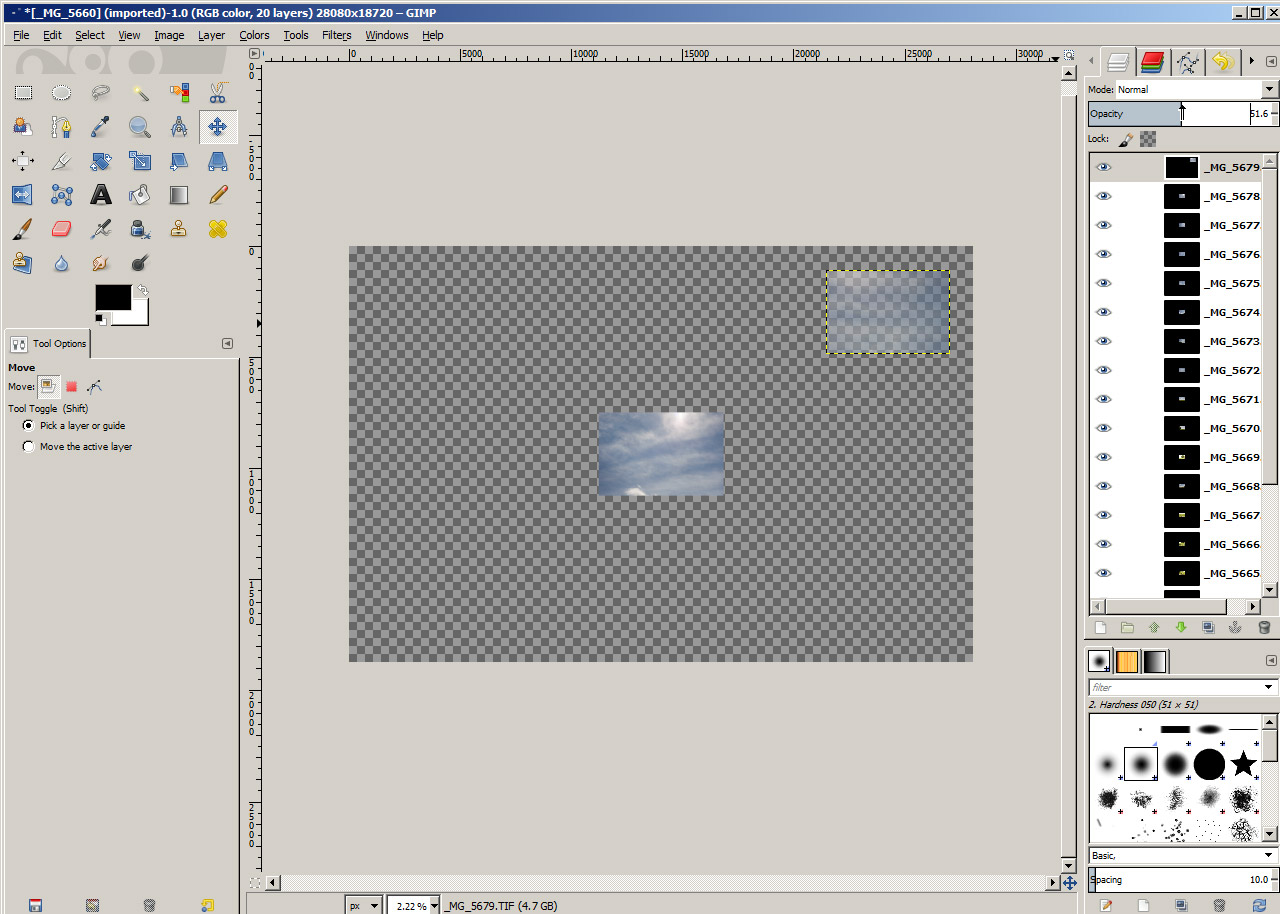
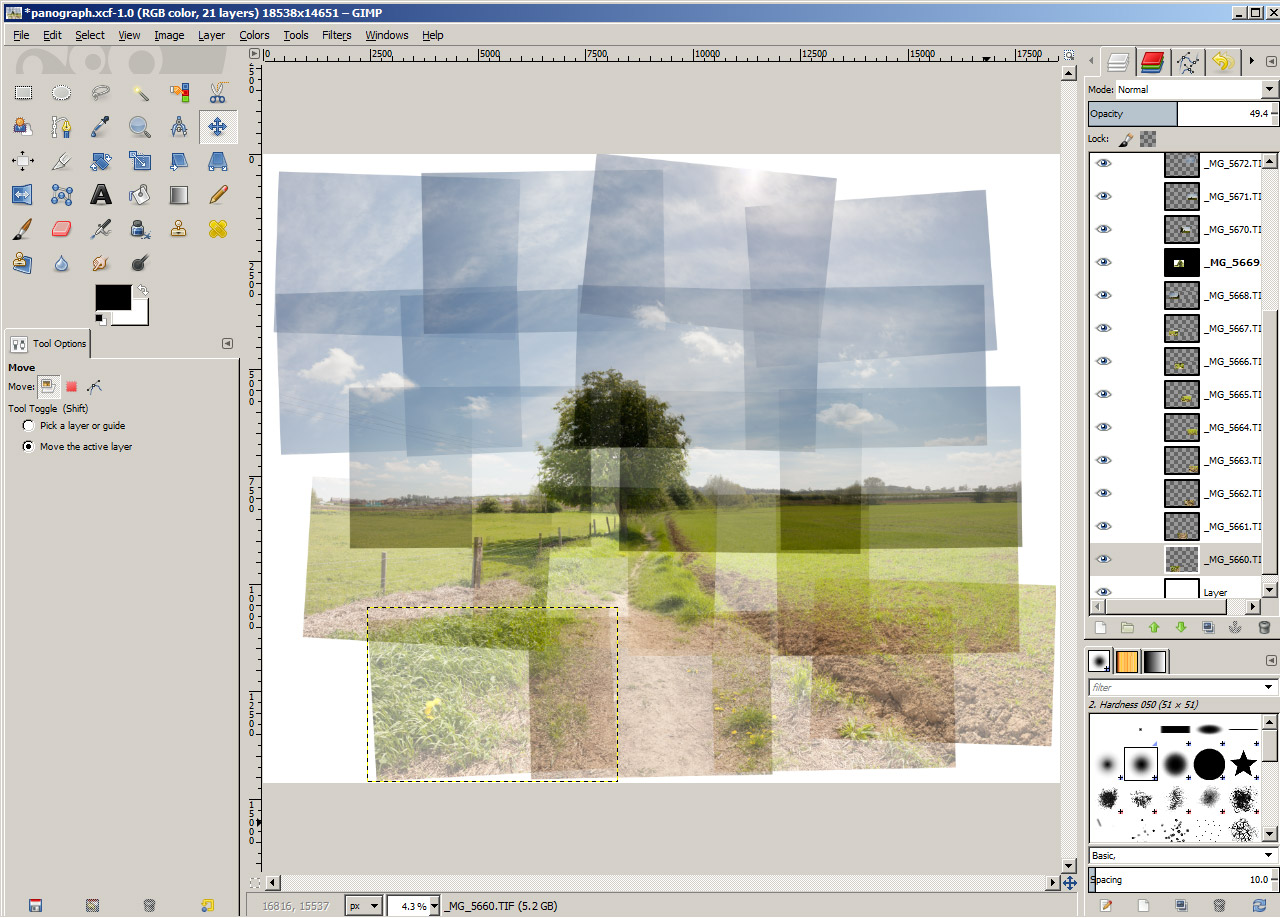
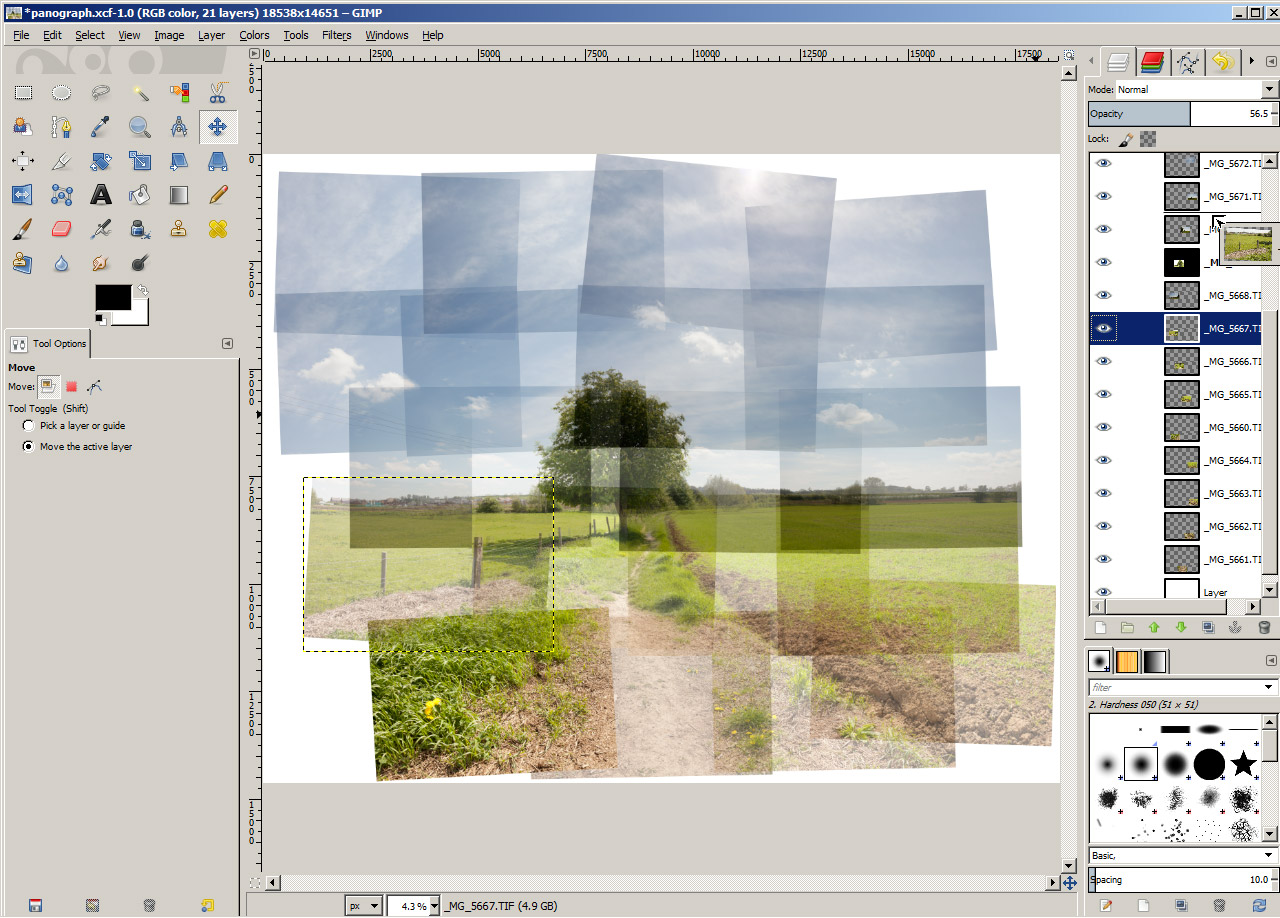
The next step is to start arranging your photos. Zoom out so you can see the whole canvas. Then use the move tool to move the current layer to the correct position. I'm starting with the top-right corner, image, so I'm moving it to near the top-right corner of the canvas.
Next, decrease the opacity of the layer you have just moved (assuming it is the top layer in the layer palette) to 50%. This step isn't essential, but making the layer semi-transparent makes it easier to position the other layers that overlap with it.
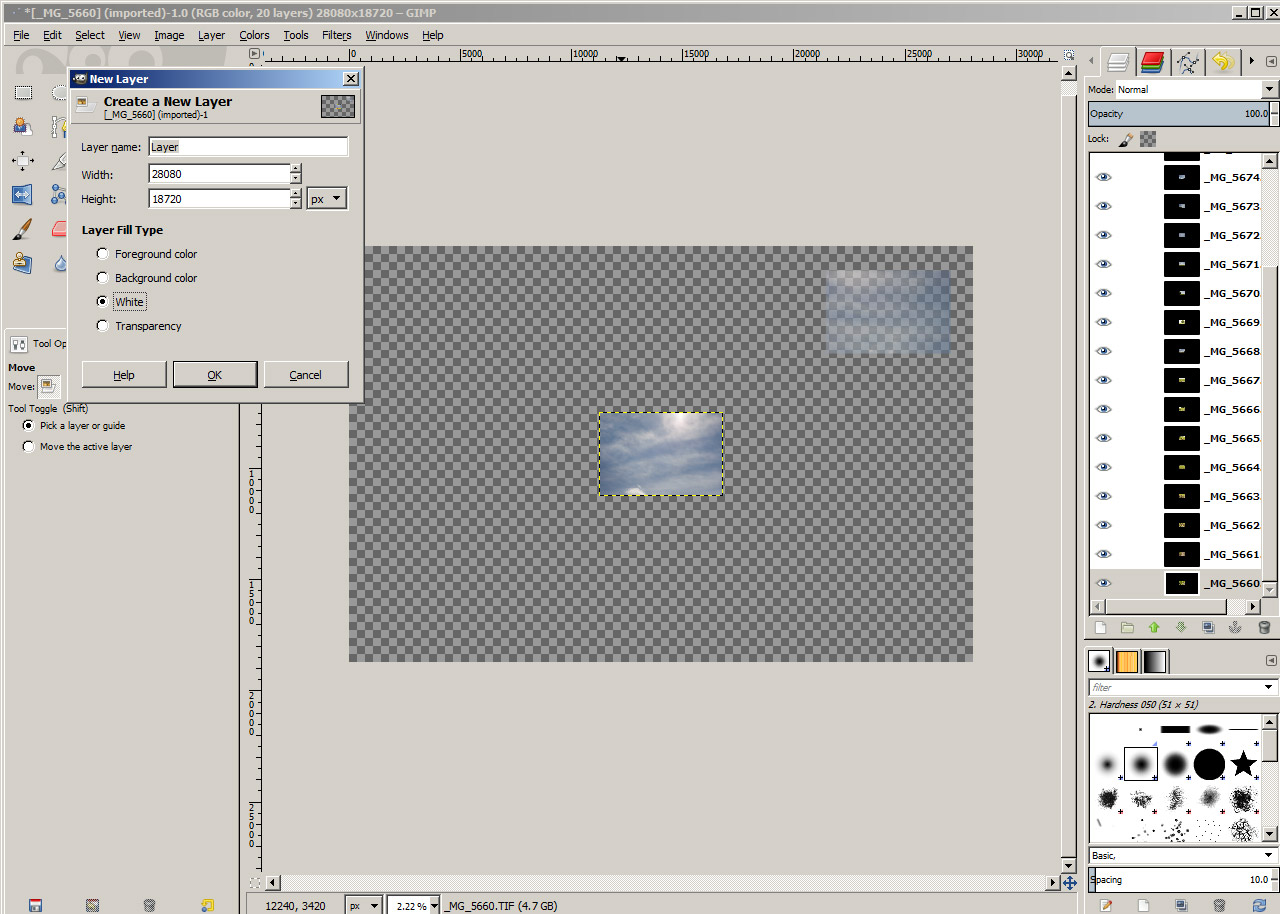
To make our semi-transparent layer easier to see, we can add a background to the image at this point. Create a new layer filled with white. In the layers palette make sure the new layer is positioned below all the other layers.
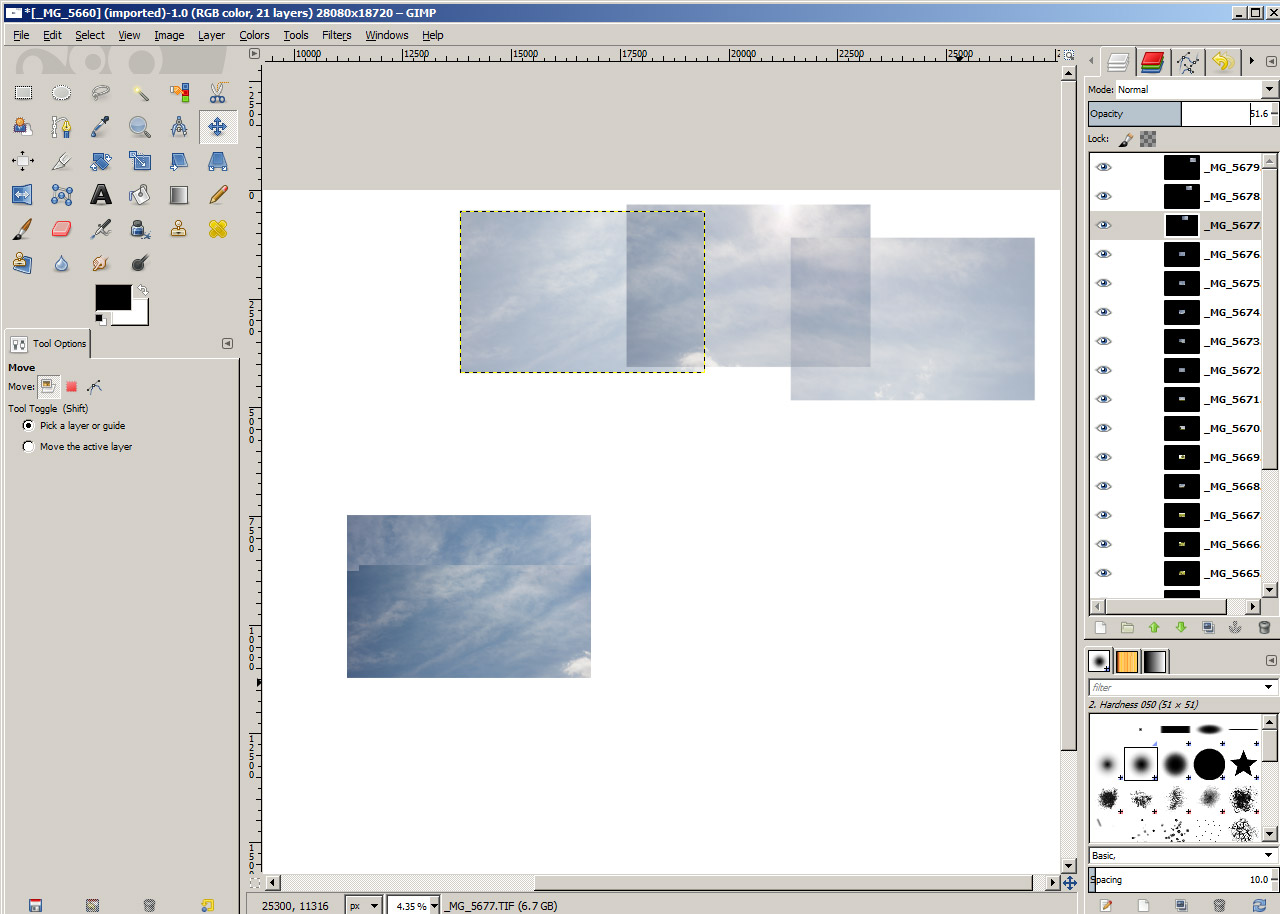
Select the next photo down from the top one in the layers palette, and use the move tool to position it. When it is roughly aligned with the top layer, switch this layer's opacity to 50%.
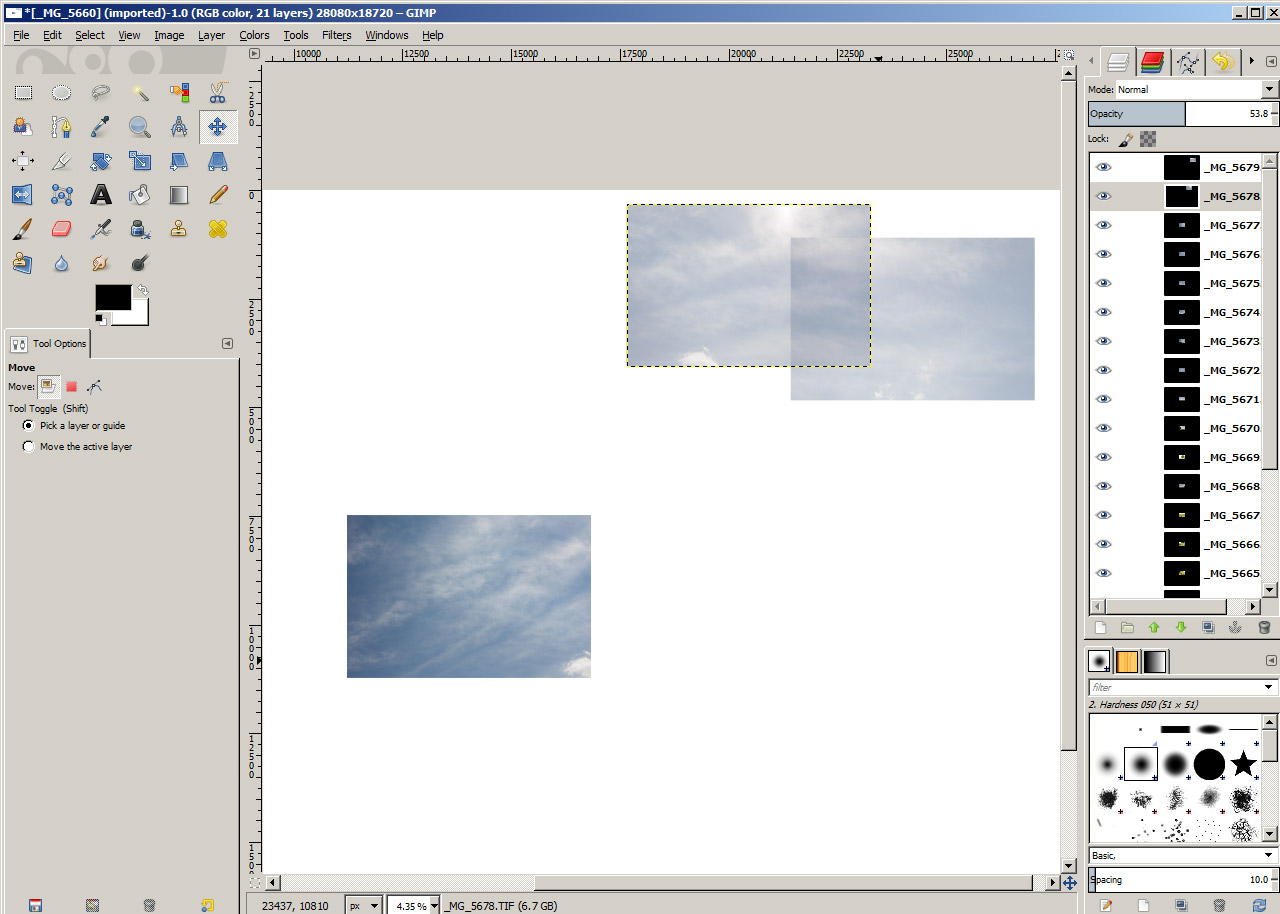
Move the third photo in the layers palette into position, then reduce it's opacity to 50%. Then repeat with the fourth image, etc.
After adding all my images, I found that I didn't have quite enough space on the right of the image, but had a lot of space below and to the left of the image. So I increased the canvas size a little more to the right. Then I made a selection around the image and chose Image > Crop to selection.
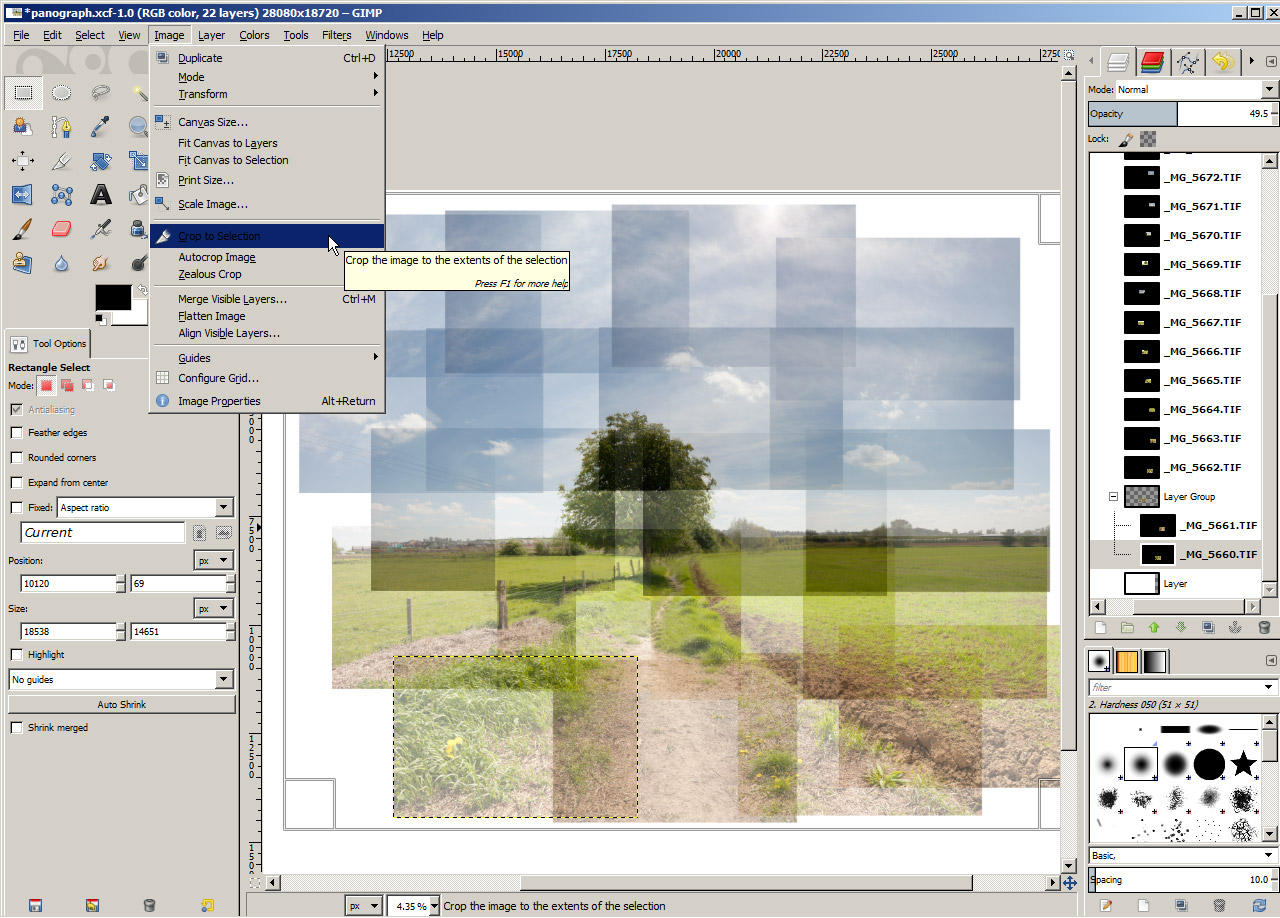
Because I had increased the canvas size, this meant that the background layer wasn't covering the new area of the canvas. To fix this we first need to make the background layer the same size as the canvas. Go to Layer > Layer to Image Size to do this. Then to fill with white, go to Edit > Fill with BG Color (assuming your background color is white).
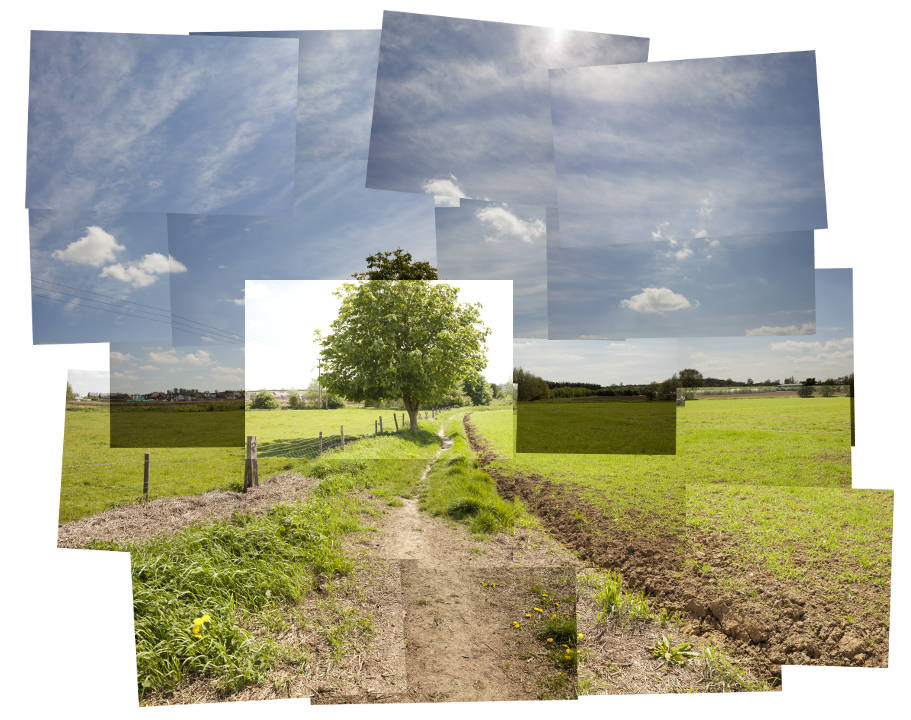
When I took the photos for my panograph I didn't intentionally keep the camera straight, but I didn't intentionally tilt or rotate it either. So my photos align reasonably well without any rotation. But I think it looks a bit boring like this, so I'll apply a bit of rotation to some of the images.
In the layer palette select a layer you want to rotate. Then choose the rotate tool in the layer palette or go to Layer > Transform > Arbitrary Rotation. In Photoshop you can press Ctrl + T or Edit > Free Transform. Click and drag outside of the image to rotate it as you like. Then click on the Rotate Button or press Enter to accept the transformation.

If you did tilt or rotate the camera while taking the photos, then it is probably best to rotate the images as you align them, rather than aligning them roughly and then rotating.
After rotating the images a little, I have the following:
The next two steps are optional. You can change the order that the images appear in (whether one image appears on top of or below the other images overlapping it) by changing the layer's position in the layer palette. Just click on the layer and drag it it upwards to place it above other layers. Or drag it downwards to place it below.
When re-ordering your layers it could get a bit confusing as to what layer is what part of the image. To aid in this you can name your images based on the 'row' and 'column' they are in the image.
The other thing you might want to do is to change the opacity of all the layers back to 100%. This gives an effect more similar to arranging printed photographs one on top of the other. A lower opacity gives an effect similar to layering transparencies one on top of the other.
You may also want to consider changing the scale of some of the images, to make them smaller or larger.
A drop-shadow effect can be added to each of the layers to make the edges of the photos more obvious and give a more realistic 3D effect.
You don't need to stick to landscapes or architecture for panography. The same technique can be applied to portraits and close-up photography.
christian jew and misc. by daren on flickr (licensed CC-BY)
You can also create panographs in a similar way to panoramas, by using panoramic stitching software (e.g. Autopano Pro, PTGUI, or Hugin). When choosing the output format you choose layers and no blending. This is likely to produce a panograph where the images are aligned quite accurately.
Panograph photo montages could be considered to be a poorly executed and put together panorama. But the actual result can often be more interesting than a panorama or single photo of the same scene. Why not give panography a try sometime?
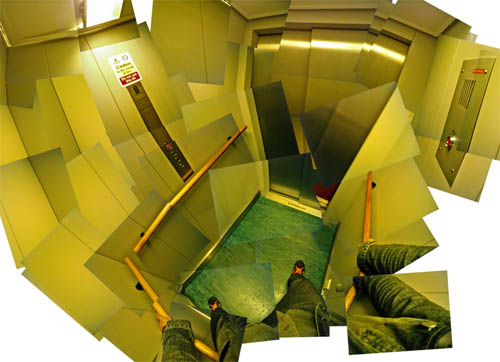
momentarily trapped and relocated against my will by daren on flickr (licensed CC-BY)


