Steps to better Landscape photography
Many times we might see a beautiful scene in front of us, take a few shots, but then when we get home and view the photos on the computer, we end up disappointed. Although there was a great scene we somehow couldn't capture it effectively with our camera.
This happens because our mind works differently to a camera, which just captures what it sees. You can't really have a crooked horizon in what you see, and your mind might ignore some distracting element, while your camera won't.
However, all is not lost. We can capture great photos that record what we saw, and more importantly, the emotion we felt. The following landscape photography tips will help you do that.
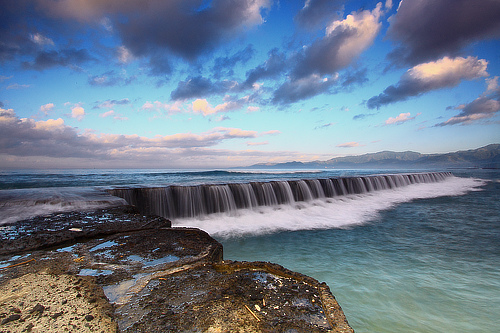
What Have I Done? by tropicaLiving - Jessy... on flickr (licensed CC-BY-SA)
Take your time
The first, and most important tip to improving your landscape photography is to take your time. If you just snap a couple of quick shots and briefly review them on your camera's LCD, you will probably miss some problems. The most common problems that are easy to miss are a crooked horizon and distracting elements, particularly at the edges of the frame.
Before you take the photo analyze the scene. What makes the scene beautiful, and is there anything that detracts from it? When taking the photo make sure you include the positive points and exclude (if possible) any negative points. It sounds obvious, but it is so easy to overlook this step.
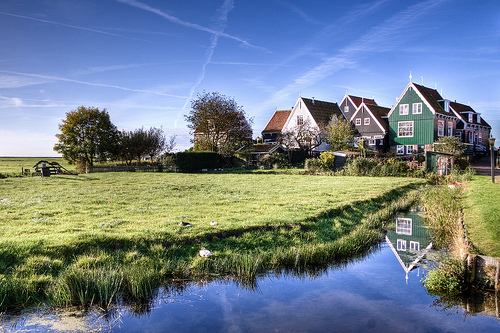
Wittewerf Marken by Bas Lammers on flickr (licensed CC-BY-ND)
After taking the photo take your time reviewing the image on the camera's LCD, zoom in and look carefully for any problems.
Check the horizon
In landscape photography it is particularly important to make sure the horizon is straight. This is especially true if you are photographing a large body of water such as a lake or the sea. It is fine to break the rules, but if you mean your photo to have a tilted horizon, make sure it is more than just a few degrees of tilt so that it is obvious the tilt was done on purpose.
Use the rule of thirds, it is generally best for the horizon to be placed one third down from the top or one third up from the bottom of the photo.
Use lines to guide the eye
Look for lines to guide the viewer's eye through the image. Converging lines, such a path, fence, or row of trees leading off into the distance work well. The lines should lead into the image, not out of it. A line leading the viewer's eye out of the image (such as a path turning off to one side) should be avoided if possible.
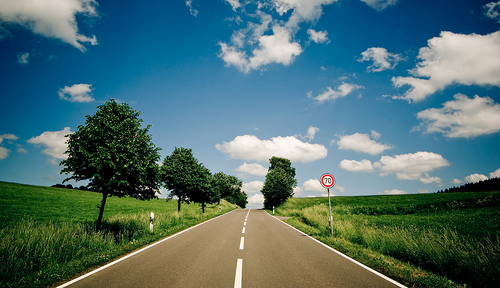
_IGP5461 | 70 by Ben Fredericson on flickr (licensed CC-BY-NC)
Ideally the converging lines should point towards your main subject point, and / or converge on a third point of the photograph. In some cases you may be able to find an old branch or piece of wood that you can manually place in the photo. This can act as a line, particularly if you are photographing with a wide angle lens.
Use a foreground object to create depth
Another benefit of placing an old branch in the scene can be to create depth. By including an object in the foreground it gives the viewer a much better sense of distance between the foreground and the background, and prevents the photo from looking flat.
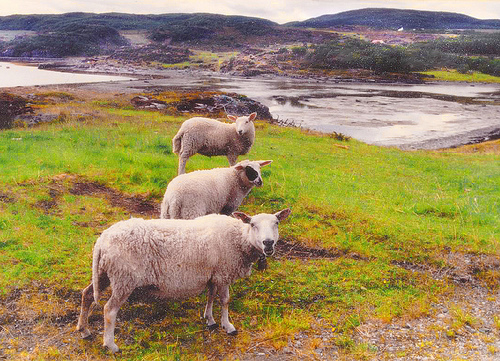
Triple Sheep by Per Ola Wiberg ~ Powi on flickr (licensed CC-BY)
The same things that can be used as leading lines (fences, trees, paths etc.) also work well for this if they lead off from the foreground into the background.
Add movement
How can you add movement to a still photograph? For landscape photography you can do this by using a long exposure that blurs any movement. Trees or grass blowing in the wind, rushing water, or moving clouds can all be captured in this way to show their movement.
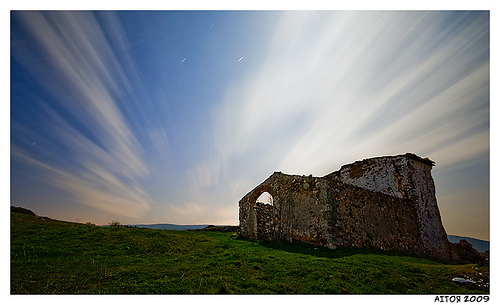
Running Clouds 2 by Aitor Escauriaza on flickr (licensed CC-BY)
You will need to use a tripod to support your camera for long exposure photography without blurring the photo from camera shake. Depending on the light levels you may also need to use a neutral density filter to allow a long shutter speed without the resulting image being over exposed.
Experiment
When you've got your camera set up, don't just take one shot then walk away. Look around you - sometimes you may find an even better scene behind you. Try taking the shot from a slightly different position, try different framings and different crops.
As you're experimenting with different shots, pay attention to the light and clouds. If they improve over when you took your original shot, it may be worth re-taking.
All these tips may seem quite simple, and they are. The trick is remembering to slow down and apply these basics of landscape photography to your photos. Easier said than done, but with practice you'll find you remember more often.
A trick that can be helpful is to write a checklist of what you need to look for when taking a photo. Then take the checklist with you and go through it step by step when you come to take a photo. You'll start to notice the improvement in your photos, and over time you'll learn the points off by heart.


