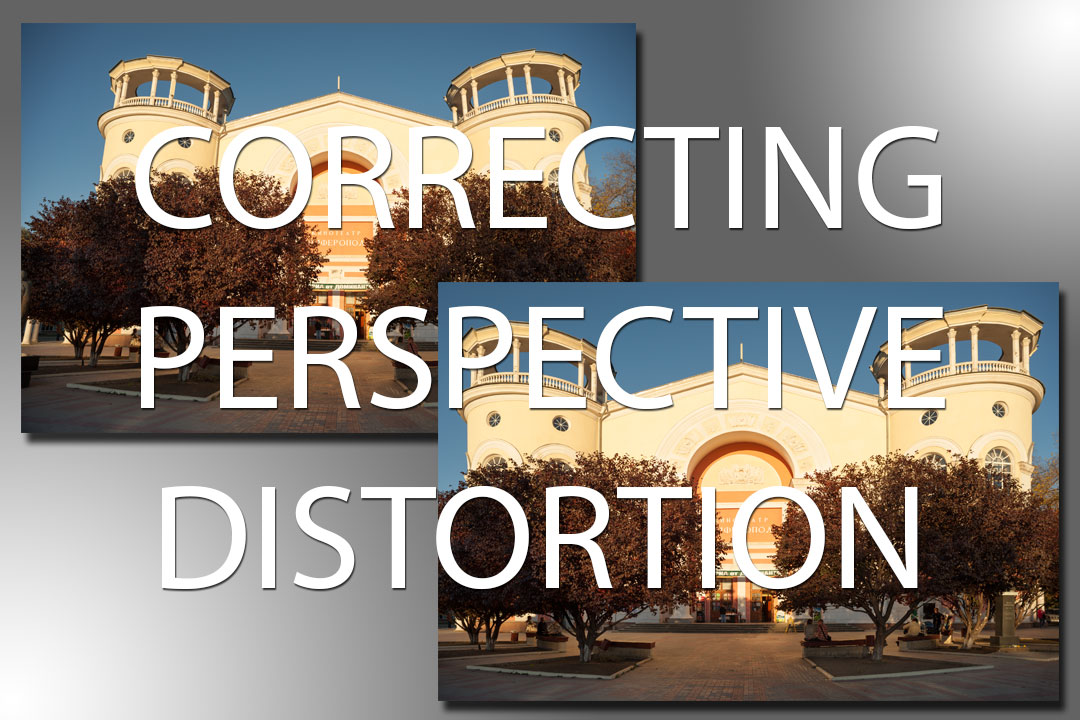
Correcting perspective distortion
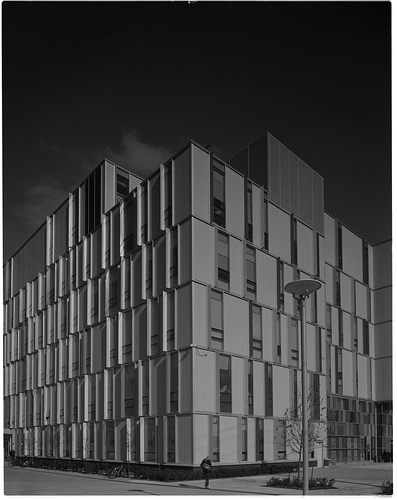
Perspective distortion is something you'll often find in photos that contain straight lines, such as the lines of a building. This type of distortion comes in the form of converging or diverging lines. For example, if you take a photo looking up at a tall building, the sides of the building will form converging lines, getting closer together higher up the building.
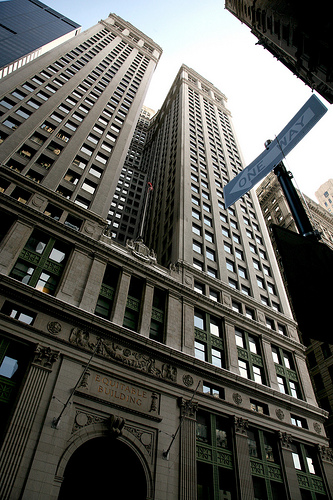
New York City, Lower Manhattan, Financial District, Broadway Av. : Equitable Building 1915 by (vincent desjardins) on flickr (licensed CC-BY)
Often this effect can be put to good use, to create an image that is more compelling than if the straight lines were perfectly vertical (or horizontal). But there are some instances where perspective distortion may be unwanted. For example, in architecture photography, perspective distortion is sometimes avoided.
There are a few different ways that perspective distortion can be removed, which I'll look at in this article. These techniques can also be reversed if you want to add or increase perspective distortion in your photos.
Use a tilt / shift lens
If you want to correct the perspective distortion 'in-camera', then you can use a special type of lens known as a tilt-shift lens. (And you will need an interchangeable lens camera to mount the lens on).

This type of lens has an enlarged image circle compared to a standard lens. The lens has a built-in shift mechanism that allows shifting the front of the lens. You can then position the camera to be level vertically, and shift the lens upwards to get all of the building in the frame.
DSC_0095 by IK's World Trip on flickr (licensed CC-BY)
This won't work completely in every situation, with very tall buildings you'll likely still have some perspective distortion even with the lens shifted to its maximum. But for shorter buildings it can work fine. The effectiveness will also depend on how close you are to the building. The further away you are, the less adjustment will be needed.
The issue with tilt shift lenses is that they are very expensive. It will take some time to adjust the tilt as you want it, but if you are the type of photographer that needs a tilt-shift lens, then this will likely not bother you.
Use a view camera
View cameras use a bellows system between the back and the lens. The bellows usually allow tilting and shifting the lens (and often the back as well). In addition, the image circle cast by a large format lens is much greater than that of most digital camera lenses.
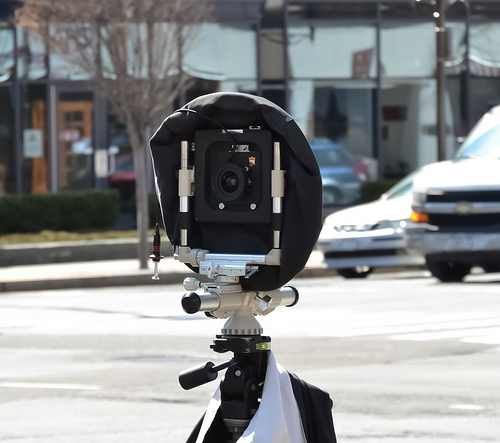
View Camera 1 by Madhu Madhavan on flickr (licensed CC-BY)
So, if you use film with or attach an interchangeable lens camera or digital back to the back of a large format view camera, you can typically achieve quite large movements to correct for perspective distortion.
Algonquin Trades Building, Nov. 10 2011 by Justin Scott Campbell on flickr (licensed CC-BY-ND)
A large format view camera has the same negative points as a tilt-shift lens, but an additional big issue is how large (and heavy) the system is. The size and weight is the reason you'll hardly ever see anyone schlepping a large format view camera around. You can find them in some high-end photography studios though, where they are used for avoiding perspective distortion in product photography.
Move further back, level the camera, then crop
This solution works in a similar way to shifting a lens, except that you need to move further away from the subject (or use a wider lens), and perform the 'shift' by cropping away the bottom of the image.
You need to position your camera far enough back from the building (or use a wider focal length) so that you can get the entire building in the frame with the camera leveled vertically. Depending on the height of the building, this will probably leave you with quite a lot of uninteresting foreground in the bottom half of the image.
Now, in your image editing software, crop the photo to remove the unwanted foreground. You will end up with an image that has a building with nice straight, vertical sides.
The obvious disadvantage of this method is that you loose a lot of pixels by having to crop away quite a bit of the image. The other problem is that you might not be able to move any further back without other things in the foreground obscuring parts of the building.
Correct it in Photoshop
I think it would be fair to say that correcting perspective distortion in software in by far the most popular method. It does have a negative point, in that some pixels in the image will become stretched, so image quality will be affected.
But for the majority of images, only a small amount of correction will be wanted, and any reduction in image quality is unlikely to be visible.
I'll give an example of correcting vertical perspective distortion in Photoshop Elements, the process is similar (though not quite identical) in other image editing software.
To start off with, I rename the background layer to convert it to a standard layer. This will allow us to easily move the layer after distorting it, and ensures that the edges of the image will be surrounded with transparency rather than filled in with solid color. To rename the layer, just double-click the layer's name in the layer palette.

The next step is to straighten the image. To do this, select the ruler tool from the tools. Because I'm correcting vertical distortion, I want to straighten the image based on a horizontal line, near the center of the image.
Click at one end of a line that should be straight, then, still holding the mouse button down, drag the line out to the other end of the line that should be straight. For my image I used the steps at the building entrance, clicking at one end of the top step, and dragging the line to the other end.

Let go of the mouse button, and then photoshop will rotate the image so that the line you just 'drew' will be perfectly horizontal.
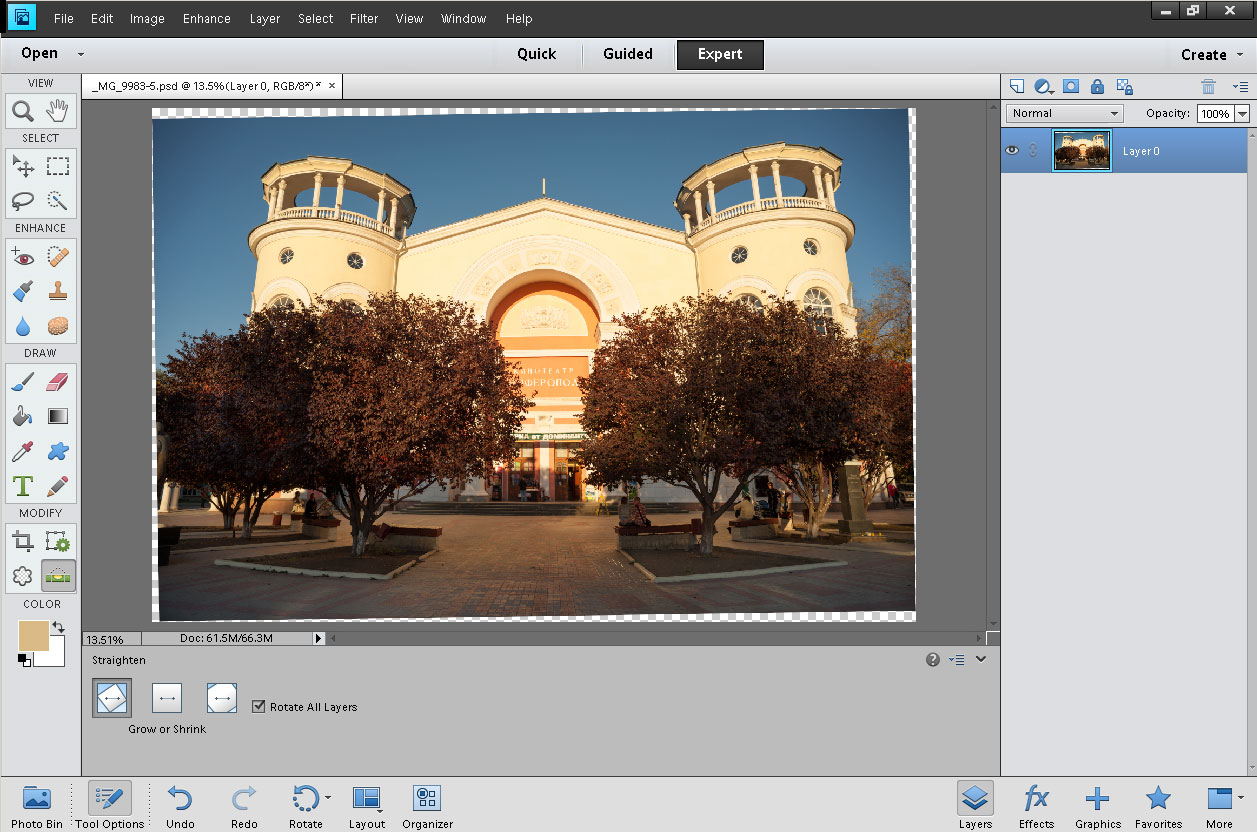
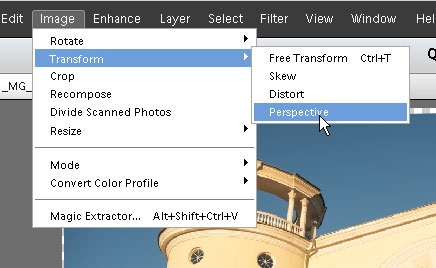
Now the image is straightened, the vertical perspective distortion can be corrected. Go to Image > Transform > Perspective.
A bounding box will appear round your image, with points at each corner. To correct the perspective distortion where vertical lines are converging towards the top of the image, drag one of the top corners out to the side. You will need to judge how much perspective correction the image needs.
To aid in checking the perspective correction, you can turn on the grid overlay. This can be switched on via View > Grid. In this image I can compare the sides of the towers to the edge of the image frame to check they are straight, so I didn't use the grid.
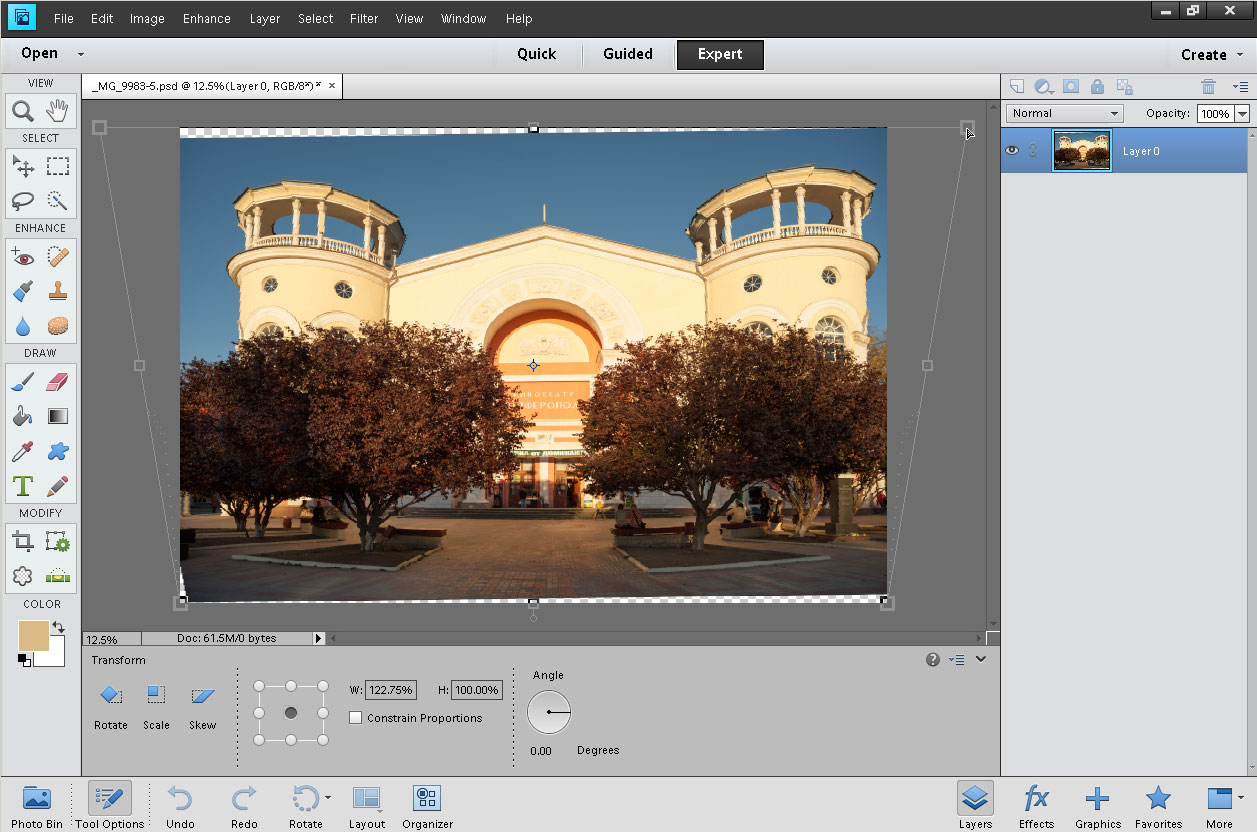
You might notice that the building starts to look squashed and flat, depending on how much perspective correction you need to apply. If you check 'constrain proportions' in the tool options, then this will correct for that.

However, my personal preference is to correct perspective without 'constrain proportions' checked, and then fix the vertical distortion manually. When I've corrected the perspective distortion, I don't apply the correction. Instead I go to Image > Transform > Free Transform. Then I drag the top middle control point of the bounding box up to increase the height of the image.
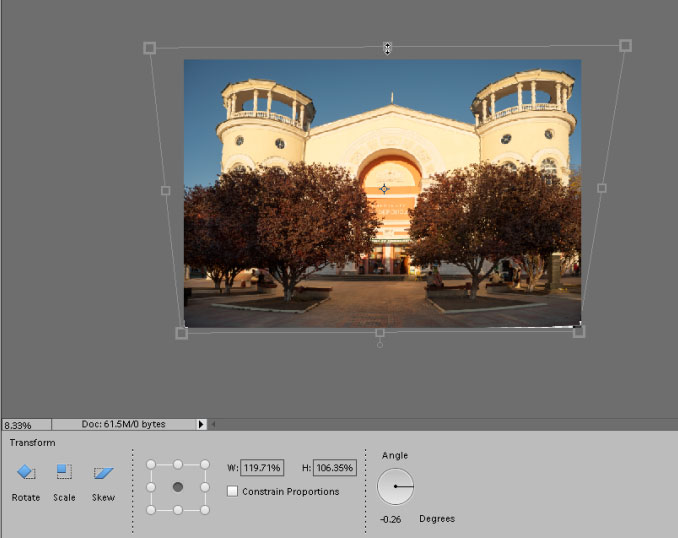
I prefer this way of working, as the image with 'constrain proportions' checked looks stretched too much vertically to me. So I prefer to manually correct the vertical distortion to what looks good to my eyes.
After applying the perspective distortion and height adjustment, I then move the image to approximately center it. You can do this by choosing the move tool, then clicking and dragging the image to move it.
You'll notice that we've got a gap at the edge of the image near the bottom right corner. You've two options to remove the gaps at the corners created by correcting the perspective. The first is to crop the image to remove the gaps. The other option is to fill in the gaps.
In this instance I decided to fill in the gap, using the clone tool. I like to keep my adjustments separate from the actual image, so I created a new layer. I selected the clone tool, and ensured that 'Sample All Layers' was checked. I also ensured the tool was set to use a brush with a soft edge. This smooths the edges of the cloned area, so it is not so obviously cloned.
Using the clone tool, you hold down the Alt key on PC / Option key on Mac and click on the area you want to clone from. Then you can paint with the tool normally, painting a clone of the area you selected.
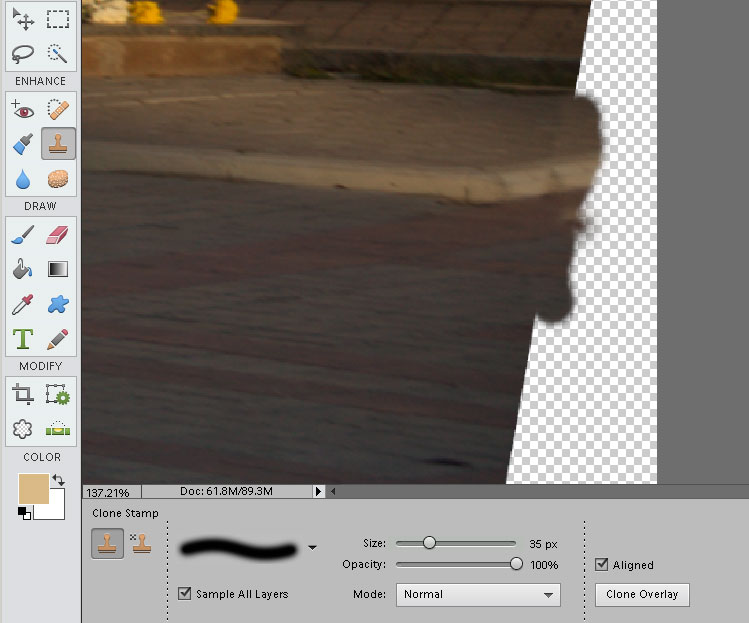
After repeating this process quite a lot of times I eventually got all the empty area in the bottom right hand corner filled in.
Correct it in RAW
An alternative to using image editing software to correct for perspective is to correct the distortion in RAW. I'll give an example using Adobe Camera RAW (ACR). Note that many RAW conversion programs will also let you perform these modification on non-RAW images, such as JPEGs.
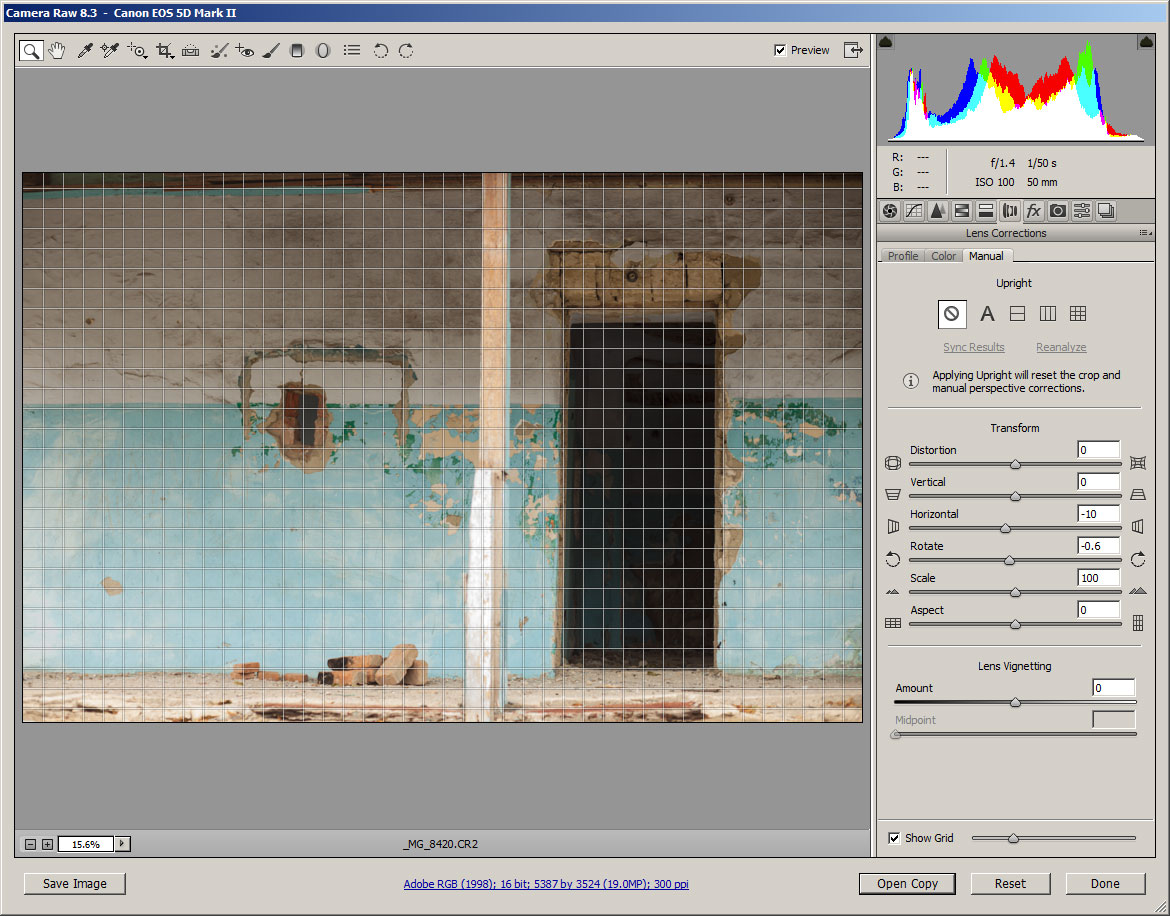
In ACR for Photoshop CC you can find the perspective distortion correction options in the Manual tab of the Lens Corrections panel. If check 'Show Grid' at the bottom, it will make it easier to check our adjustments are giving straight vertical and horizontal lines.

This image has horizontal perspective distortion, it was taken looking at the building from a slight angle, as opposed to straight-on. This can be corrected through use of the Horizontal slider. I found the image also needed a bit of straightening, which can be adjusted with the rotate slider. It's just a case of adjusting the sliders until you get what you want.
When that's done, you'll notice that you have gaps at the corners of the image. This time I'll crop the image to get rid of them. By choosing the crop tool and ensuring 'Constrain to image' is checked, I can easily crop away the empty corners.
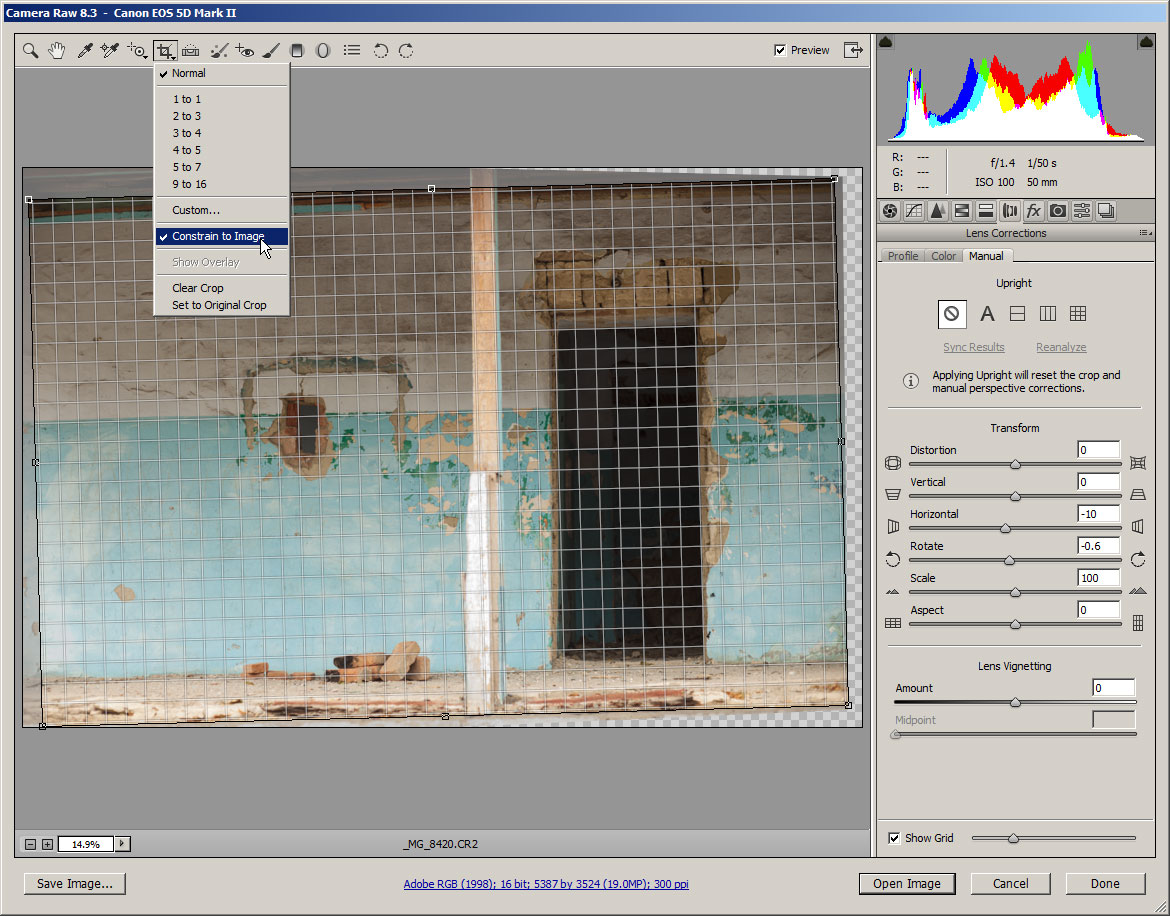
After drawing my crop and double clicking it to apply the crop, I end up with an image where the perspective distortion has been removed.
Correcting perspective distortion isn't particularly tricky, however it's probably not something you're going to want to apply every time you photograph anything with straight horizontal or vertical lines. Most photos look fine with converging horizontal or vertical lines, and as I said at the start of the article, can be used as an important compositional element.
The main time I personally use perspective distortion correction is when I was trying to photograph something straight-on (e.g. boxes or pipes against a wall), but didn't get my angle quite right. Then perspective distortion correction can come to the rescue to give nice straight horizontal and vertical lines.


