What is Vignetting? How to remove or add vignetting to a photo
Vignetting describes an effect where the edges of an image are darker than the center.

The main reason that vignetting occurs is that light beams at oblique angles are blocked at the edges of the lens. The blocking of these light beams could be due to usage of a lens hood, or it may be inherent to the lens.
Although vignetting can often be thought of as a problem or defect, it can also be put to good use. Having the center of the frame bright while the edges are dark helps draw the viewer's eye towards the center of the image, around where your subject is likely to be located. (Your subject might not be right at the center, but in the majority of images they will be closer to the center than the edge).

… by Garuna bor-bor on flickr (licensed CC-BY-SA)
Optical Vignetting
Vignetting caused by the lens itself is known as optical vignetting. Light heading for the lens at an oblique angle near the edge of the lens may be blocked by the sides of the lens. But light entering the lens straight on (from the front) is not blocked by the sides.
So more light can enter the center of the lens, resulting in the center of the image being brighter than the edges. The below images demonstrate this:

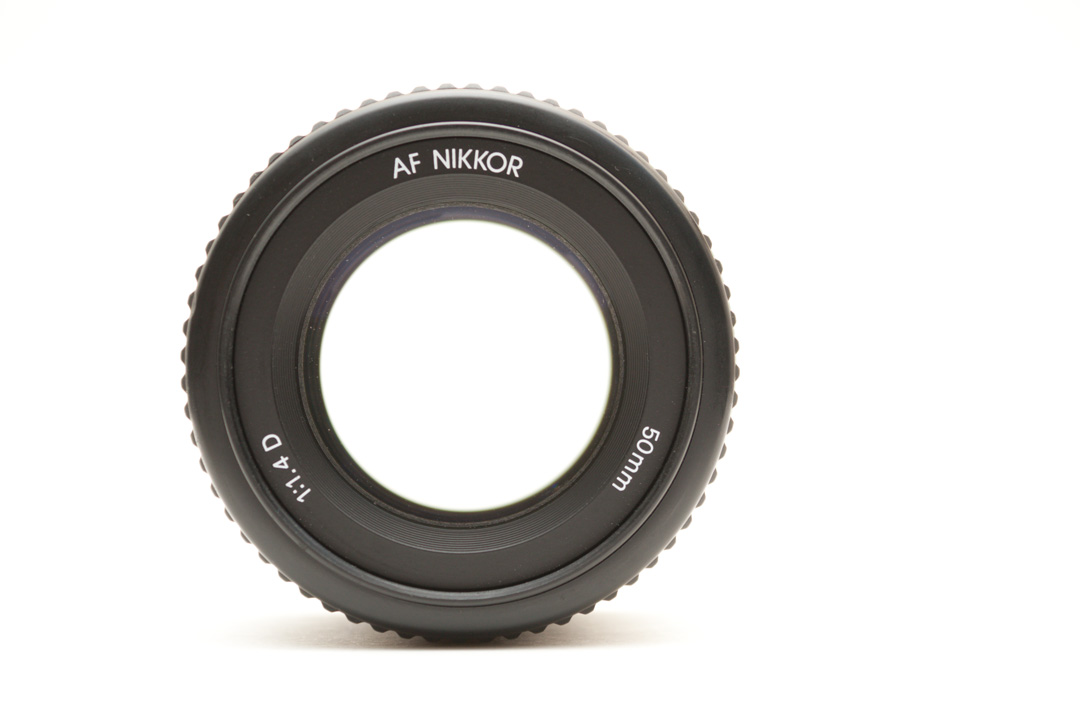
Small size hole for oblique angle of light
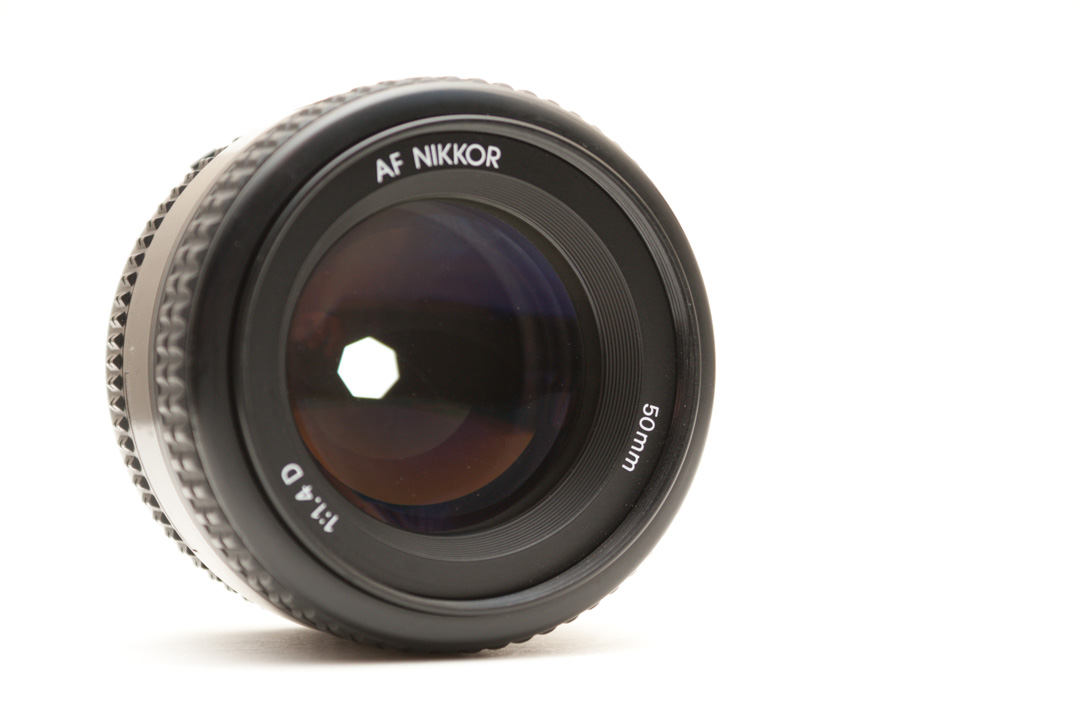
Large size hole for light entering straight on
At this point, I should mention this website: toothwalker.org - Optics: Vignetting, which gives a very good technical discussion on vignetting, and which the above illustration was derived from. To learn more about vignetting it is definitely worth giving their page a read.
Correcting Optical Vignetting
Optical vignetting can be reduced or removed by using a smaller aperture (stopping down the lens). The smaller aperture means that less light overall gets through the lens to the camera image sensor.
But it also means that the opening that light must pass through is the same size for both oblique light rays and light rays that are entering the lens straight on. So there is no difference in the light level between the edges and center of the lens:
Small size hole for oblique angle of light
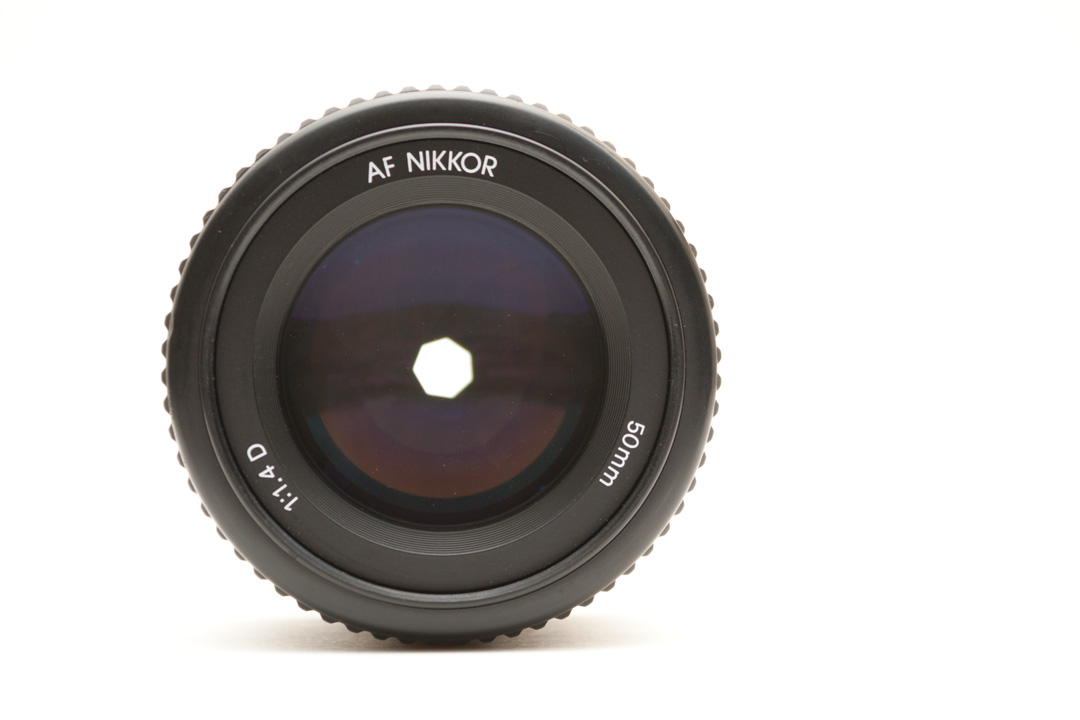
Same size hole for light entering straight on

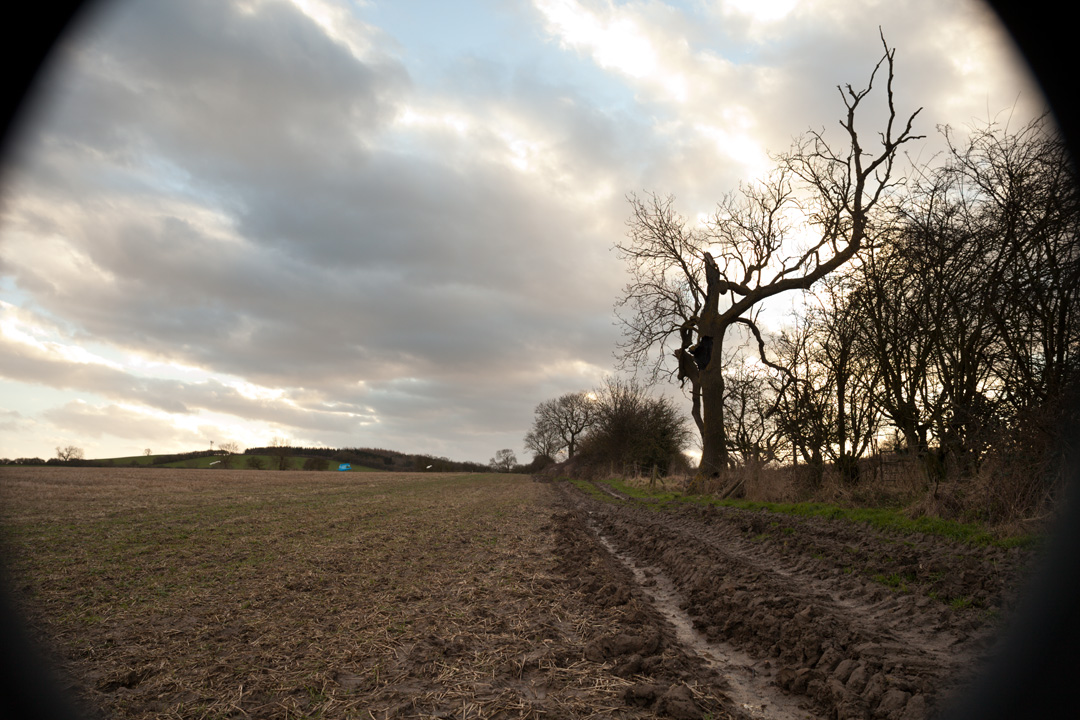
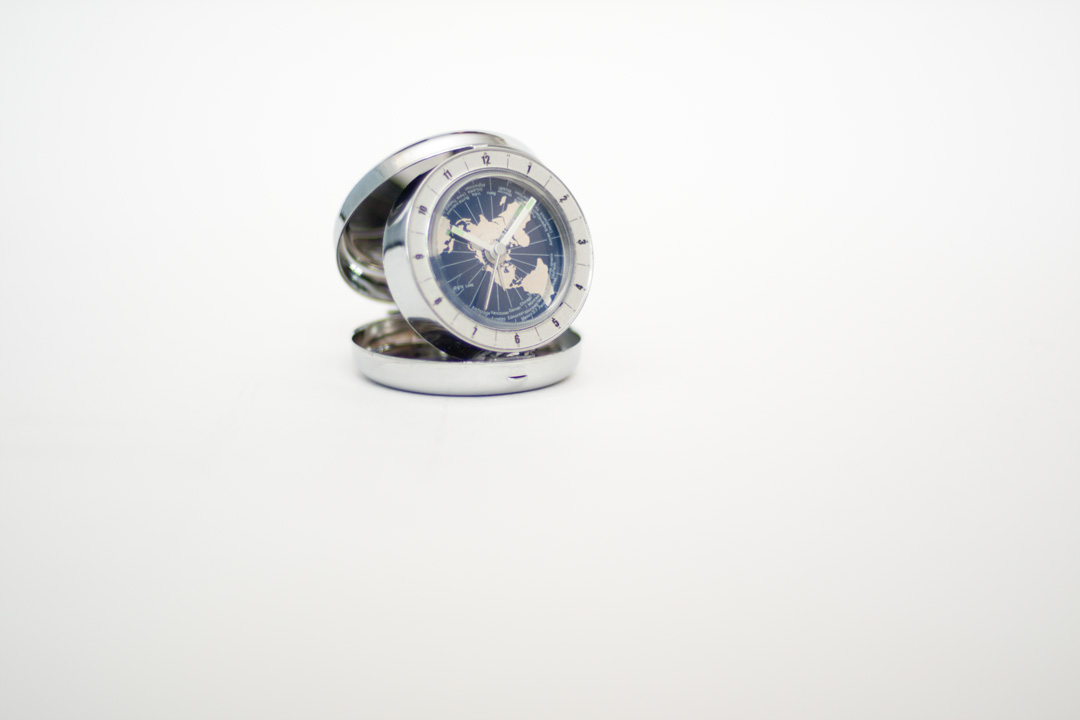
Image taken with lens wide open at f/1.4 exhibits vignetting

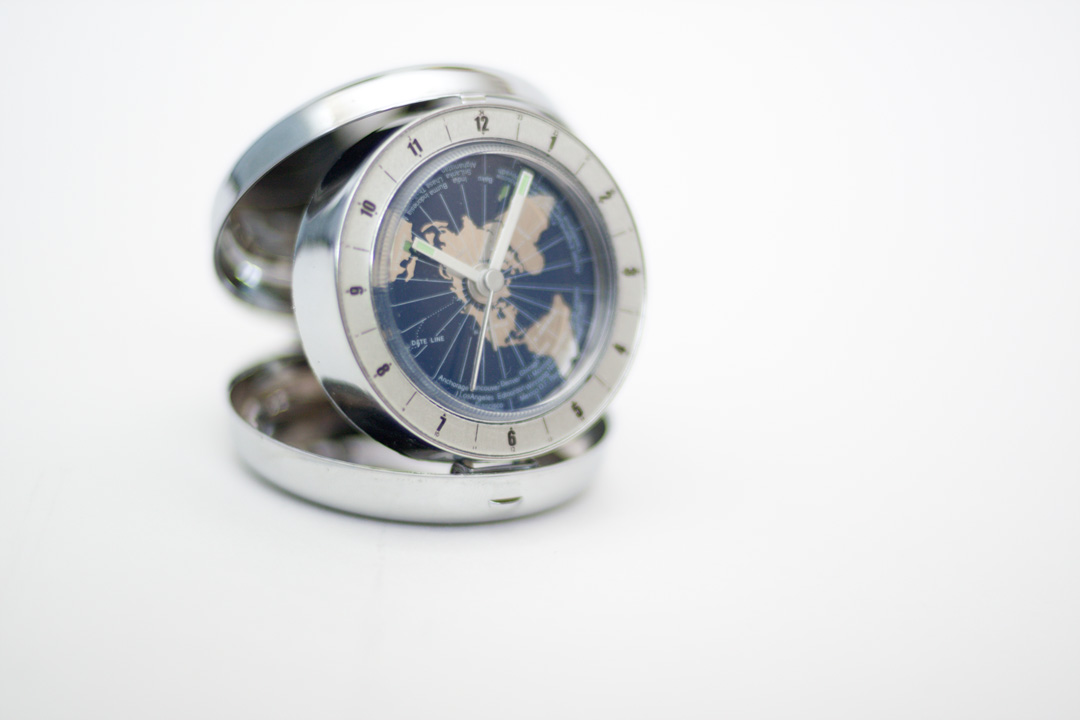
Stopping the lens down to f/8 has eliminated the vignetting
Optical vignetting can also be corrected in software, which we'll look at later.
Mechanical Vignetting
Mechanical vignetting is caused by something solid blocking light at the edges of the lens. Most commonly this would be caused by using a lens hood that is too long for the focal length of the lens, or using stacked filters on the lens.
Vignetting caused by using a lens hood
How much the hood or filters protrude into the lens' field of view will determine the amount and harshness of vignetting. A hood that only protrudes slightly into the field of view may give a soft vignette when the lens is used at a large aperture (e.g. f/2.8), but become harsher as the lens is stopped down.
Correcting Mechanical Vignetting
Mechanical vignetting cannot be easily corrected in software as it normally results in the corners of the image being completely black (rather than just darkened). However, there is a simple fix - just don't use a lens hood that is too long for your lens, or don't stack multiple filters on your lens.
Mechanical vignetting is often a problem with very wide-angle lenses. If you are having trouble with seeing vignetting when using a single filter, there are special thin filters available. These filters have a thinner profile than standard filters, which is less likely to cause vignetting.
Natural and Pixel Vignetting
There are also two other types of vignetting - natural vignetting and pixel vignetting. Natural vignetting is dependent on lens design and the distance of the exit pupil of the lens from the image sensor. Pixel vignetting is related to the positioning of the micro lenses used on the camera's image sensor.
Neither of these types of vignetting can be solved by stopping down the aperture. But neither of them are likely to affect your images much (or at all) either.
Lighting Vignetting
You can also have vignetting in your image caused by the way that a scene is lit. If a scene is lit so that it is brighter at the center than at the edges, the image will look like it has vignetting.
You're not particularly likely to come across lighting like this naturally, but artificial lighting will often create this effect. The center of the area where the light shines is very bright, while the brightness tapers off away from the center.
An example where this effect might be used is when photographing a subject against a flat background with flash. By pointing the flash (or other light source) behind the subject, at the wall, the center of the lit area is brighter than the edges, creating a vignette effect.

Vignetting and crop factor
The visibility of both mechanical and optical vignetting are dependent on the image circle of a lens, and the size of the camera's image sensor. For example, if you use a lens designed for use with full frame 35mm cameras on a camera with a crop sensor, you will see far less vignetting.
On a crop sensor camera, only the central portion of the lens' image circle is used. Since vignetting is always heaviest around the far edges of the lens, this is cropped away on the crop sensor camera.
Lens at f/1.4 exhibits easily visible vignetting on a full frame sensor camera
Same, lens, same settings, but used on an APS-C camera, with the camera moved backwards to achieve the same framing. There is virtually no vignetting.
Bear in mind that all that is happening here is that the vignetted edges are cropped away with the smaller APS-C camera. We can do the same test again, but this time don't move the APS-C backwards to match the same field of view as the full frame camera. Instead we crop the full frame image down so that the field of view matches that of the APS-C camera.
Lens at f/1.4 doesn't exhibit much vignetting on an APS-C camera.

After cropping down our full frame camera image, it doesn't have much vignetting either.
Correcting Vignetting in Software
Just like lens distortion, many cameras will automatically correct vignetting if you shoot in JPEG format. (On Canon cameras the setting to enable this is titled Peripheral Illumination Correction rather than Vignetting correction).
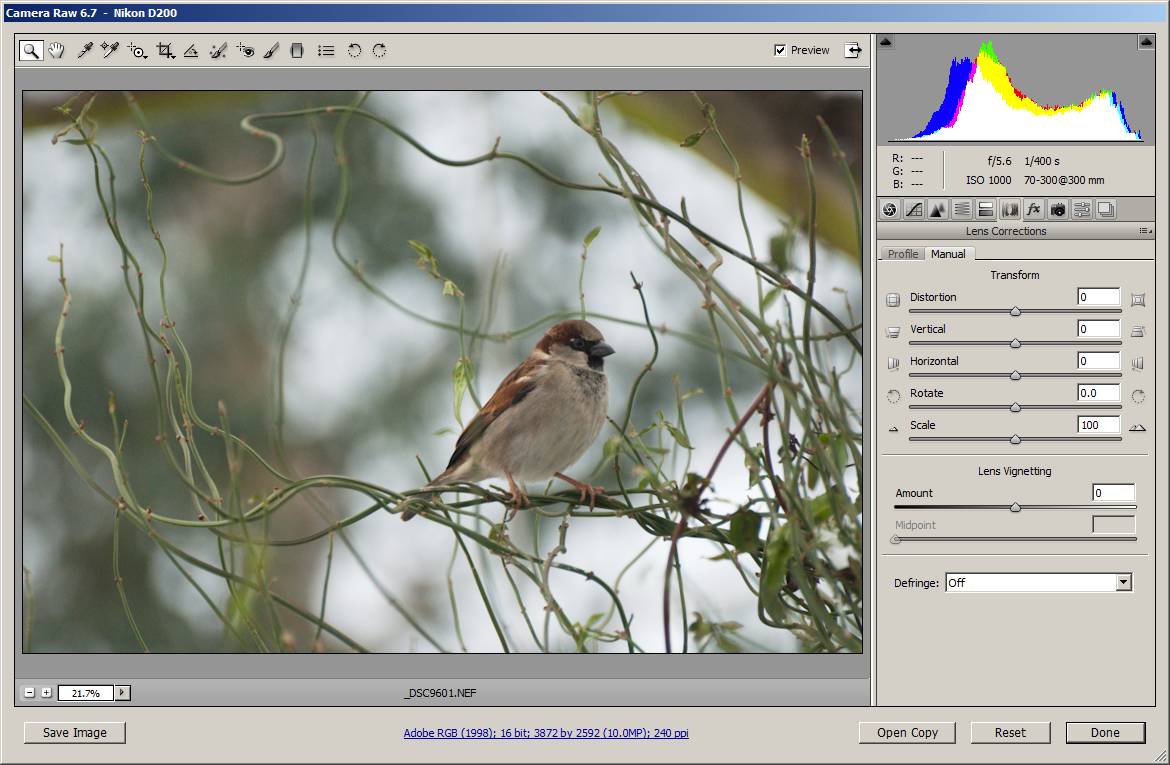
And similarly, if you shoot in RAW format, most RAW convertors have an option to correct vignetting automatically. If vignetting is not removed automatically, you can usually adjust a setting to remove it manually.
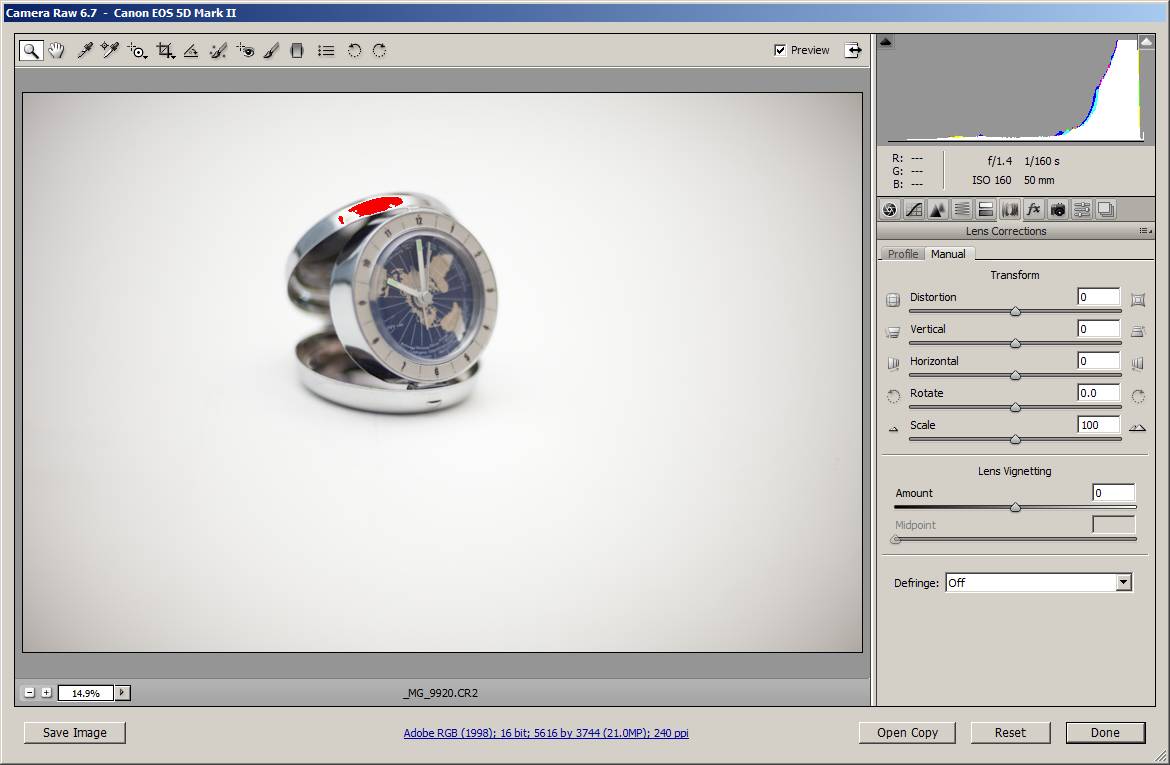
Before making any adjustments
After adjusting vignetting
Note that some camera manufacturer supplied RAW conversion software does not allow manual corrections of vignetting, and will only automatically correct vignetting for a selection of their own cameras and lenses. I'm looking at you, Canon.
Vignetting can also be removed in most photo editing programs that feature a Lens correction plugin:
- Photoshop Elements (PSE): Filter > Correct Camera Distortion
- Photoshop CS: Filter > Lens Correction
- GIMP: Filters > Distorts > Lens Distortion (use edge and brighten sliders)
Adding Vignetting in Software
As I said near the beginning of this article, vignetting can quite often be a useful effect to have in your photo. In some cases you might have a photo with no vignetting that you want to add a vignette to. Or maybe you have a photo with a light vignette that you want to make stronger to help draw attention to your subject.
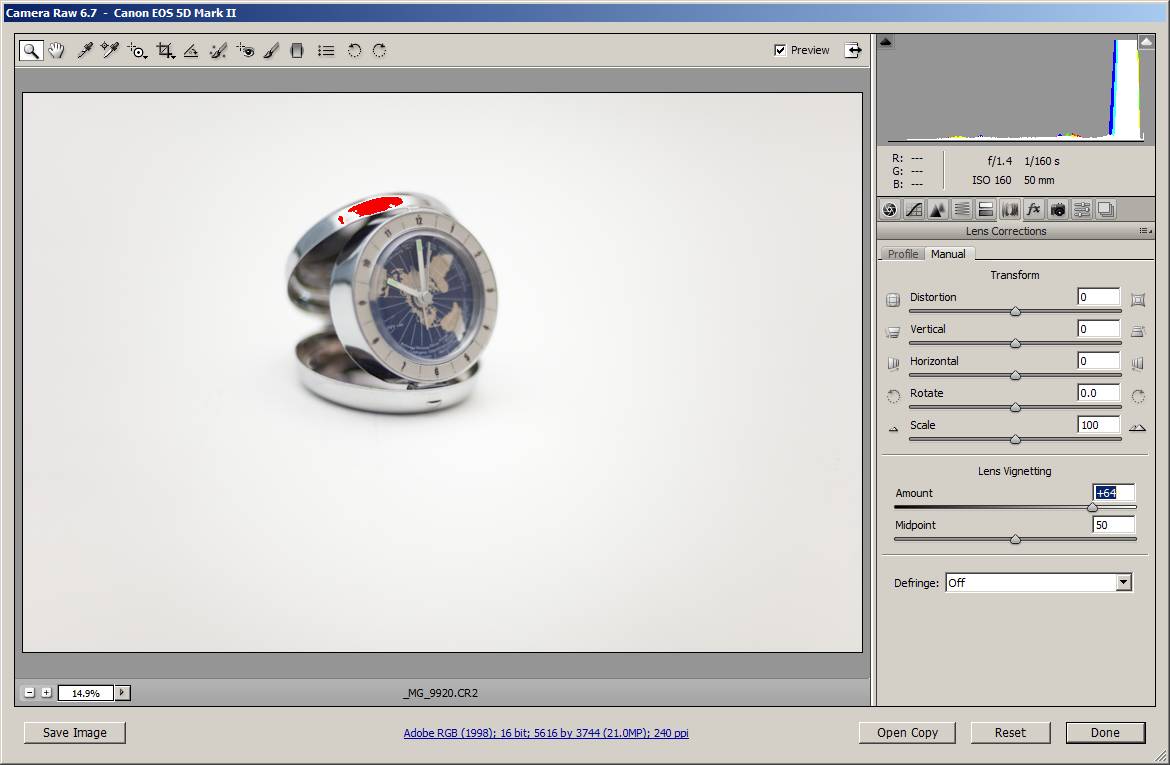
The easiest way to add a vignette is to use the vignetting correction sliders in your RAW conversion or photo editing software. Instead of moving the slider to remove vignetting, move the slider in the opposite direction to add vignetting.
Before adding any vignetting
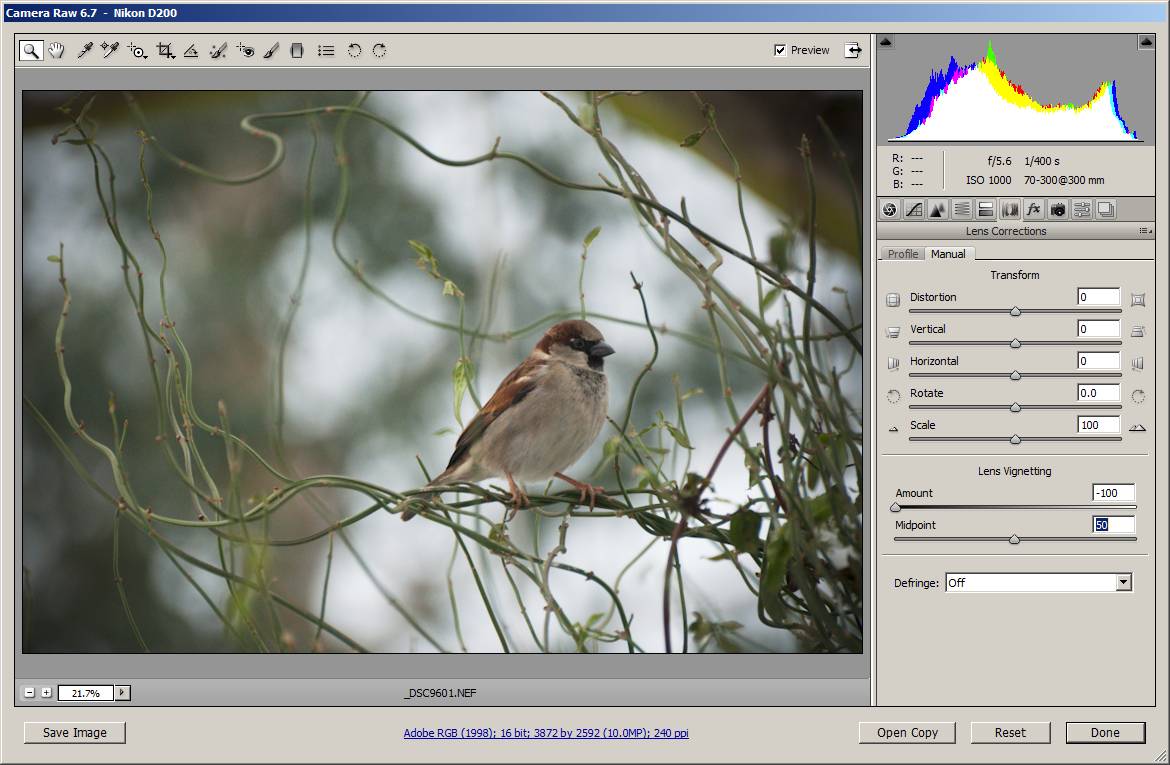
Vignetting slider used to add vignetting
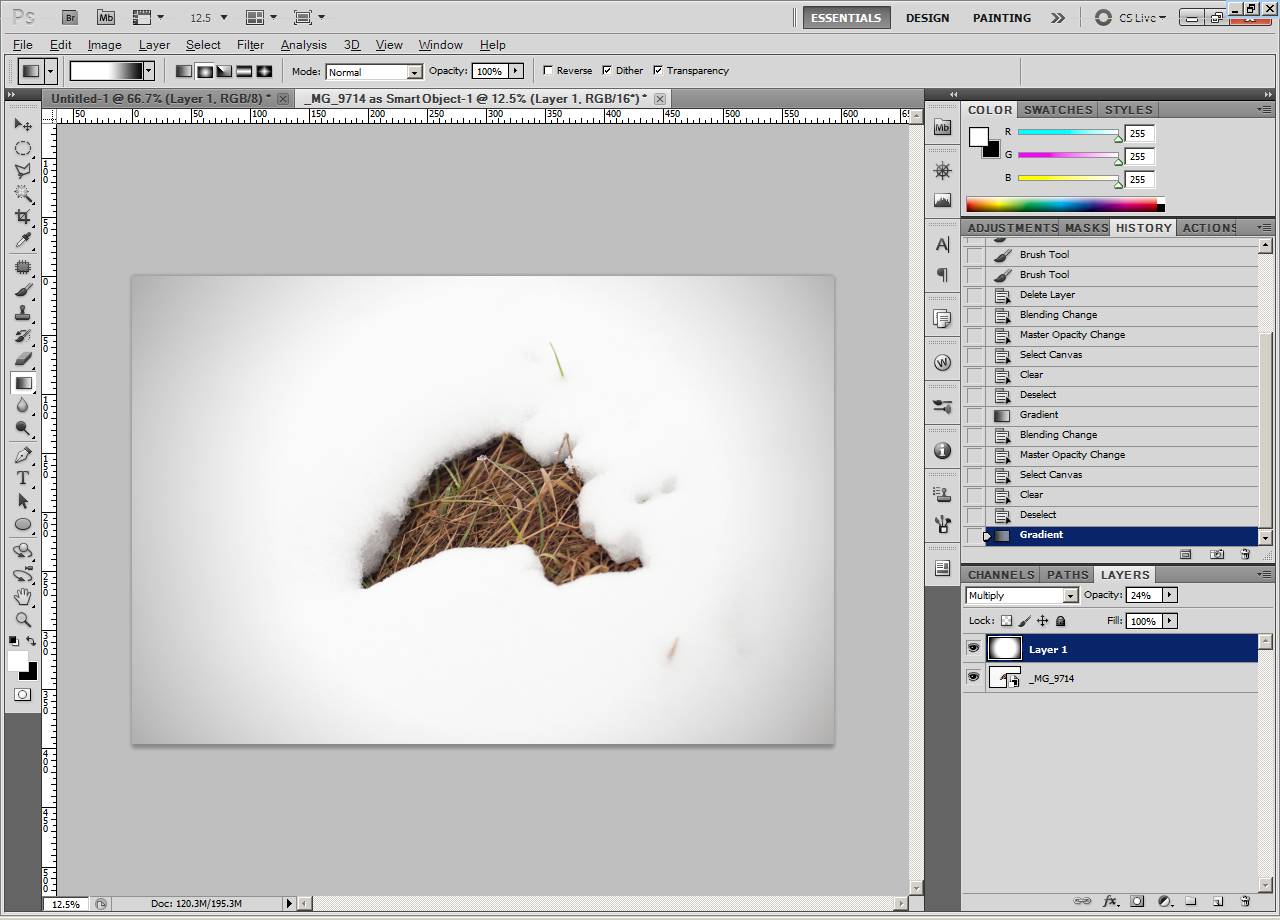
Another way you can vignetting is to open your image in your image editing software. Create a new layer above the image and fill it with a radial gradient going from white to black.

Change the layer's blend mode to Multiply, then reduce the opacity of the layer as desired.

You can adjust how large the center (bright area) of the vignette is by adjusting the radial gradient options before you draw the gradient.
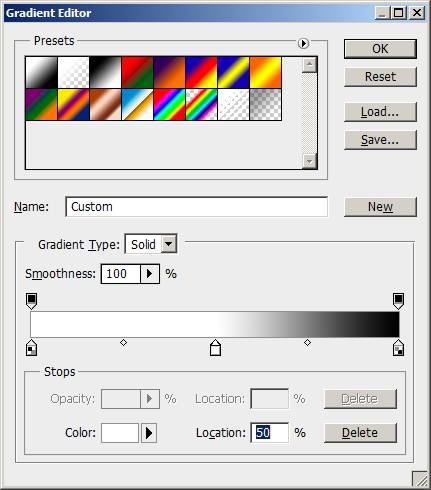
Adding a white color chip at the center of the gradient means that the first 50% of the gradient is white (and so has no effect on the image).
To sum up, try to avoid vignetting caused by using a lens hood that is too large for your lens or stacking filters. Don't worry about other types of vignetting, you can easily remove it in software if you want, or you might find it actually enhances your image. Bear in mind also that vignetting varies between cameras and lenses, and what aperture you use, so you may never have any vignetting in your photos anyway.


