Get a grip! How to improve your grip on your camera
Most modern cameras handle quite well. However, they are designed for the average person, and if your hands are larger or smaller than average, then you could find that keeping a firm grip on your camera is not as easy as you'd like.
This is one reason why it is often a good idea to try out a camera before purchasing it. How a camera handles is an important factor in how easy it will be for you to use. But if you do find yourself with a camera that is not quite grippy enough for you, there are a number of different things you can do to remedy the situation.
Use a Hand / Wrist Strap
A hand strap is similar to a neck strap, except that it wraps tightly around your hand instead of loosely around your neck. One end of the strap connects to the strap lug of your camera nearest the grip. The other end of the strap screws into the tripod socket on the bottom of the camera.
The strap is quite short and features a large area like the back of a glove that wraps round the back of your hand. Your hand fits between the strap and the camera grip, and the strap can be tightened to give a secure grip between the camera and your hand. Basically it is like sticking the camera to your hand.
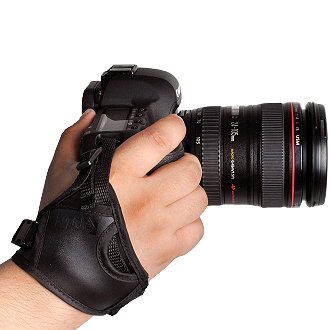
Although the hand strap uses the camera's tripod socket, most hand straps have a tripod socket in the bottom of their connector, so the camera can still be used on a tripod without having to unscrew the hand strap.
The disadvantage of a hand strap is that if you want to use your hand for something else, it is a bit more effort to remove your hand from the strap than it is to just let go of a camera without a hand strap.
Another potential problem can be in moving your hand to access the controls on the rear of the camera. I would suggest reading reviews of any hand strap you are considering to check if this has been a problem for other users.
Use a Battery grip
A battery grip or portrait grip is an accessory that is not available for all cameras, but they are produced for virtually all DSLR cameras. They attach to the bottom of the camera, giving an extra grip that can be particularly useful when holding the camera in portrait orientation.
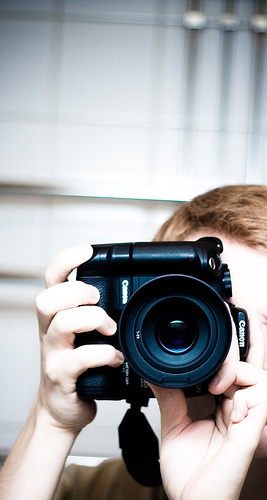
Selfportrait IV - Portrait of My Canon by Okko Pyykkö on flickr (licensed CC-BY)
Most grips screw into the tripod socket on the bottom of the camera and have a section that slots into the camera's battery compartment. The grip then takes two batteries, so the camera will last longer before it runs out of power. Some grips also allow the use of AA batteries, which could come in handy if you find yourself in need of more batteries but can't purchase another camera battery (e.g. when on holiday).
The battery grips produced by the camera manufacturers often tend to be quite expensive. However, there are third party grips available, that may be slightly lower in build quality, but tend to be a lot cheaper. Even a third party grip is likely to be quite a bit more expensive than the other options for enhancing your camera's grip though.
Note that different camera models require different battery grip models. If you buy a grip for your camera, but then later upgrade to a better model, you might find your old grip is incompatible and that you'll need to buy a new one.
Using a battery grip adds bulk and weight to your camera. For some people this is a plus point, depending on your hands and the lenses you use, the extra weight and bulk can make the camera balance better. For others, this can be a negative, taking up more bag space, and tiring the arms more quickly.
Add an accessory grip
For smaller cameras, a battery grip is not usually available. However, some cameras have accessory grips available. These are primarily produced for enthusiast cameras where the front of the camera is quite flat, with no real grip area for your fingers to curl around. These grips add that extra area at the front of the camera.
There are two main types of accessory grips available – an L-plate grip and a stick-on grip. A stick-on grip is attached to the camera using high adhesion tape on the back of the grip. An L-plate grip screws into the bottom of the camera's tripod socket. As well as adding a grip to the front of the camera, it will usually also the equivalent of an arca-swiss compatible quick release plate to the bottom and side of the camera.
Use a flash bracket with grip
A flash bracket is designed to let you mount your flash slightly off camera, which can give more pleasing lighting than a camera hot-shoe mounted flash. Some also let you rotate the camera or flip the flash to keep the flash above the camera in both portrait and landscape orientation.
Many flash brackets incorporate a grip in them, which allows you to grip the camera with two hands (left hand on the bracket grip, right hand on the camera grip).
The flash bracket screws into the tripod socket on the bottom of the camera, and then extends past the gripless side of the camera. Then there is a vertical section with the integrated grip, and above that the area for mounting the flash. They are available in a range of designs and prices.
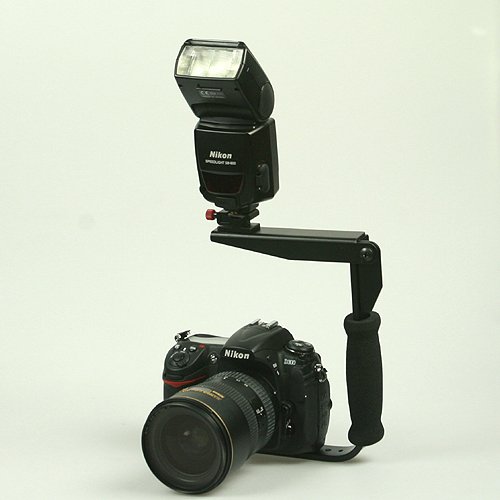
Although a flash bracket will let you grip the camera with two hands, this isn't necessarily the best way to keep your camera steady when shooting. (Particularly if you're not actually using the bracket to mount a flash on). Holding the camera normally, with one hand on the camera grip, and one under the lens, will usually give a steadier and more stable platform for the camera.
But if you are using flash, and in particular if you want to mount the flash on a bracket anyway, then a bracket that incorporates a grip can be a good idea.
Add some friction / grip tape
Friction tape is often used to make the handles of sports equipment such as tennis rackets and hockey sticks easier to grip. Adhesive backed friction tape can be stuck to any camera to make it easier to grip.
It will provide most benefit when used with a camera that has a smooth finish. But it won't have much benefit, if any, when used with a camera that already has a well textured rubber surface.
The main disadvantage is that most adhesive backed friction tapes do not use a glue that is easy to remove. If you later want to remove the tape, it will likely leave behind a sticky mess, and could remove part of the camera paintwork when it is pulled off.
I have not used this method myself, but I have a feeling that the glue could become soft and sticky in hot weather. If so, this could result in the tape slipping and your fingers getting covered in the sticky glue. Though this may be dependent on the quality of tape you use.
Use Grippy Gloves
This last solution will work with all cameras, but you might feel a bit funny. Just use some gloves that are designed to give you a good grip, such as most driving gloves.
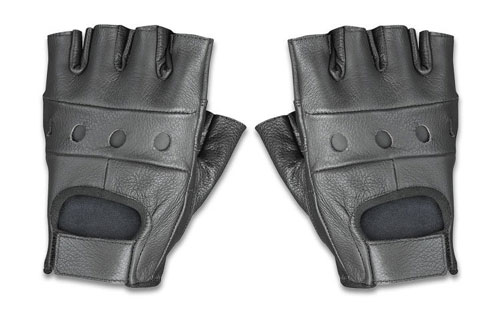
If you can find gloves with half or three quarter fingers (so the ends are open), this will allow easier operation of the camera controls.
Using gloves does mean that you need to remember them for a better grip. You might also look a bit strange wearing them unless you're taking photos by your car at the side of the road. And in hot weather they might be a bit hot and sweaty.
So, there we have it. Quite a few different ways you can improve your grip on your camera. As I said at the start of the article, for most people their camera will be easy enough to grip as is. But if you do need a better grip (it can be particularly helpful if working with a heavy camera / lens combination), then hopefully you'll find some of the above ideas useful.


