Light Trail Photography Tips
Light trail photography involves capturing long exposure photos of moving lights, usually cars moving along a road at night. As the cars move across the frame, the bright headlights (and rear lights) create a long streak. Because the cars themselves are not well lit, and move across the frame, they do not appear in the final image, just the trails left by their lights.
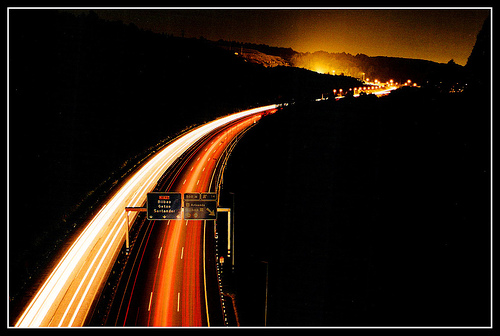
autobahn by kainet on flickr (licensed CC-BY)
A good time for capturing light trail photos is around 5-6pm in the autumn or early Spring. At 5-6pm most people are traveling home from work, making it easier to get photos with lots of light trails. It also means you don't have to wait for a long time for a car to come along.
The exact timing that you want will depend on the road where you take the photo. It could be that during rush hour the traffic slows to a snail's pace (no good for light trail photography), in which case you'd probably be better off coming back a bit later.
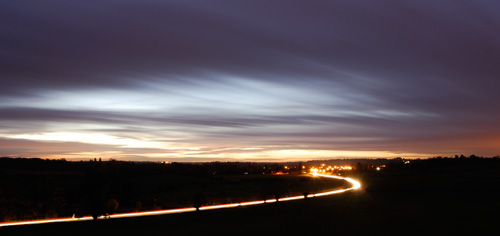
I suggest Autumn and early Spring as a good time for light trail photography as this will allow you to shoot busy traffic at twilight. Shooting at twilight will allow more ambient light into the shot, giving more color in the sky and revealing more detail in the surrounding landscape.
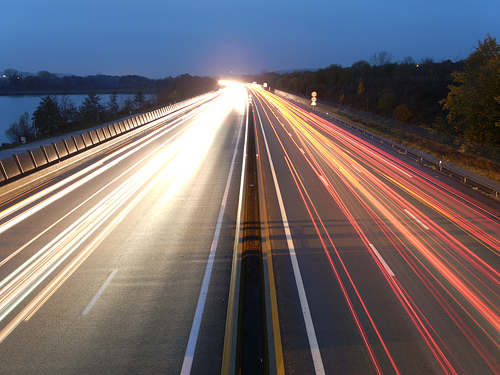
Automobile light trails by ComputerHotline on flickr (licensed CC-BY)
Of course, shots taken later at night look great too.

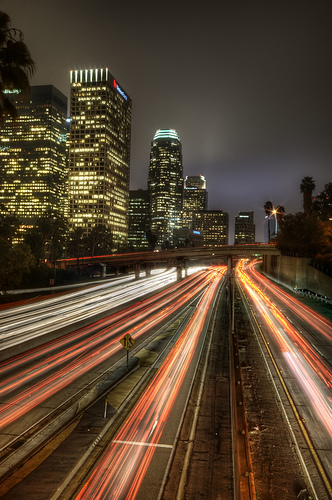
Light Trail by DaveOnFlickr on flickr (licensed CC-BY-SA)
You need to use a fairly long shutter speed to capture the streaks. I would suggest using a low ISO setting such as 100 or 200. An aperture of around f/8, and a shutter speed of 8s - 60s. This will give you an image with long light trails, but without the image turning out too bright.
To avoid camera shake, you need some support for your camera. This could just be resting your camera on the pavement near the side of the road. But in most cases, you will probably want a tripod to allowing positioning the camera as you want while keeping it secure and steady.
For tripping the camera's shutter, either use the camera's self timer function, or invest in a remote shutter release. This way the camera does not receive the vibration caused by taking your finger away from the shutter button during the exposure.
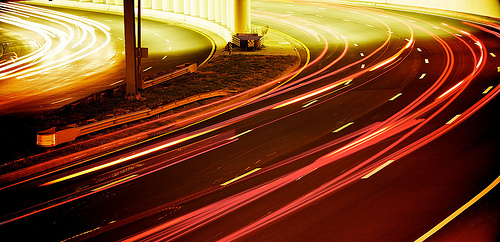
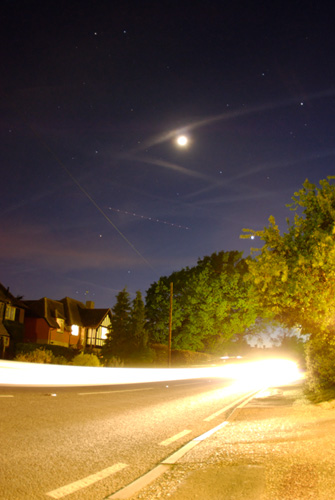
Full Moon Light by Neil Kremer on flickr (licensed CC-BY-ND)
You will probably need to experiment somewhat with the required shutter speed needed. A very busy and fast road probably won't need a particularly long shutter speed.
If you're photographing cars going along a country road, you'll likely need quite a long shutter speed. The longer shutter speed compensates for for the lack of street lighting, slower speed of cars, and lower number of cars using the road.
Your camera's autofocus probably won't work too well at night, especially when you are focusing on a stream of moving traffic. You don't want to press the shutter only to find that the camera tries to autofocus the lens without success.
If your camera has a manual focus mode, then use that, and manually focus the lens to the approximate distance of the traffic from where you're shooting. You don't need to get the focus dead-on since you should be using a small aperture, which gives a large depth of field.
020 of 365 by Yogesh Mhatre on flickr (licensed CC-BY)
If you are using a compact camera with no manual focus, then you will probably need to pre-focus. Point the camera (while mounted on the tripod) at something reasonably well lit that is about the same distance away as the traffic you're photographing. A lamppost at the side of the road is nice and bright and should work well.
Then half-press the shutter button to focus. With the shutter button still half depressed, re-compose your original shot and then fully depress the button to take the shot. You will probably need to repeat this procedure for each shot you take as the autofocus will always kick in when the shutter button is half-depressed.
Some compact cameras do not allow manual focusing, but do allow setting autofocus to a button other than the shutter button. In this case, you can point the camera at the lamppost (or whatever), and press the focus button to focus. Recompose your original shot, then so long as you don't press the focus button again, focus will be locked at the correct distance for all subsequent shots.
To add some more interest to your light trail photography, try getting down quite low with the camera. This creates quite a different perspective to shooting light trails from above. You can see under the light trail, giving it a greater appearance of hanging in the air.
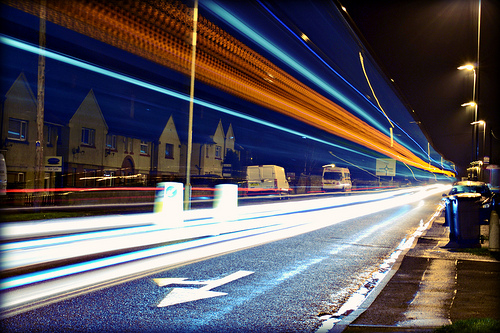
Also try capturing some taller vehicles, such as buses and lorries. These can leave quite different light trails to cars. They often have different colored lights near the top of the vehicle. Many also carry advertisements on the side that are illuminated at night. The streaks created by these can be colorful, and contrast against the red and white streaks created by car lights.
Light Trail by Emz.watson on flickr (licensed CC-BY-ND)
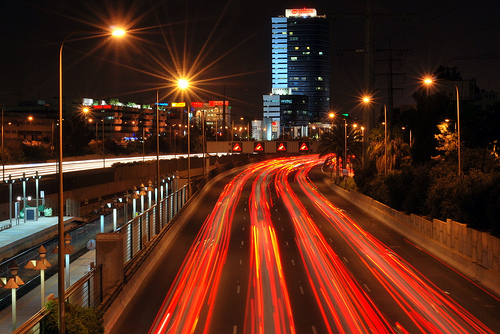
Shooting traffic from a bridge can work very well for effective light trail photos. You'll notice quite a few of the example photos in this post were shot from bridges going over a busy road. The higher angle looking down gives a better view of the light trails. The road vanishing into the distance also acts as an effective composition.
Shooting from a bridge allows you to get a good view of a busy road without any danger to yourself. Make sure you use a tripod to secure your camera though, don't just rest the camera on the edge of the bridge railing where it could easily be blown off.
DSC_0064 by Yoni Lerner on flickr (licensed CC-BY)
You may find using a lens hood can be helpful to prevent lens flare. It won't help against lights shining directly into the lens. But if you have a street light above you, it could cause lens flare that can be prevented by use of a lens hood.
Remember at night it can get cold quite quickly, so make sure you have enough clothing to keep warm. Standing still next to a tripod you will feel much colder than you do when walking round carrying the tripod.
Light trails can make for some great photos, and are a readily available subject. You just need a road with some traffic on at night and a way to steady your camera. So why not give it a try?


